We may receive a commission when you use our affiliate links. However, this does not impact our recommendations.
We may receive commission when you use our affiliate links. However, this does not impact our recommendations.
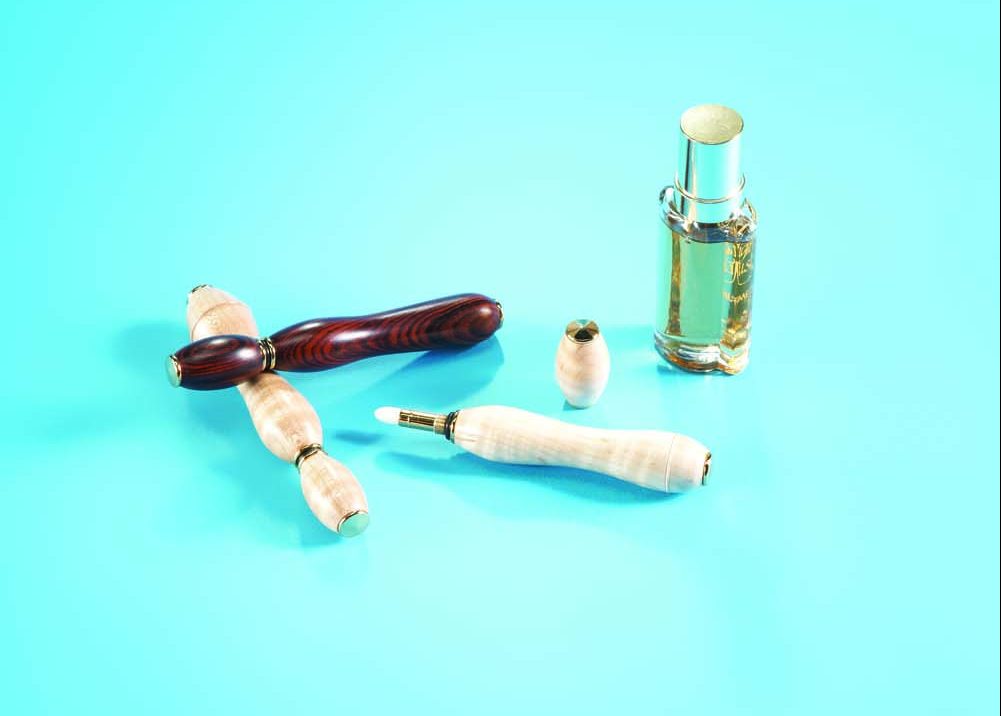
Here’s a simple turning project that makes a thoughtful gift. The process is similar to pen turning—you drill holes through a pair of blanks, turn them using a mandrel and then insert brass tubes in the holes. But rather than installing a pen cartridge, you install a perfume applicator, which is available as a kit.
In addition to basic turning tools, you’ll need a mandrel, bushings sized to match the perfume applicator and a barrel trimmer. Pen-turning blanks are available online and in woodworking specialty stores in an astonishing variety of woods and other materials. You can easily make your own blanks by milling stock to 7/8″ x 7/8″ and cutting it to length. You’ll need two such blanks for this project, one 1″ long and one 2-15/16″ long.
Drill centered holes
Drilling accurate holes through the center of the blanks is the most critical part of this project. You can drill these holes using a drill press and a centering vise, but I get the best results by drilling them on the lathe. Drilling a hole on a lathe is different than on a drill press, because the bit doesn’t spin. Instead, you advance the bit into the spinning workpiece. You’ll need a scroll chuck and a key chuck for this process.
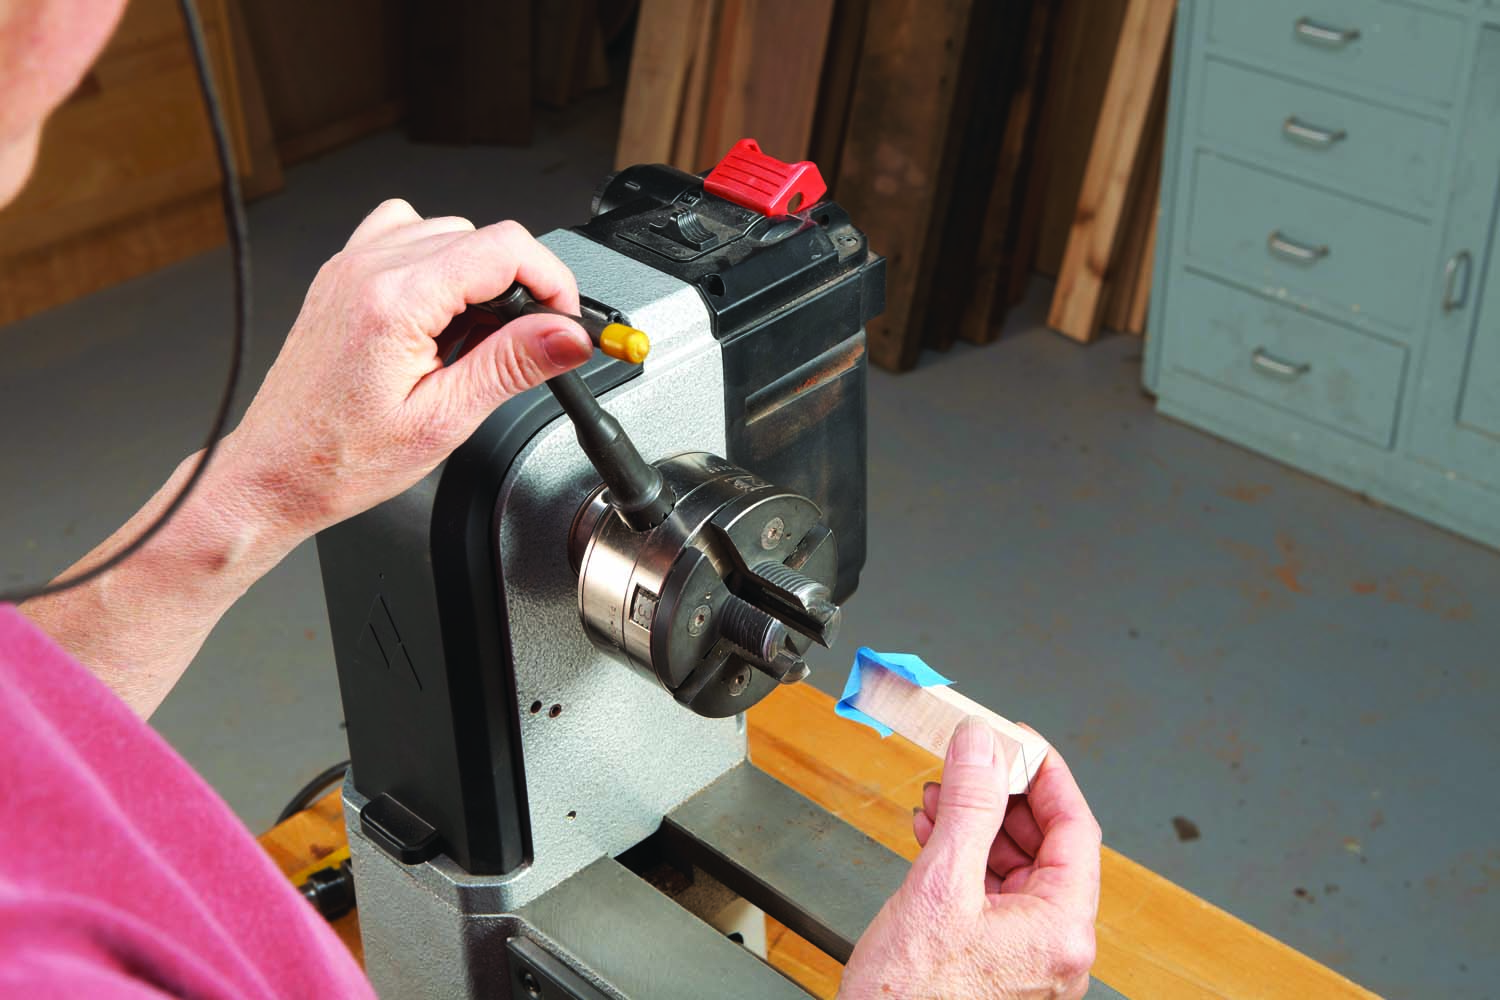
Photo 1. Center each blank when you mount it in the scroll chuck—this is critical for drilling perfectly centered holes. Tape helps to prevent blowout when you drill through the blank.
Start by marking an “X” on one end of each blank to locate its center. Cover the other end with tape to keep the bit from blowing it out. Center the blank in the scroll chuck by making sure all four of the jaws engage (Photo 1). Then turn on the lathe to mark the center on the end of the blank (Photo 2).
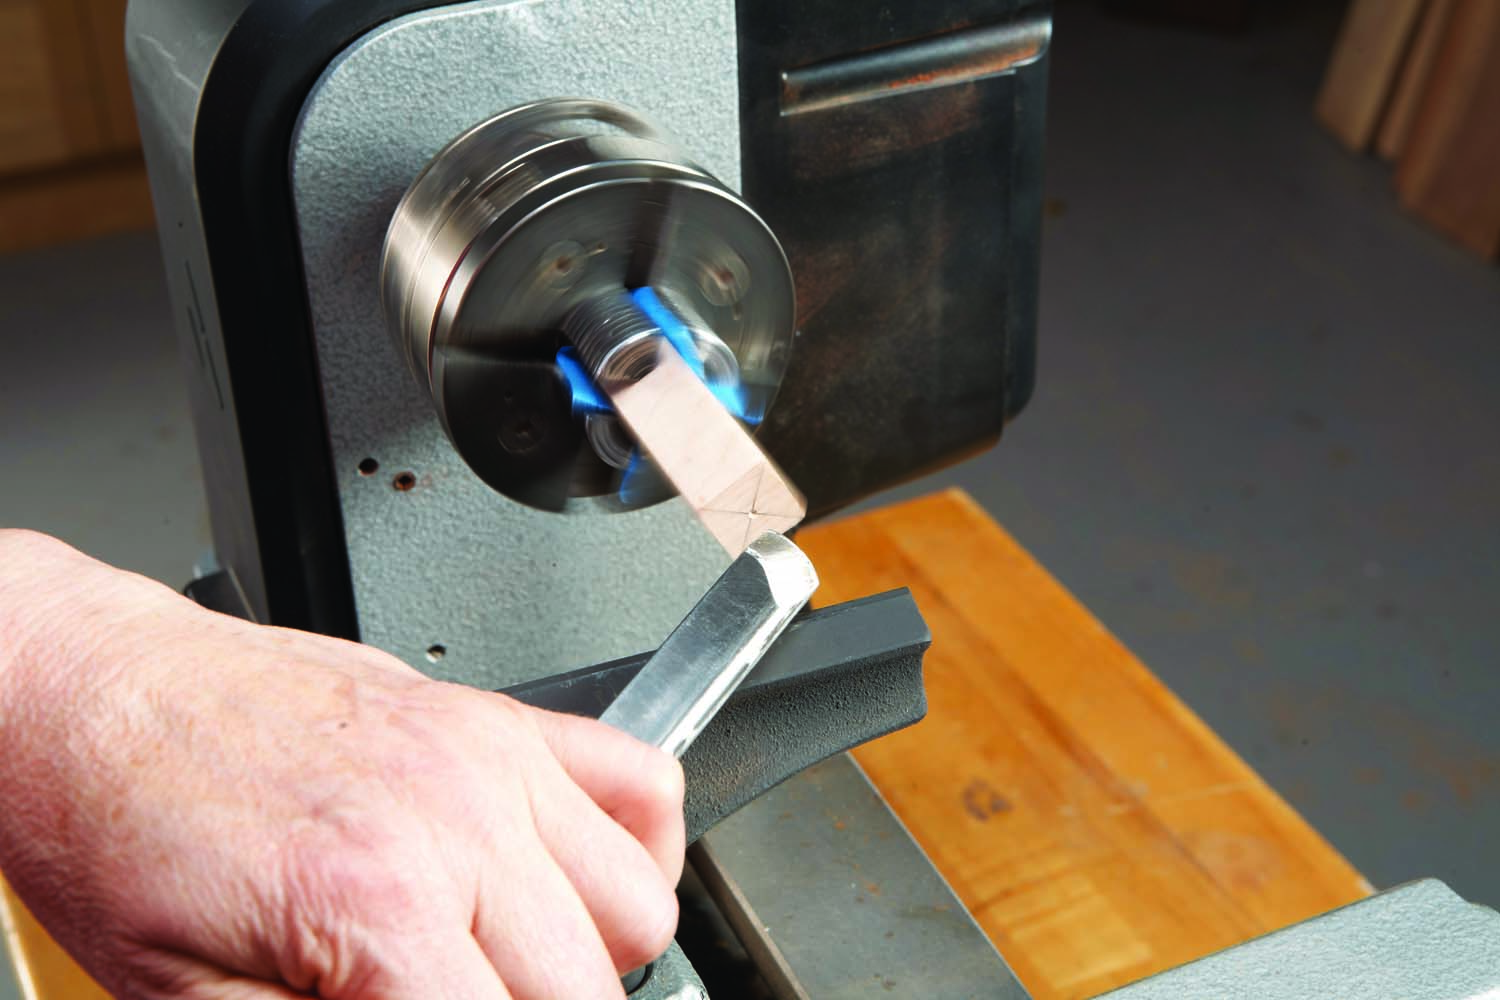
Photo 2. Mark the blank’s center with the lathe running. Lay a skew chisel flat on the tool rest and use its point to mark the end.
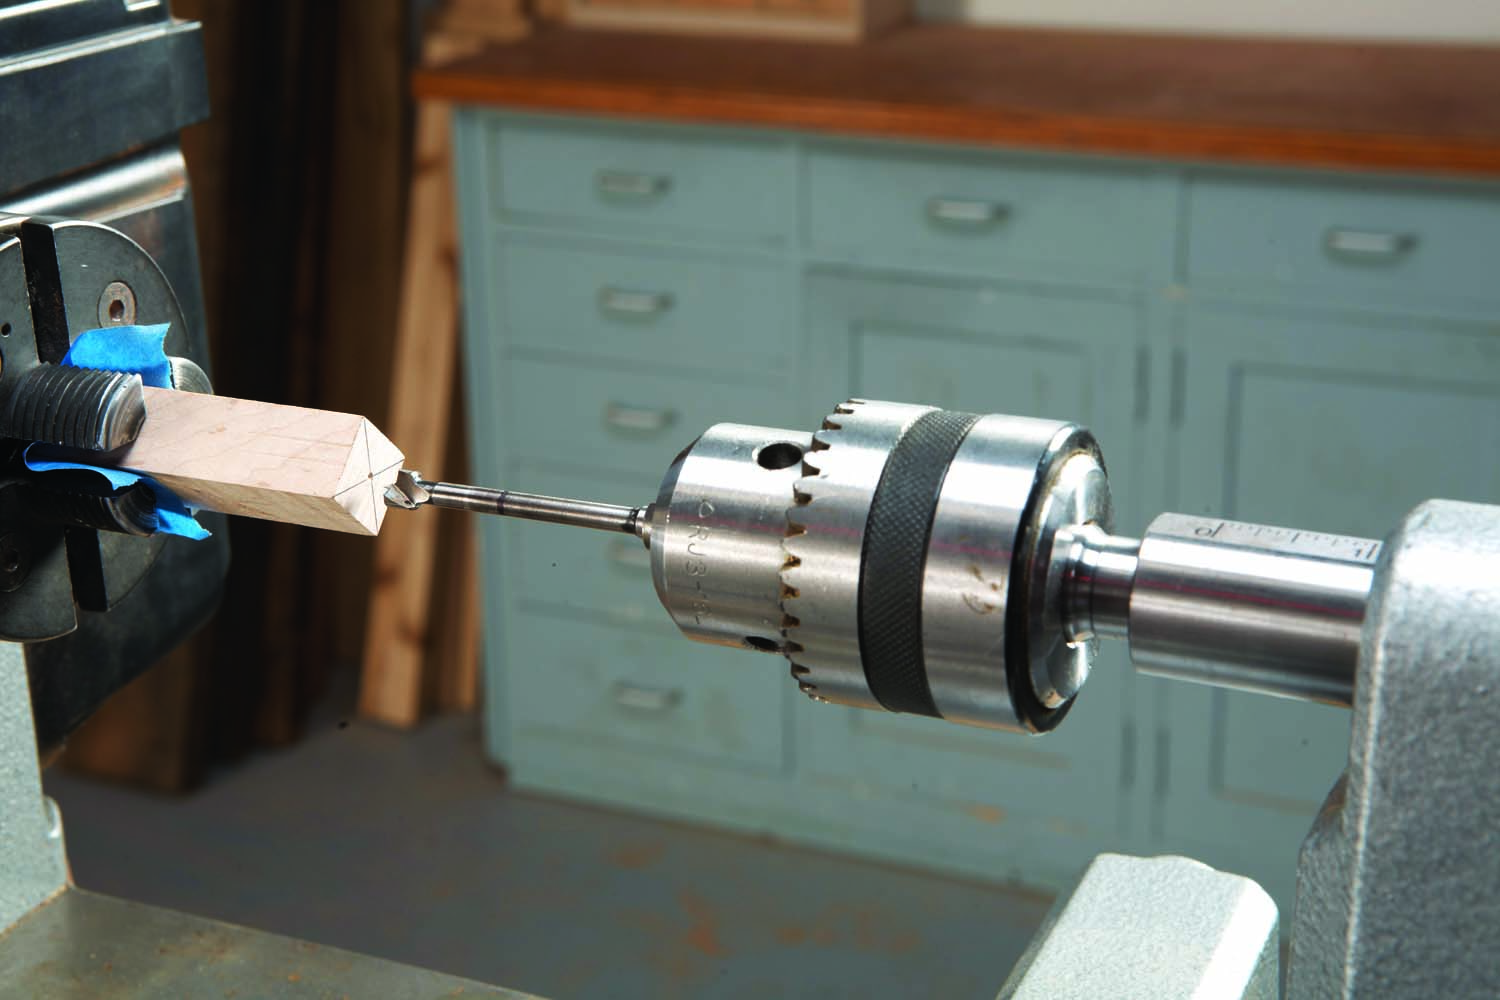
Photo 3. Check the drilling point after installing the key chuck and bit. The weight of the extended chuck is likely to cause misalignment that must be addressed to avoid ruining the blank.
Mount the drill chuck in the tailstock and install a 5/16″ Forstner bit—seat the bit as far into the chuck as possible—make sure the chuck is securely seated as well. Then check the alignment (Photo 3). As the bit and chuck will be extended about 6″ beyond the tailstock, it’s not unusual for the bit to sag. If the bit is even slightly below center, you’ll have to lift the chuck to properly center the bit when you drill (Photo 4).
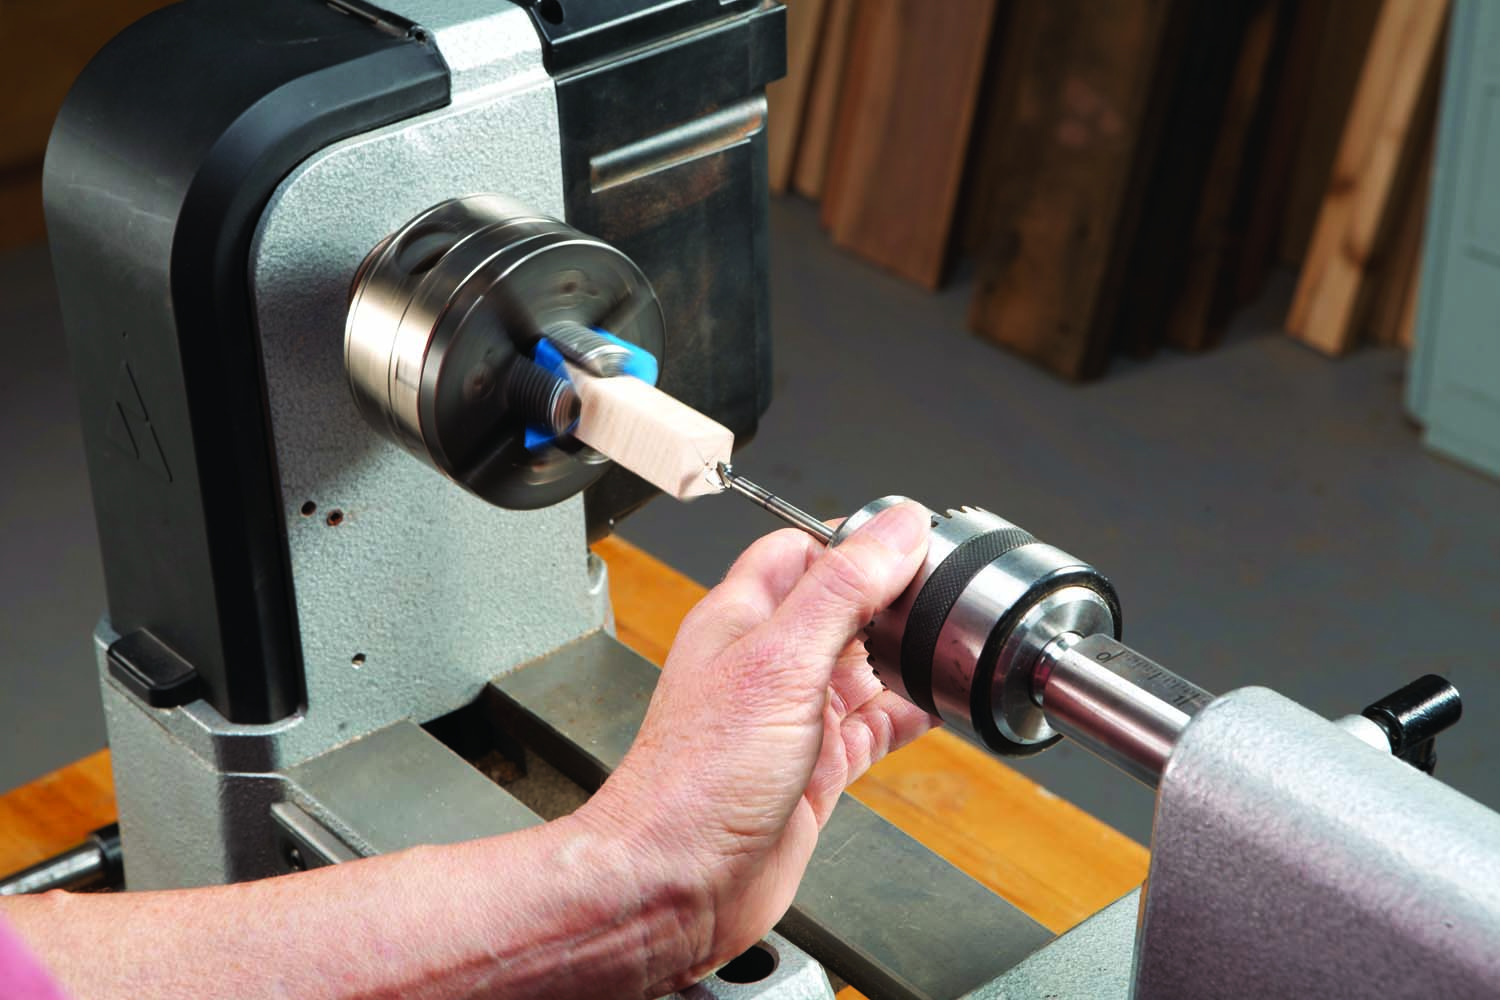
Photo 4. Position the chuck by hand to align the bit with the center mark when you drill. To avoid overheating, drill through the blank in stages, stopping frequently to clear the chips.
You should also plan to stop drilling every 1/2″ or so to clear out the chips. It’s time to stop when chips start to build up around the outside of the hole or if the lathe bogs down or starts to squeak. Be careful when you retract the bit, as pressure from chips trapped inside may damage the hole.
TIP: After clearing the chips, always insert the bit back into the hole before you turn on the lathe, so it doesn’t catch an edge and ruin the hole.
When drilling the long blank, you’ll also have to stop to remount the bit so it will extend far enough to drill all the way through. Slow down when the bit gets close to the end, to keep it from blowing through. It’s a good idea to mark the lengths of both blanks on the shaft of the bit, so you’ll know when to slow down. You can also avoid blowout by drilling halfway from each end—this method is especially useful for brittle or chalky materials.
Glue in brass tubes
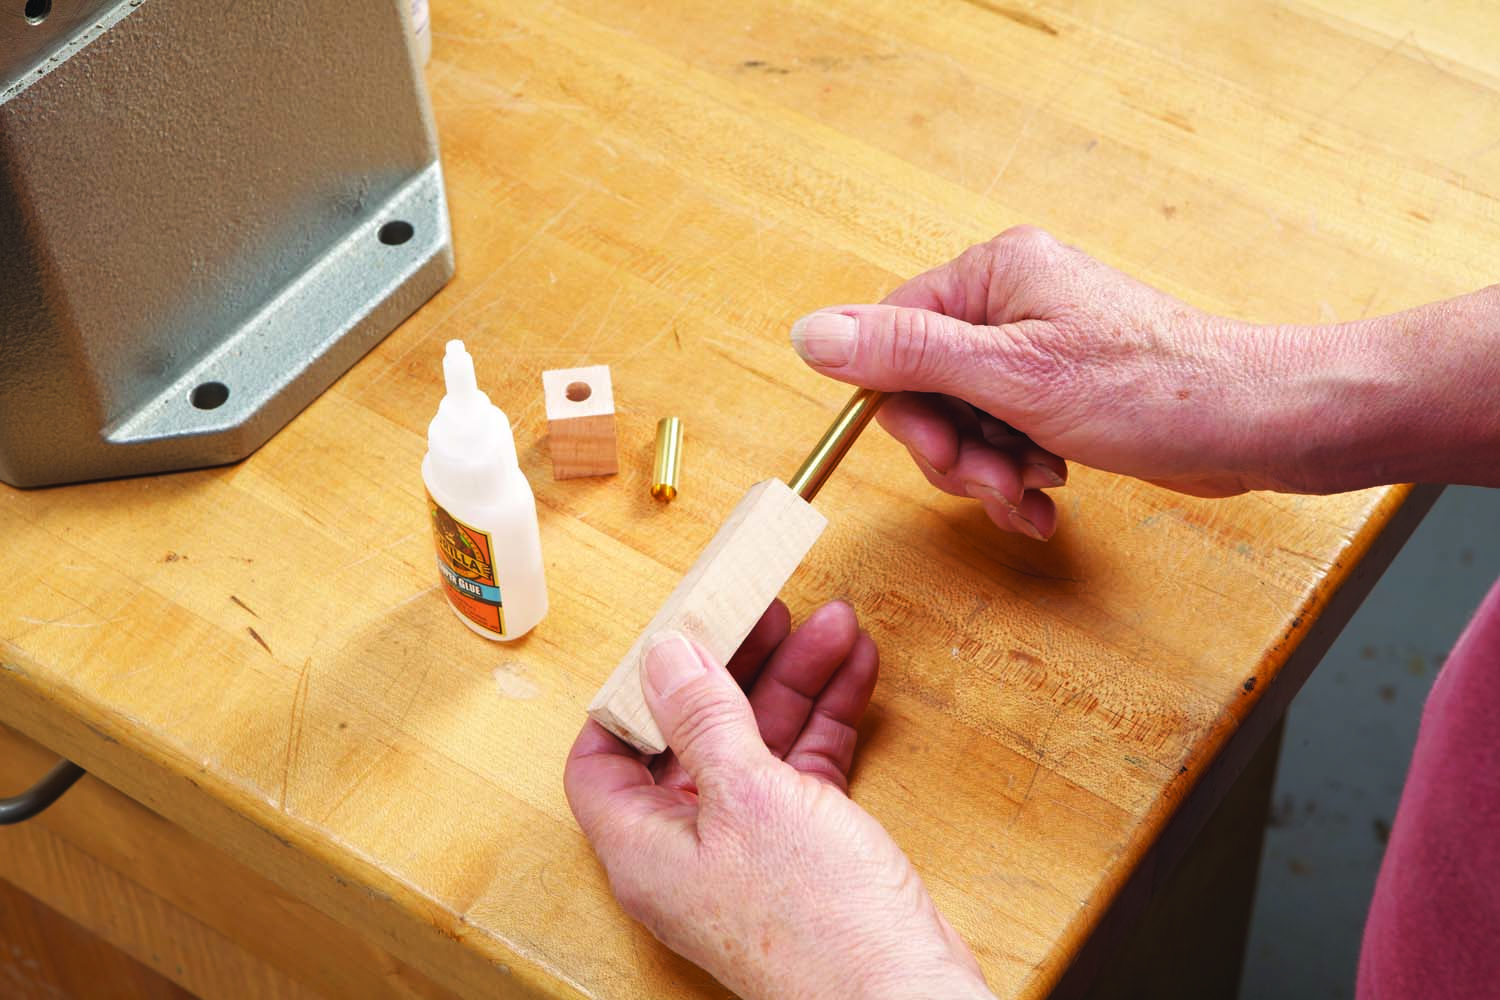
Photo 5. Install a brass tube in each blank using a twisting motion and CA glue. The brass tubes are part of the perfume applicator kit.
Prepare the brass tubes for gluing by roughing them up with 220 grit sandpaper for better adhesion. Apply medium-viscosity CA glue or 5-minute epoxy to the tube and twist into the hole—this helps to evenly spread the glue (Photo 5). Make sure the tube is housed inside the blank on both ends. When the glue has set, use a barrel trimmer to square both ends of each blank and remove any wood that extends beyond the tube (Photo 6). You can work the trimmer by hand, but it’s faster and easier to install it in the scroll chuck.
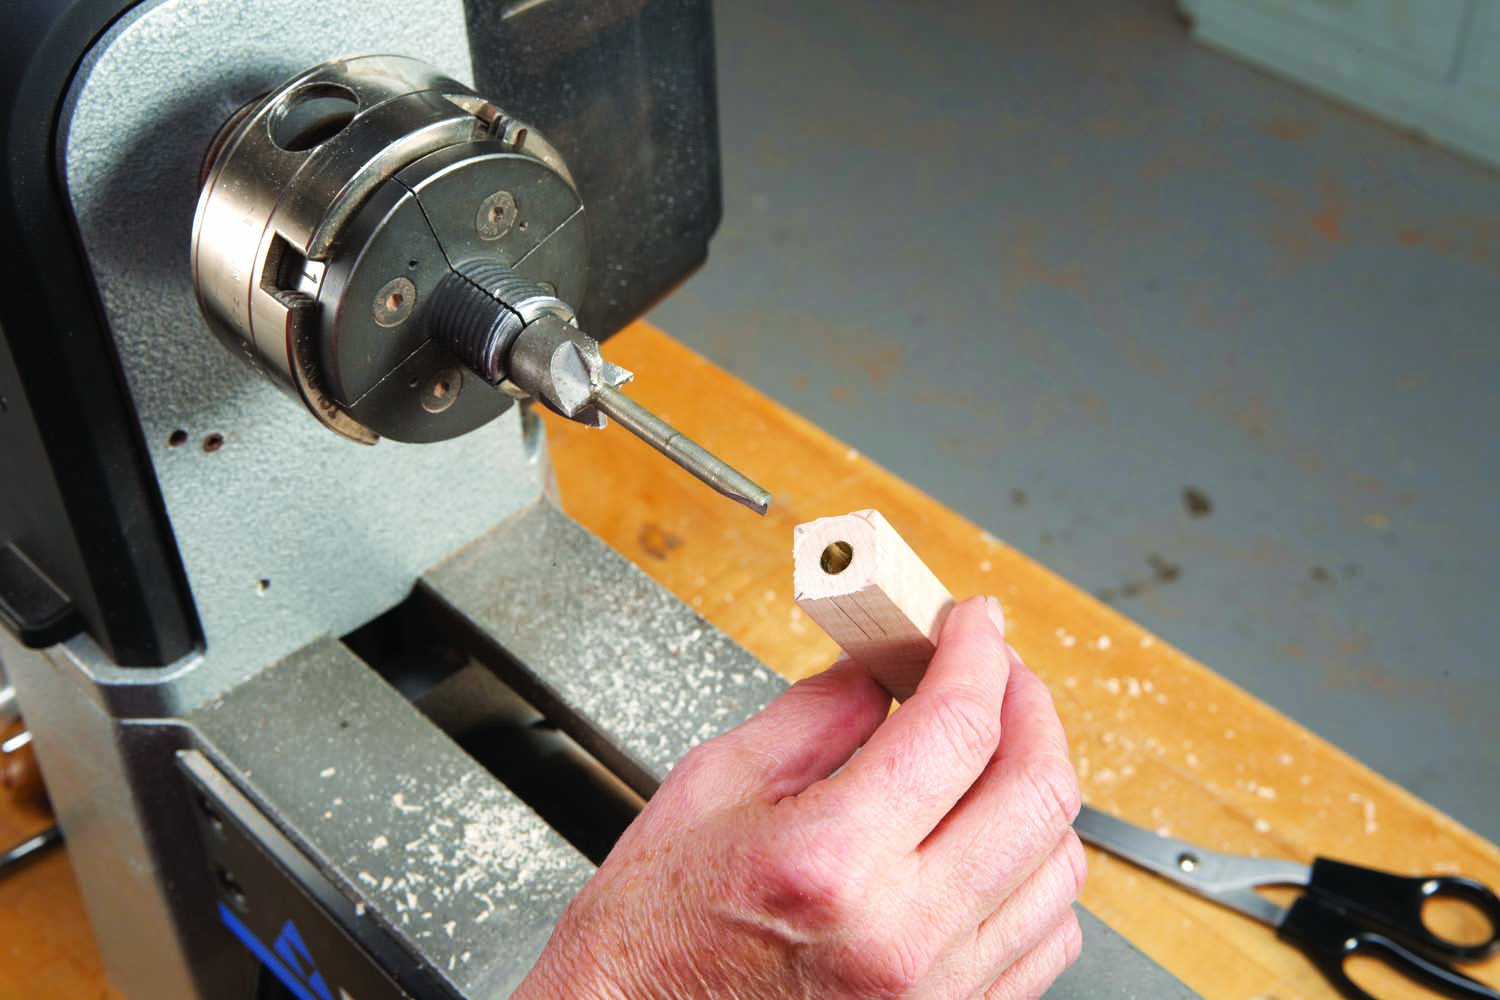
Photo 6. Square the ends of each blank flush with the tube, using a barrel trimmer installed in the scroll chuck.
Turn the blanks
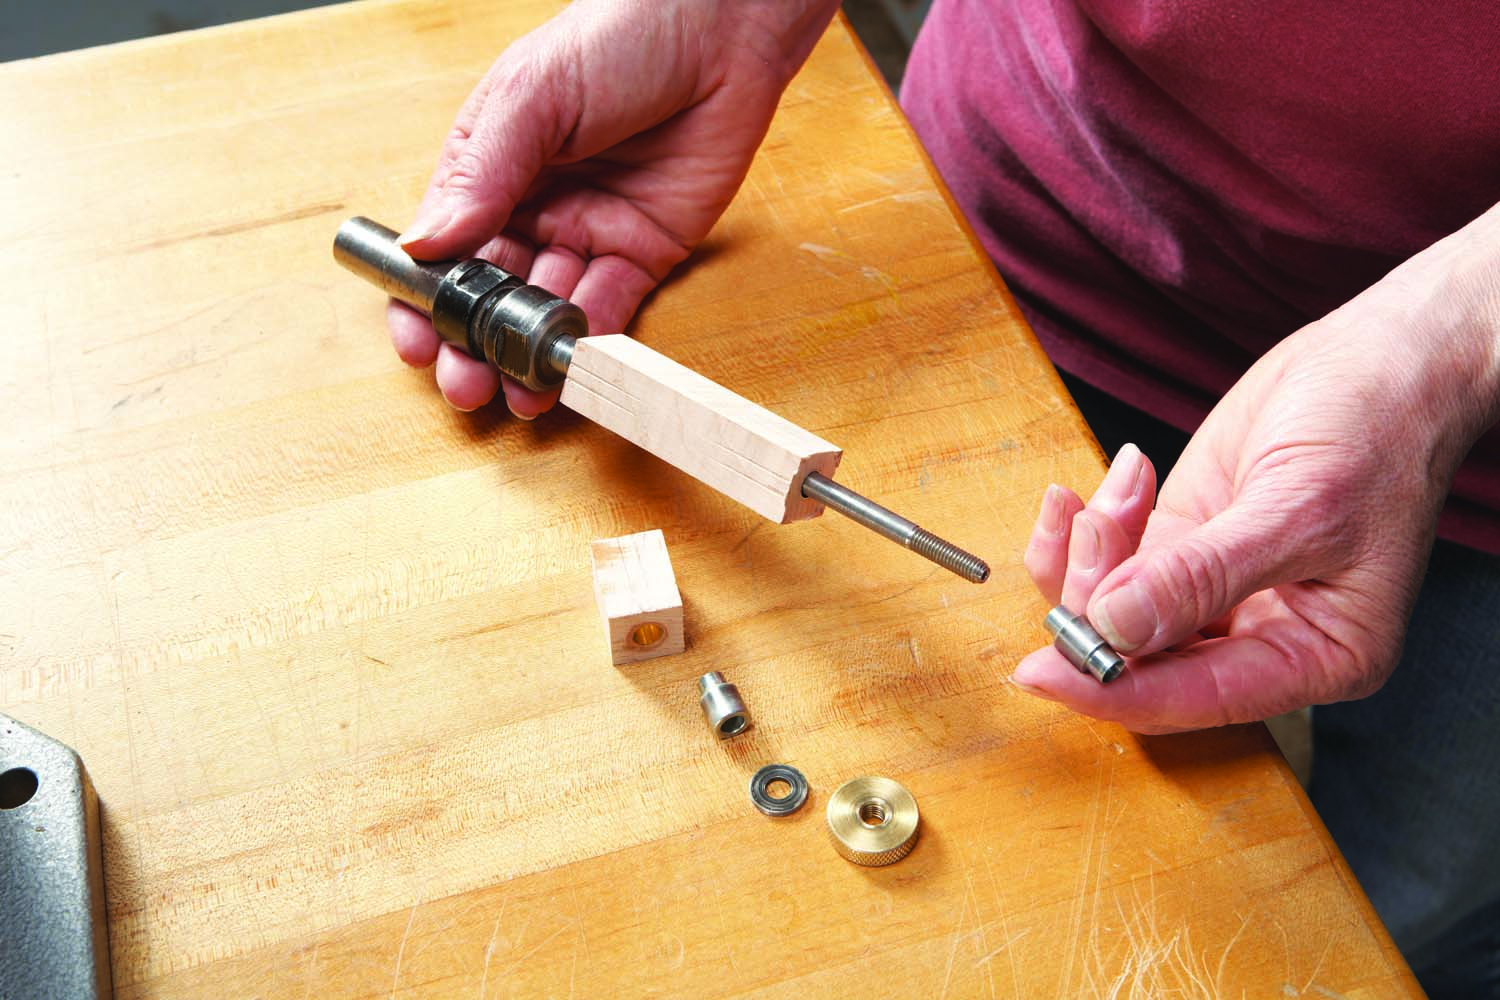
Photo 7. Mount the blanks on a mandrel with bushings on both ends and in between. The bushings are sized to match parts included in the perfume applicator kit.
Mount both blanks and the three perfume applicator bushings on a mandrel with a #2 Morse taper (Photo 7). Insert the mandrel into the headstock and bring up the tailstock to support the other end.
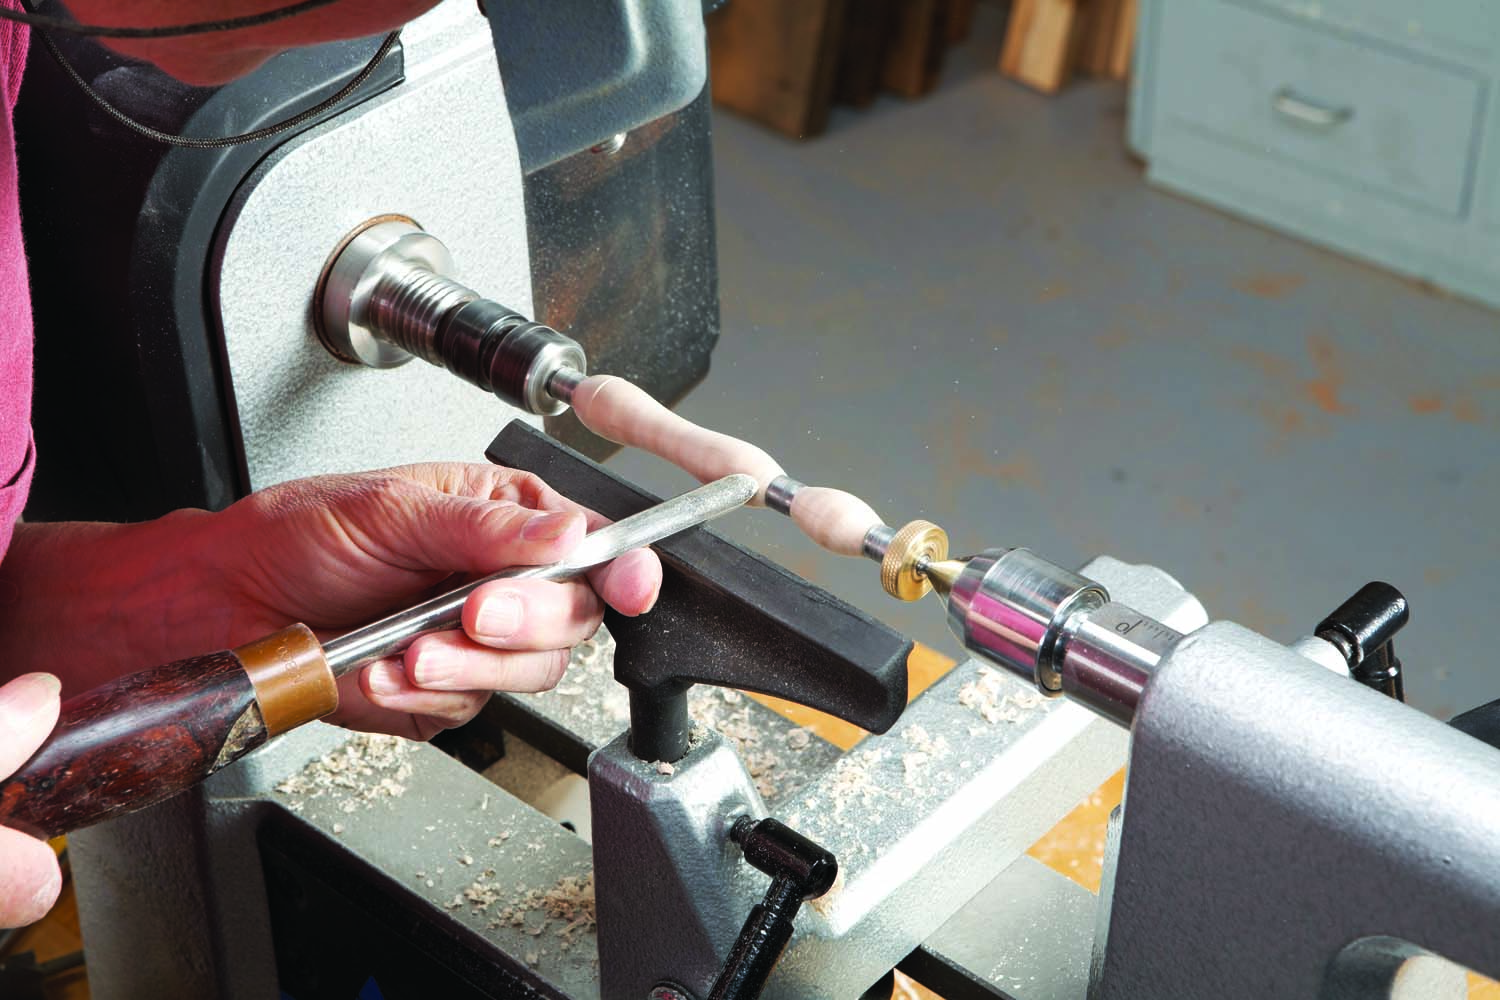
Photo 8. Turn down the ends to meet the bushings after shaping the barrel and cap. A concave shape makes the barrel easy to grip. A delicate bead created with the skew adds a sophisticated touch.
Use a roughing gouge to turn the blanks to a cylinder. Then switch to a detail/spindle gouge to create contours that will make the pen attractive and comfortable to hold (Photo 8). There’s even room to add a small embellishment. Finish the job by turning down the ends to meet the bushings so the turned parts will match the caps that come with the pen applicator kit.
Apply finish
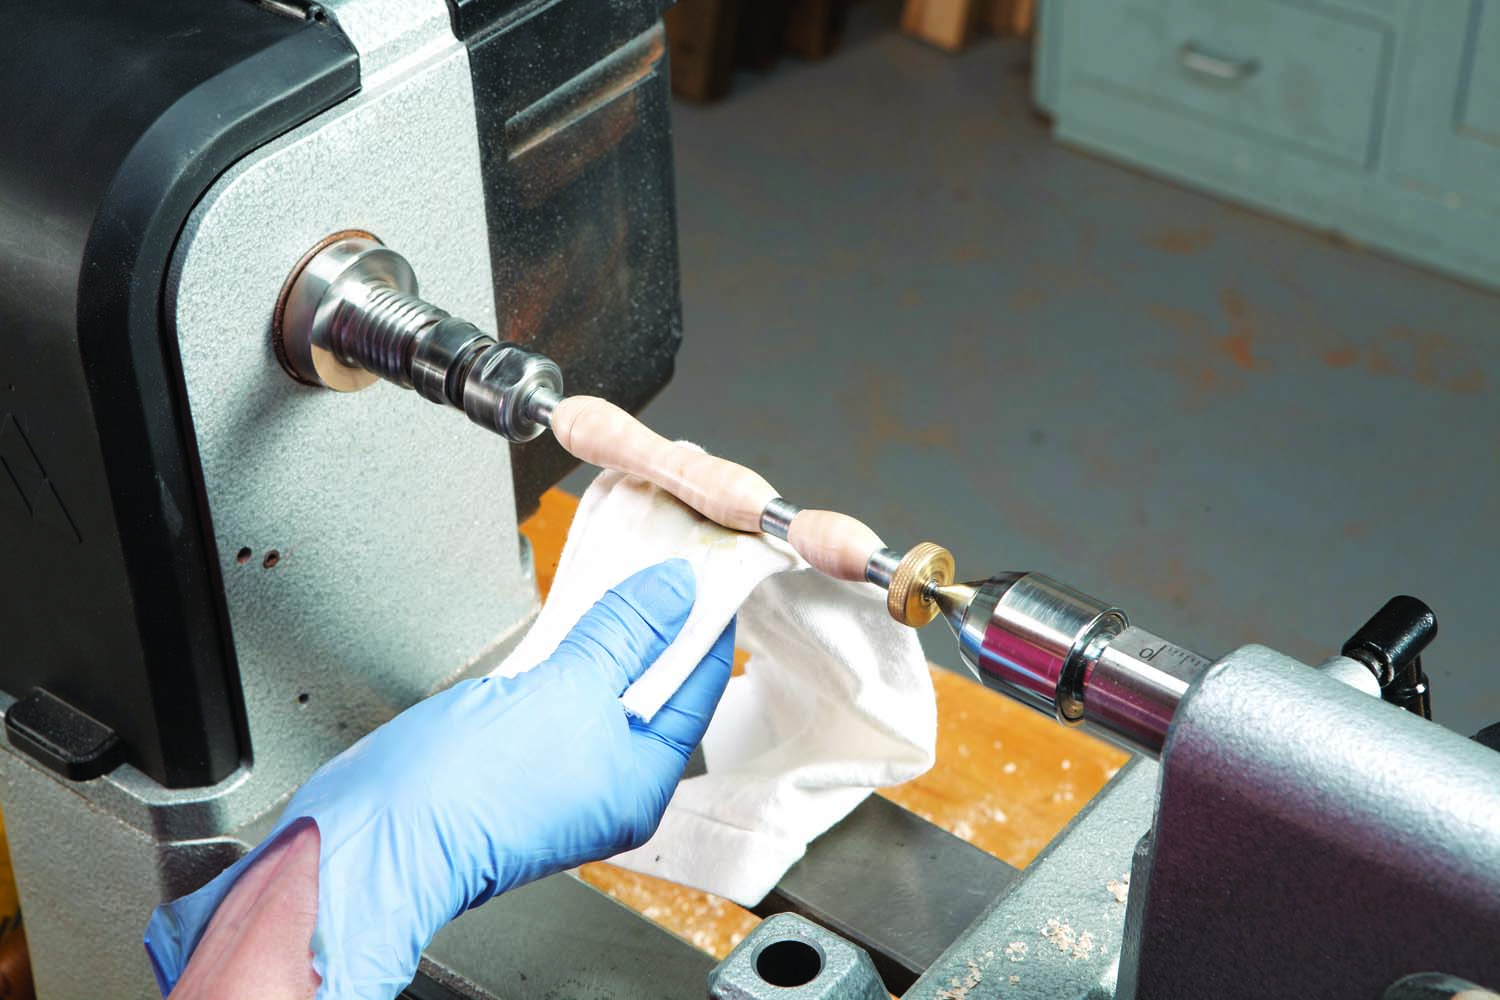
Photo 9. Apply the finish while the barrel and cap are still on the lathe. Varnish provides durable protection for non-oily woods. A buffed wax finish is sufficient for oily woods.
Sand and finish the pieces while they’re still on the lathe (Photo 9). Start with 180 grit sandpaper and work up to 600 grit. For non-oily woods such as the figured maple shown here, you can make a finish that’s tough, durable, water resistant and easy to apply with a soft cloth, by thinning 2 parts of Behlen Rockhard Table Top Varnish with 1 part mineral spirits. Three light coats of this finish, sanded between with 600-grit sandpaper, will provide sufficient protection. It’s best to wait twelve hours between coats. Oily woods, such as cocobolo, bocote or ebony, require only wax.
Assemble the pen
Decide how to orient the two parts by studying the grain: Check each end of the cap with both ends of the barrel to find the best match. Then assemble the pen. The perfume applicator kit includes end caps, a nib, a reservoir, a ceramic applicator and an O-ring. The nib and one of the end caps are threaded so the pen’s barrel and cap will screw together. Make sure to install these parts to orient the cap and barrel with the best grain match.
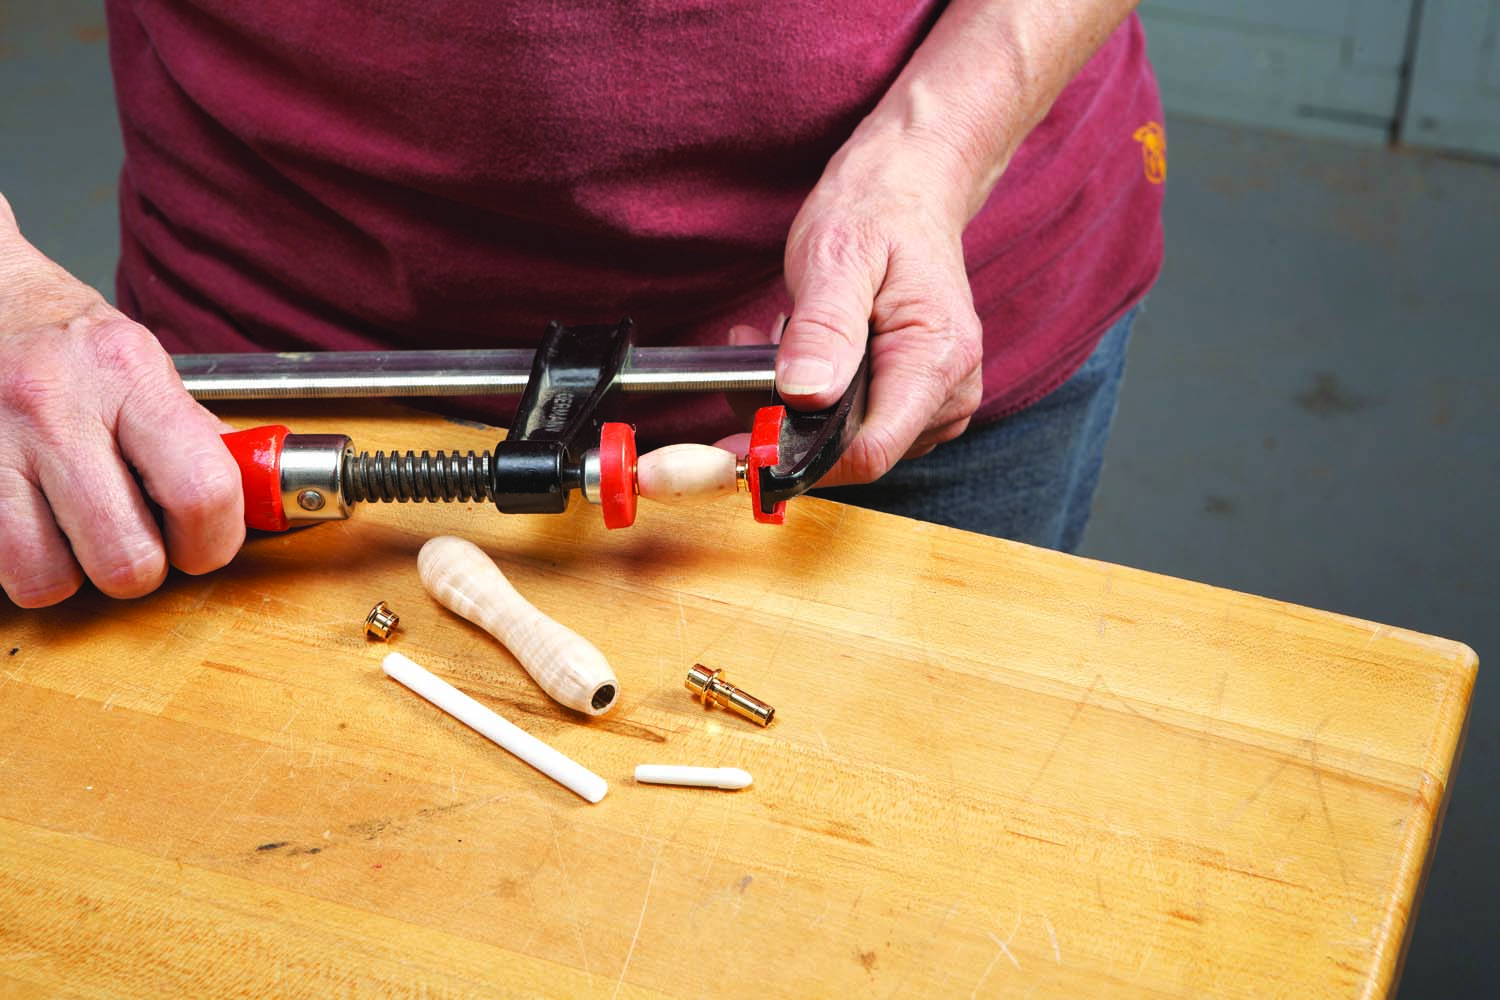
Photo 10. Assemble the cap and barrel by installing parts from the perfume applicator kit. Insert the reservoir in the barrel before installing its end cap and nib. Then press the applicator into the nib.
Use a clamp or vise to press the metal parts onto the turned parts (Photo 10). Insert the reservoir in the barrel and press on its end cap and threaded nib. Then install the ceramic applicator and finish assembling the pen (Photo 11).
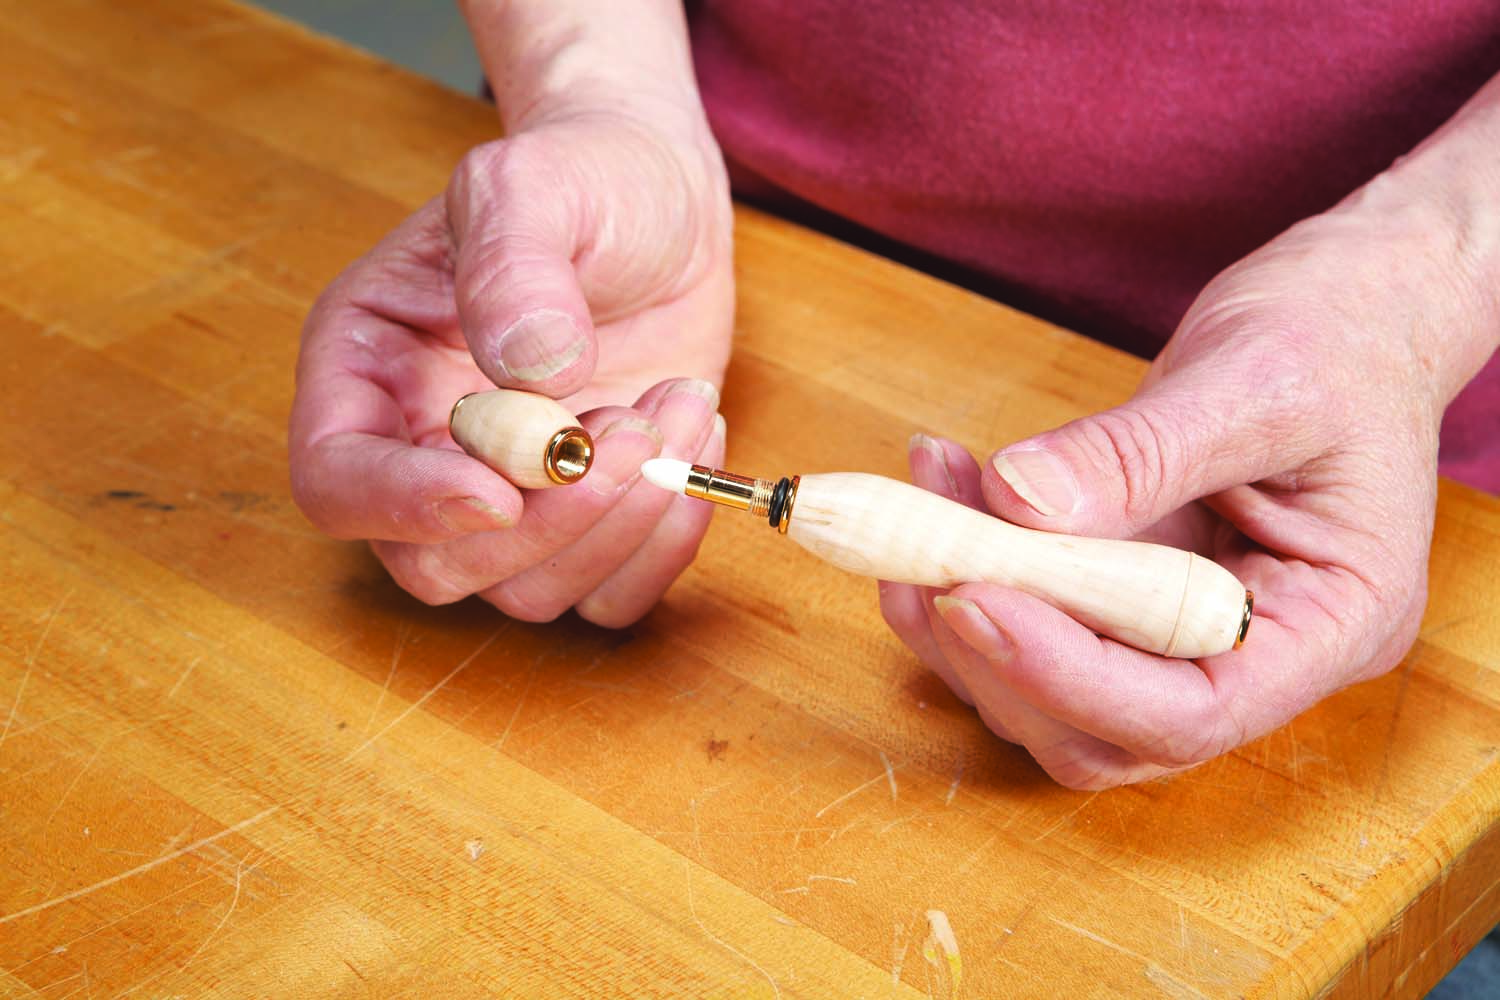
Photo 11. Mount the O-ring on the nib. When the cap screws on, the O-ring creates an airtight seal, so the perfume won’t leak or evaporate.
To fill the pen, simply dip the applicator into a bottle of your favorite perfume (Photo 12). Each time you refill the pen, clean the applicator tip by soaking it in rubbing alcohol.
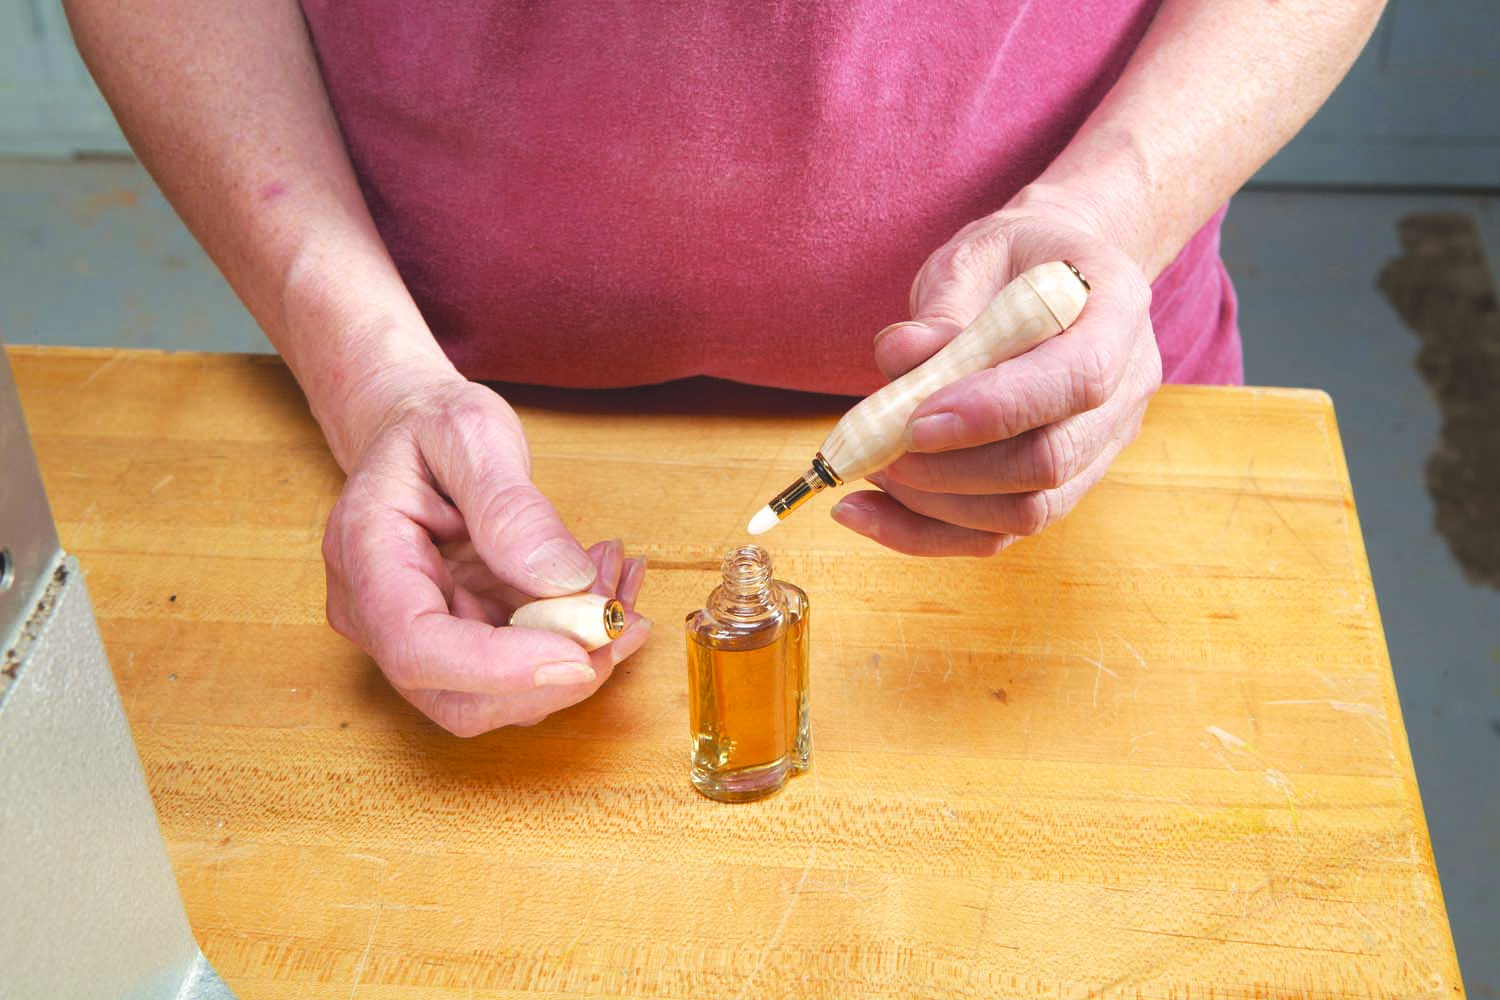
Photo 12. Dip the applicator in perfume and let it wick up into the reservoir. It takes about a minute to fill the pen with perfume.
Beyond Solid Wood
Pen-turning blanks are available in an astounding variety of alternative materials, including laminated wood, resin-injected wood, black palm, corn cob, denim, acrylic, inlace acrylester, polyester, polymer clay, RhinoPlastic acrylic, artisan glass fiber, TruStone, carbon fiber, laser cut inlay, antler, buffalo horn and even rattlesnake skin.
Most of these materials require working slowly and making very light cuts with very sharp tools. Aggressive cuts are likely to cause chip-out that can be difficult or impossible to repair. I sometimes use a woodturning scraper for the last cuts to avoid chip-out that could ruin the piece. Some materials are a bit chalky—using CA glue before cutting helps to firm up the surface.
Plan to sand alternative materials to 600 grit and then use two types of polish developed for plastics to remove the scratches—a heavy scratch remover and a fine scratch remover.
Bio
Mary Lacer has been turning wood for more than 30 years. She has taught in a number of turning programs across the country and lives near River Falls, WI.
Here are some supplies and tools we find essential in our everyday work around the shop. We may receive a commission from sales referred by our links; however, we have carefully selected these products for their usefulness and quality.


