


We may receive a commission when you use our affiliate links. However, this does not impact our recommendations.
This versatile router joint is perfect for production work.
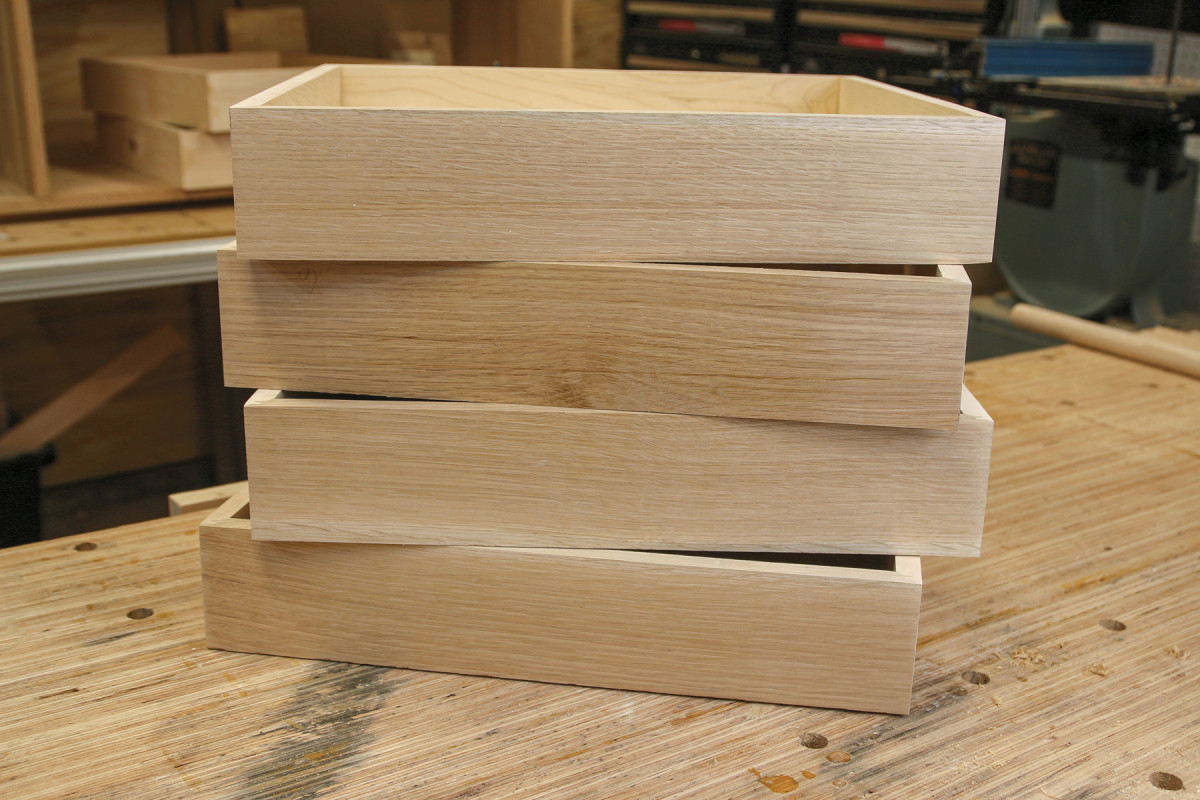
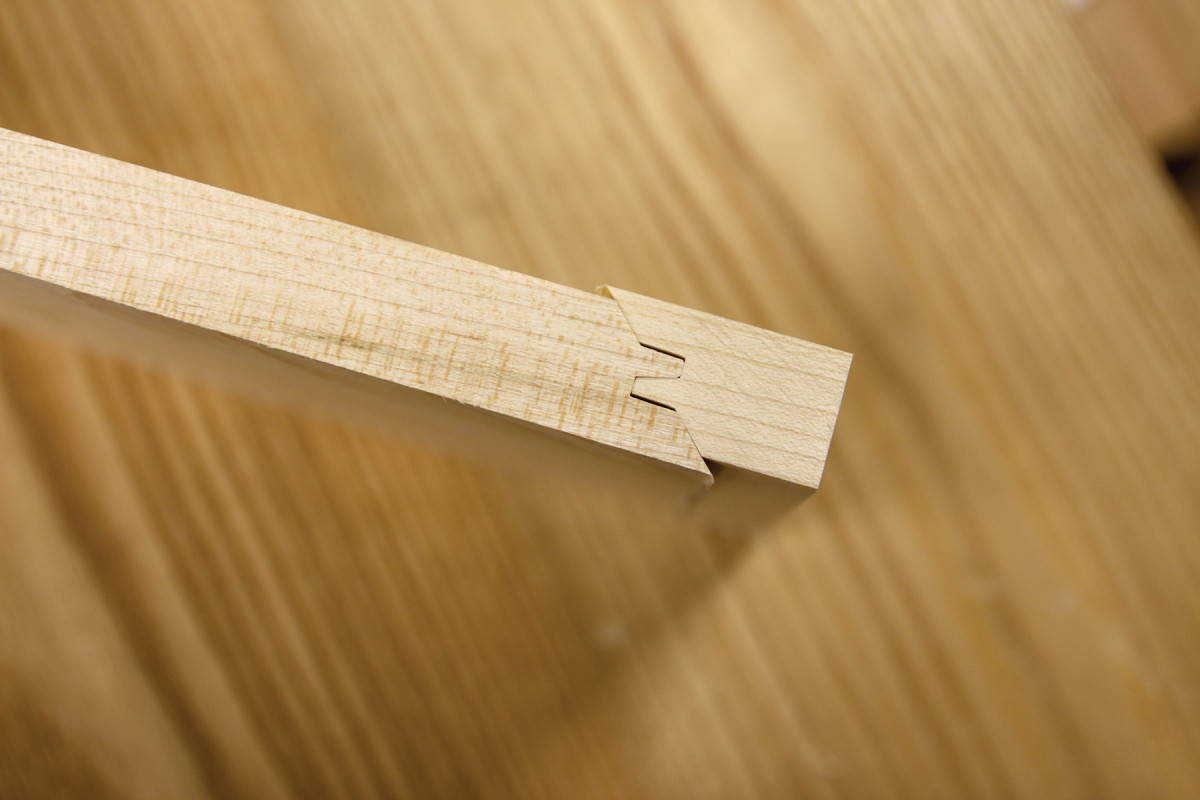
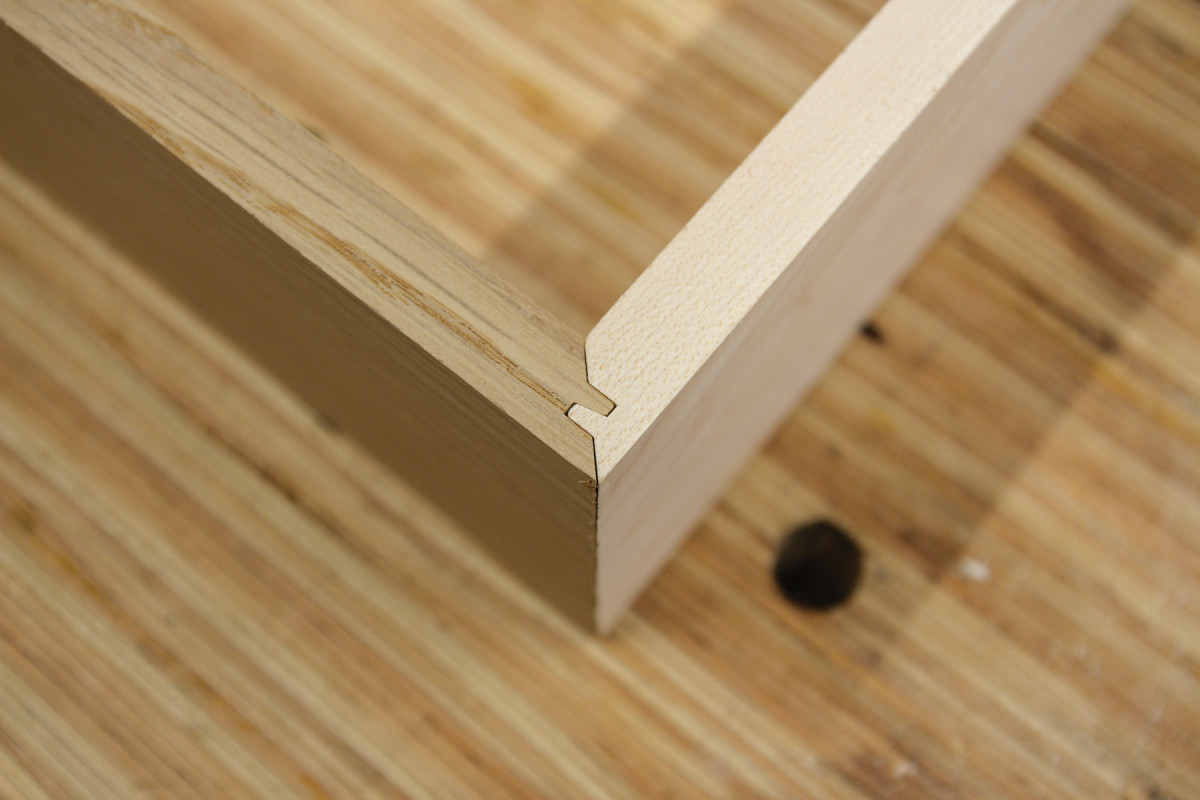
When I need to batch out a bunch of drawer boxes, I use a lock miter router bit. Not only does this bit create a joint with a clean, mitered look on the outside, but the profile of the bit gives the drawer a good mechanical joint with plenty of glue surface (making it a good choice for drawers). The joint can be made on end grain (which is how I’m using it for drawers), and it can be used on edge grain, too. It’s often employed when making hollow legs and other furniture parts where a strong mitered edge joint is needed. And, the joint is self-aligning and easier to glue up than a regular miter joint.
A lock miter bit is always used in conjunction with a router table. When making drawers, you’ll be routing the ends of drawer fronts and backs, so a miter gauge or sled is important to keep your work square to the fence. You’ll also be routing the ends of drawer sides, upright against the fence, so a taller fence is nice to have.
Companies make bits to be used with material ranging in thickness from 1/2” to 1 1/4” material. Expect to pay about $100 for a quality bit. Because these bits are 1 1/2” in diameter or larger, your router needs to be capable of running the bits at slower speeds. Most 2 1/4 horsepower variable speed routers meet the specs for both power and RPM. The bit I’m using here is made for stock between 1/2” and 3/4” (my drawer stock is 5/8” thick), and I’m using it with a 21/4 hp router, dialed down to its slowest speed (approximately 10,000 RPM).
Prep Your Stock
Cutting accurate lock miter joints starts with good lumber prep. Mill your drawer fronts, backs and sides to all be the same thickness and cut to length. Because we’re routing end grain, there’s a tendency for the bit to tear out at the back of the cut, so leave your parts a little wide and trim them to final width after the joints are cut. Also, mill up some extra parts for testing your setup. You’ll need at least two extra fronts and a side, as well as an offcut of the same thickness as your drawer pieces for the jig. Finally, because the joint is cut in one pass, it’s helpful to remove a bit of the waste on each end of your stock. I do this on the table saw with a miter gauge, just trimming off
the corners.

1. Set your bit height. A good starting point is to keep the bit roughly centered in your piece of stock. Cut two test piece pieces–they should align perfectly when the bit is at the right height.
Set Bit Height
The first step in setting up a lock miter bit is setting the height of the bit in your router table. The middle of the bit (right below the “finger” in the profile) should be aligned with the exact center of your board edge. There are a bunch of different set-up blocks and gauges designed to help you with this process, but I’ve found the best way to do this is eyeball it, make a test cut, and adjust as needed.
2. If they don’t align, your bit is either set too low or too high. Use a miter gauge or sled to hold your piece firmly as you rout the end grain.
Before you make your first test cut, set your fence to cut roughly the thickness of the board. Get it close, but we’ll dial it in after we have the bit height set. It’s also helpful to adjust the edges of the fence as close as you can to the edges of the bit, to give your drawer pieces as much support as possible as you’re routing them.
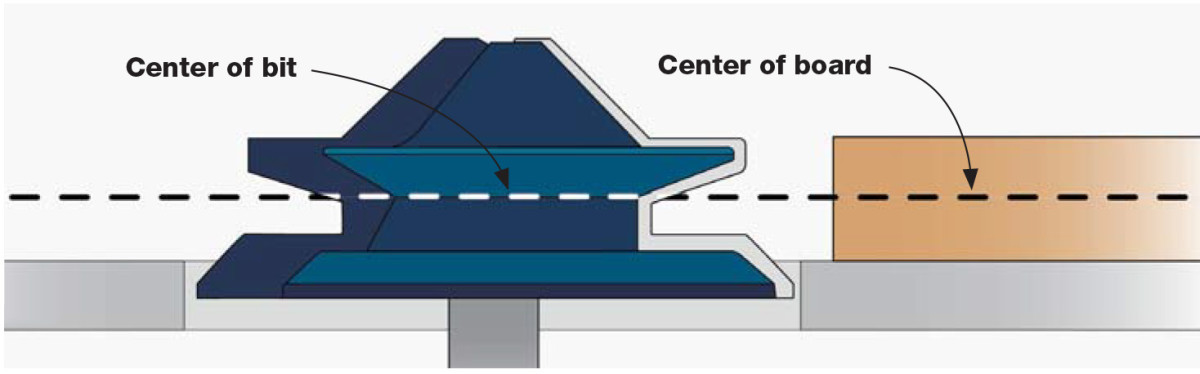
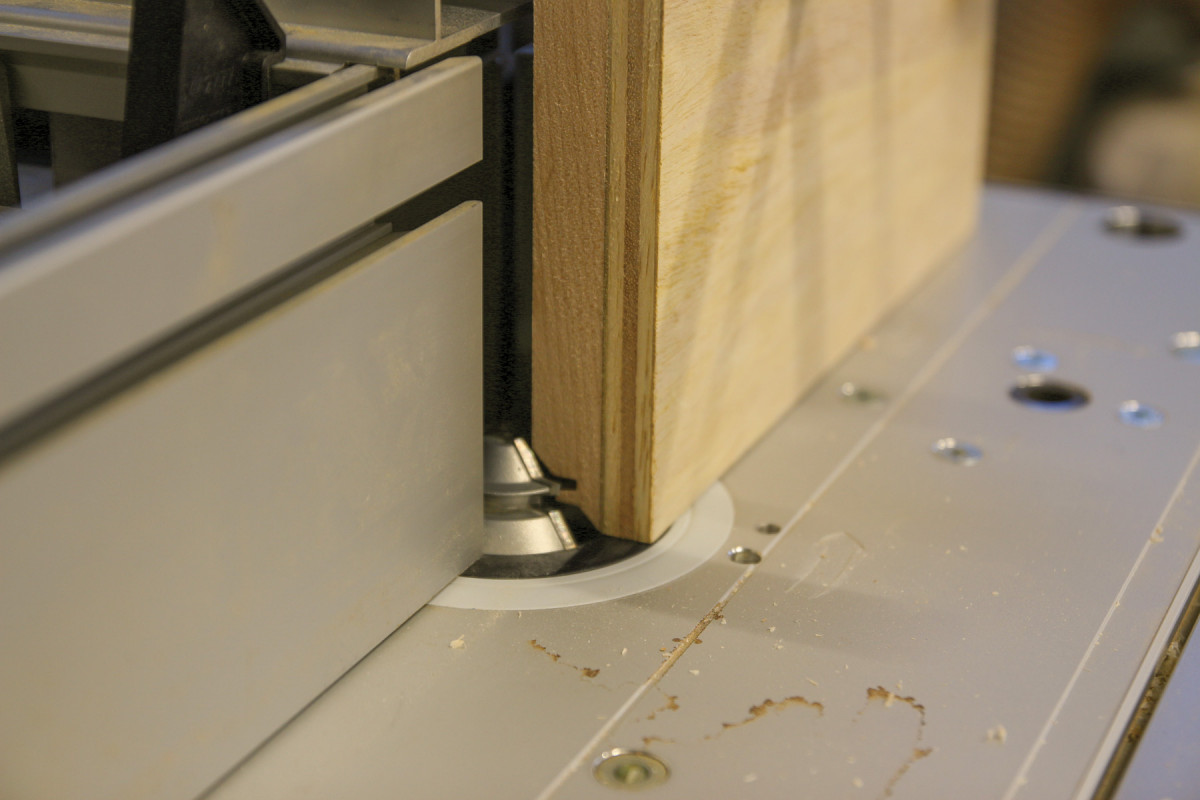
The router bit height is properly set when the center of the bit profile lines up with the center of your material.
Make two cuts on your test pieces on the end grain, with both pieces flat against the table. You want the faces of the boards to be perfectly aligned when they’re fitted together. If the faces are proud of each other, your bit is too low. If they’re shallow, your bit is too high. I use the same two drawer fronts over and over for this. If they’re not aligned, I chop off the ends on my miter saw and rout them again. I can usually dial in the height after two or three test cuts.
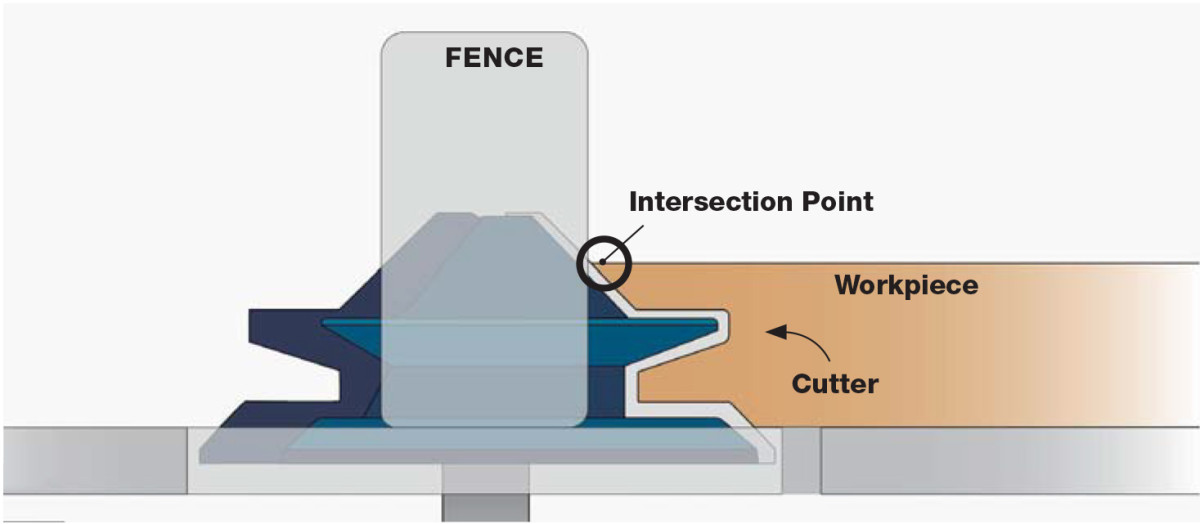
The correct fence position has cutter, fence and top of workpiece all intersecting at top edge of the workpiece.
Set the Fence
Before we think about cutting our drawer sides with their faces against the fence, we need to make a quick jig. It’s just a shorter piece of drawer stock attached to a piece of plywood. It’s enough to hold and keep your hands away from the router bit, but also lets you firmly clamp your piece to the jig and keep it against the fence.
With your jig assembled and bit height set and locked in place, it’s time to set the fence. The fence should be set back from the front edge of the bit by the exact thickness of your drawer sides. Again, I use a drawer side against the fence to eyeball this setup, lock the fence down and make a test cut. If you’re using a miter gauge (as I am here), you also want to make sure your fence is square to your miter gauge.
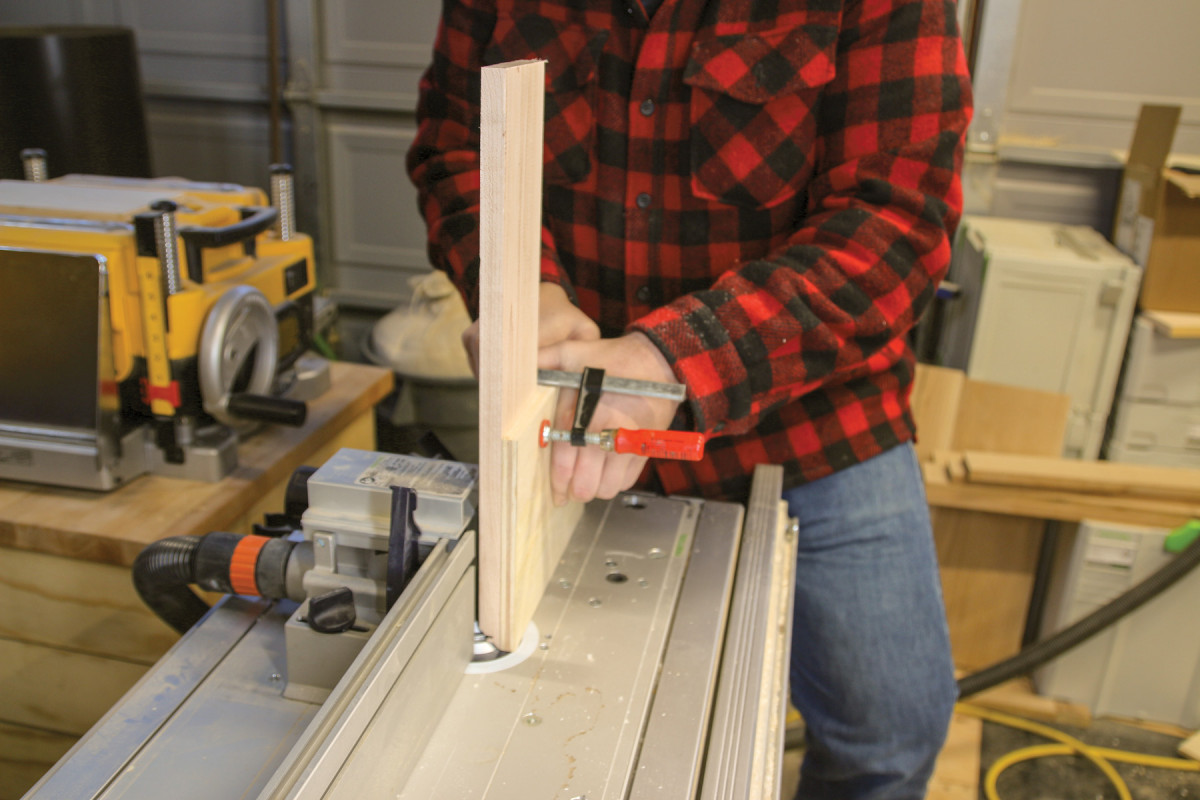
3. This simple jig, made from an offcut of drawer stock and a piece of plywood, makes it easy to keep your drawer side square against the fence.
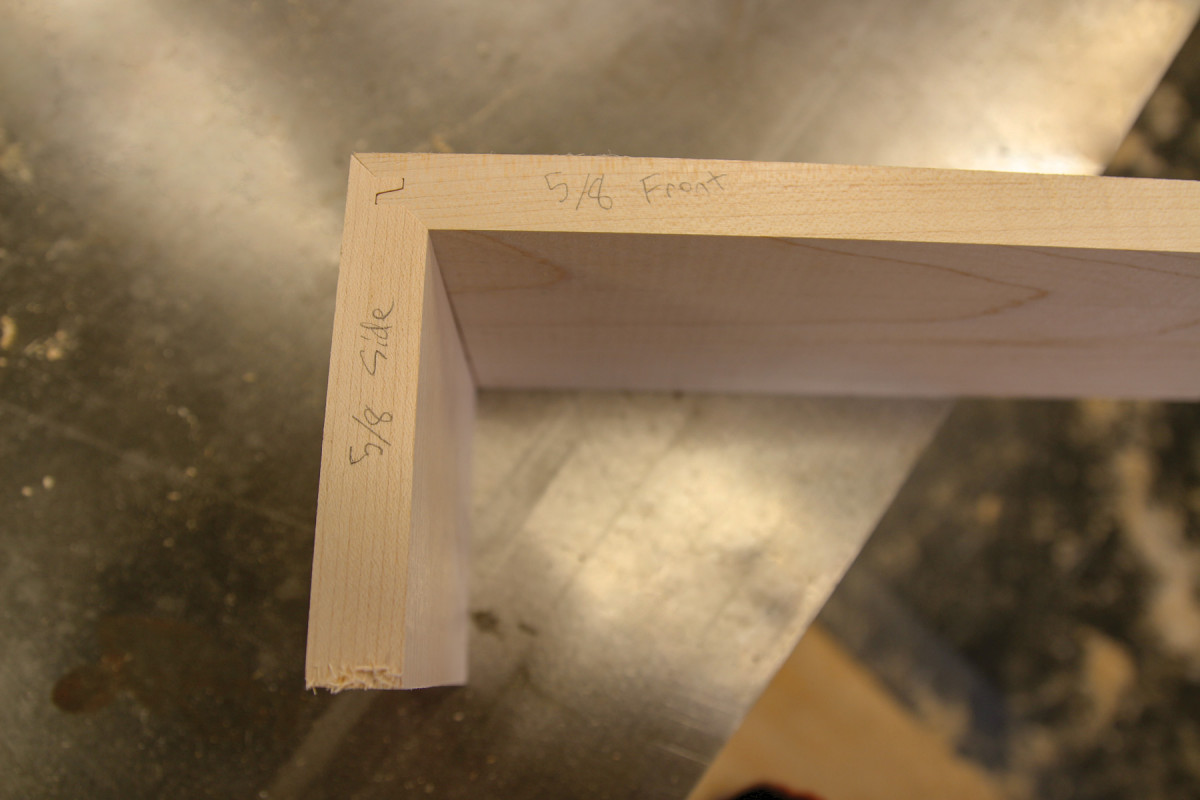
As you’re cutting the lock miter joint on your test drawer side, you’re looking for a nice sharp end. If there’s a flat edge on the end, your fence is too far forward. If your end is sharp, but doesn’t perfectly align with your test drawer front, the fence is too far back from the front edge of the bit. Once you have your drawer front and side cuts perfectly dialed in, mark the two pieces with their thickness and save them as setup blocks for next time. They’ll help expedite setting the bit height and fence when you do this again.
Rout Your Parts
First, I rout my drawer fronts and backs flat against the table. This goes pretty quickly. Pay attention to your feed rate and listen to your router as you’re routing. You’re making a pretty big cut for a router of any size. It’s better to err on the side of going slowly and steadily versus fast. Each end of your fronts and backs gets routed, with the inside faces against the router tabletop.
4. With the height dialed in, cut a mating piece against the fence and test fit. You’ll need to move your fence in or out to get things to match perfectly.
Then, I rout my drawer sides against the fence. Again, with the jig, you want to keep things square against the fence and feed the side slowly and steadily. I make the cut and when I hear and feel the bit go into my waste/backer board, I stop, shut off the router (waiting for it to spin down), and then remove my drawer side. Again, each end of the drawer side is routed.
5. With your bit set up, cut reference setup blocks so you can get your cuts dialed in quickly next time.
With all of my front, back and side joinery routed, I rout a 1/4” groove in the bottom of each piece for a plywood drawer bottom. I also do this on the router table, with a 1/4” straight bit. I use an offcut of the drawer bottom to set the distance of the bit from the fence to 1/4“, and to also set the height of the bit to 1/4“.
Assemble the Drawers

6-8. Cut lock miters on your drawer parts. Make sure to label your stock. I cut my fronts against the table and my sides against the fence.
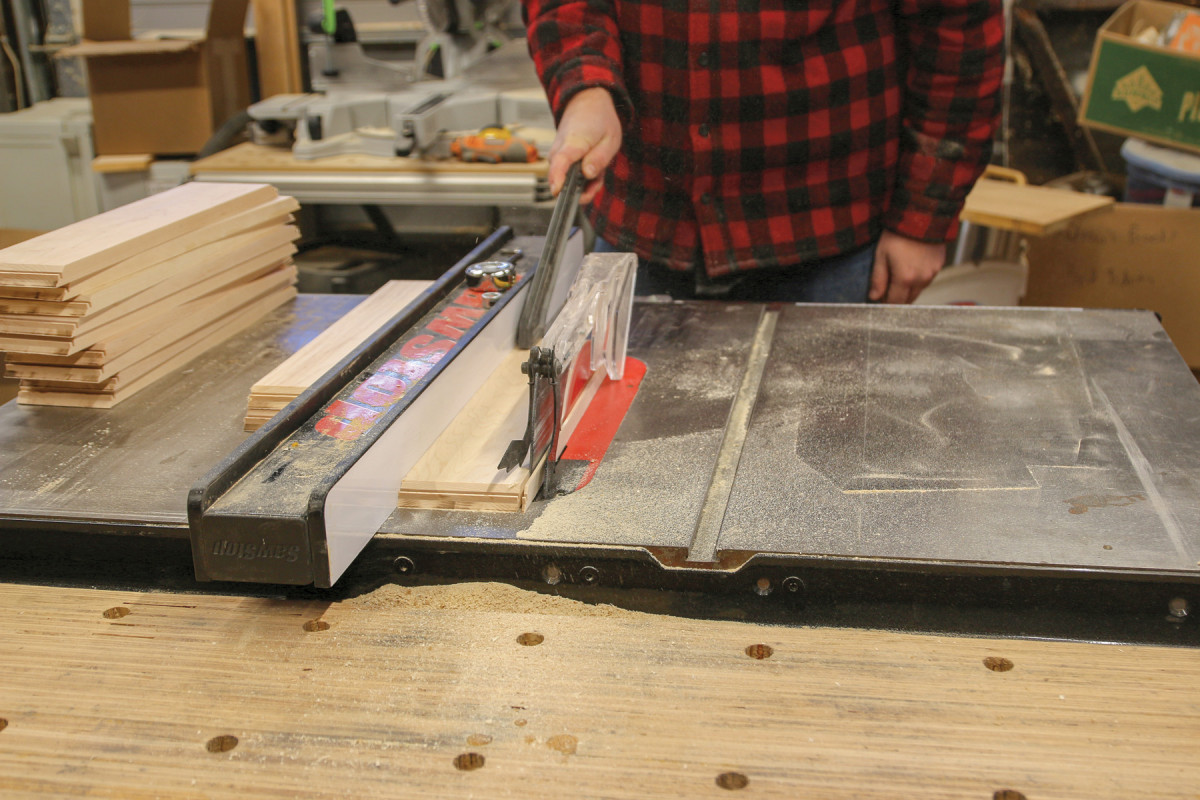
Once all of your parts are mitered, cut parts to final width (eliminating any tear-out from the router bit).
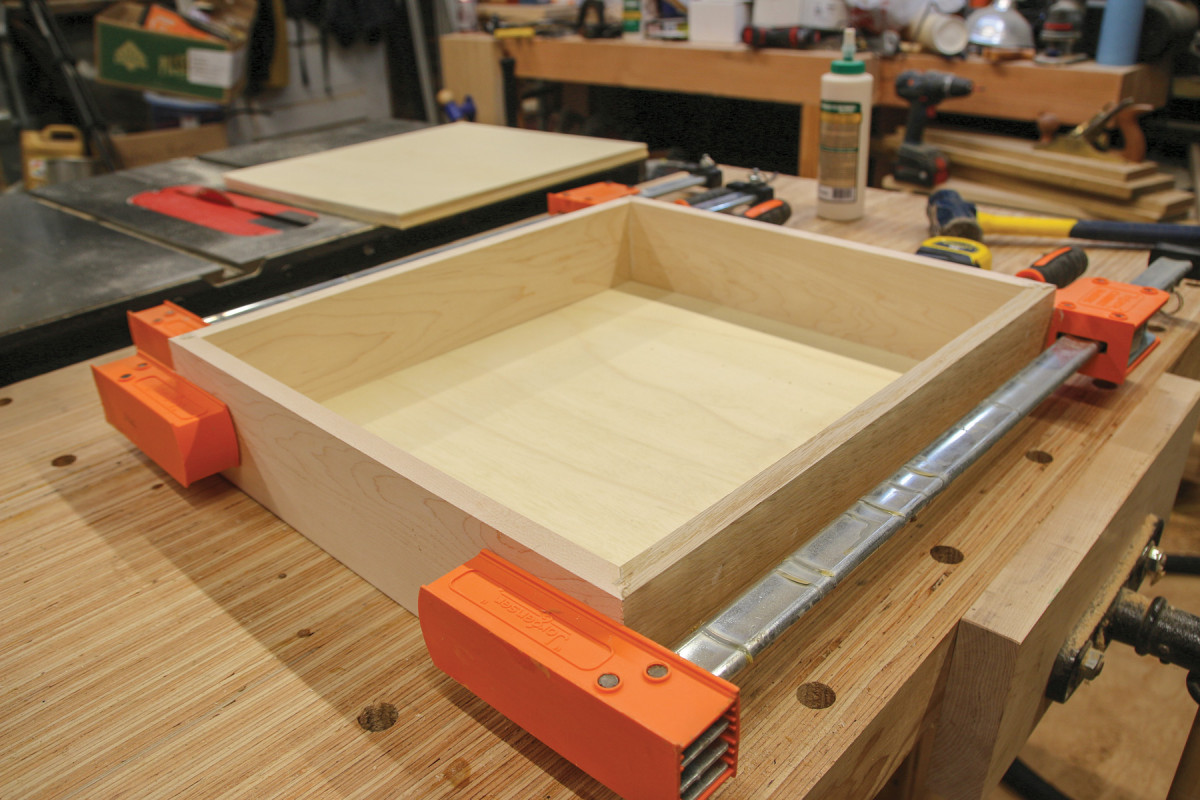
 With the joinery for all of your drawer fronts, backs and sides routed, the next part is the most satisfying: assembly. I dry clamp one drawer and then measure for the plywood drawer bottom. I cut the plywood to size, dry clamp the drawer again to check the fit, then unclamp, glue, and clamp the drawer.

9. Cut a groove for the drawer bottom. I cut my drawer bottoms so there’s 1/4″ of material to support the bottom, with a 1/4″ bit 1/4″ high. Pay close attention to which face of the board you’re routing—the inside faces of the drawer parts should be against the table.
For glue, I use a small brush to get a nice, even coating of glue on all of the glue surface of the joints. I fit the drawer bottom in the two sides of the drawer, then add glue to the drawer front and back, then clamp the whole thing together. Measure corner to corner to make sure the drawer is square, then set aside to let the glue cure.
10. Cut drawer bottoms to size and assemble your drawer boxes.
The end result is a drawer with good, mechanically strong and mitered corners. And you can make a bunch of them efficiently, which is what I like so much about the lock miter router joint.
Here are some supplies and tools we find essential in our everyday work around the shop. We may receive a commission from sales referred by our links; however, we have carefully selected these products for their usefulness and quality.


As is the case with many of these articles, this one is dated. But it was still written after the advent of Infinity’s Lock Miter Master set-up jig.
I think Andrew is down-playing the difficulty in setting up a lock miter bit. His approximation of the center of the bit’s cutting edge is imprecise if not incorrect, and it will not work the way he says. The center-line of the stock must be aligned precisely with the center of the bit’s cutting edge- both when setting the bit height and fence position. Since the bit’s main cutting edge is on a 45° angle, any change to one setting will require an adjustment to the other. It is easy to spend an inordinate amount of time chasing the setting and one reason these bits often get relegated to the back of the bit drawer and not used.
Also, joining stock of two different thicknesses can be problematic- Andrew’s procedures fly out the window in this case. Another thing to consider is that the tip of the outside corner where the sides meet the front can be weak and easily damaged. An offset lock miter, where the miter is repositioned (“around the corner”) to the drawer side, is preferred- but how do you do that??
Infinity’s simple, patented, Lock Miter Master jig answers and solves all these issues quite easily and works with almost every bit on the market. At the very least, take a look at their on-line, illustrated, manual which explains how to do all this and more. (Disclaimer- I invented the LMM)
$100 is mentioned as a price point for a quality miter joint bit. Any suggestions for a specific bit to buy?
I’ve used bits from both Rockler (#91722) and Infinity Cutting Tools (#55-503) with success. Freud also makes one that I wasn’t able to source locally, but should suit you well.
Ok this magazine is turning into another Fine Woodworking magazine. I dumped FWW because it was mostly power tool oriented and now I see the same thing happening here. I loved Popular Woodworking for it’s focus on hand tools. About the only mag out there doing that.
If this keeps up I will not re-subscribe when my subscription expires.