We may receive a commission when you use our affiliate links. However, this does not impact our recommendations.
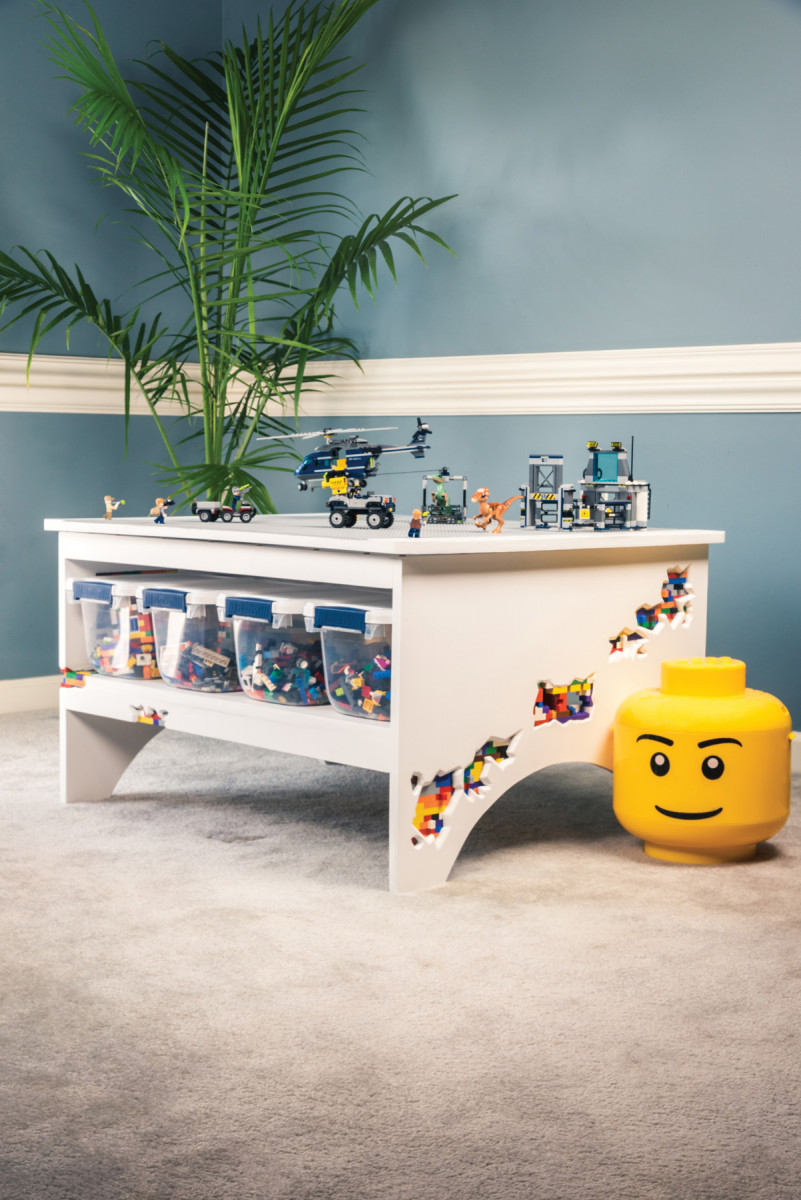
Add artful accents to a play table.
Project #1914 • Skill Level: Beginner • Time: 1 Day • Cost: $150
Last Christmas my wife and I introduced our young boys to LEGO. This was a good reminder that there is something really special about spending time with your kids with toys that you grew up with. It’s been incredible seeing how fast they’ve gone from just wanting me to build things for them to smash, to my oldest building kits with minimal assistance.
1. Panels of LEGOS inlayed into the table add a dash of fun to this simple build.
As our collection has grown and my boys became ever more interested in LEGO, I decided they needed a fitting home. I wanted to build something that brought inspiration when you saw it. A table that would draw my boys in when they come home from school rather than settling in with their electronic devices.
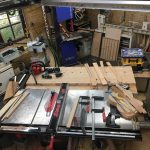
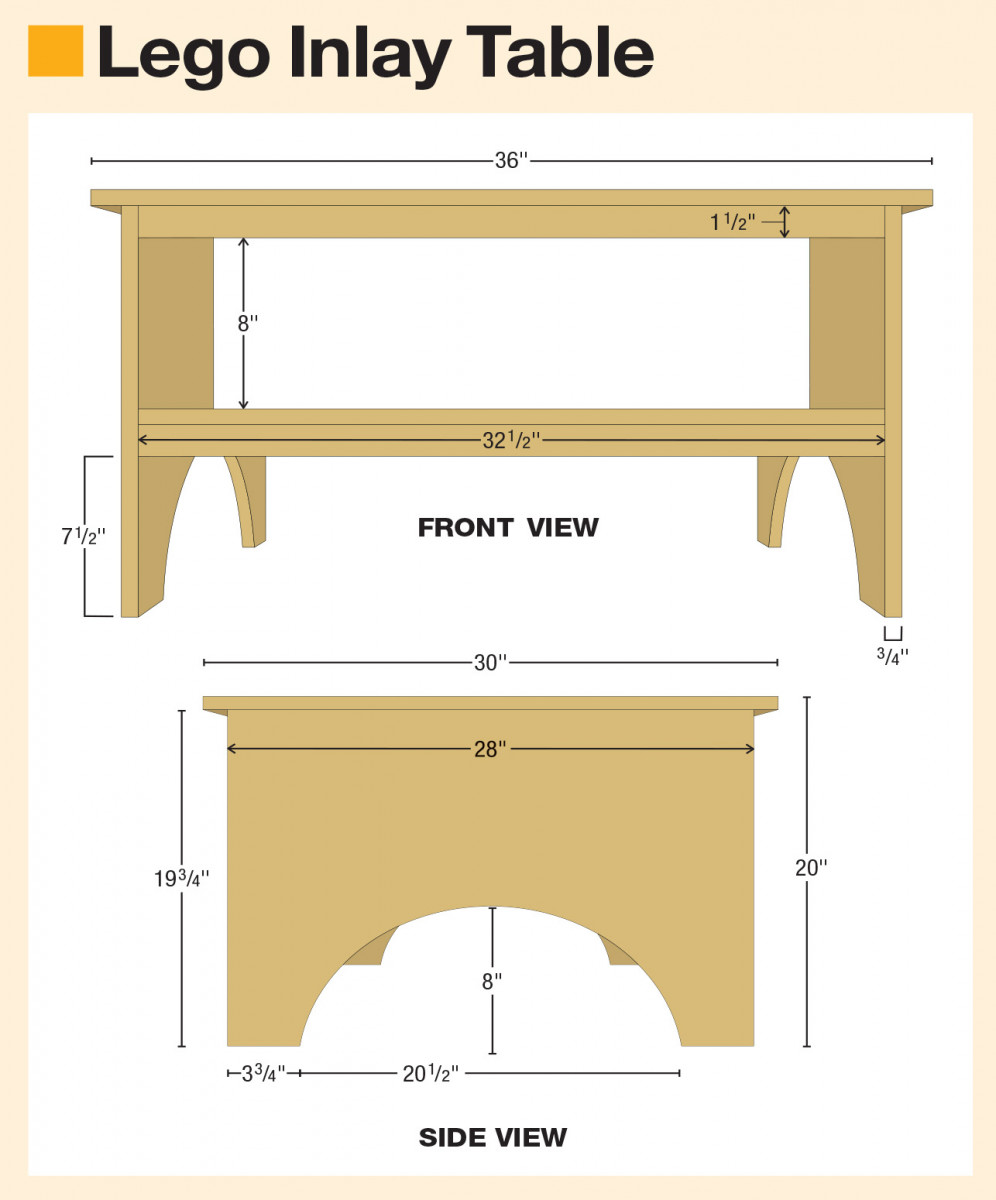 Table Construction
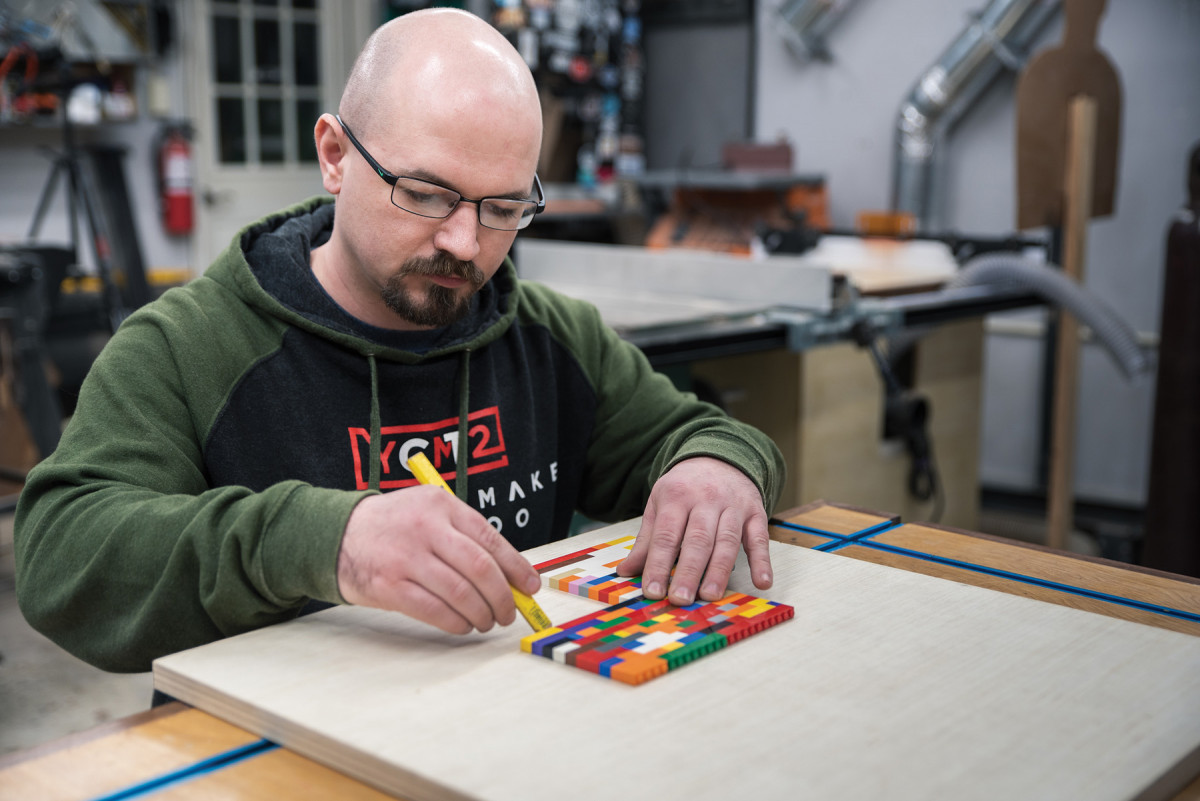
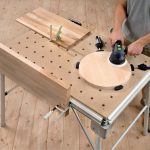
2. With the LEGO panel built, trace it to inside of the plywood panel.
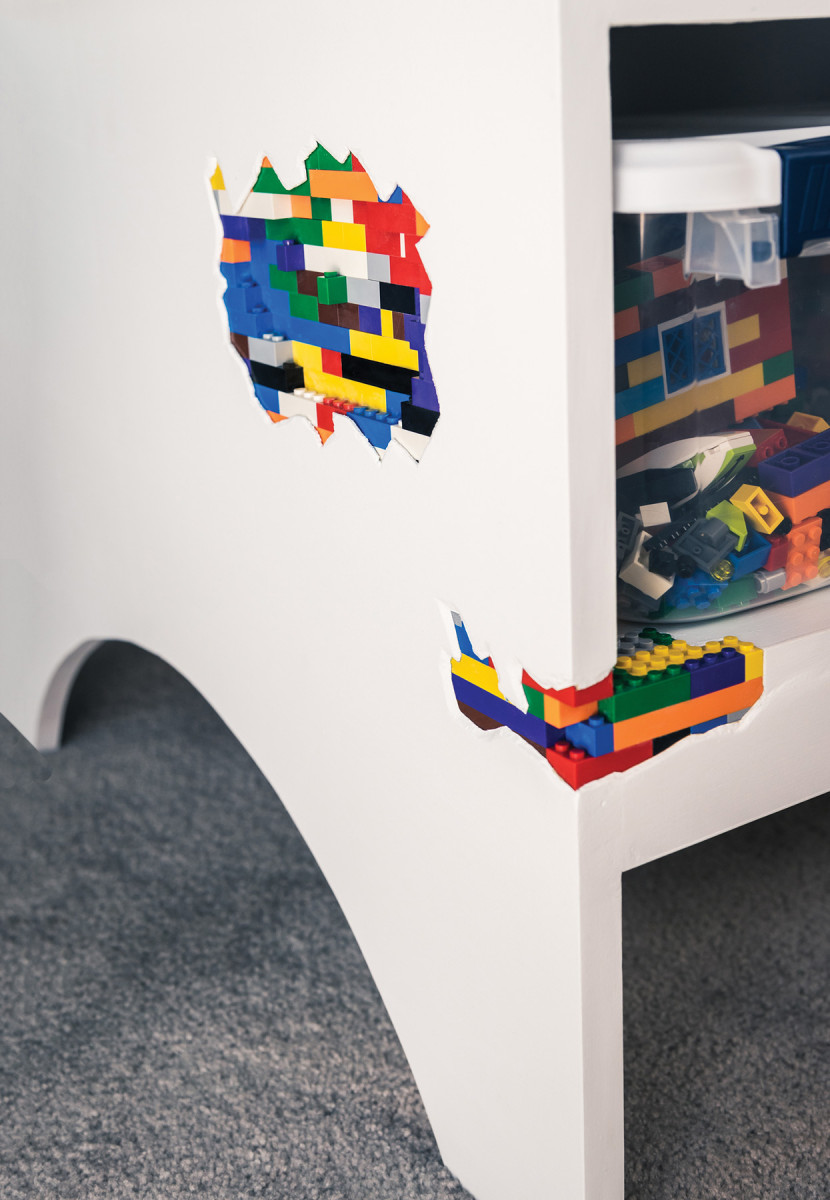
I came up with the idea of a simple plywood table with a shelf for storage containers, all pretty standard, but I didn’t stop there. I added a LEGO inlay of sorts. I used panels of LEGO, situated behind some creative cutouts in the base of the table so that it would look like the table was plastered over LEGO that had been worn away. To make the concept more convincing and to challenge myself, some of the inlays were placed in corners.
The table construction is very straightforward. The entire table comes from less than a 4’x8′ sheet of 3/4” plywood. Everything is pocket holed together to keep things simple and they are more than strong enough for a table like this. The corners of the top are rounded for safety and the exposed edges of the plywood get edge banded for a cleaner appearance.
 The Cutouts

3. I made the reveal jagged as if the table were plaster laid over bricks that were starting to crumble. Keep in mind that the sharper the angles, the more handwork you’ll have to do.
The first step is building the LEGO panels that will fill the cutouts. To keep the panel together, I used a tiny dab of CA glue between the pieces. It’s important to be conservative and skip the activator. If any of the glue seeps out it will discolor the bricks.
With the panel built, it is easy to experiment to find the spot where the inlay will look good. Once I decided on a location, I traced the outline of the layout onto the inside face of the plywood. That marks the location of the pocket the inlay will fit in and provides boundaries for sketching the shape of the reveal that’ll be on the other side.
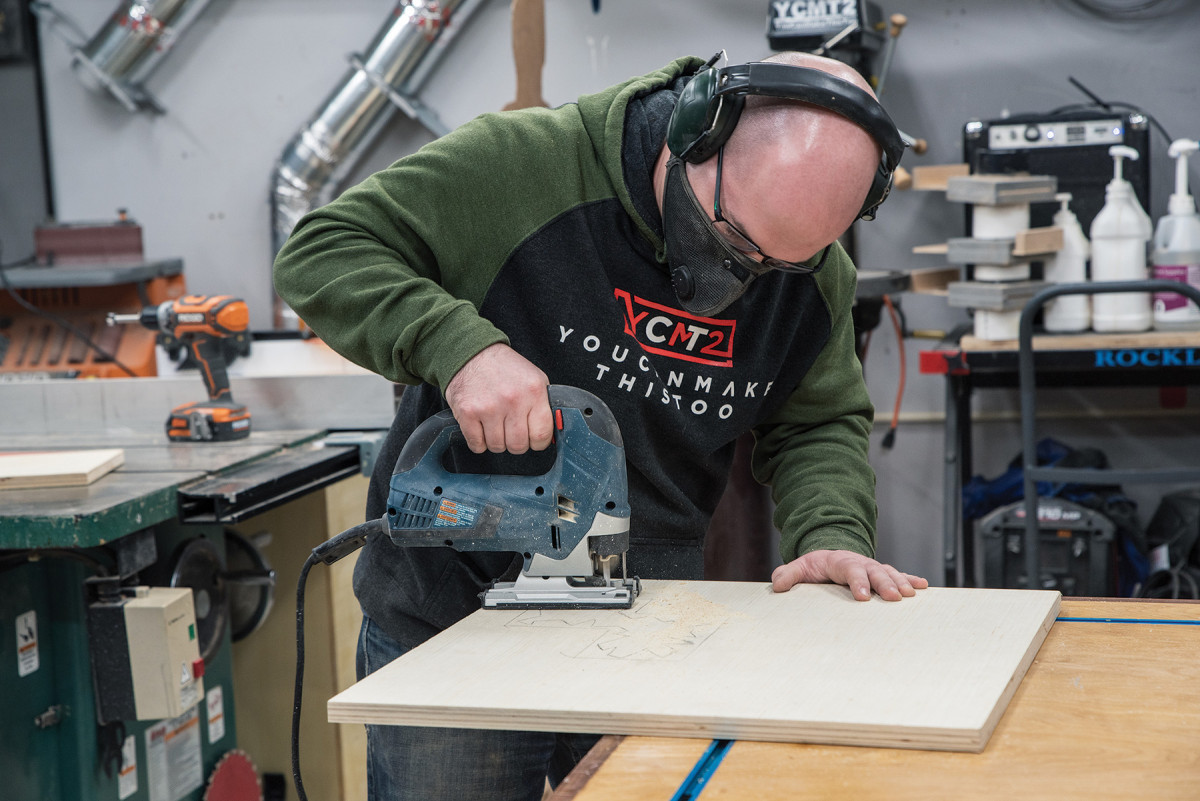
4. Drill a hole to give yourself a starting point and proceed slowly, making relief cuts as necessary.
When sketching the reveal, it is important to leave room between the boundary line and the reveal so there will be material to glue the inlay to. I opted to sketch my reveal in a very jagged and angular shape that had a diagonal direction. My inspiration was how grout lines crack on an old brick building.
Fitting the inlay into the plywood is four easy steps. First is cutting out the reveal. The easiest way to do that is with a jigsaw. Just drill a few holes to put the blade in to get started and then cut away following the sketch.
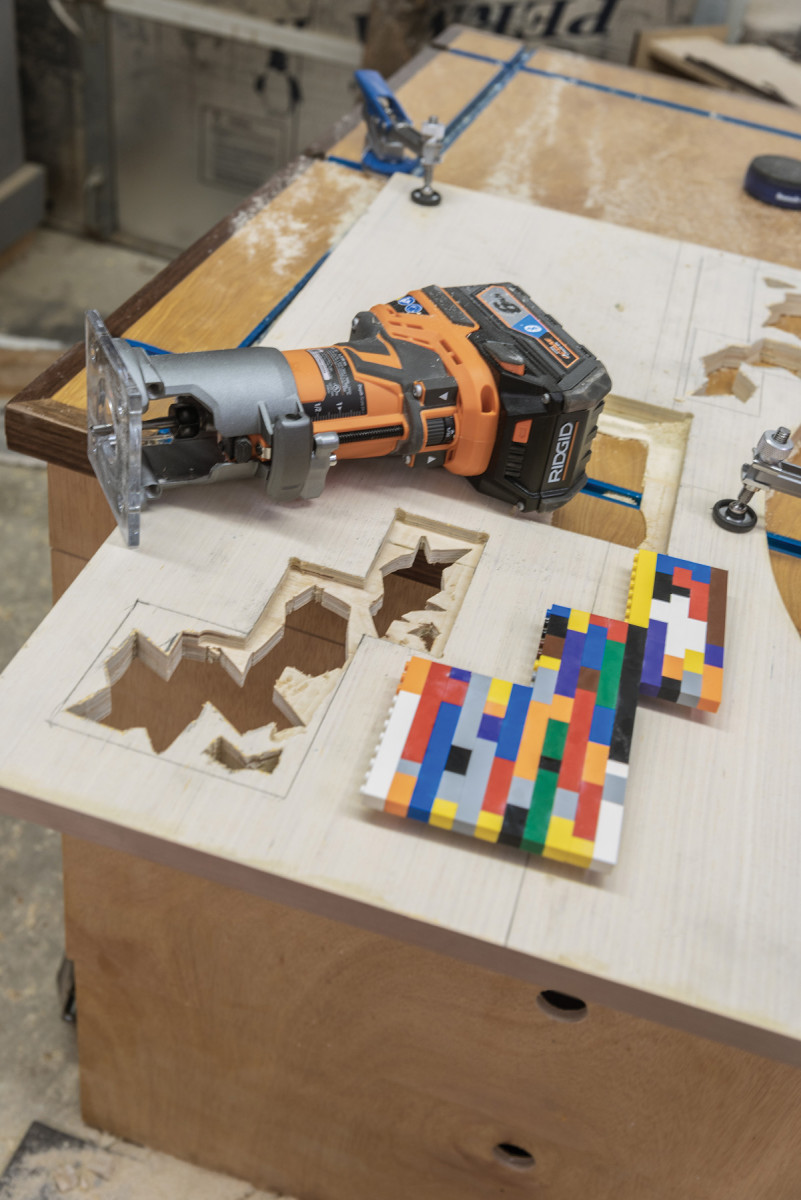
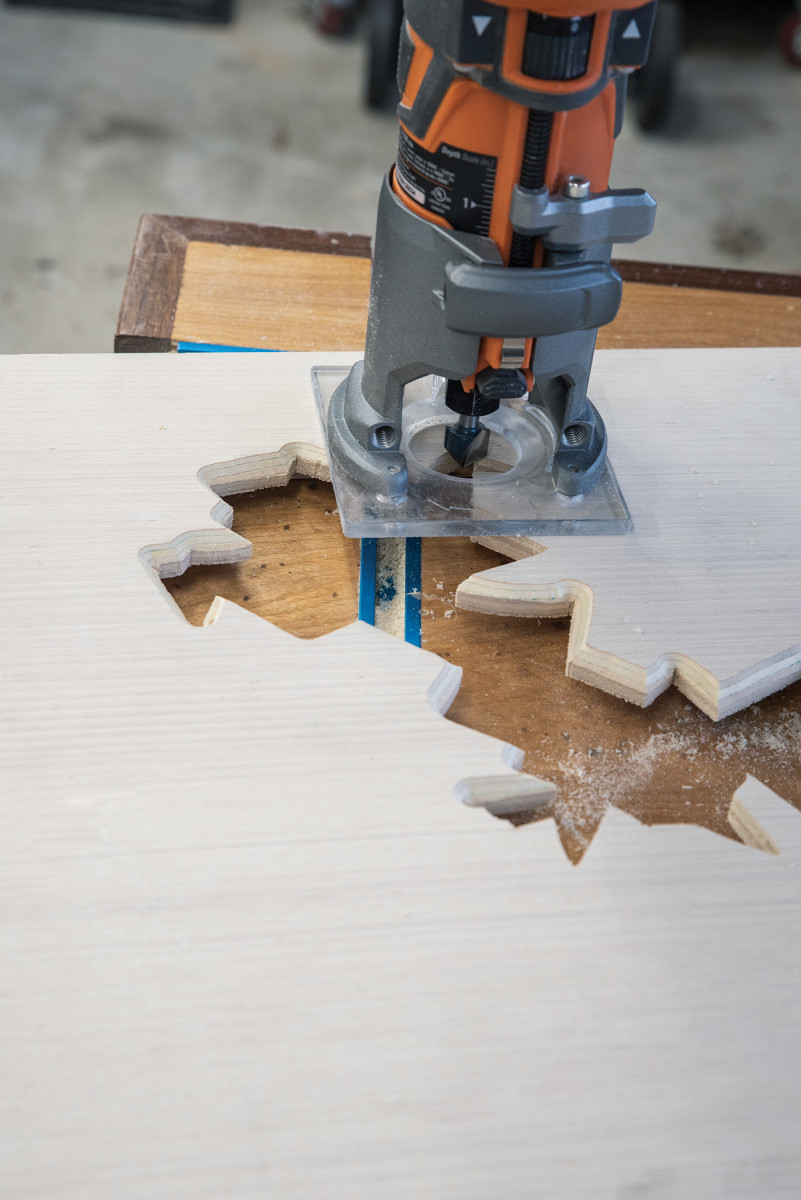
5. A downcut spiral bit and a guide will allow your LEGO inlay to appear closer to the surface on the front side of your panel.
Second is routing out the pocket that the inlay will sit in. A downcut spiral bit set to the depth of the inlay will minimize tear out and a trim router makes for easy control. This is where making the inlay a rectilinear shape keeps things easy because it should mostly be following straight lines with very few corners to contend with. If following a line freehand isn’t your thing, just clamp down an edge guide to follow. The inside corners can be squared off with a chisel.
Third is chamfering the reveal. This really opens it up and makes the inlays look a lot better. The fastest way is to use a trim router. A bearing bit makes following the pattern really easy but prevents the bit from really getting into the corners. So, I used a v-bit and just freehanded the shape. This could also be done with files and rasps.
6. Route as much as you can on the front with a bearing guided bit. I got into the corners with a v-bit working freehand.
Last is securing the inlay into position. I made the pockets snug so the inlays would friction fit but added some CA glue for insurance and to make sure my boys can’t push them out.
Though it may seem intimidating to inlay LEGO in wood, I hope you realize that it is just a few simple steps using techniques and tools you are probably familiar with.
Caleb is the maker behind YouCanMakeThisToo, a source of confidence, knowledge, and inspiration for anyone who wants to make the ordinary a little extraordinary. His work can be found at ycmt2.com.
Here are some supplies and tools we find essential in our everyday work around the shop. We may receive a commission from sales referred by our links; however, we have carefully selected these products for their usefulness and quality.