


We may receive a commission when you use our affiliate links. However, this does not impact our recommendations.
 Combine five 2x4s, a handful of screws and a long afternoon to build a handsome and sturdy sitting spot for your deck or garden.
 Combine five 2x4s, a handful of screws and a long afternoon to build a handsome and sturdy sitting spot for your deck or garden.
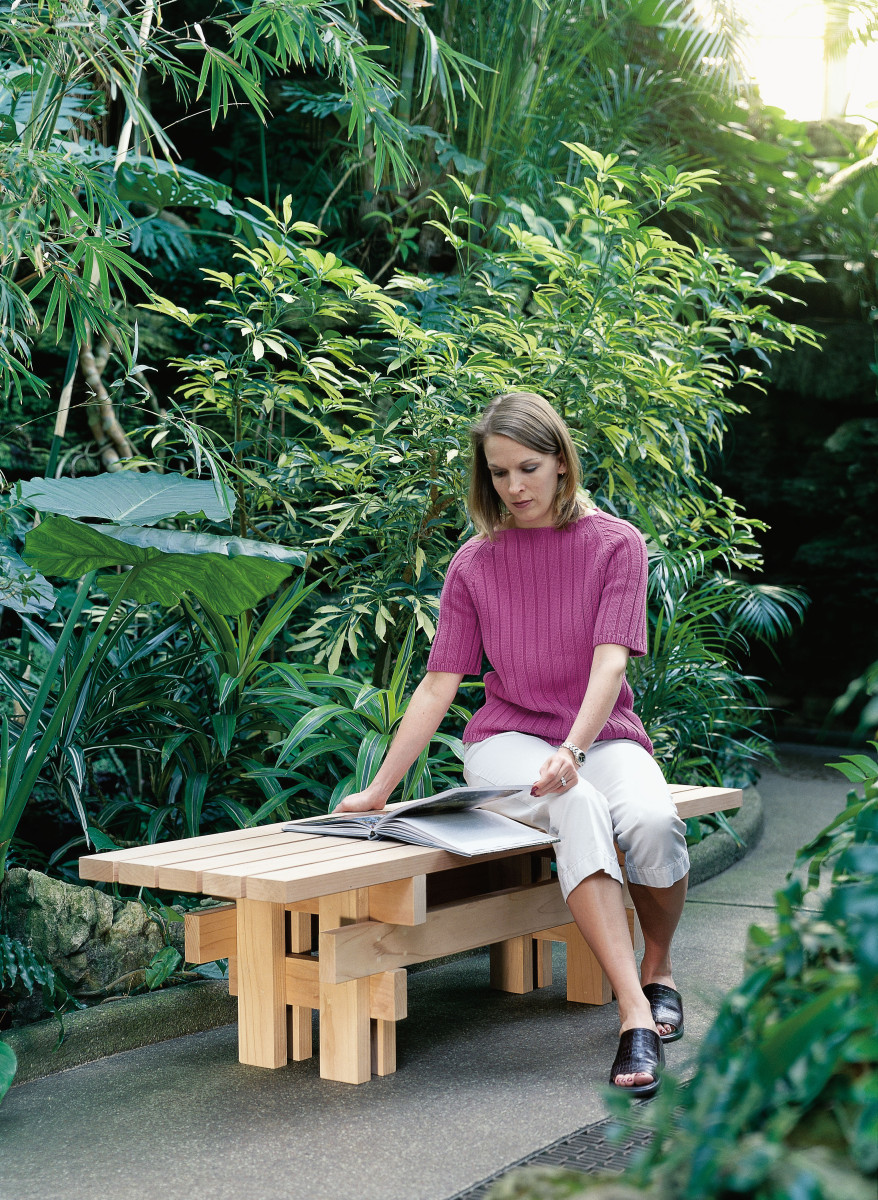
My father always has had a knack for doing more with less. He built the first house on our farm using a Skil saw, a drill and a hammer. Sometime during my childhood he built a pair of these Japanese-looking benches using leftover 2x4s and framing nails. While visiting him one summer, I was struck by the fact that they have survived more than a dozen winters and still look good.
This project is really great for the beginning woodworker who doesn’t have a lot of tools, skills or confidence. But the end result will make you look like you’ve got all three, in spades.
Trip to the Lumberyard
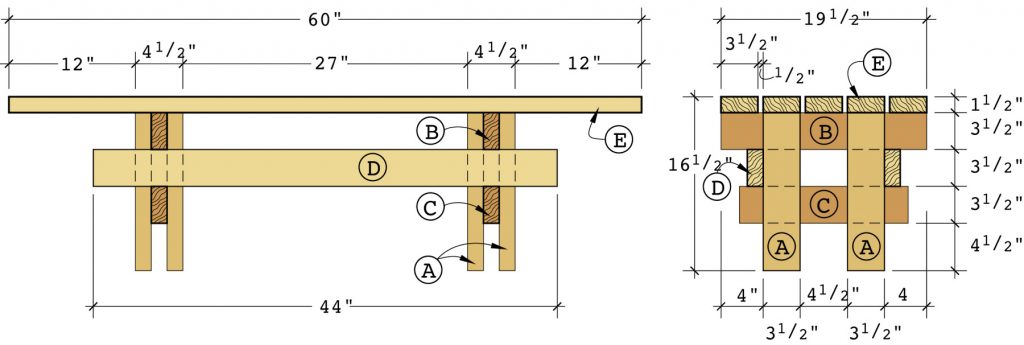
This bench is designed to be built using just five 10′-long 2x4s. You can build it from sugar pine, paint it and spend less than $10 ($60 as of 2022). I always liked redwood for my outdoor projects (and that’s what the originals were made from) so I spent the extra cash – about $200. No matter what species you choose, select the straightest, most knot-free 2x4s you can find.
While you’re at the lumberyard, pick up a pound of stainless-steel screws. Associate Editor Kara Gebhart (who helped me build this project) and I used #8 x 2″ screws. Another excellent choice would be Miller Dowels.
Back in the Shop
You don’t need a jointer, planer or table saw to build this bench. You don’t even need a shop. A drill, a saw, some sandpaper and a couple of sawhorses will get the job done right on your driveway.
Start by laying out your crosscuts on the 2x4s using chalk. Pick the best-looking boards for the five top pieces. Boards with too many knots or dings can be used as legs, which are mostly covered up by the top pieces.
Then cut all your pieces to length as shown in the cutting list below. What’s important to remember here is that it’s not critical if you cut your legs a bit long or cut the top boards a bit short. What is important is that you cut all the legs the same length, whatever that turns out to be. For that reason, I recommend “gang cutting” your parts.
“Gang cutting” is when you clamp together all the parts that are the same length and trim them to size simultaneously, as shown below. This works no matter what tool you use for crosscutting.

We used a miter saw to cut our pieces to length. Here you can see that we clamped all the top boards together and “gang cut” them to length simultaneously
Sanding (Insert Groan Here)
It’s tempting to screw this project together immediately, but I’d suggest you do all you can to resist the urge to assemble. A better bet is for you to sand all your pieces to remove marks and dings. This helps get them ready for whatever finish you’ll be applying (paint, deck stain, tung oil or nothing). Once the faces and edges have been sanded, you need to “break the edges” of all the boards. This is pretty simple to do. Just grab some #120-grit sandpaper and take a couple of licks on all the edges of each board (you’re trying to remove any sharp edges). This will make the bench more comfortable to sit on and less likely to splinter when it gets wet.
Leg Assembly
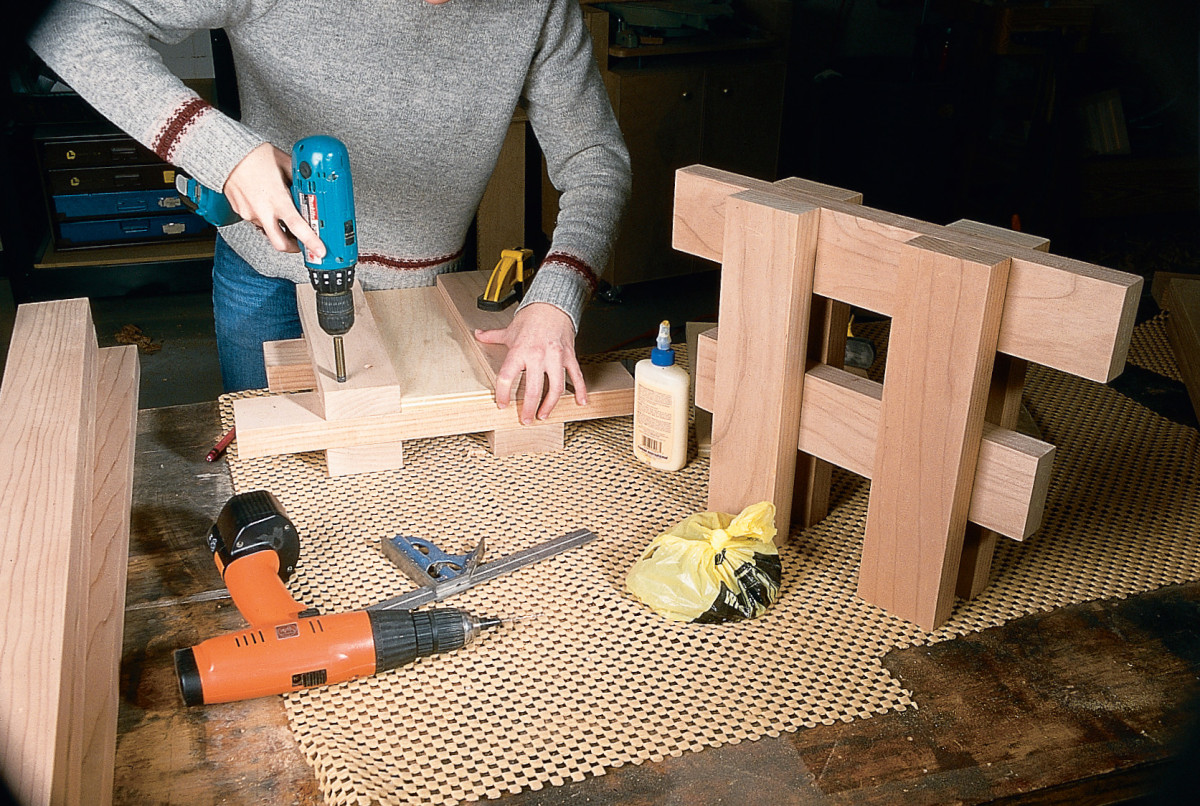
This bench goes together quickly. Chuck a bit in your drill to give you a 3⁄16″ pilot hole and a countersink simultaneously. These bits are available from most home supply or hardware stores.
Begin by assembling one of the leg structures. First find a piece of scrap that’s 4 1⁄2″ wide and place it between two of the leg pieces.
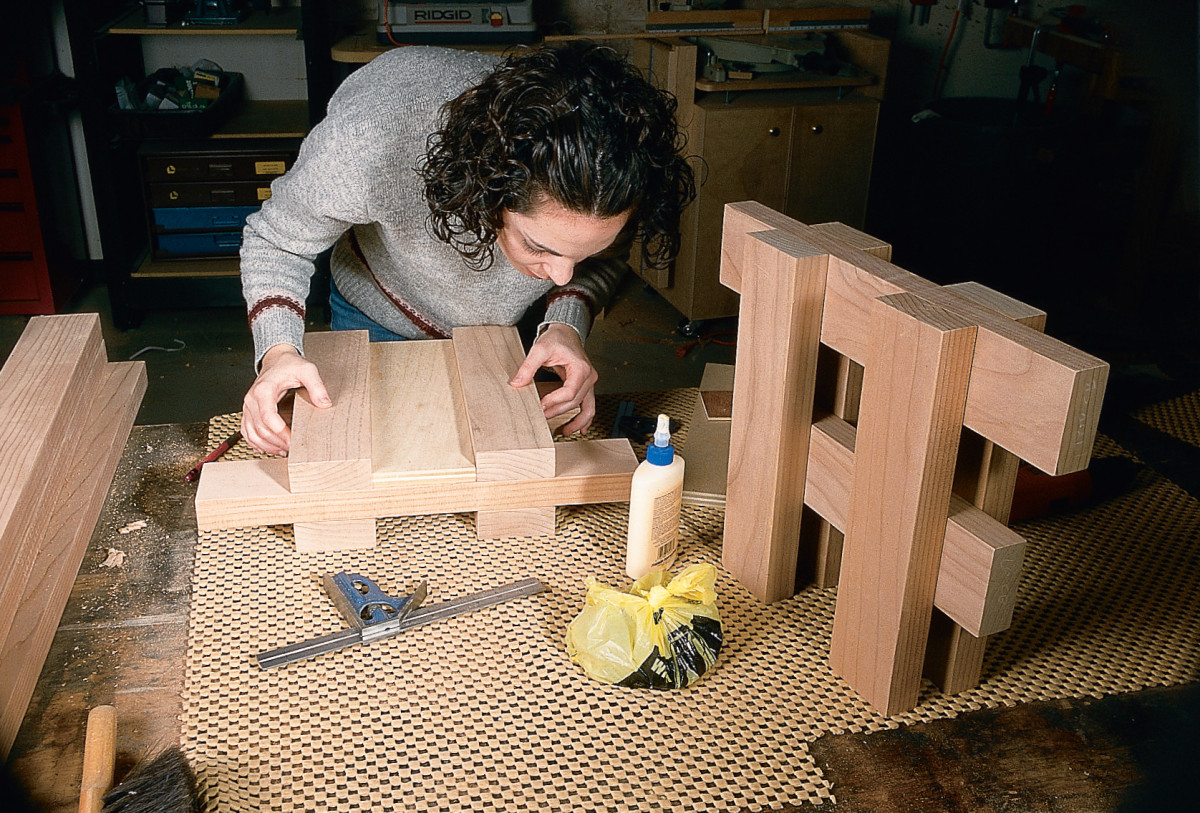
Use scraps as spacers to ensure that your leg assemblies go together just right. This is a lot easier than measuring everything.
Center the top cross brace on the two legs, flush everything up, then glue and screw the cross brace to the legs using two screws in each. You can use polyurethane glue or a waterproof glue such as Titebond III.
Put another piece of scrap 2×4 against the top cross brace and center the low cross brace below that scrap. Then glue and screw the low cross brace to the legs.
Next, put two more legs on top of the cross braces and place the 4 1⁄2″ scrap spacer between them. Glue and screw these two legs to the cross braces. Repeat this same procedure for the other leg assembly. You’re almost done.
Then screw it together using stainless steel screws.
Plug It Up
For a finished look, we took a few minutes to plug the holes made by the countersink. Our countersink made a 3⁄8″-diameter hole.
You can plug the hole with store-bought 3⁄8″ plugs or 3⁄8″- diameter dowels. We took some 3⁄8″ x 3⁄8″ square stock, whittled one end and glued it in place. The square corners of the wood cut the round hole into a square one. Once your plugs are glued in place, cut or sand them flush.
Final Assembly
Stand the legs upright on your work surface and put the stretchers in place between the two cross braces. Glue and screw the stretchers into place and plug the holes left by the countersink.
Then arrange the five top boards on the base. Because the pith side of flat-grained wood is more prone to raised grain, make sure you place all your boards barkside up. (Look at the growth rings.)
To ensure everything was spaced evenly, we first attached the top pieces at the front and back of the bench using glue and screws. Then we centered the middle board between those. Finally, we put the remaining two boards in place and figured out what gap should be between each board. We then glued and screwed these two boards in place. Finally, we plugged the holes.
Check out Bob Flexner’s advice on protecting exterior wood here. We chose to leave the wood in its natural state and allow it to turn a silvery-gray, which will happen when left outside.
By Christopher Schwarz & Kara Gebhart

SketchUp model by reader George Kreiger.
Here are some supplies and tools we find essential in our everyday work around the shop. We may receive a commission from sales referred by our links; however, we have carefully selected these products for their usefulness and quality.


