We may receive a commission when you use our affiliate links. However, this does not impact our recommendations.
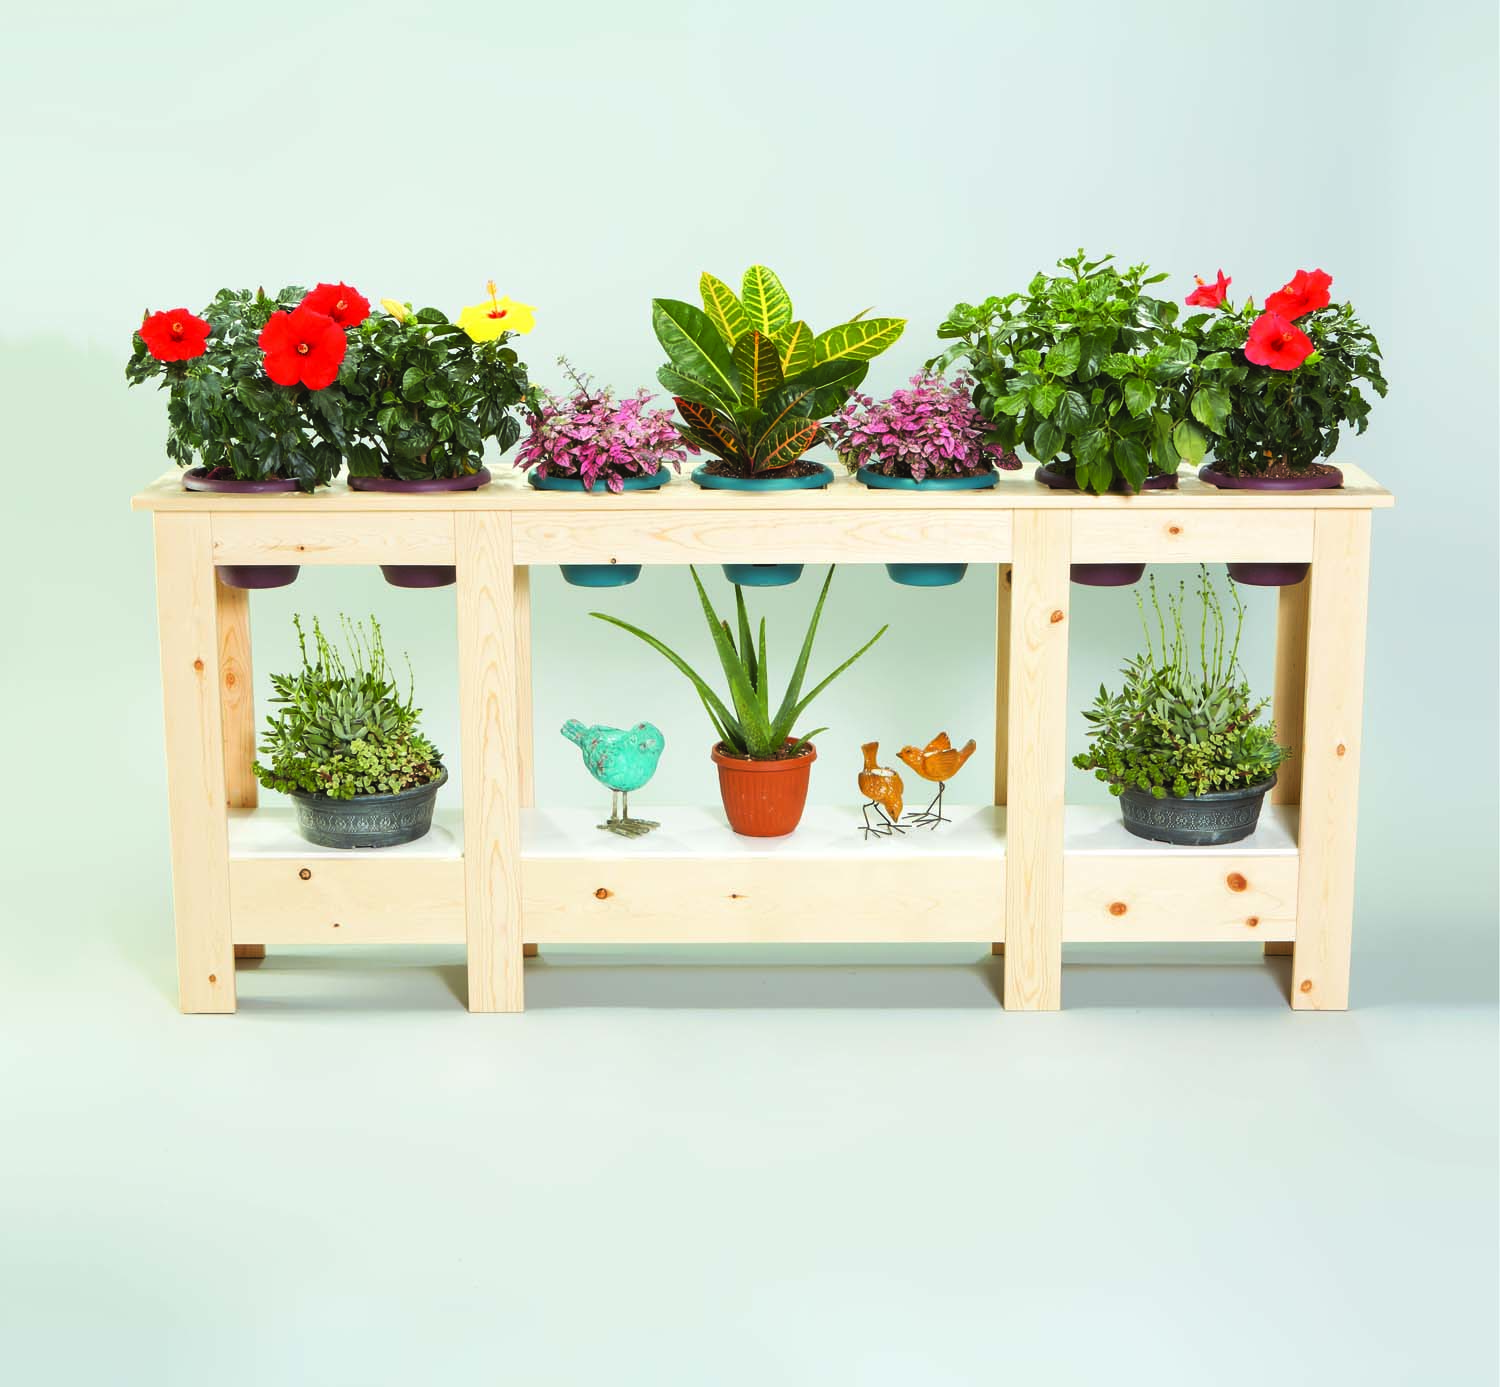 Sometimes “pretty good” furniture is good enough, even though you may wish you could spend all your precious time in the shop making fancier stuff. When my wife asked me to build a large indoor planter “just like the one in this crafts book” for a sunny hallway, I winced, but thought—what the heck. It was made from 1x4s and 1x6s, looked way too clunky and was merely nailed together. “OK,” I said, “But I’ll make it my way.”
That is, the way a woodworker makes things. I stuck with the cheap lumber (more about that later), lightened up the design and substituted biscuits for the nails. All in all, the project was pretty easy to build and is well within the range of any budding woodworker. It could also be the starting point for a cabinet with doors or drawers.
Materials
I built a prototype of the planter from one sheet of 3/4″ MDF to work out the how-to steps and refine the design. Working with material that is absolutely straight and flat—with no jointing or planing—was a joy. It may seem weird to turn MDF into “lumber,” but I’m sure you could build the planter this way, if you wish.
The thickness and width of all the planter’s parts correspond to the dimensions of wood commonly available in a lumberyard or home center (see Cutting List). In these stores, you can usually find 3/4″ clear pine, yellow poplar or red oak with square edges and smooth surfaces that would work quite well—just as it is—and with little waste. Most of this wood will be pretty straight, too, which will make the building process much easier. All you have to do is cut it to length.
I passed by this material, however, and chose the least expensive stuff: #1 common pine. I rummaged through a whole stack of boards looking for pieces that weren’t cupped, bowed, twisted or full of large knots. Even the best boards weren’t as flat as the premium wood, though. I bought about 25% extra, because many of the boards I chose had short sections that were unusable. I wasn’t able to find any good 1×2’s, so back in the shop I ripped wider pieces to make them.
Buy shelf and pots first
Sticking with the theme of simple construction, I also purchased a pre-made melamine shelf at a home center (E, Fig A), rather than make one. Back in the shop, I realized that the overall dimensions of the planter’s base would then be determined by the exact size of the shelf, because it must fit inside. Knowing that I would be dealing with squirrely wood, I made the inside of the base about 1/4″ wider and longer than the shelf in case the base came out a little crooked and out of square—which it did. If you buy a similar shelf, check its dimensions before cutting parts to length. Alter the cut list as needed.
The top of the planter is designed to hold 8″ dia. pots. Before building, I looked for pots having an attached saucer, which prevent drips. The pots I found hung nicely into a 7-3/4″ square opening (Fig. 05), but an opening that size might not work for pots made by a different manufacturer. As with the shelf, you should buy the pots before cutting any lumber and make adjustments to the cut list as needed. If you re-jigger the size of the openings or their spacing, you may also have to move the position of the upper cross rails (H, Fig A and Fig 05).
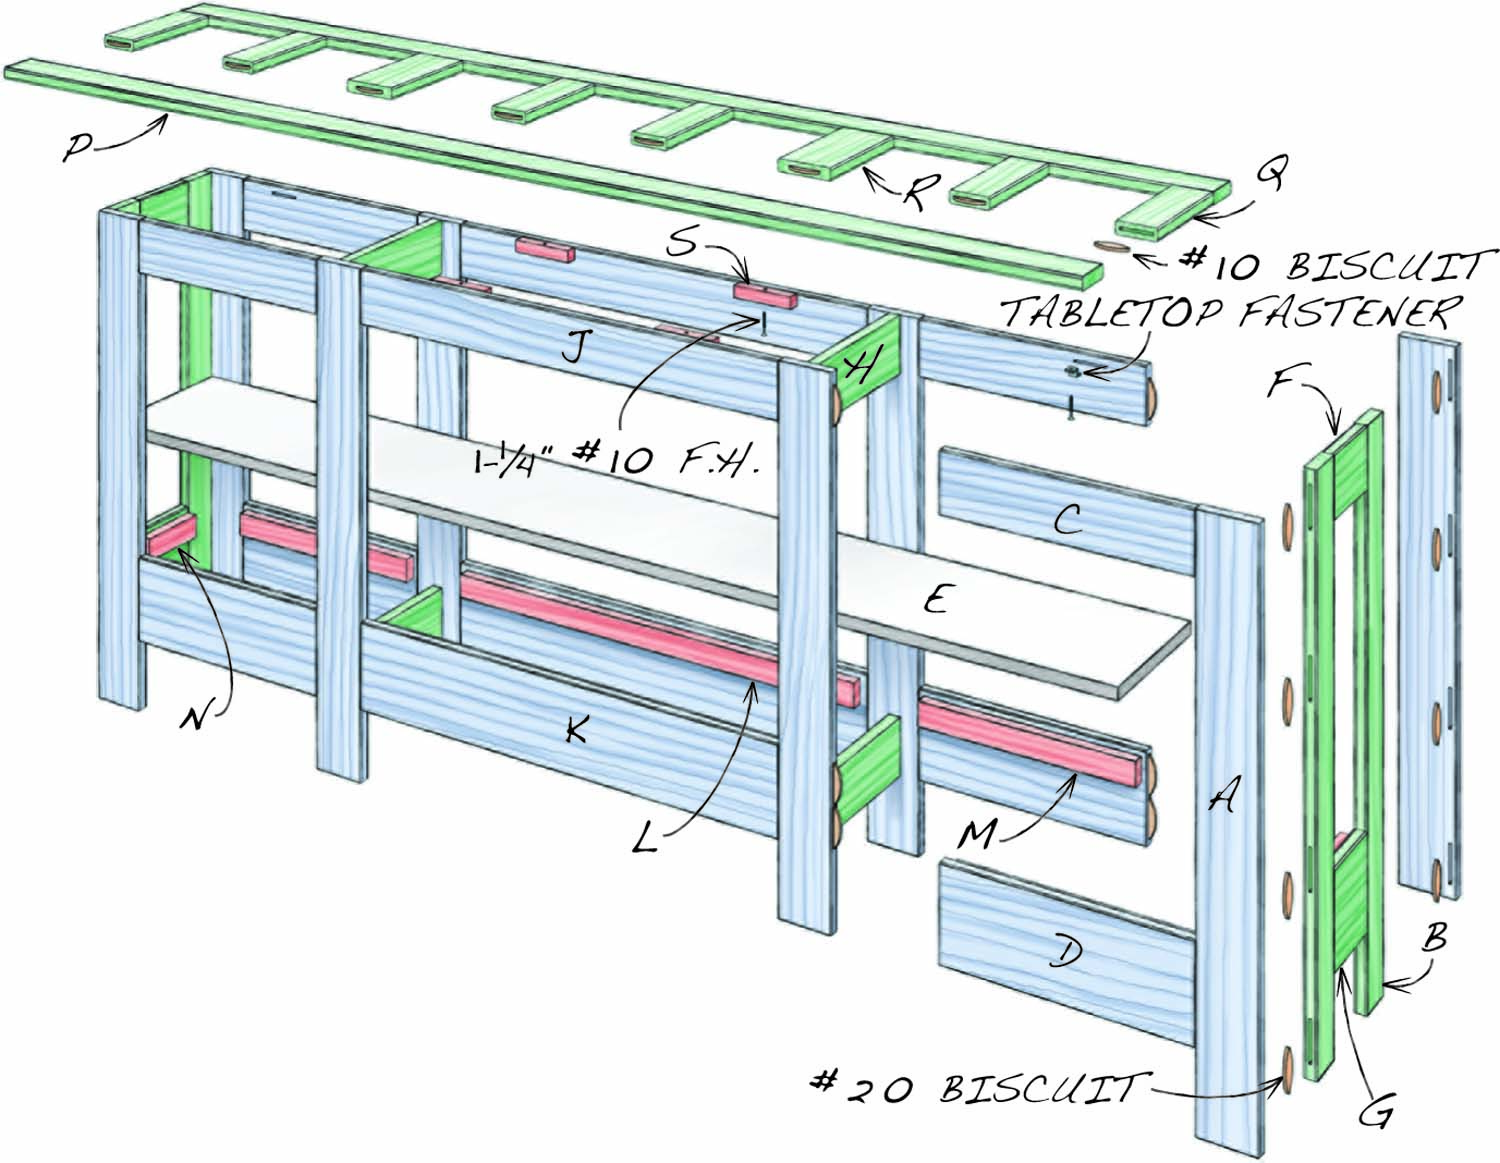
Fig. 01. Exploded View
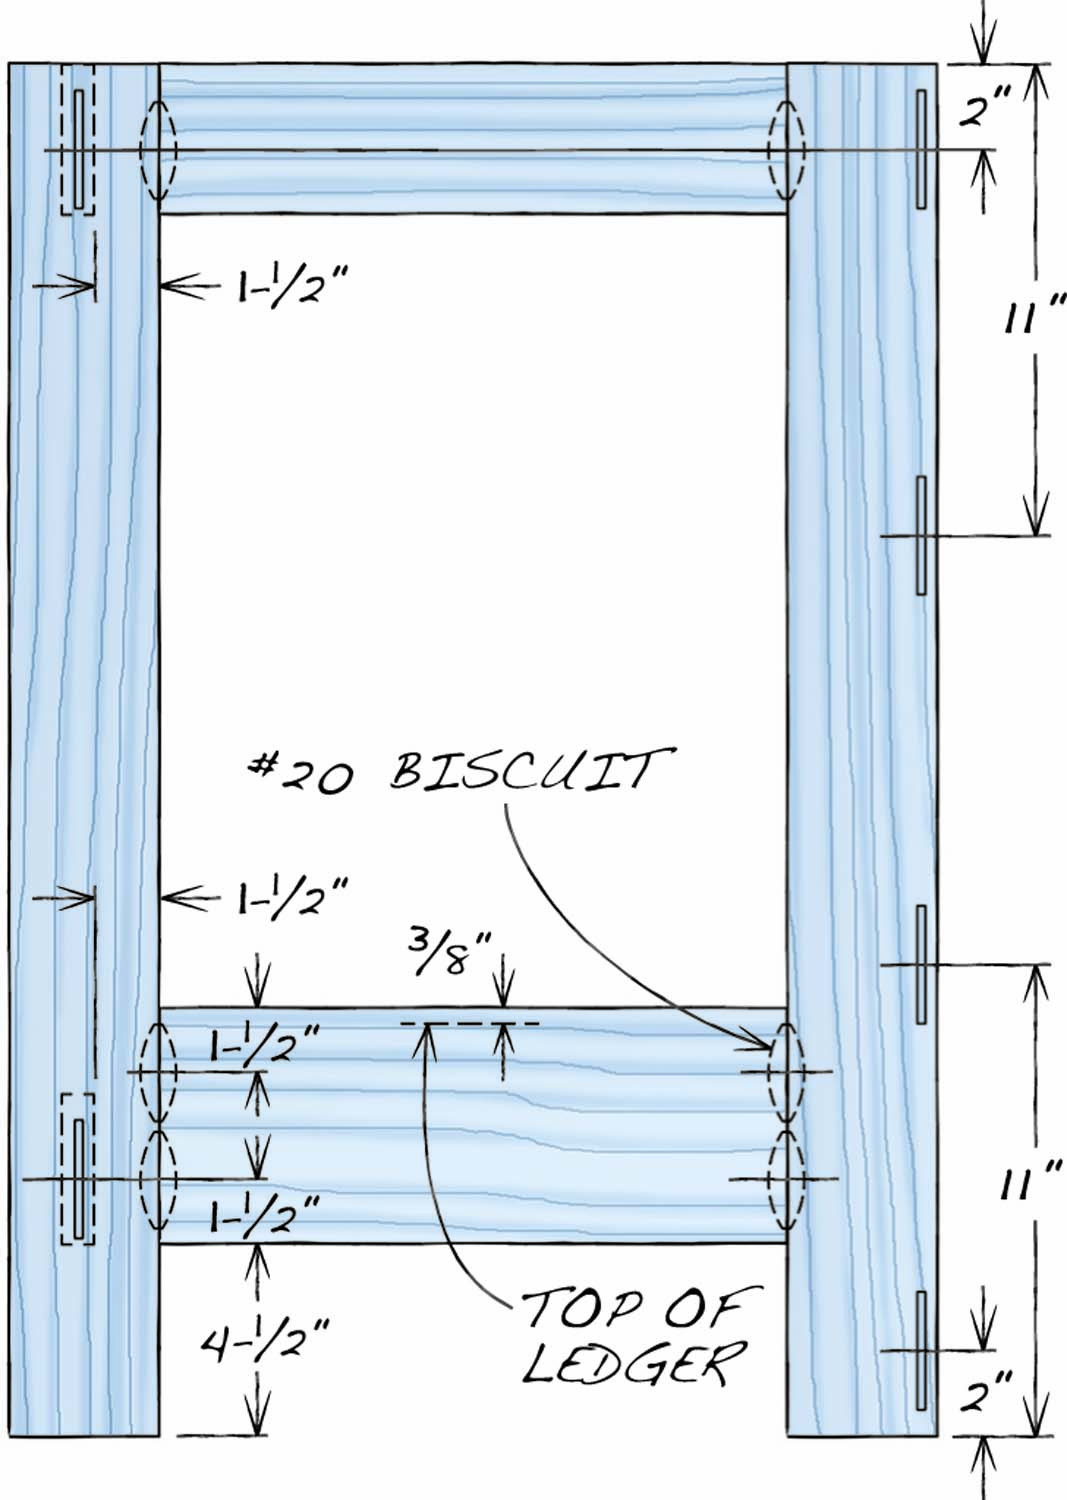
Fig. 02. Biscuit Layout for the Base
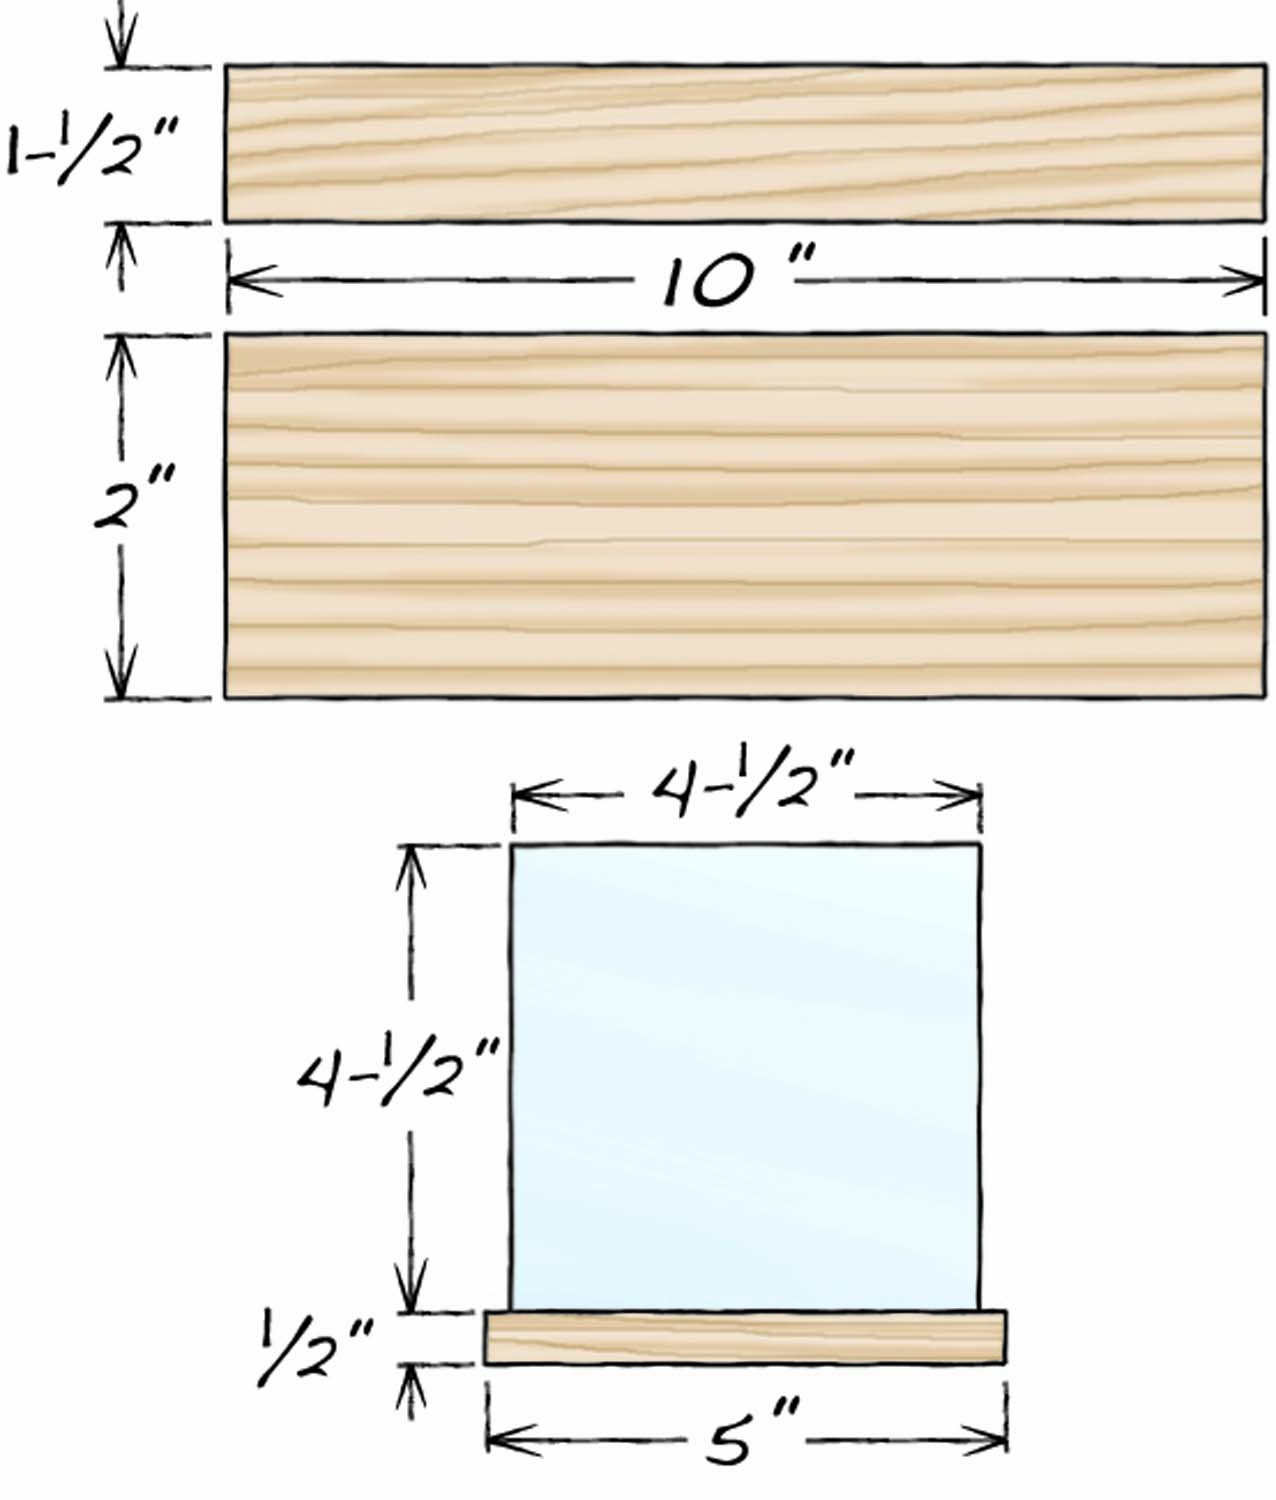
Fig. 03. Spacing Sticks and Blocks

Fig. 04. Reveal Details
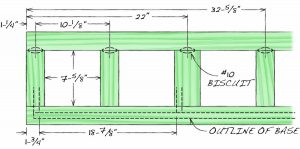
Fig. 05. Biscuit Layout for the Top
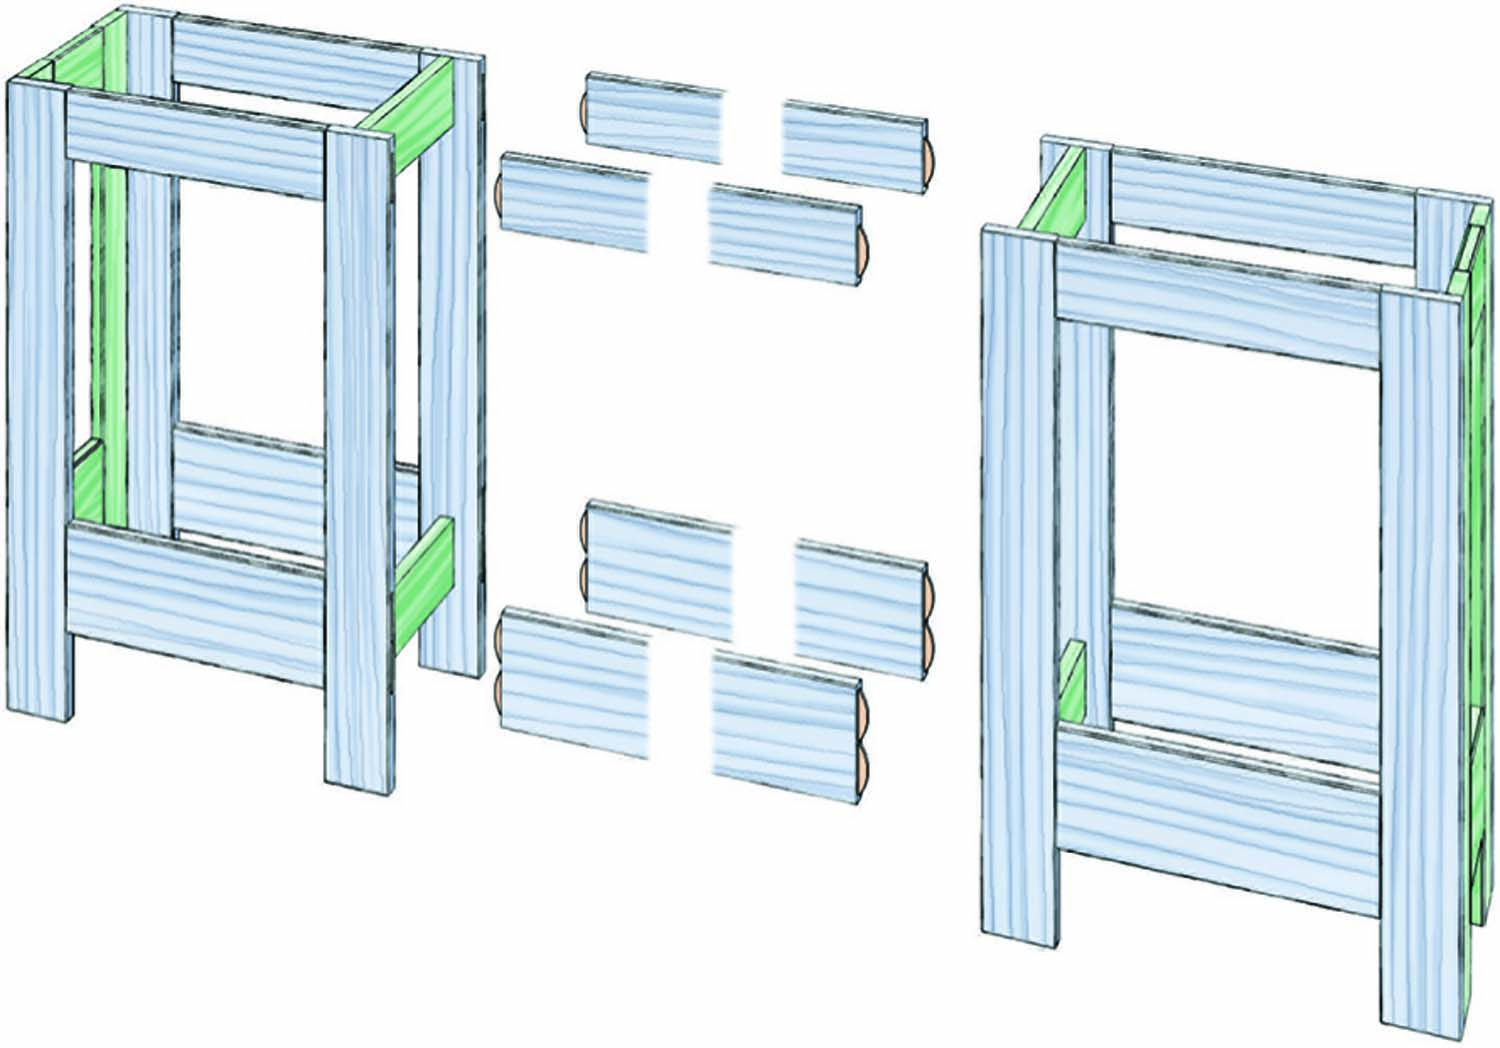
Fig. 06. Start by Building Boxes
Cutting List
|
Planter |
||||||||
|
Overall dimensions: 32-3/4″ H x 75-3/8″ L x 12-5/8″ D |
||||||||
|
Rough lengths (a) |
||||||||
|
Part |
Name |
Qty. |
Material |
Th x W x L |
1×2 |
1×3 |
1×4 |
1×6 |
|
A |
Leg |
8 |
1×4 |
3/4″ x 3-1/2″ x 32″ |
8@33″ |
|||
|
B |
Leg return |
4 |
1×3 |
3/4″ x 2-1/2″ x 32″ |
4@33″ |
|||
|
C |
Side rail, top |
4 |
1×4 |
3/4″ x 3-1/2″ x 14-5/8″ |
4@16″ |
|||
|
D |
Side rail, bottom |
4 |
1×6 |
3/4″ x 5-1/2″ x 14-5/8″ |
4@16″ |
|||
|
E |
Shelf |
1 |
Melamine |
3/4″ x 9-13/16″ x 71-3/4″ (b) |
||||
|
F |
End rail, top |
2 |
1×4 |
3/4″ x 3-1/2″ x 5″ (c) |
2@6″ |
|||
|
G |
End rail, bottom |
2 |
1×6 |
3/4″ x 5-1/2″ x 5″ (c) |
2@6″ |
|||
|
H |
Cross rail |
4 |
1×4 |
3/4″ x 3-1/2″ x 10″ (c) |
4@11″ |
|||
|
J |
Middle rail, top |
2 |
1×4 |
3/4″ x 3-1/2″ x 30-3/16″ (d) |
2@31″ |
|||
|
K |
Middle rail, bottom |
2 |
1×6 |
3/4″ x 5-1/2″ x 30-3/16″ (d) |
2@31″ |
|||
|
L |
Ledger 1 |
2 |
1×2 |
3/4″ x 1-1/2″ x 29″ |
2@30″ |
|||
|
M |
Ledger 2 |
4 |
1×2 |
3/4″ x 1-1/2″ x 14″ |
4@15″ |
|||
|
N |
Ledger 3 |
2 |
1×2 |
3/4″ x 1-1/2″ x 4-3/4″ |
2@6″ |
|||
|
P |
Top, front and back |
2 |
1×3 |
3/4″ x 2-1/2″ x 75-3/8″ |
2@77″ |
|||
|
Q |
Top, crosspiece 1 |
6 |
1×3 |
3/4″ x 2-1/2″ x 7-5/8″ |
2@9″ |
|||
|
R |
Top, crosspiece 2 |
2 |
1×4 |
3/4″ x 3-1/2″ x 7-5/8″ |
2@9″ |
|||
|
S |
Fastening block |
4 |
3/4″ x 3/4″ x 4″ |
|||||
|
Notes: a) Rounded up by at least 1″. b) 3/4″ Melamine shelf purchased from home center c) Cut length to fit shelf’s width. d) Cut length to fit shelf’s length. |
||||||||
Build two boxes
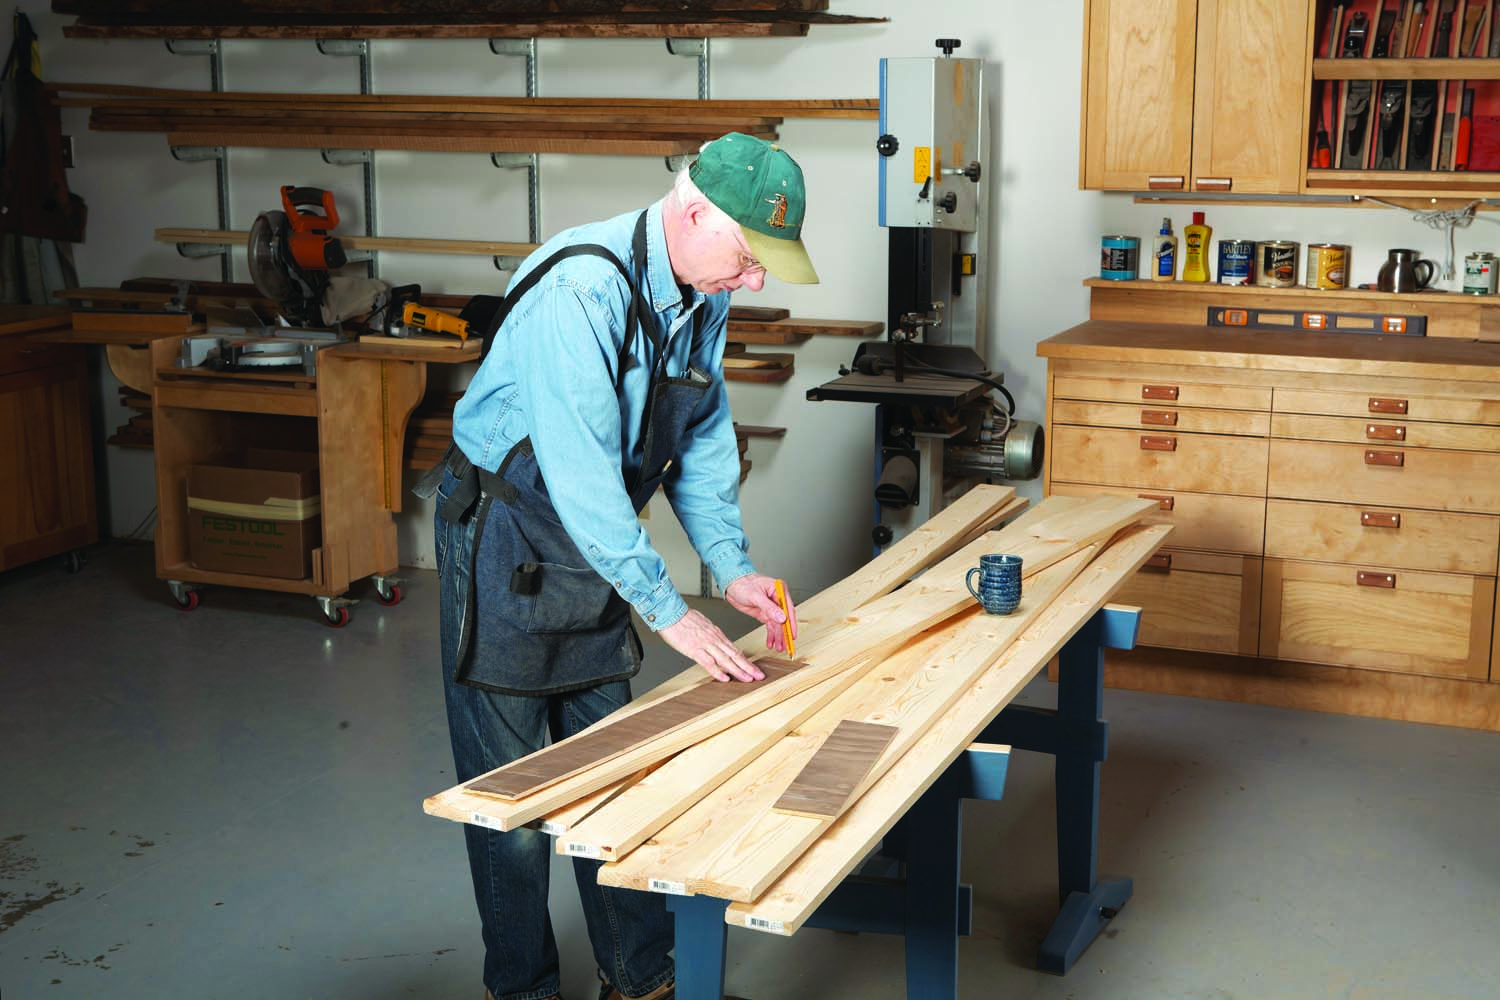
Photo 1. Lay out all the parts to rough length, using templates. This project is designed for lumberyard 1x4s and 1x6s; templates make it easier to mark around the knots.
Start with the base. The easiest way to build it is to make two identical “boxes” and connect them later on (Fig. 06). Each box has many similar pieces: the legs (A), leg returns (B), top side rails (C), bottom side rails (D), top end rails (F) and bottom end rails (G). Using scrap wood, make a template for each part. The widths of the templates are unimportant—it’s their length that counts. Cut each one at least 1″ longer than the part’s finished length. (Use the “rough length” measurements in the Cutting List). Use the templates to lay out the crosscuts on your pile of boards (Photo 1). Use a miter saw to cut the boards to rough length first, then trim them to final length (Photo 2).
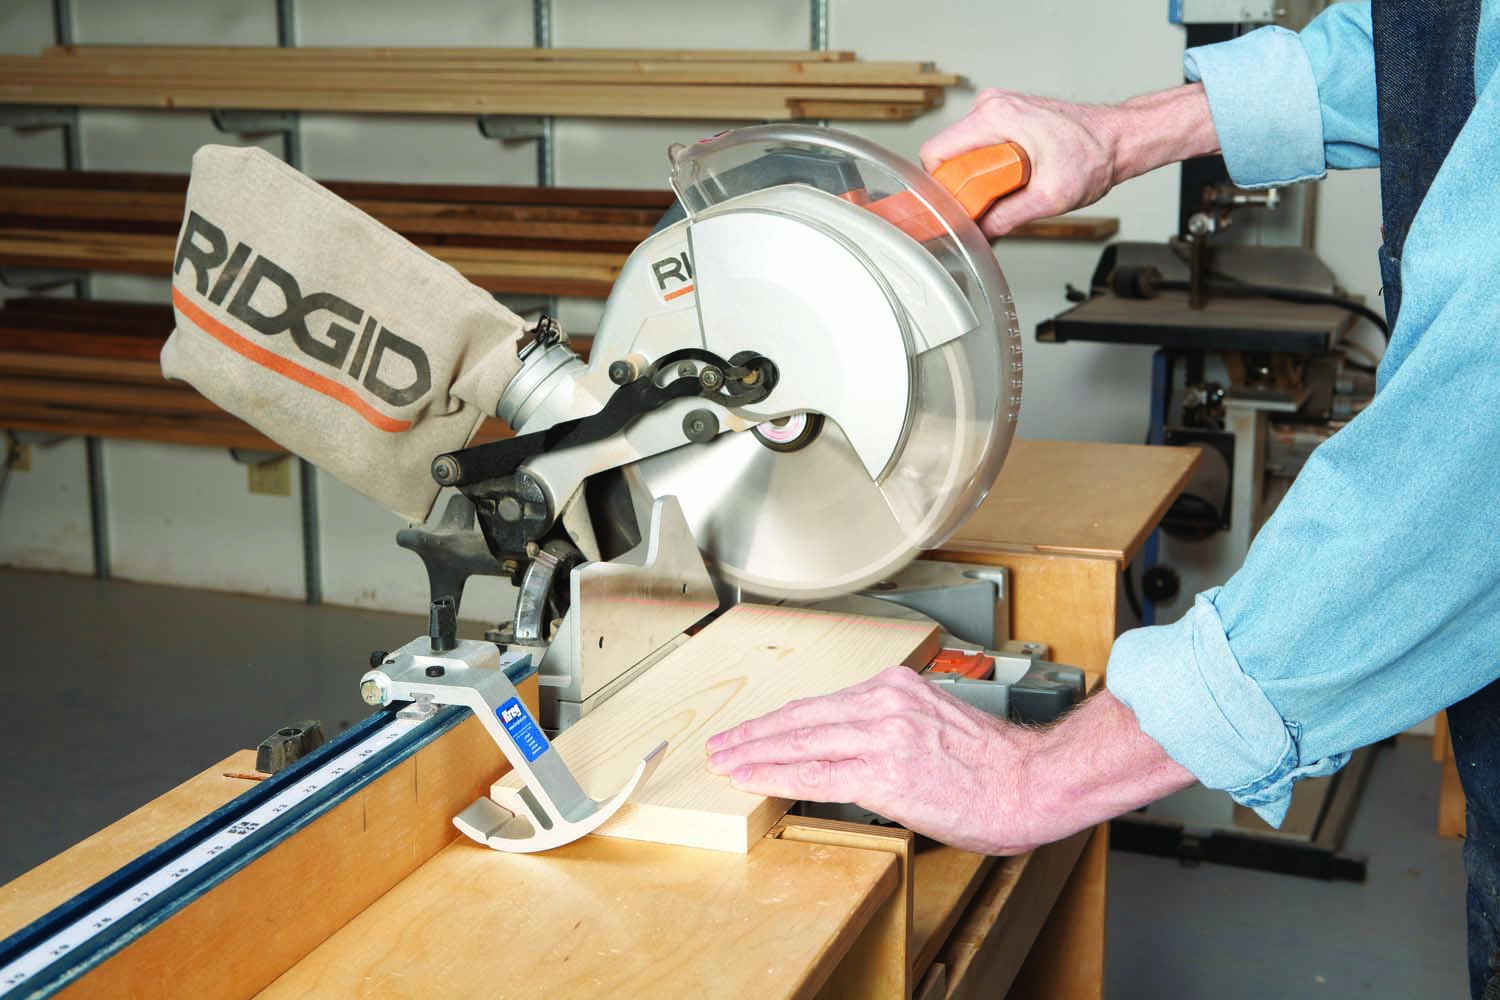
Photo 2. Cut the boards on the rough-length marks, then trim them to final length. Use a stop to make sure similar parts will be the same length.
Each box you’ll build is composed of three frames—two identical “side” frames and one “end” frame. All three frames are joined by biscuits in similar locations. When you cut biscuit slots, you always work off a centerline. All the centerlines for these frames are either 1-1/2″ or 2″ from an edge. With so many centerlines to draw, it’s best to make two marking sticks—one that’s 1-1/2″ wide and another that’s 2″ wide (Fig. 03). When you draw a centerline, position one stick by butting it against the other (Photo 3).
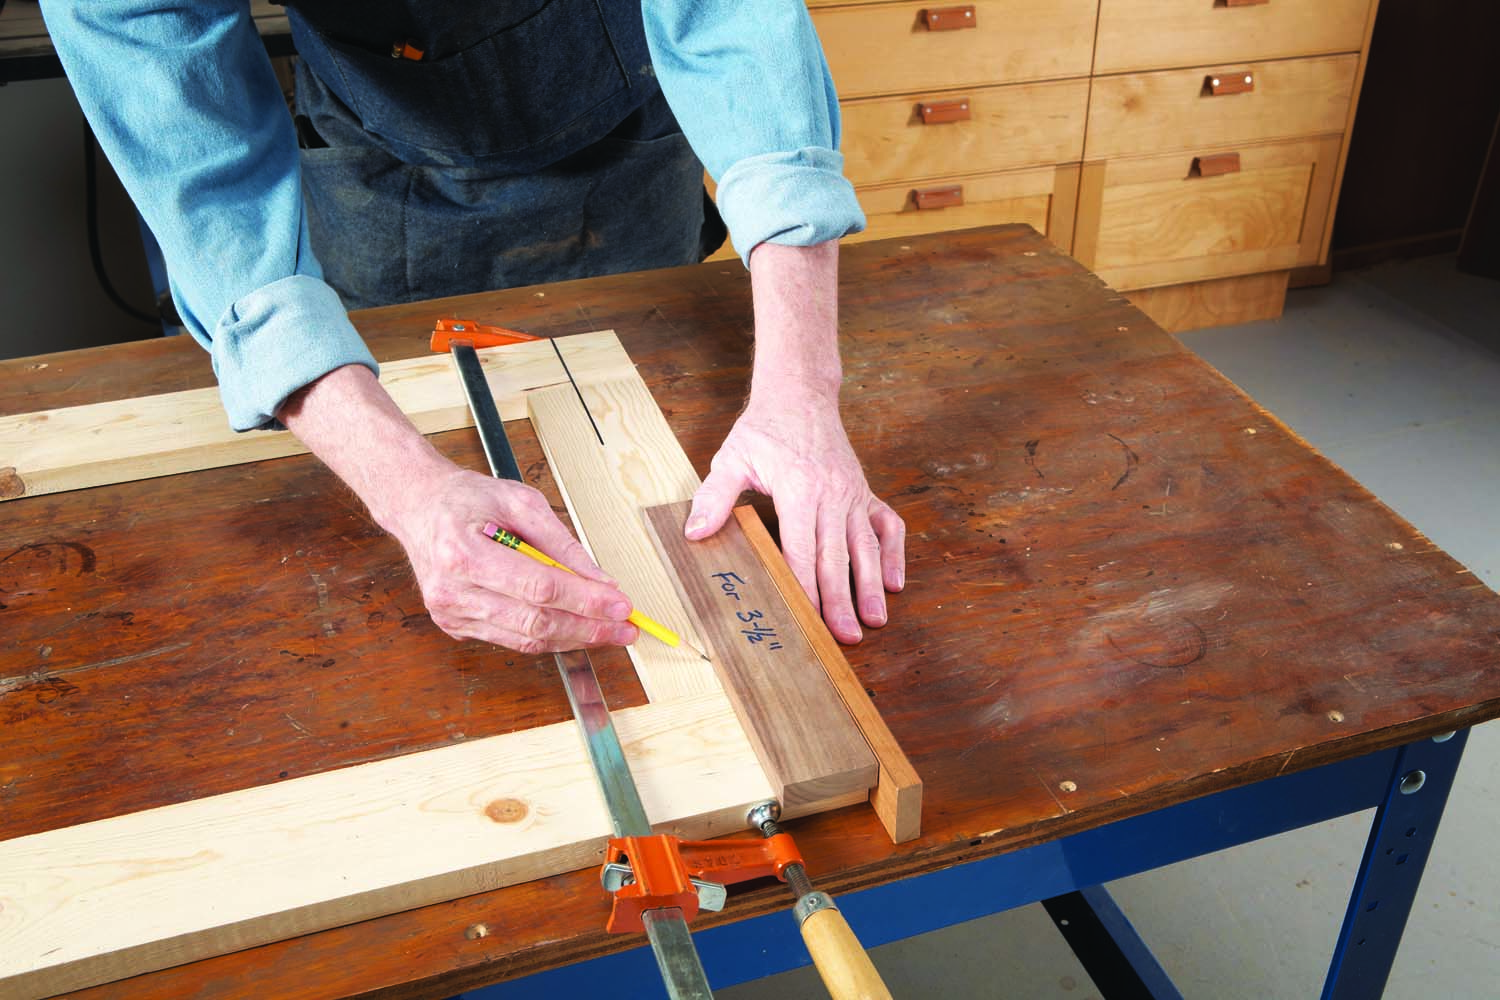
Photo 3. Build a pair of boxes joined with biscuits (Fig 06). Each box consists of three frames. Assemble each frame to mark centerlines for the biscuits. Use this spacing stick to draw centerlines for the top rails.
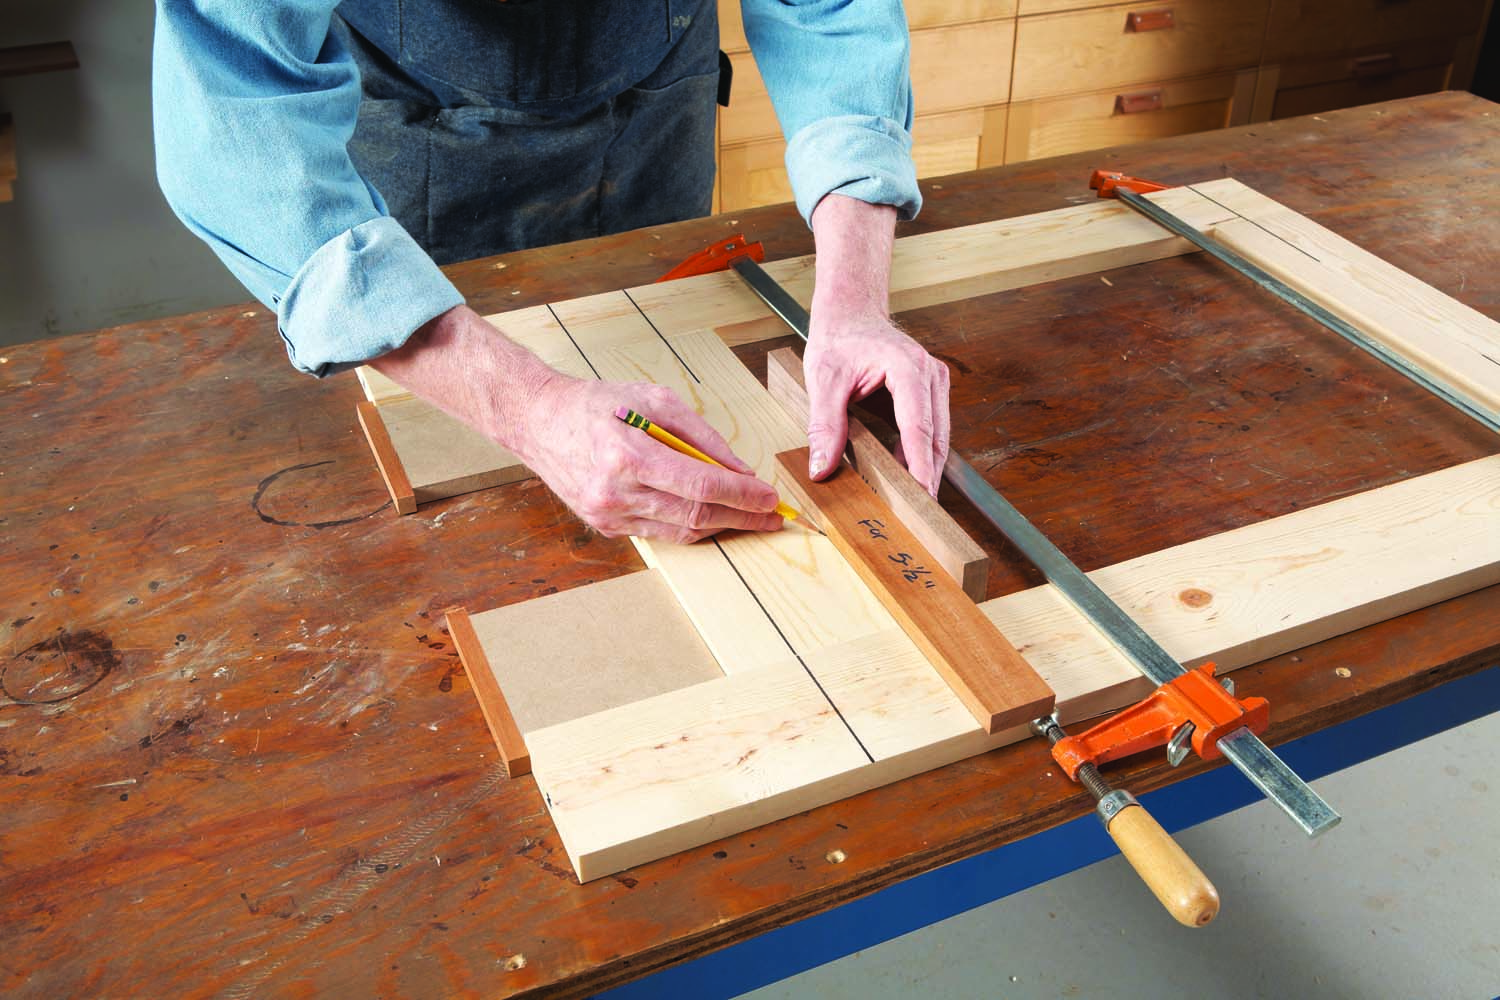
Photo 4. Draw centerlines for the bottom rails using a second spacing stick. Position these rails with a pair of spacing blocks butted up to the ends of the legs.
Clamp each frame together in order to draw the centerlines. Make your marks on the inside surfaces of the frames (Fig. 02). The marks won’t be visible after the planter is complete, so you won’t have to erase them later on. Make a pair of spacing blocks to position the bottom rails of each frame (Photo 4 and Fig. 03). Mark a small “x” on the centerlines opposite where each biscuit slot will go, then cut the slots (Photo 5).
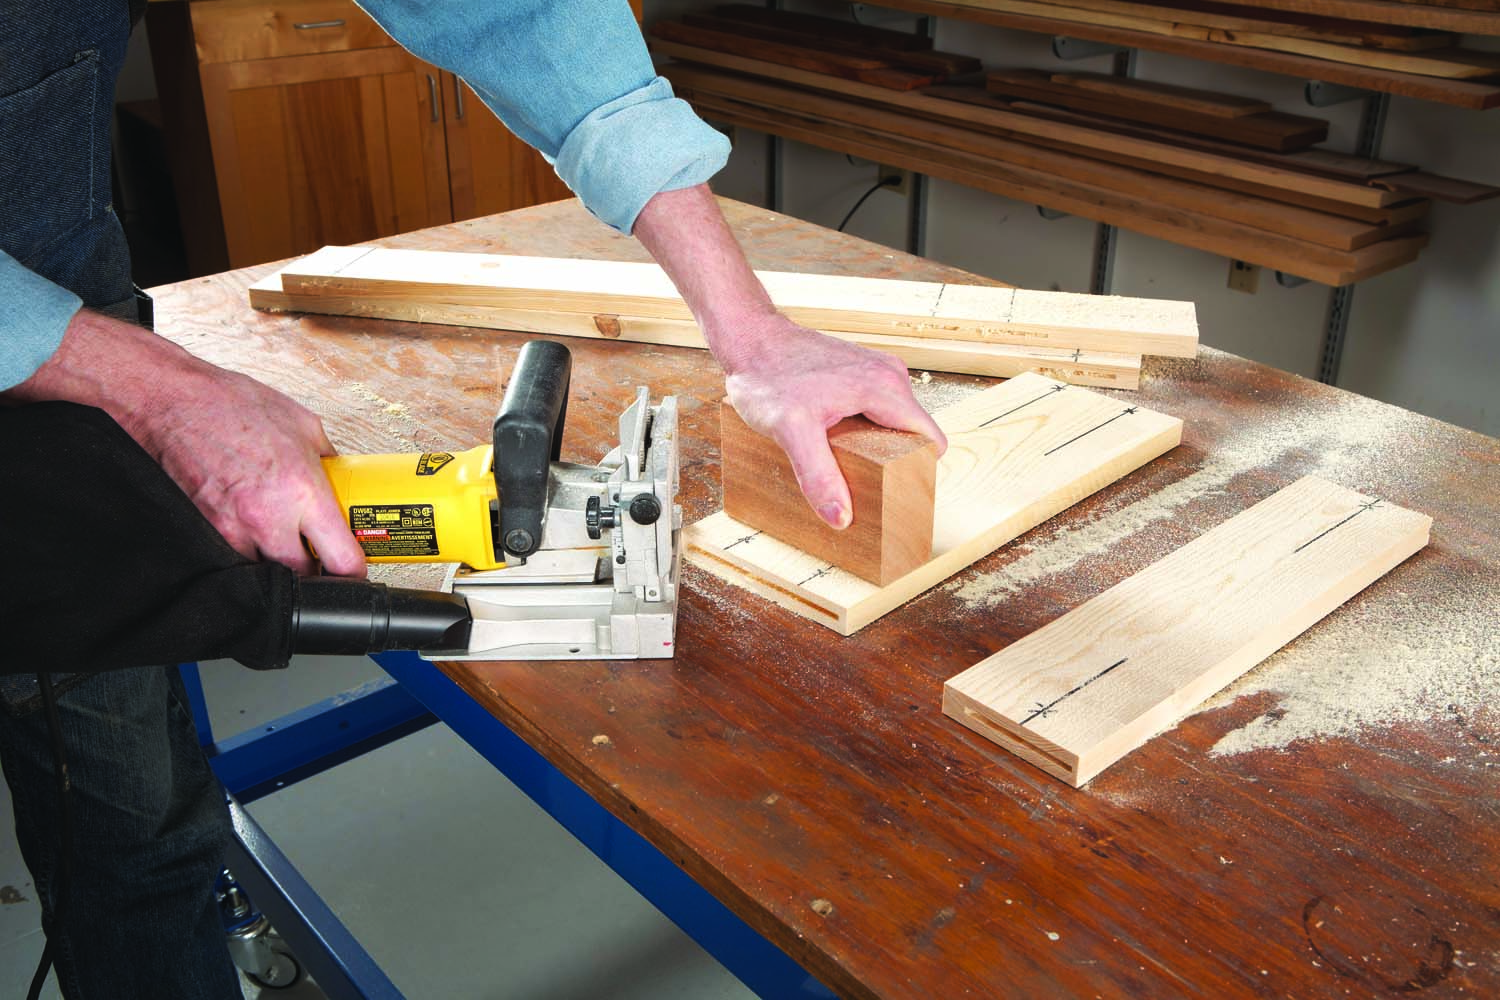
Photo 5. Cut biscuit slots in the legs and rails. Push down on each piece with a large block to make sure it stays put and sits flat on the bench.
Next, rout a small bevel on every edge of your pieces (Photo 6 and Fig. 04). This step is optional, but it will make your planter look much better and save your from having to even up the joints later on. As you know, biscuit joints don’t always come out perfectly aligned—particularly when they’re cut in this wood, which isn’t flat. Routing these bevels adds a small visual gap between neighboring pieces (a “reveal”). The pieces will look like they’re perfectly even, whether they are or not. Without a reveal, you’d have to sand all the joints after gluing them up to achieve the same look, and that can be a lot of work. You can use this bit in a router table or a laminate trimmer.
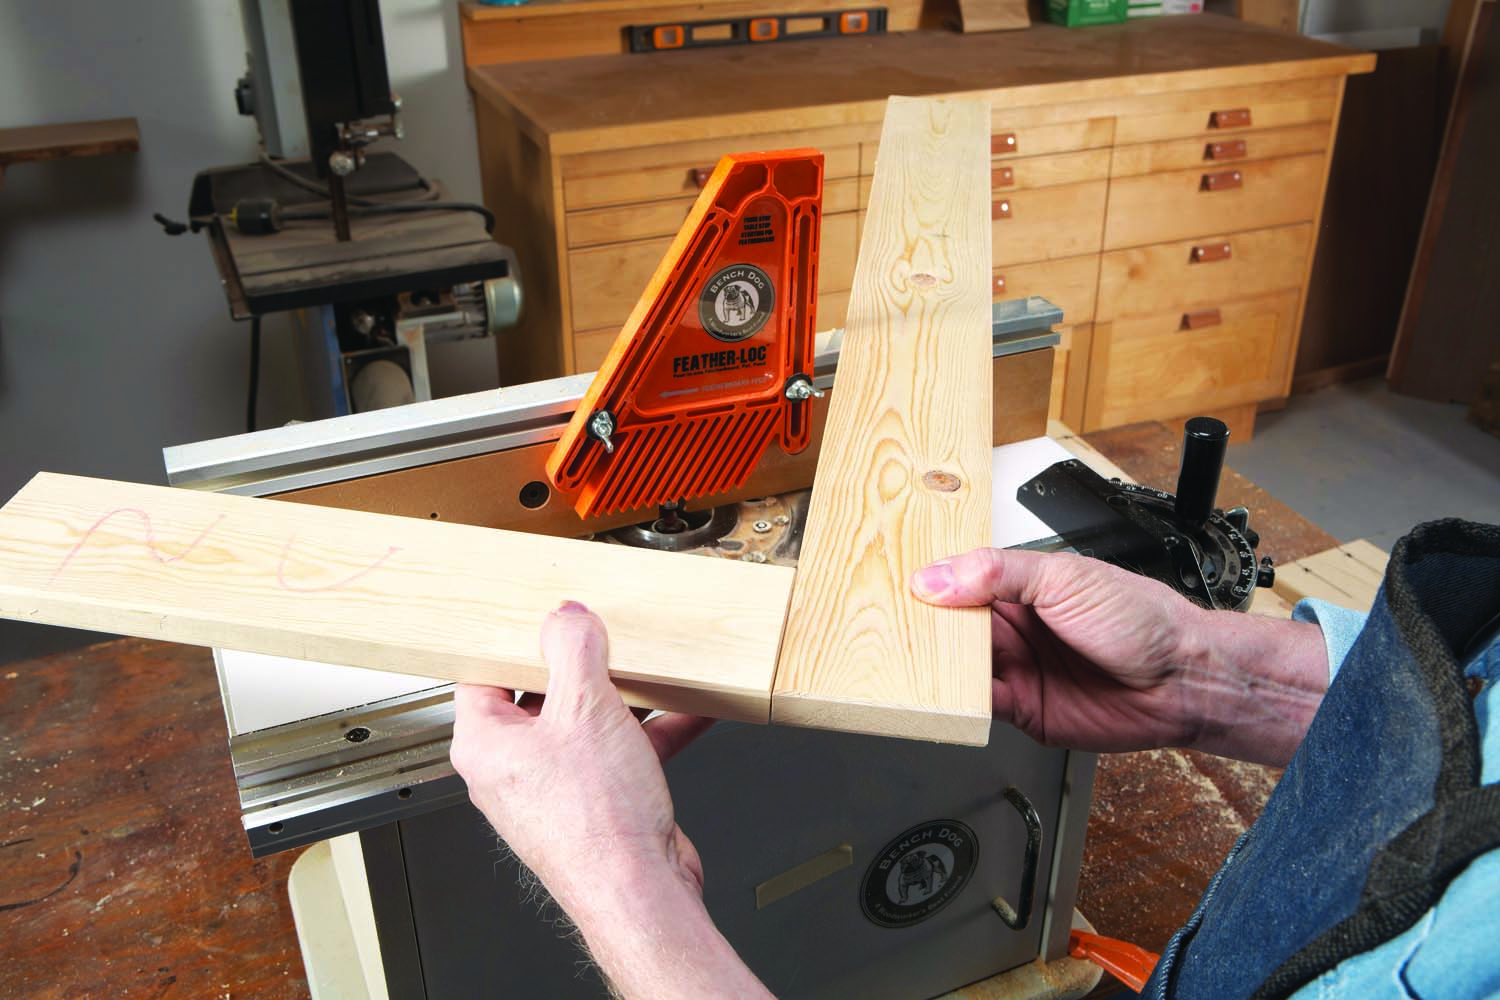
Photo 6. Rout a small bevel around all the edges of each piece. Biscuit joints usually don’t come out perfectly even; these bevels create reveals between the legs and rails, which disguise any irregularities.
Gluing up
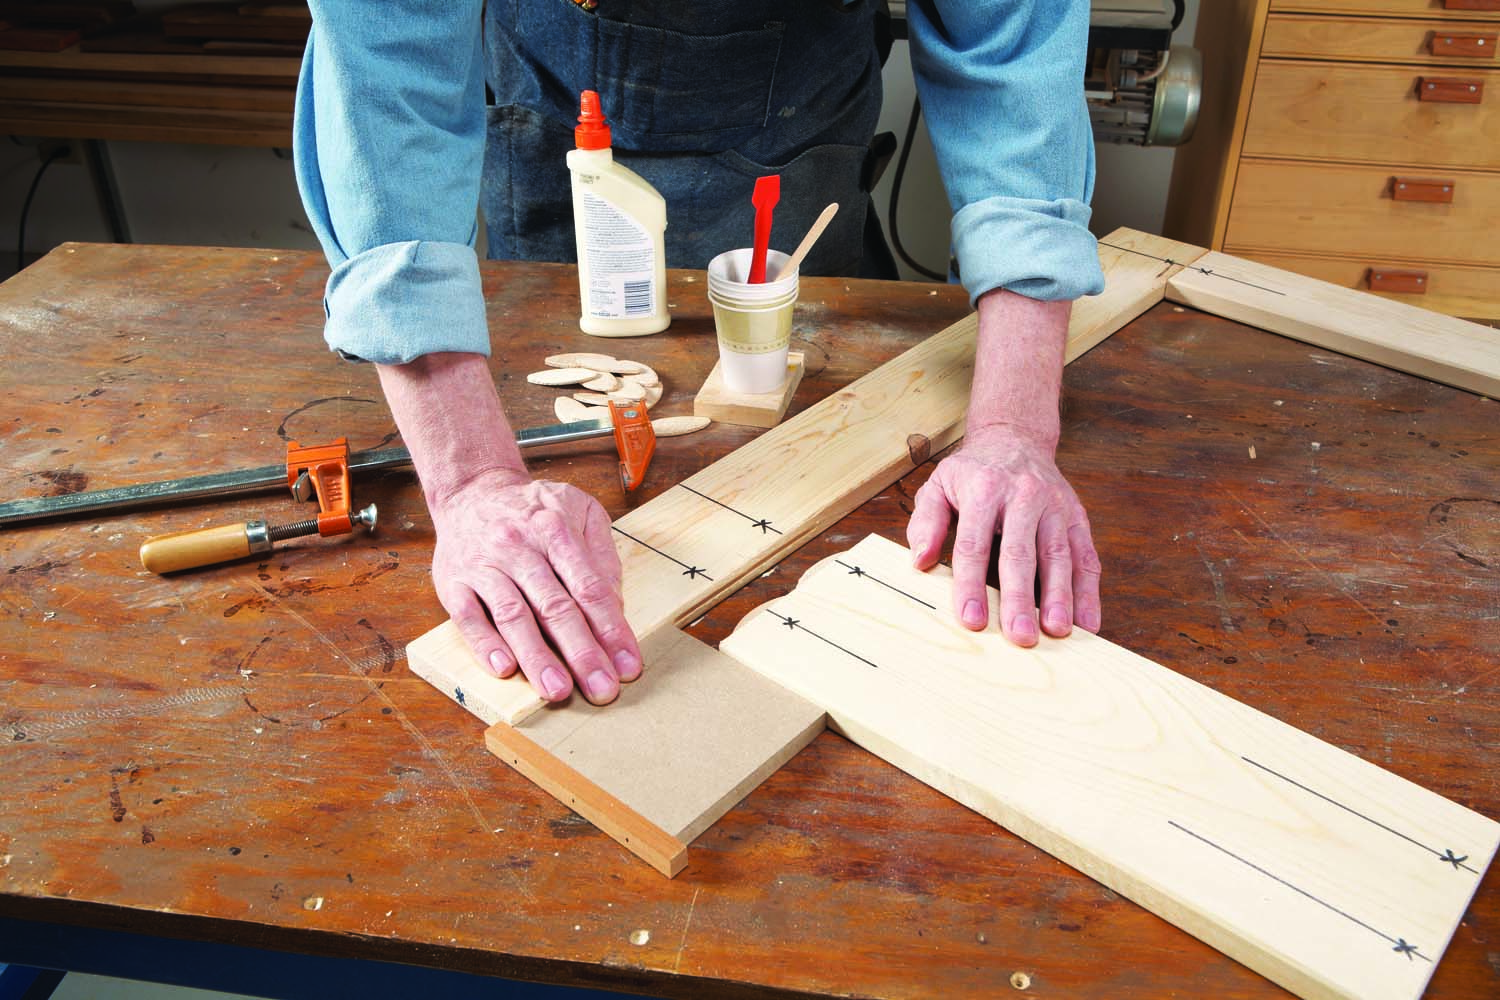
Photo 7. Glue two legs and two rails together, making a frame. Slide the bottom rail along the spacing block to ensure that the rail is in the correct position.
Glue the three frames together (Photo 7). Using a popsicle or craft stick, put glue only in the slots. You don’t want a lot of squeeze-out, because it’s difficult to remove glue from the reveals. Use a putty knife and a wet rag to remove the glue that does squeeze out, before it dries.
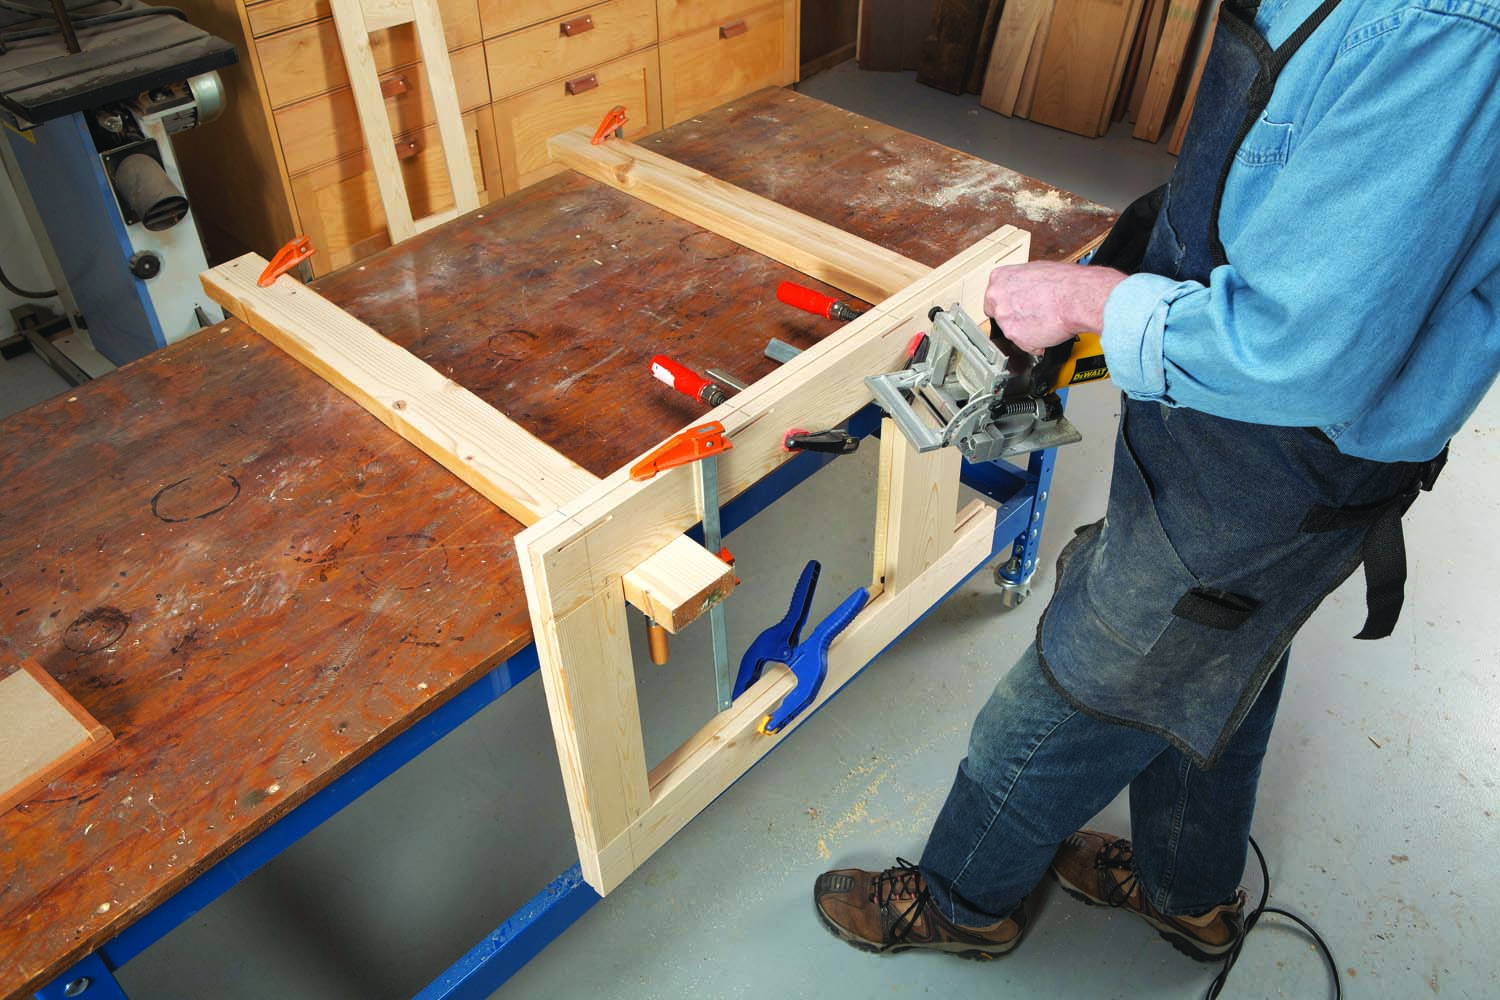
Photo 8. Cut biscuit slots along the outer legs of the frames. Clamp two frames back to back to create a wider edge for balancing the biscuit joiner’s fence.
After the glue is dry, mark the two side frames to indicate which legs will go on the outside corners of the boxes. Stand each frame up on its legs and clamp all three together in the correct position. Mark centerlines on the outsides of the frames for the biscuits that will join them together (Fig. 02). Unclamp the frames, then cut biscuit slots in the legs of the side frames (Photo 8). Use the biscuit joiner’s fence to position the slots. Cut mating slots in the end frames, again using the fence.
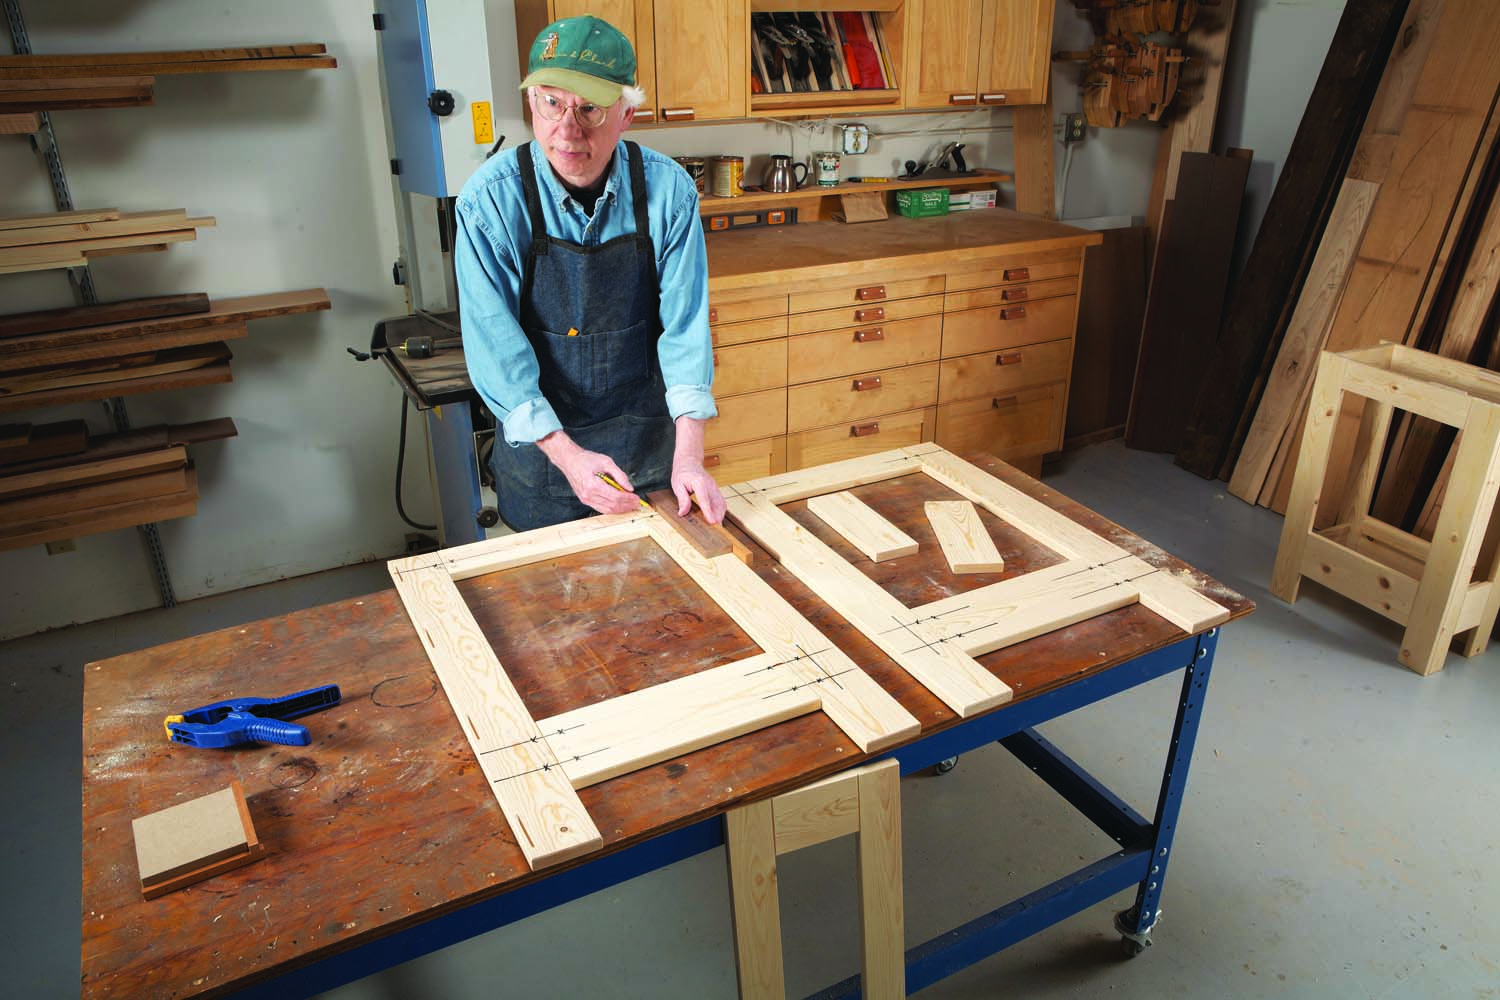
Photo 9. Mark the inner legs of the four frames in order to cut biscuit slots for the cross rails. The cross rails go in the middle of the legs, which requires a different method of registering the biscuit joiner.
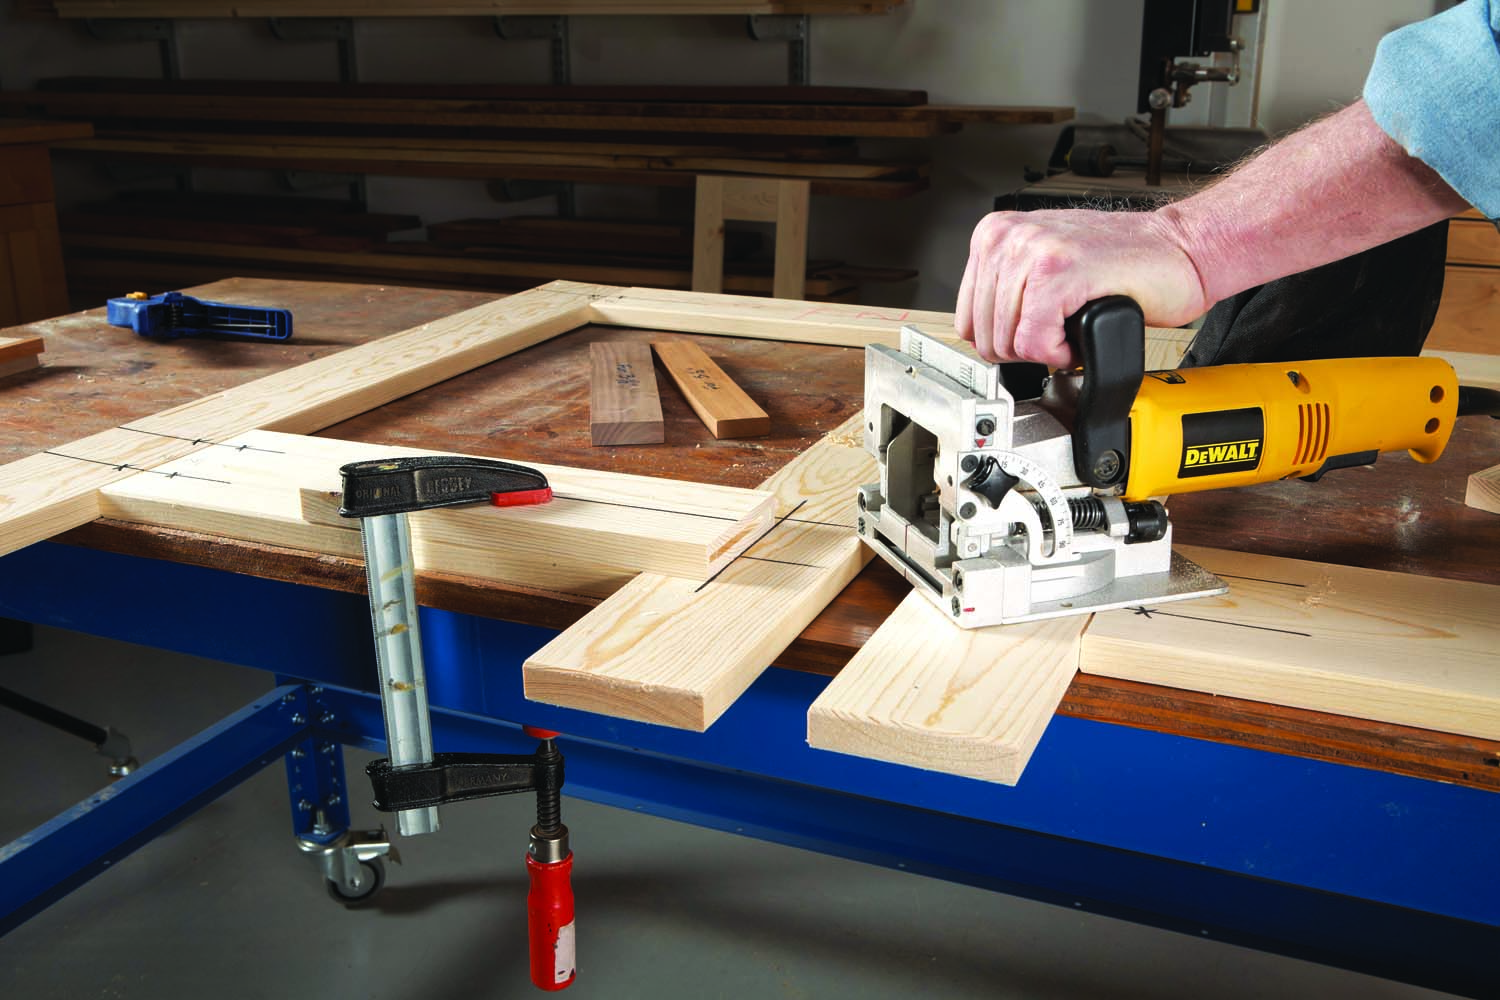
Photo 10. Clamp each cross rail on its layout line, flush with the rail below. Cut a biscuit slot in the rail’s end. Leave the cross rail clamped in place.
There’s one more set of pieces to deal with before gluing the boxes together: the cross rails (H). Cut these pieces 1″ extra-long, then trim them so their length exactly matches the width of your end frames. Mark the inner legs of each side frame to indicate where the cross rails go (Photo 9), then cut the slots for them (Photos 10 and 11). In addition, cut slots on the inner legs for the middle rails (J and K, Photo 12). Use the same centerlines you drew for the side rails.
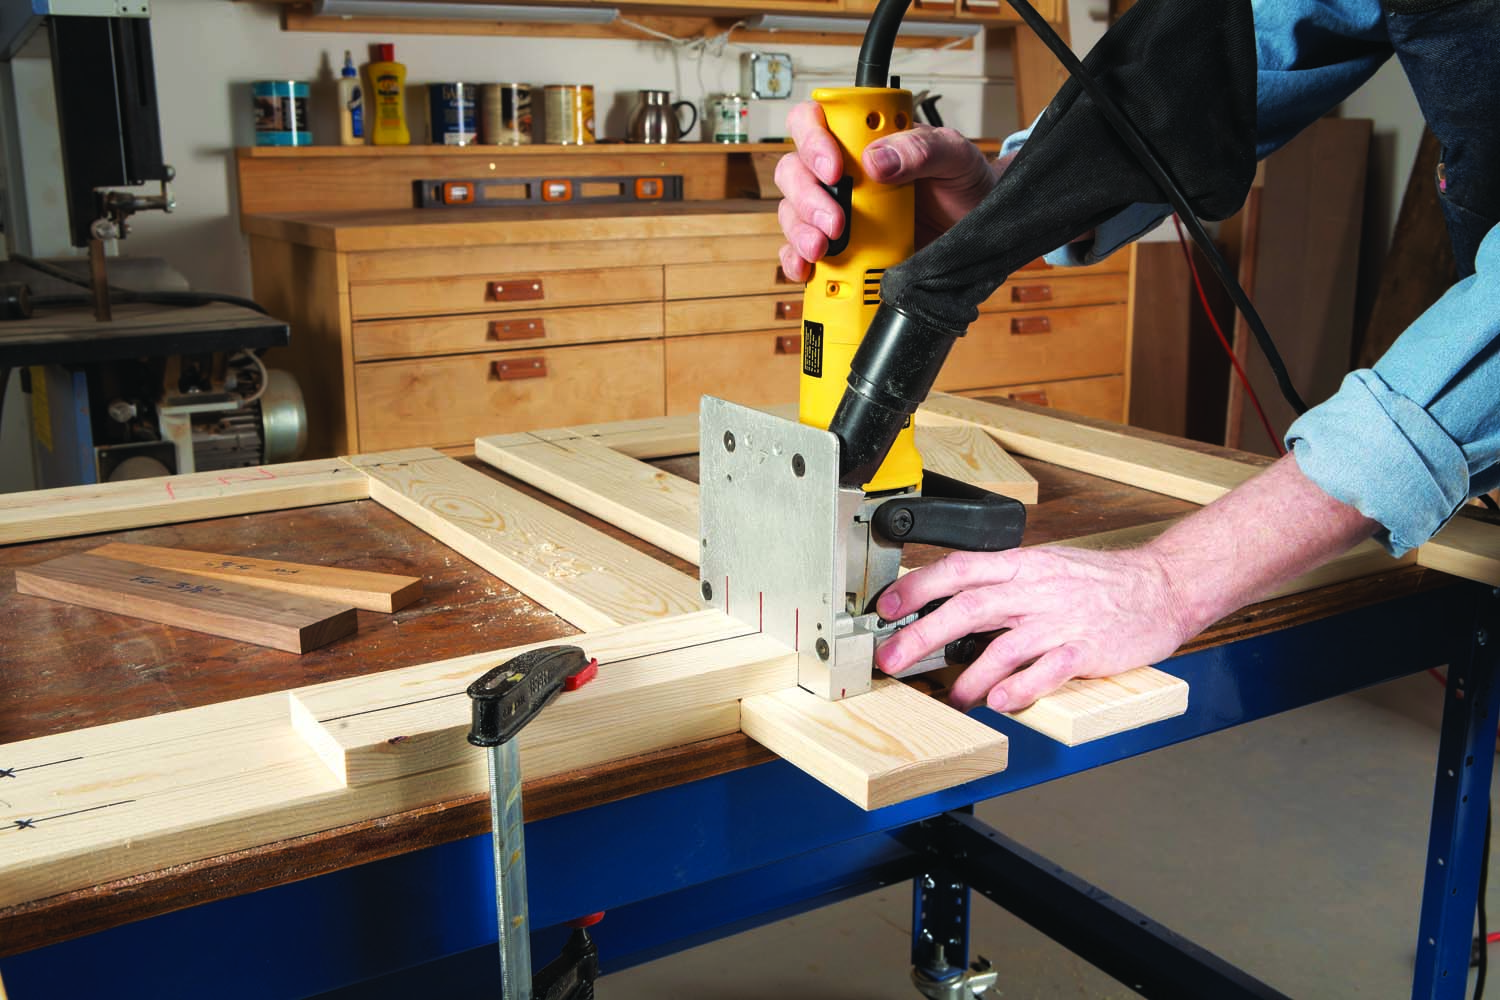
Photo 11. Stand the biscuit joiner on its end to cut a corresponding slot in the middle of the leg.
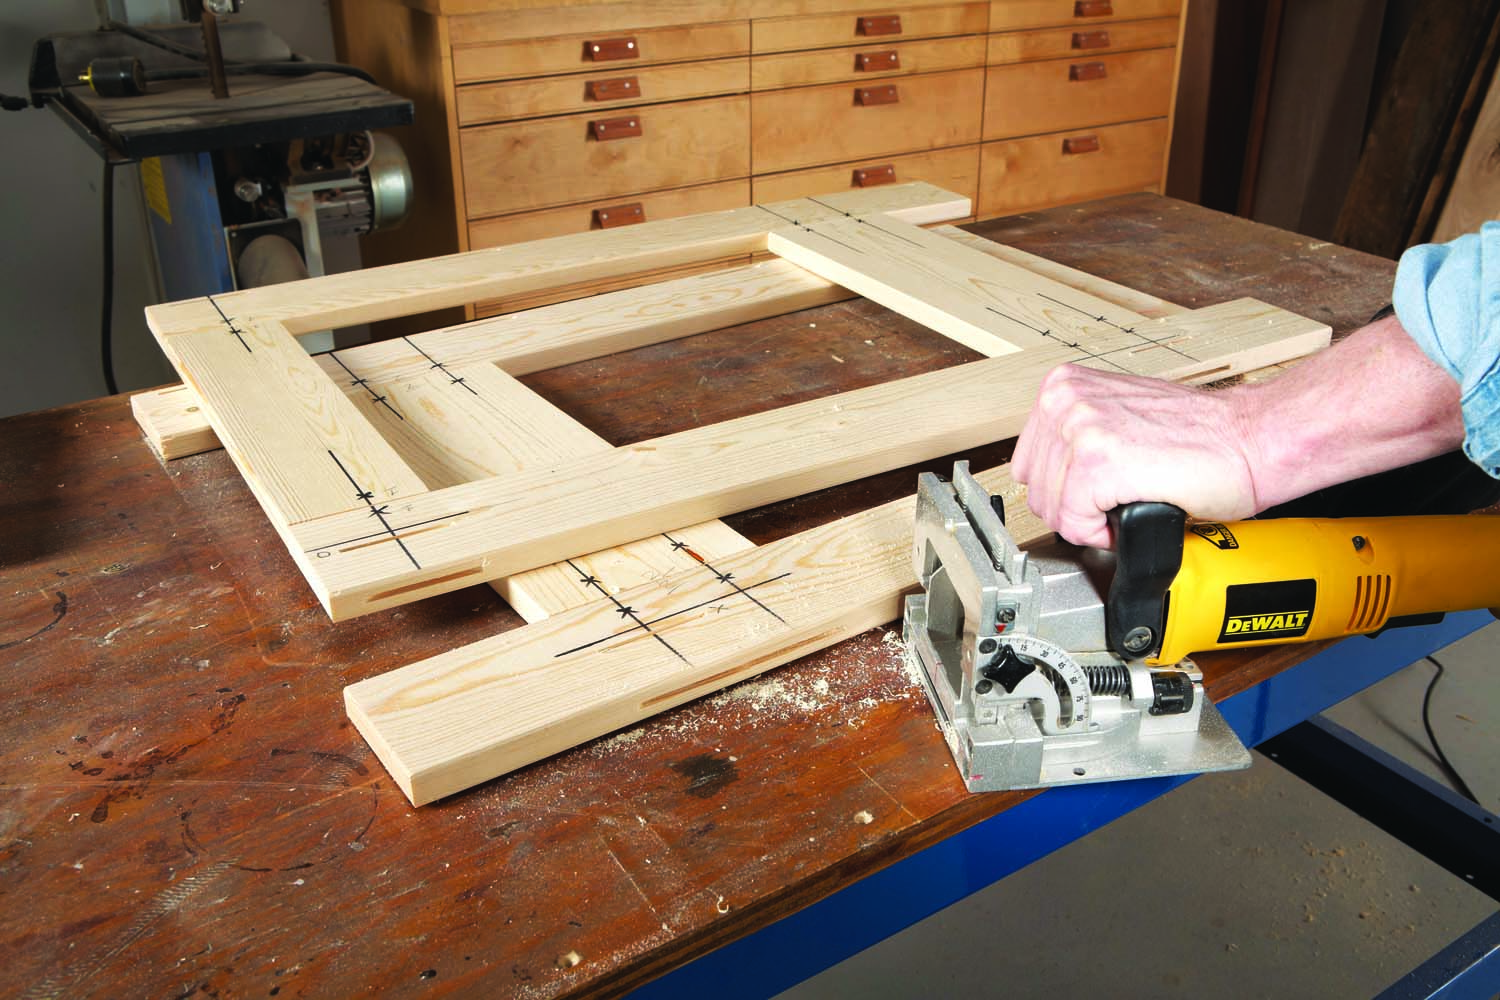
Photo 12. Cut additional biscuit slots in the frames for the planter’s middle rails. It’s best to cut these slots last, so you don’t cut them in the wrong legs by mistake!
Glue up each box (Photo 13). The best way to do this is to hold each corner rigid with shop-made squaring blocks and proceed in two stages, gluing only one-half of the box at a time. First, glue the cross rails and end frame to one of the side frames, as shown in the photo. Place the second side frame in position, with biscuits—but no glue. When the glue is dry, remove the second side frame and glue it in place. Gluing and clamping in stages gives you more time to spread the glue and to make sure all the parts are in alignment.
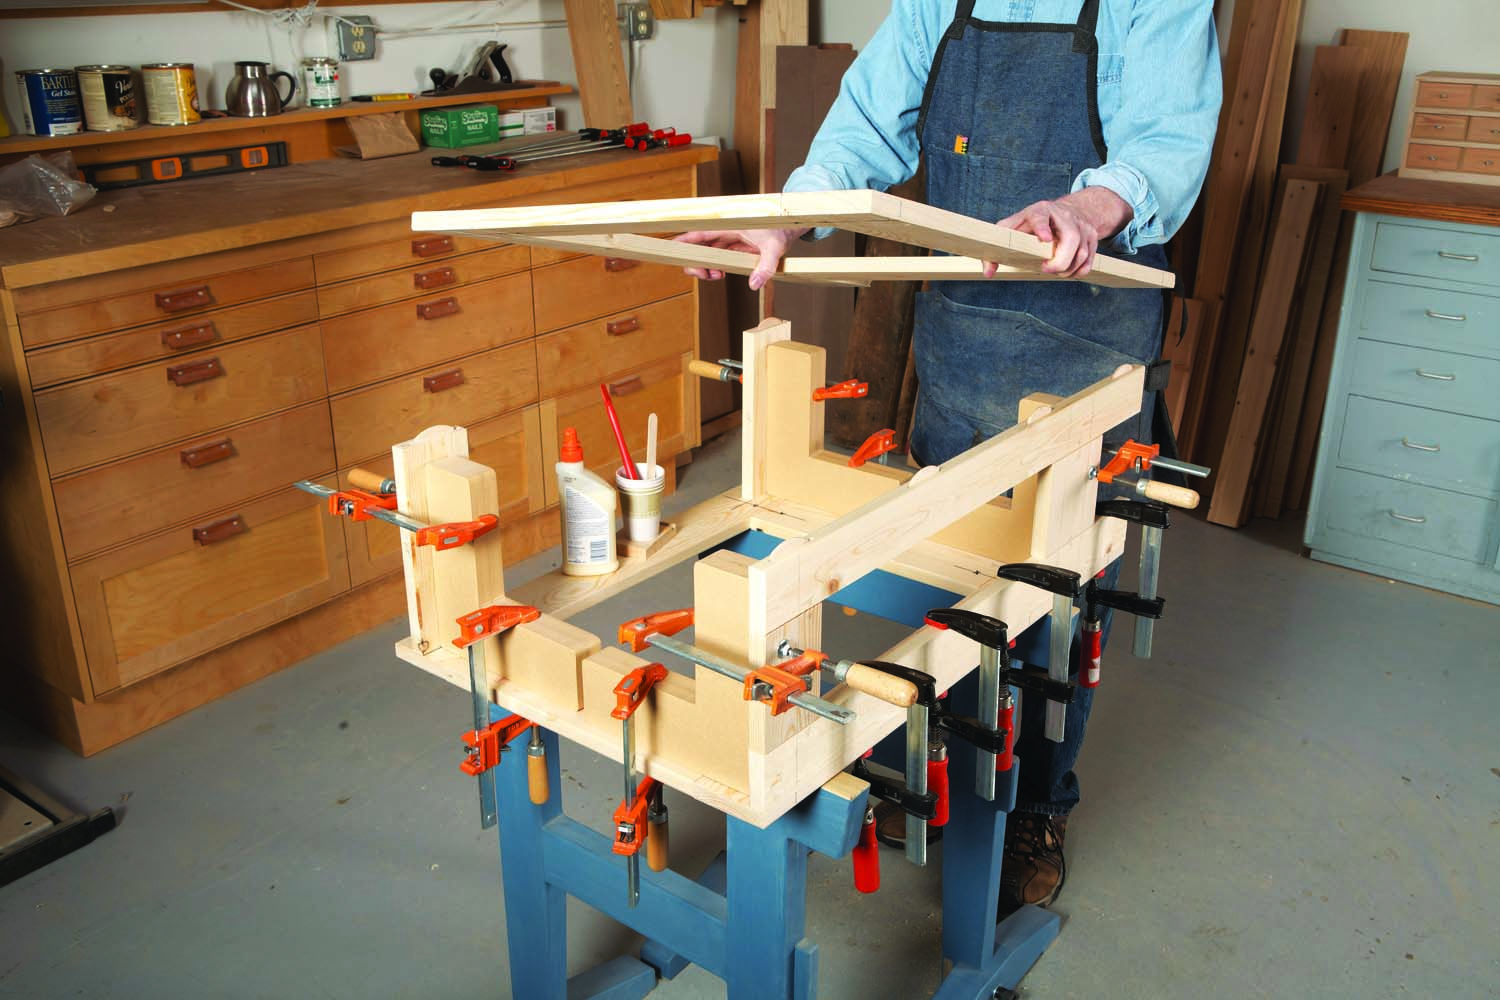
Photo 13. Glue one end of the planter together. Clamp L-shaped blocks to adjoining sides to ensure the assembly is square.
Now you can deal with the middle rails. Their exact length depends on the length of the shelf—you’ll want the inside dimension of the base to be about 1/4″ longer than the shelf. You could figure this out by measuring, but I found it was easier to place the two boxes over the shelf, leaving a 1/4 margin at one end, then measure the distance between the boxes. Trim the middle rails to this length, cut biscuit slots in their ends, rout bevels on all of their edges and glue them in place (Photo 14). You’ll need 4 pipe clamps that open at least 40″.
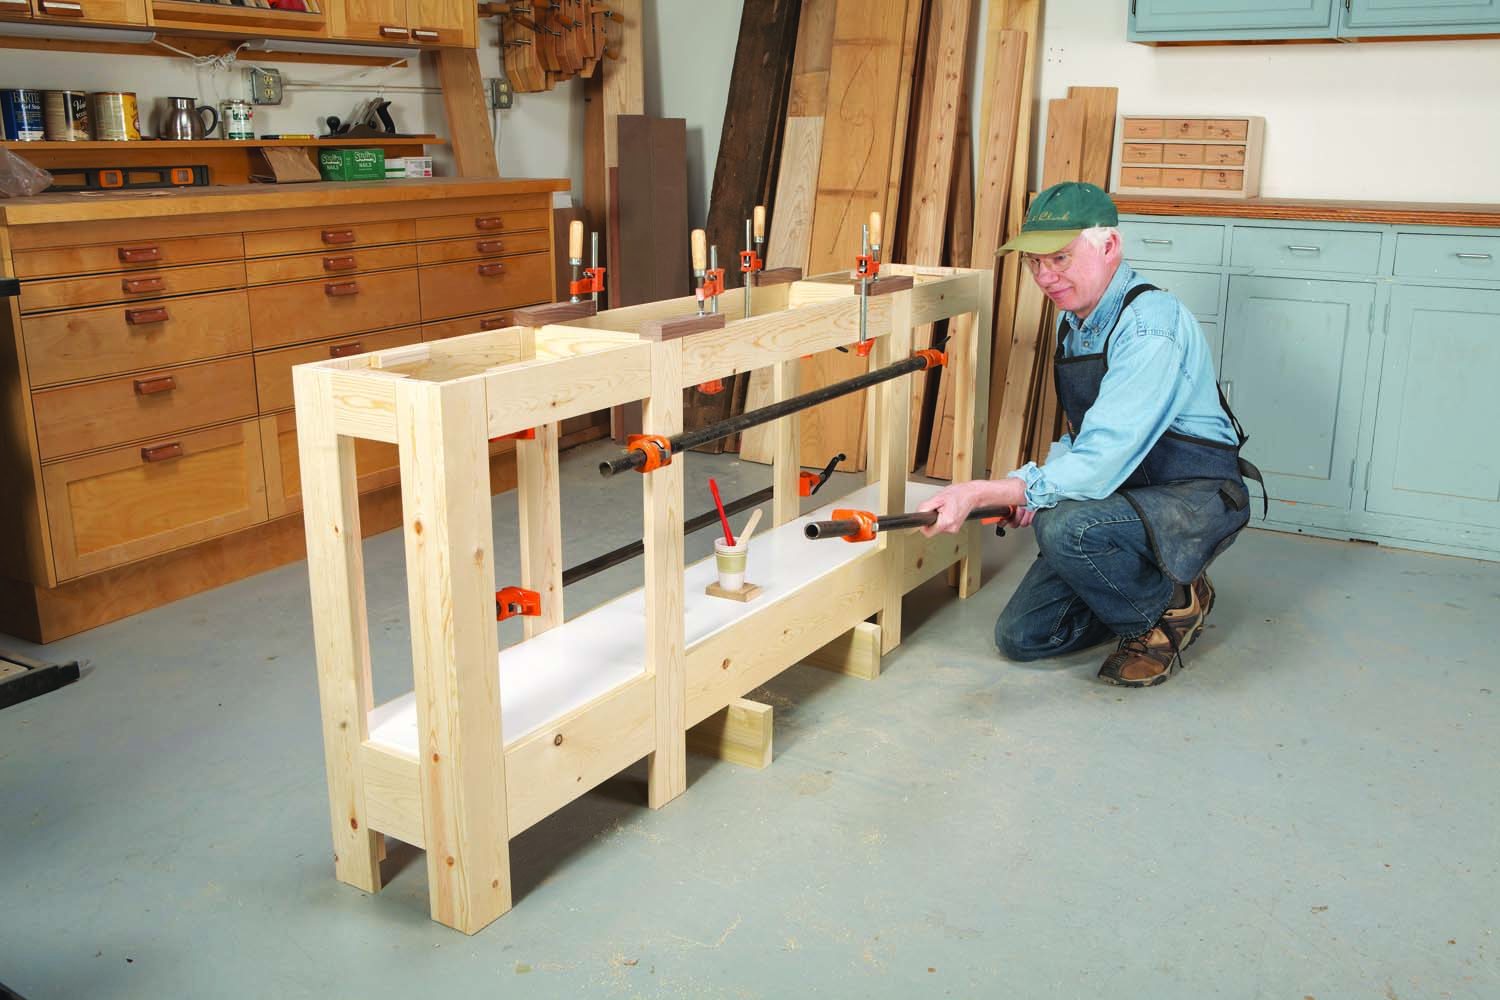
Photo 14. Glue the two halves of the planter together. Clamp “lips” on the upper rails to temporarily hold them in place. Support the lower rails with blocks. Place the shelf inside the assembly to make sure everything stays aligned.
Finish the base by making ledger strips to support the shelf (L, M and N). Glue them 3/8″ below the top edges of the bottom rails (Fig. 02).
Make the top
Cut the front and back pieces (P) and crosspieces (Q and R) to final length. Mark the locations of the biscuit slots (Fig. 05), cut the slots, bevel all edges and glue.
Make fastening blocks (S) for holding down the top. Glue them to the base. I used tabletop fasteners on the side rails, rather than blocks, from an abundance of caution. If you’re using #1 common wood, it may continue to dry and shrink after you build the planter. As the inner legs become narrower, the base will become a little bit shorter; tabletop fasteners will accommodate this shrinkage. (That’s also why the gaps at the ends of the shelf are so generous.) I cut slots for the fasteners with the biscuit joiner.
To prepare for finishing, wet all the wood with a damp sponge. Wetting the wood will cause areas bruised by machining to rise above the surface—and #1 common boards will have plenty of these. Sand with 100-grit paper, then apply one coat of water-based poly to all surfaces. Sand with 240-grit paper, then apply two more coats.
Drop in the pots (Photo 15) and you’re ready to turn it over to the gardener!
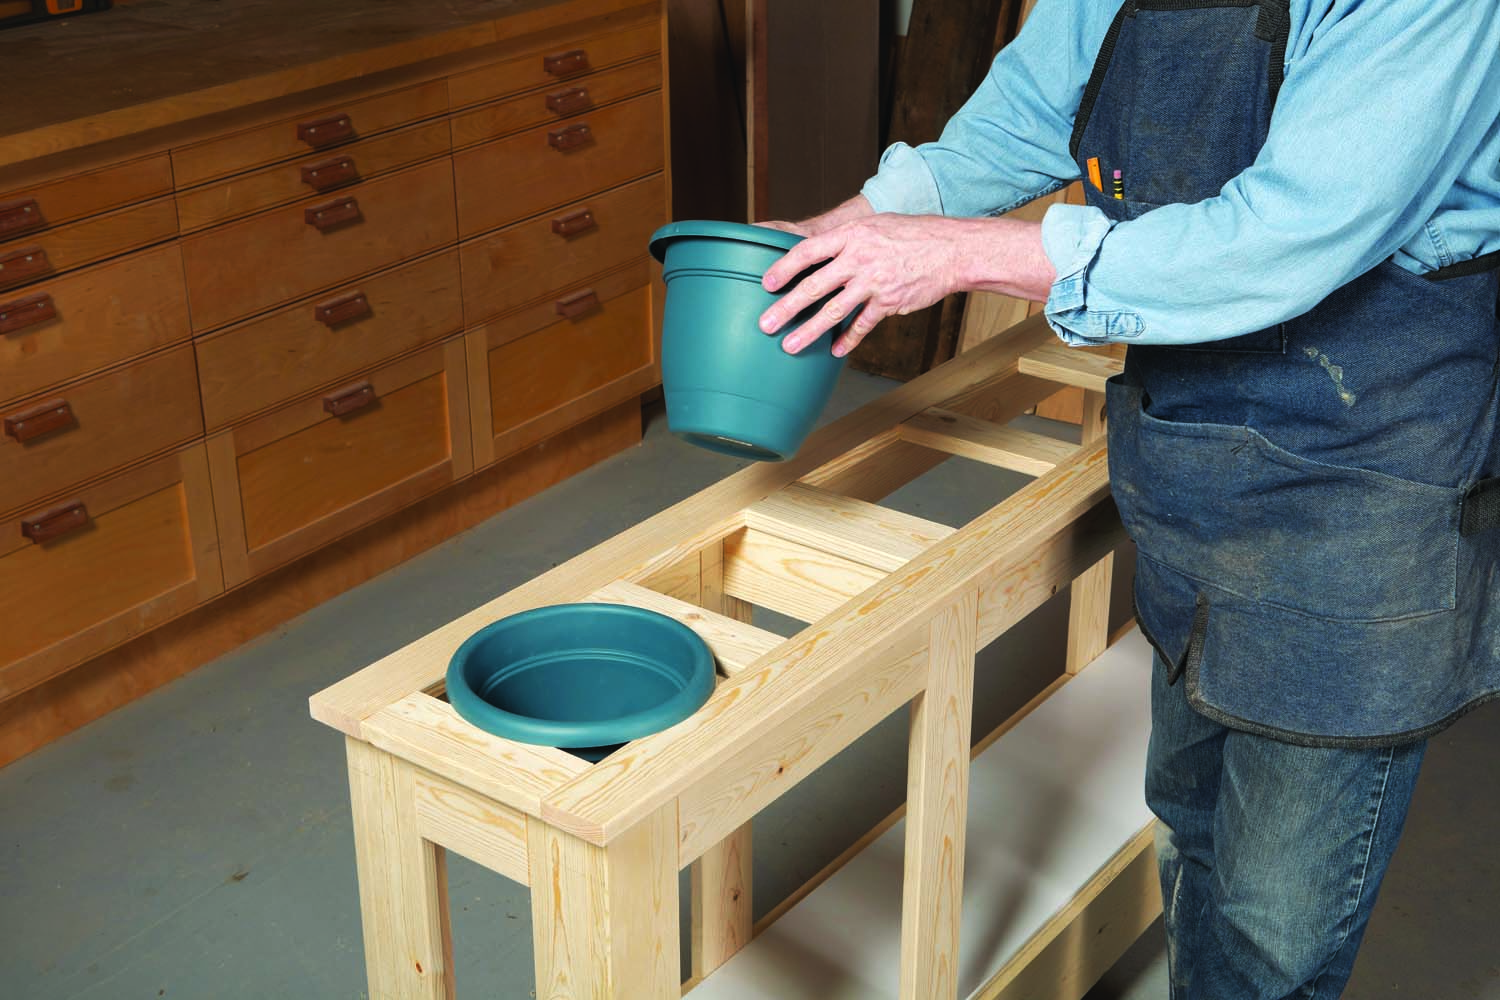 Photo 15. Hang the pots by their rims. Be sure to use pots with an attached saucer that collects water. These pots won’t drip!
Build it from MDF?
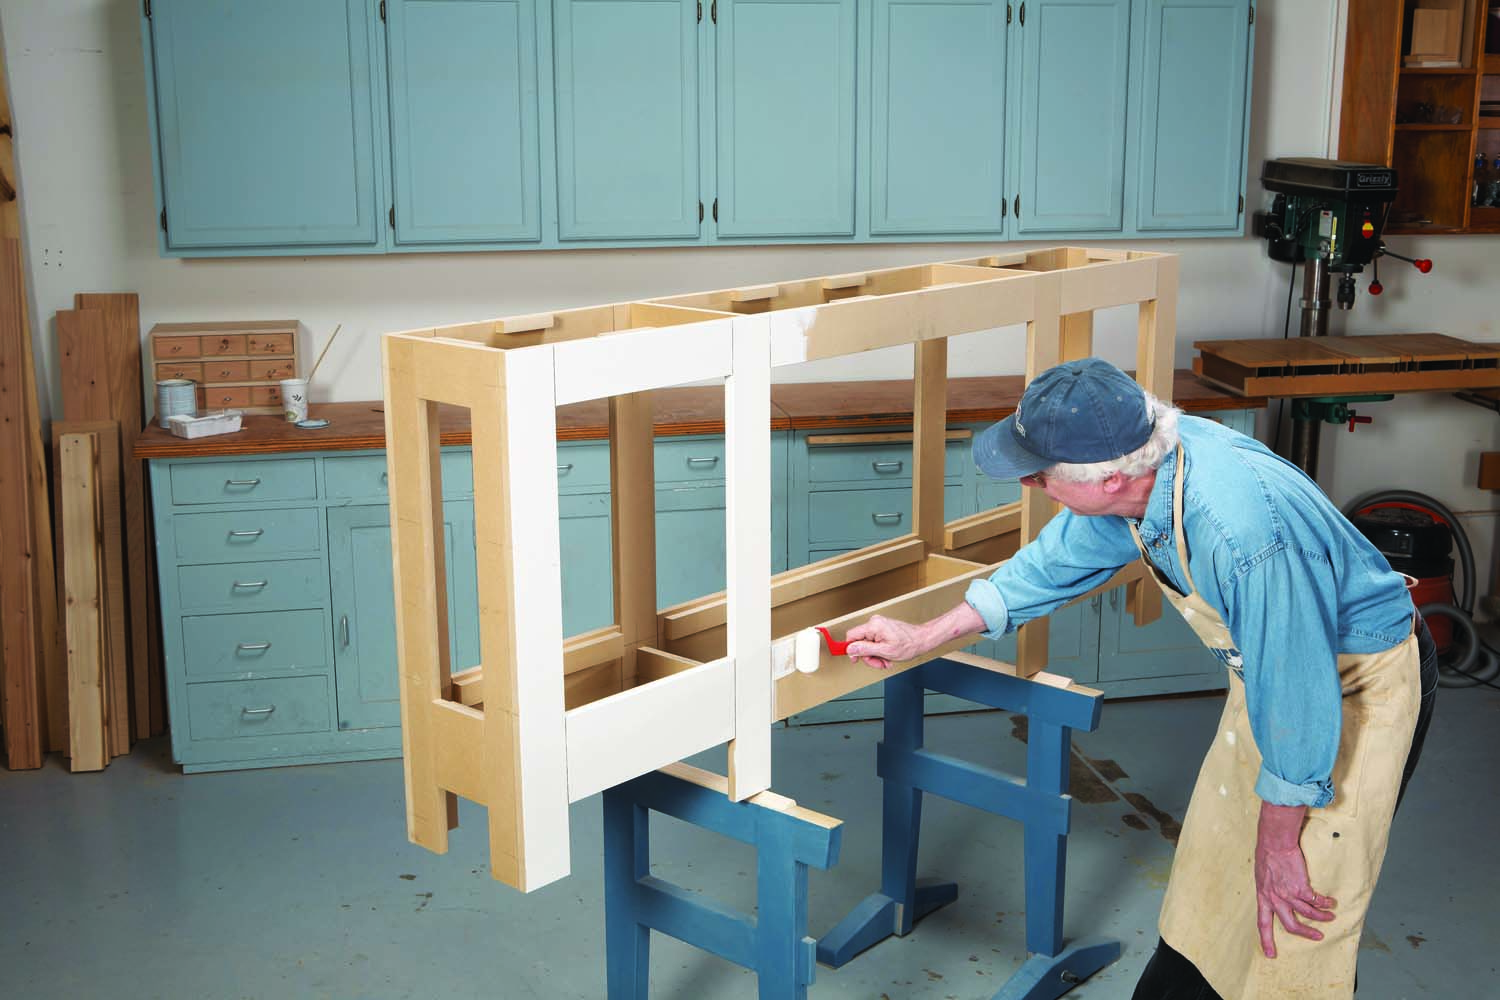 To make the project even easier, you can build the whole thing from 3/4″ MDF. Just be sure to coat every surface with paint, so over-watering the plants doesn’t cause the MDF to swell and burst apart!
Here are some supplies and tools we find essential in our everyday work around the shop. We may receive a commission from sales referred by our links; however, we have carefully selected these products for their usefulness and quality.


