We may receive a commission when you use our affiliate links. However, this does not impact our recommendations.
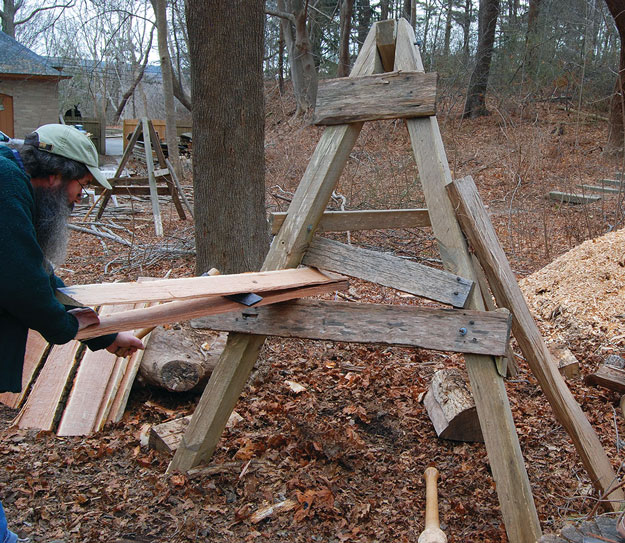
Sophisticated. The tripod riving brake shown here is the sophisticated version of a contraption to help hold logs and billets as they’re split with a froe.
Get some splitting leverage with this simple contraption.
by Peter Follansbee
Reach for a froe, and you should immediately think, “Give me a brake.” The brake can be a constructed workholding device, or just a couple of logs. Its function is to trap your workpiece in such a way that you can exert leverage on a section of a log as it’s splitting. The froe – used to split a piece when it’s in a brake – is a tool that requires some nuance to really get the most from it; the brake helps make that happen.
There are many kinds and configurations of brakes. The first one I learned is just a forked section of a tree, propped up with crossed timbers underneath.
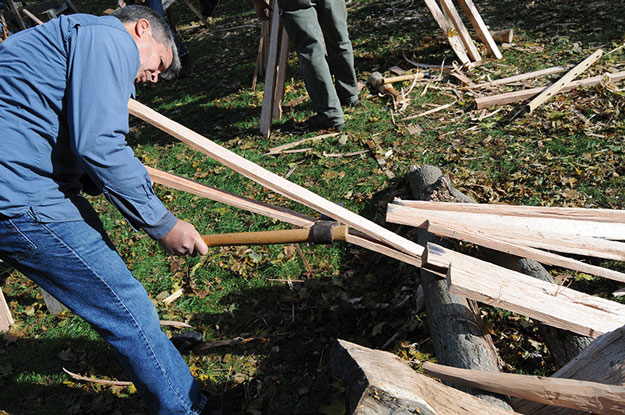
Forked. Here, a student is using a forked-tree brake as he rives oak with a froe.
Jam your billet into the fork with its other end on the ground, and drive the froe into the top end. As you twist the froe handle, you’re pulling against the thicker part of the split. Depending on many factors, you might need to flip your workpiece this way and that to get the thick side of the split on the bottom, or near, side.
In a pinch, I have improvised a brake with a log and a section of split oak; it’s a bit awkward, but it works. In both of these cases, the workpiece is pretty close to vertical.
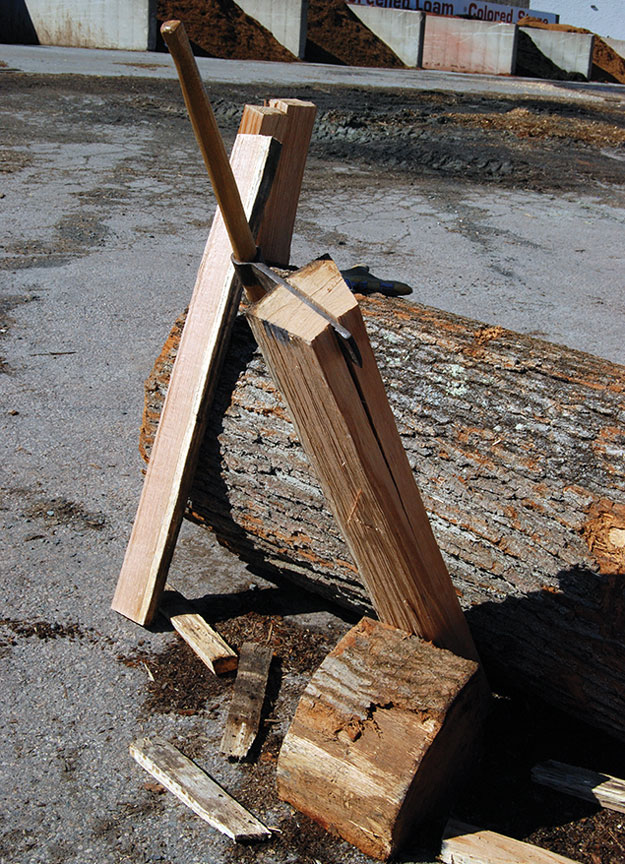
In a pinch. A log and a split section of wood can serve as a brake if need be.
Many years ago, I learned of a different brake: a large tripod with two cross bars fixed to its two front legs. My latest version (shown at the top of this article) is about 6-1⁄2‘ tall, and bolted together at the top. The legs are softwood 4x4s; the crossbars are oak 2x6s. The rear leg swings out between the two front legs.
Across the front legs I have variously nailed or lag-bolted two crosspieces. One is horizontal, about waist high. The other is above this rail, angled upward toward the left-hand end of things. The idea is that these two rails create a tapered fork into which you can jam your riving stock.
Another feature is that this upper rail is attached to the front face of my right-hand piece, and behind the other leg. This provides a broader range of points at which to pinch a workpiece. I often add another rail running from the left-hand front leg to the back leg, as shown above. I use this one to grab long whippy pieces between the front lower rail and the back end of this side rail.
I prefer this contraption to a forked-tree riving brake because it puts the workpiece you’re riving parallel to the ground. This way, the pressure you’re exerting to control the split is directly downward, not up in the air like on the first brake I used (or on the log version).
The riving I do for joiner’s work is pretty simple, all that stock is fairly thick; 1″ to 1-1⁄2“at least.
Oak ‘Hurdles’
Recently I was making some garden hurdles, and for those the stuff I want to rive is often quite thin, sometimes only 1⁄2” thick. It takes finesse to get a split like that, but with good stock, a sturdy riving brake and some practice, you can split lengths up to 6′ with ease.
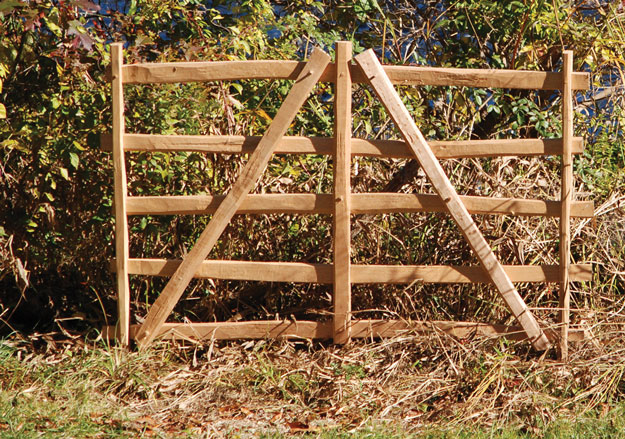
Oak hurdle. Here’s my a hurdle – a traditional portable fence – based on an English regional style (you’ve likely also seen woven willow hurdles). No matter the style, the use is the same: to keep things in or out.
Having the front rails in different planes helps when coercing a split that threatens to go astray. The offset between the rails means the pressure points are now spread out; the stock rests on the lower bar near you, but is pinched under the upper bar now about 4″-6″ farther back.
This is helpful when you’re directing the froe’s action by leaning on the heavier side of the split. You can bend the stock and force the split back on track if it wanders. Longer stock achieves the same by being trapped on top of the front lower rail and under the side rail.
When riving long stock, the action is not a quick jerk of the froe, but a gentle and slight levering of the handle. The sound is not the tearing of fibers like splitting with wedges, but a “tic-tic-tic” as each push on the handle advances the split a ways.
Watch as you go, if the split “runs out” toward a thinner side, flip the stock over so the thick half of the split is down, and lean on the top as you push the now-thicker side down. Lever the handle – “tic-tic-tic” – and you’re back on track. Easy does it.
The hurdles are simple: three uprights, several rails and a couple braces. Bore holes in the uprights, and use a chisel to chop between them to make the mortises. Hew or use a drawknife to fit the rails. All the joints and the braces are nailed or pegged in place.
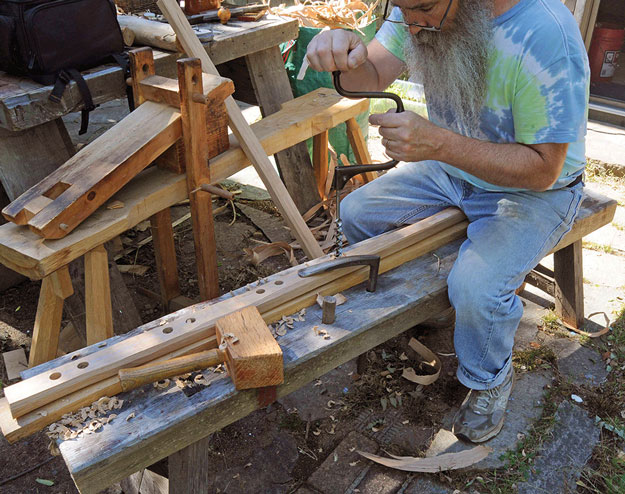
Bore… Lay out your mortise locations, and bore a hole at either end….
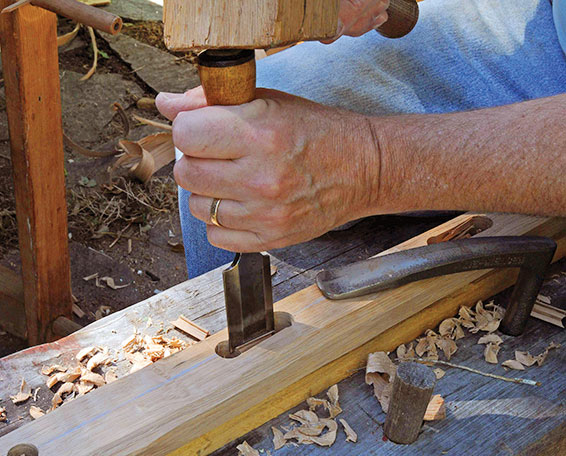
…then Chop. Use a chisel to chop out the waste between the holes.
Keep your hurdles light; these originally served as portable enclosures for sheep. I have no sheep here in my in-town yard, so I use a couple of hurdles to keep our kids from careening into the river when sledding in the winter. PWM
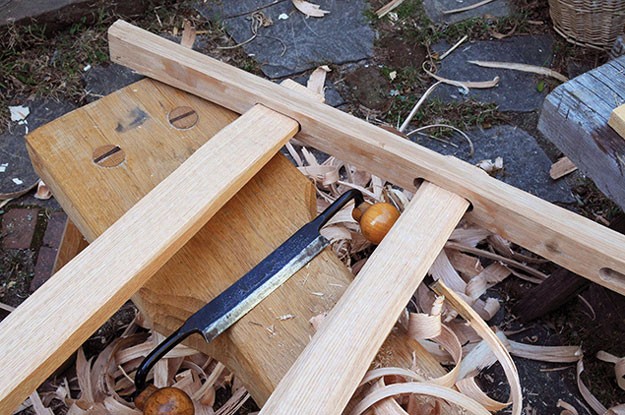
Rails. Use a hatchet or drawknife to shape the rails and fit the through-tenons (which needn’t be tight), then peg or nail the braces in place.
Peter has been involved in traditional craft since 1980. Read his blog at pfollansbee.wordpress.com.
This article first appeared in the April 2016 issue of Popular Woodworking Magazine.
Purchase this issue.
View the article index for this issue.
Here are some supplies and tools we find essential in our everyday work around the shop. We may receive a commission from sales referred by our links; however, we have carefully selected these products for their usefulness and quality.


