We may receive a commission when you use our affiliate links. However, this does not impact our recommendations.
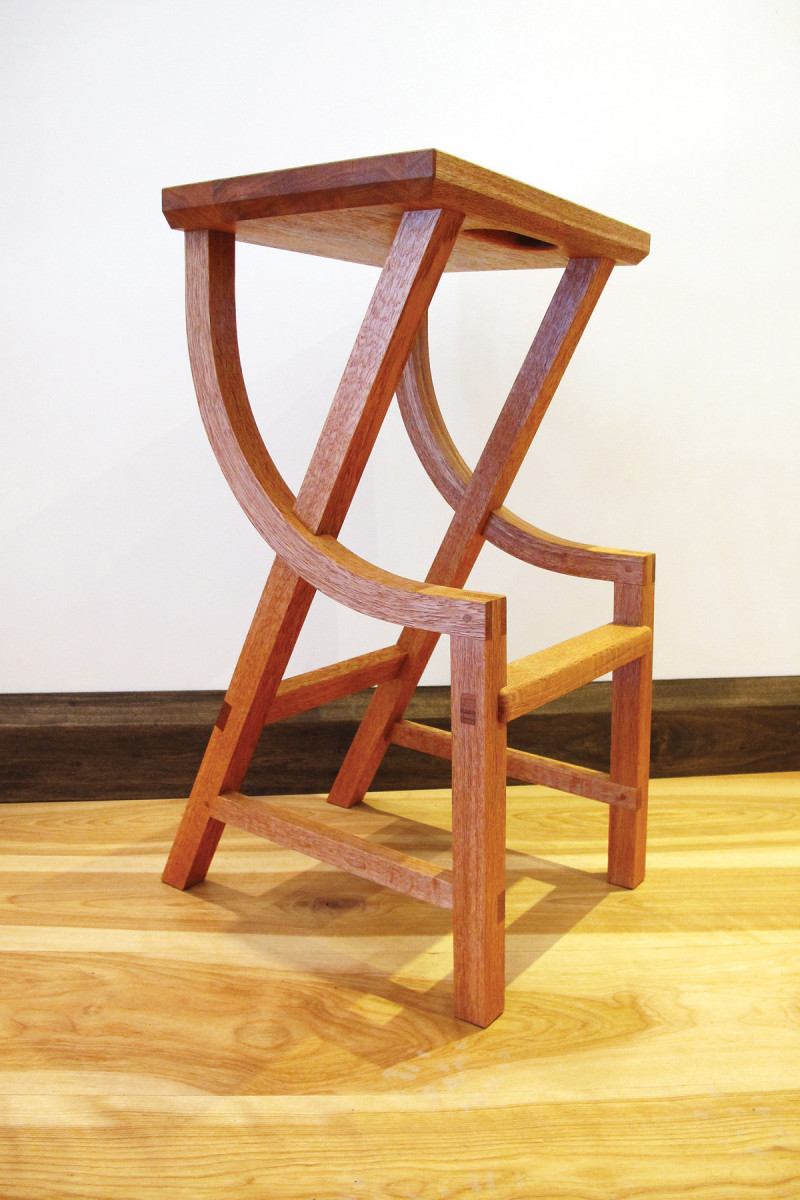
This stool builds your skills with eight different joints and bent laminations.
Competition is the whetstone of talent; this was in full effect when I built this Wharton Esherick-inspired stool for an online shop stool build-off hosted by Flair Woodworks. It was the perfect opportunity to try out a design that had been floating around in my head for a few months – and I won, so I count it as a success.
The stool provides an exercise in bent laminations and eight different joints: angled mortise-and tenons, both straight and angled drawbored mortise-and-tenons, a pegged slip joint, several different types of lap joints, dovetails and wedged through-tenons. Broken down step-by-step, this project is remarkably simple to build – even if you’re new to the techniques.
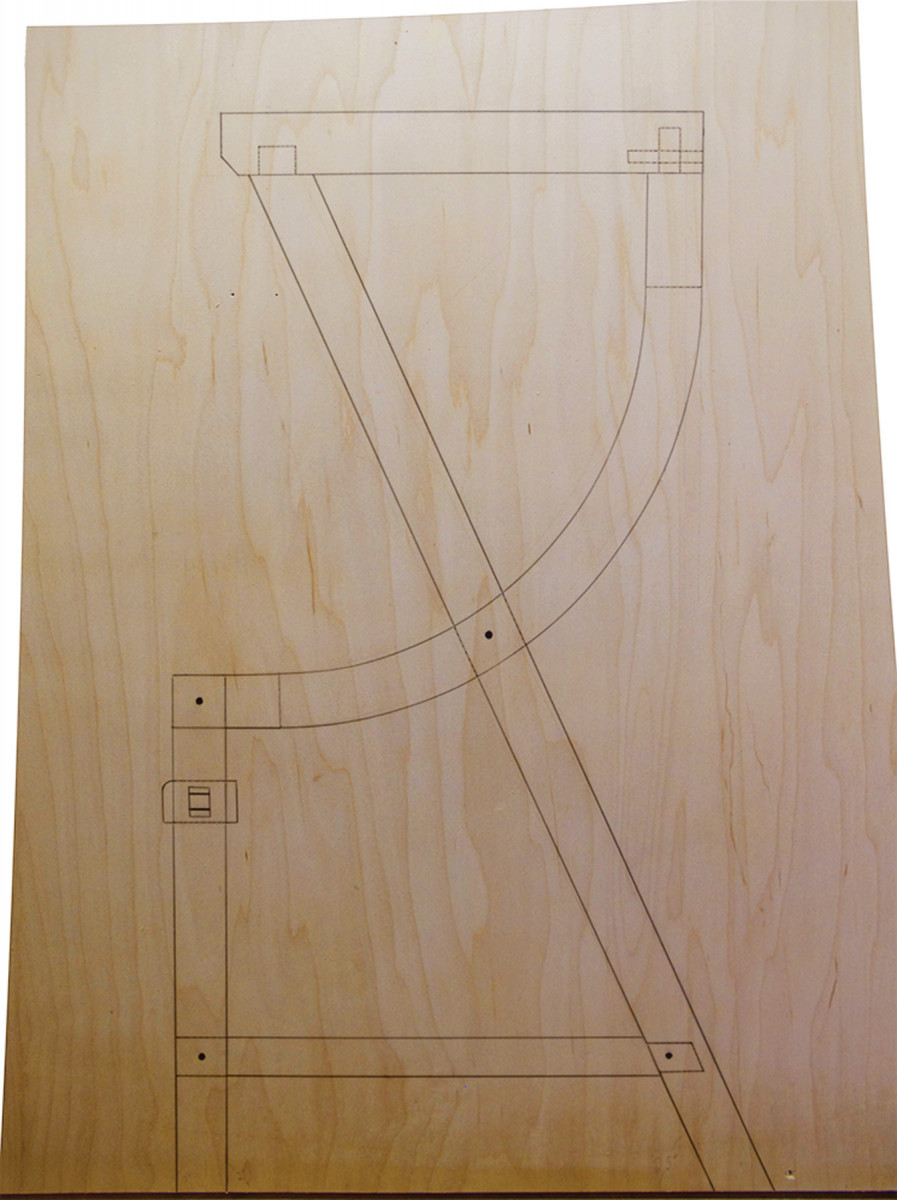
Drawing. A full-scale drawing helped me work out the joinery, but it also serves as a template for the final design.
I fiddled with the design by drawing the stool’s profile full-scale on some scrap plywood, playing with the proportions of components and joinery for each connection until I was satisfied. Then, I used the full-scale drawing as a template for the parts, and as I laid out some of the joinery.
I also made a plywood full-scale drawing of the bottom to use as a layout template, and a router jig to locate the handhold on the underside of the seat.
White oak was my choice for this project because it bends easily, so I knew it would work for the bent laminations on the legs. Also, I just like working with white oak.
Start at the Top
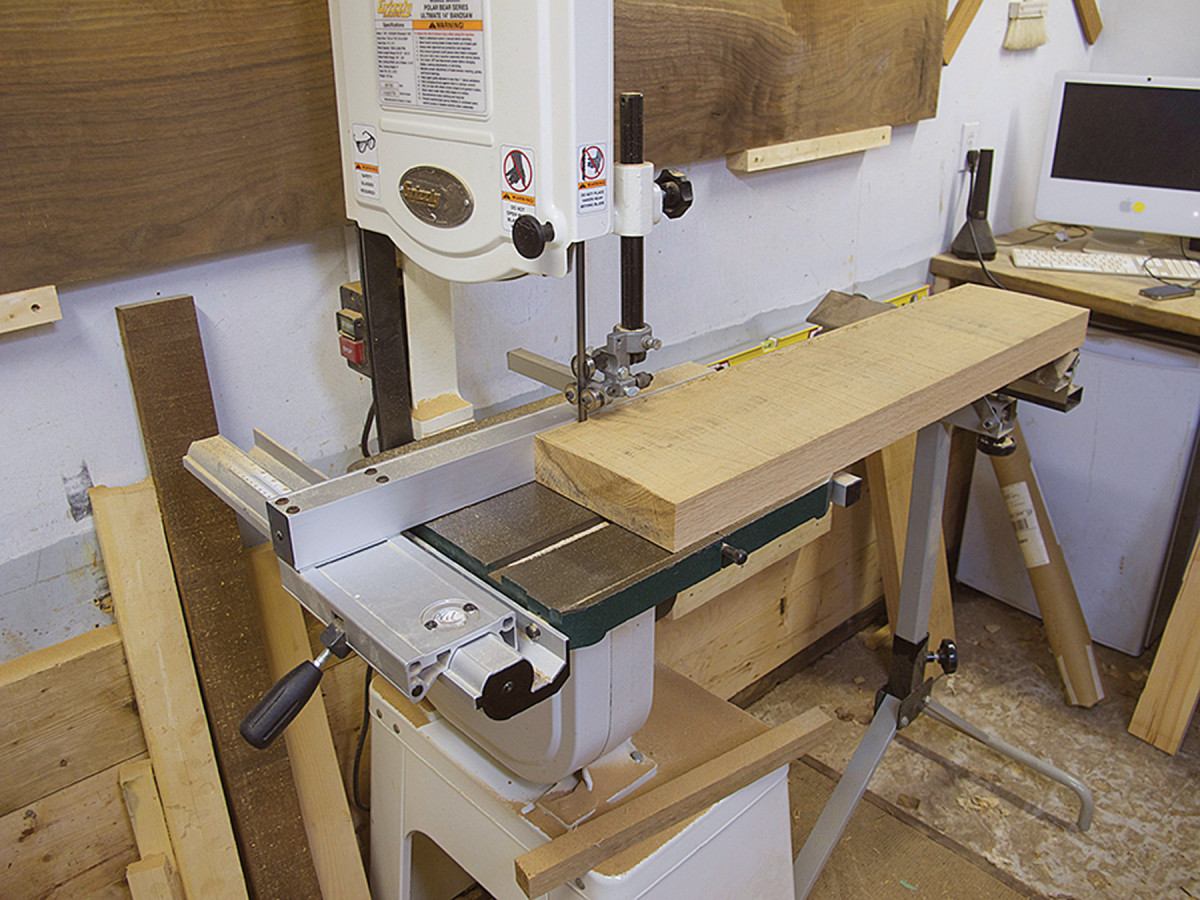
Lamination plys. I use the band saw to rip 26 1⁄8″-thick strips for the bent lams. The remaining stock is for the straight legs.
Start by laying out the parts on an 8″-wide x 8′ long 8/4 chunk of white oak and rough-cut all but the leg stock. For the legs, select one full-width piece of stock that’s at least 28 3⁄16” long (try to find a piece with a rift-sawn edge for the curved laminations). Working with an uncut piece makes it easier and safer to joint then cut the bent-lamination plies on the band saw.
The seat is 11″ wide, so if you don’t have a board wide enough you’ll have to glue up two pieces; try to slip-match them to provide the illusion of a single piece. Clamp and set that glue-up aside to dry while you work on the curved portion of the legs.
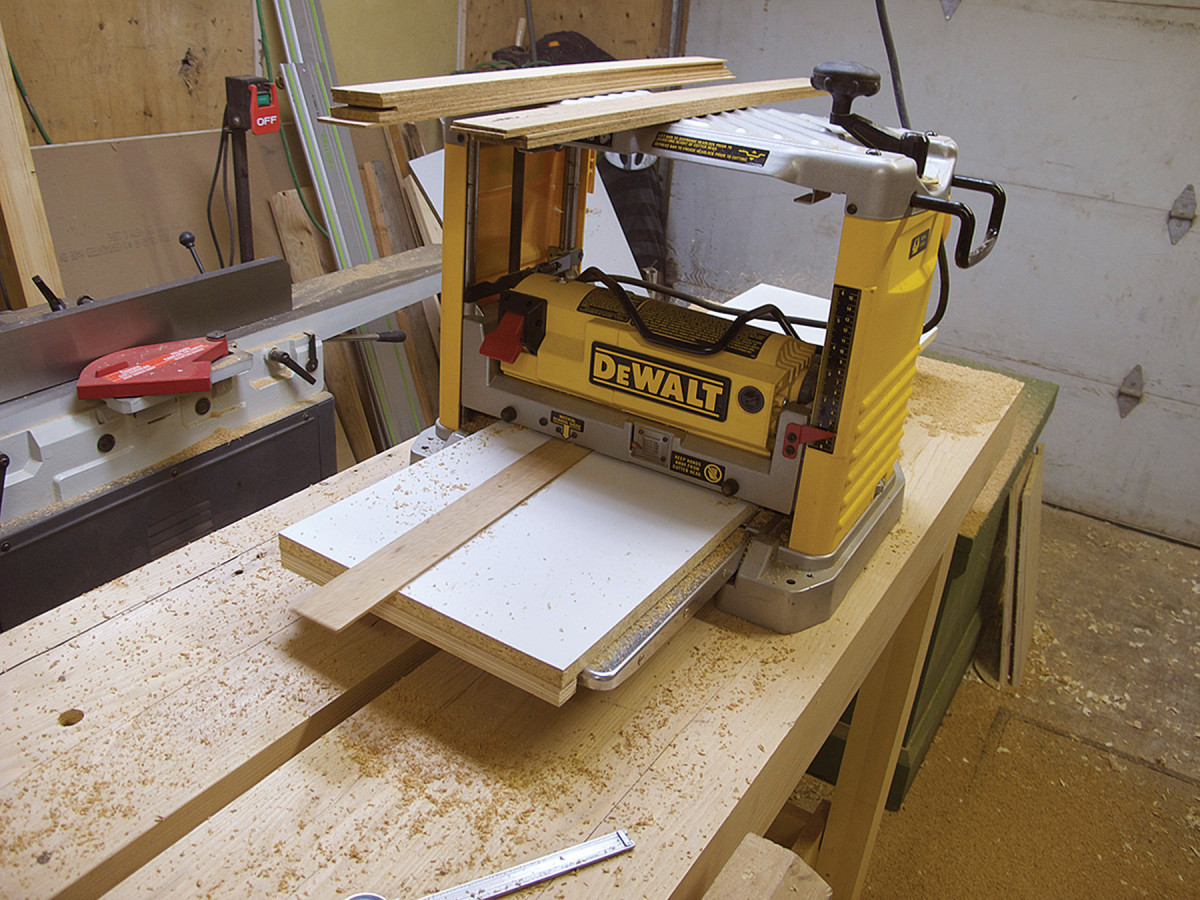
Now plane. If, like mine, your planer has a minimum depth of 1⁄8″, add a melamine or smooth plywood subbase to get to the required 3⁄32″ thickness.
With the leg material planed to 11⁄2” thick, draw carpenters’ triangles on the face so you can get the plies back in the same order after milling them.
Rip 1⁄8“-thick strips off the edge, jointing between each cut.
Cut 13 strips for each leg, then plane them to 3⁄32” to make up the 1 1⁄4“-thick bent laminations. The remaining wood is the stock for both of the straight legs.
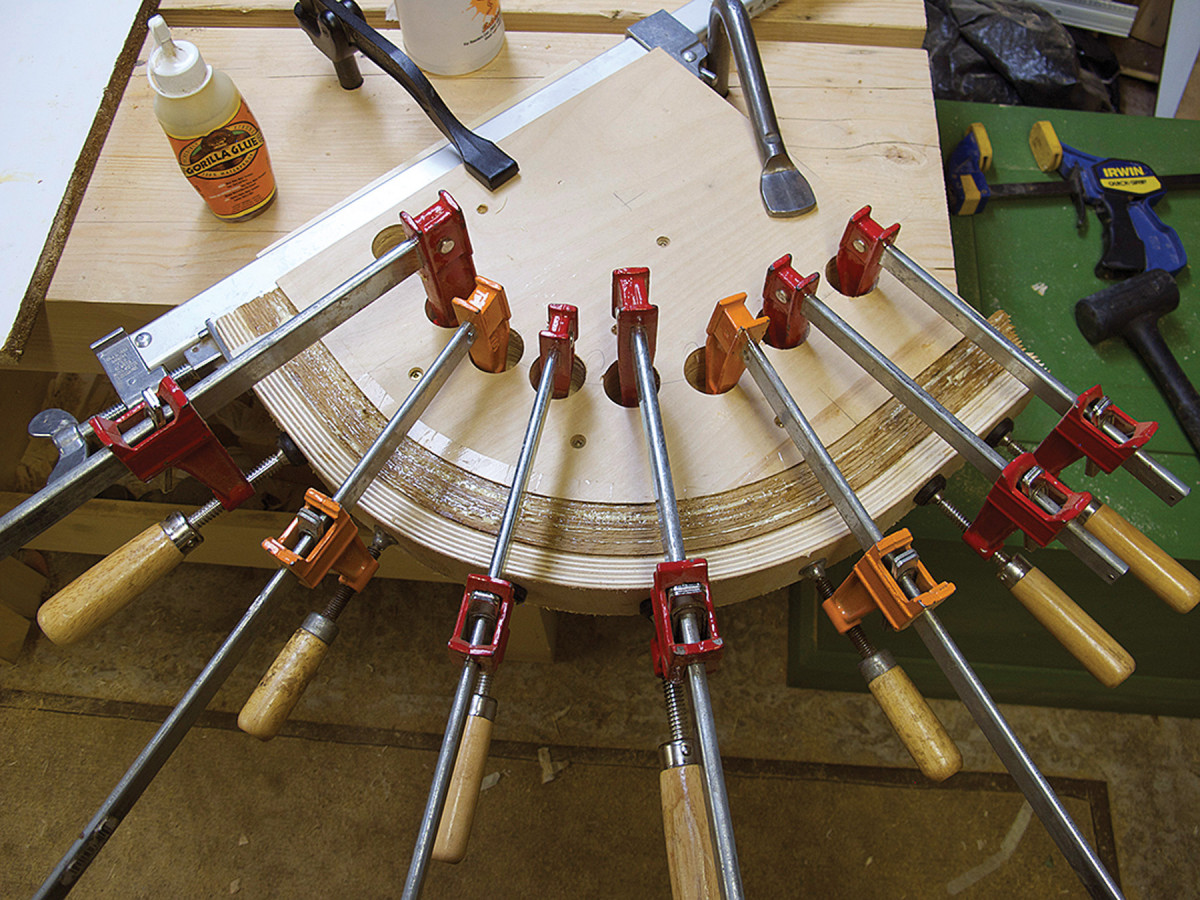
Work around. The first clamp to apply is the bar clamp across the end; then work around the form using F-style clamps to pull everything tight.
For lamination glue-ups, I’ve used both Old Brown Glue (liquid hide glue) and polyurethane Gorilla Glue. Both work well and have rigid glue lines, though I had a bit more squeeze-out to clean up with the Gorilla. I know many woodworkers prefer plastic resin glue for laminations because there’s no creep, but I didn’t have any on hand. (See “Bent Lamination Form” for how I construct a jig for this process – and you’ll need two forms, or time for two sessions of lamination bending.)
If you’re using polyurethane glue, spritz water onto both sides of the plies (not necessary with hide glue or plastic resin) then spread the glue on, stacking the plies together one at a time. With the triangles lined up, wrap masking tape around one end to make it easier to align the plies as you start adding the clamps.
Start with a big bar clamp at the end that will have the bridle joint, then work your way out from there with F-style clamps. Use your hip to push the plies toward the form as you add and tighten each clamp.
Bent Lamination Form
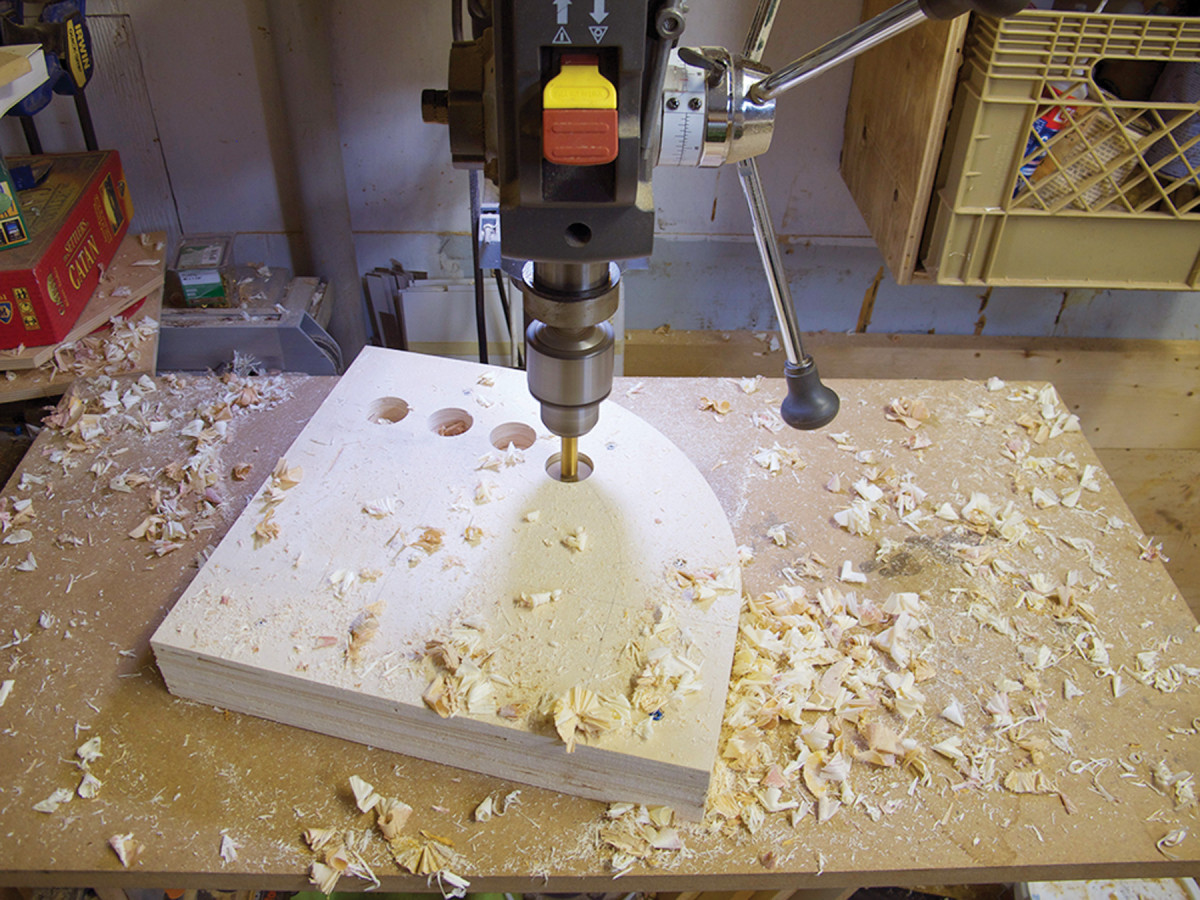
Clamp holes. After gluing up the bending form, use a Forstner bit to drill 11⁄4″ holes for the clamp heads.
For my bent lamination work, I build a form with the required radius (in this case, 8 7⁄16“) out of three layers of 3⁄4” plywood. For this form, the final length and width is approximately 15 x 11 1⁄2” – those dimensions needn’t be exact; you simply need to be able to fit the clamps.
First, lay out the radius on the corner of a squared-up piece of plywood then “Price is Right” the line by cutting as close to it as you can without going over (I use a band saw, but a jigsaw works, too). Clamp the plywood into a vise and use a spokeshave to fair the curve to your layout line.
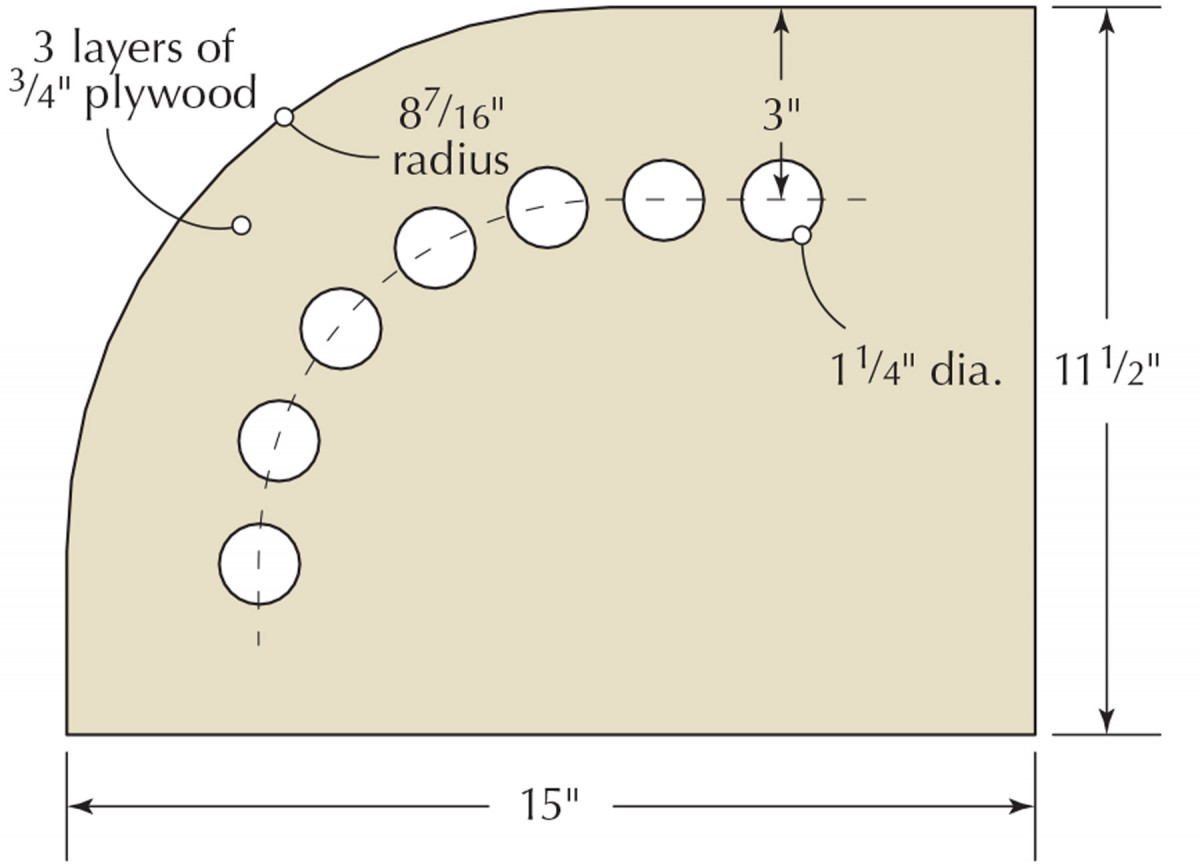
Form Plan
Trace the curve onto another piece of plywood, then cut close to that line and glue and screw it to the first piece, leaving a small amount overhanging the edges.
Use a pattern bit in a handheld router to match it to the first piece, then repeat this step once more to get to three layers in total.
Set a combination square to 3″ and draw a line in from the edge, then drill 1 1⁄4” holes centered on that line for the clamp heads.
Cut six 2 1⁄4“-wide strips of 1⁄8“-thick Baltic birch plywood to act as clamping cauls.
‘Curve Appeal’ Stool Cut List
No.ItemDimensions (inches)MaterialComments
t w l
❏ 1 Seat 1 5⁄16 x 11 x 14 1⁄2 White oak Bevel sides and front
❏ 2 Long legs 1 1⁄4 x 1 1⁄4 x 28 3⁄16* White oak Tenon one end
❏ 2 Curved legs 1 1⁄4** x 1 1⁄4 x 21 5⁄16 White oak Tenon one end
❏ 2 Stub legs 1 1⁄4 x 1 1⁄4 x 14 5⁄8* White oak
❏ 2 Side stretchers 3⁄4 x 1 x 12 7⁄16 White oak
❏ 1 Rear stretcher 3⁄4 x 1 3⁄8 x 11 11⁄16 White oak Dovetail both ends
❏ 1 Foot rest 1 x 1 3⁄4 x 12 5⁄8 White oak Tenon both ends
*Includes extra for leveling **Final size; start with 21⁄2” or thicker stock to account for lamination saw kerfs
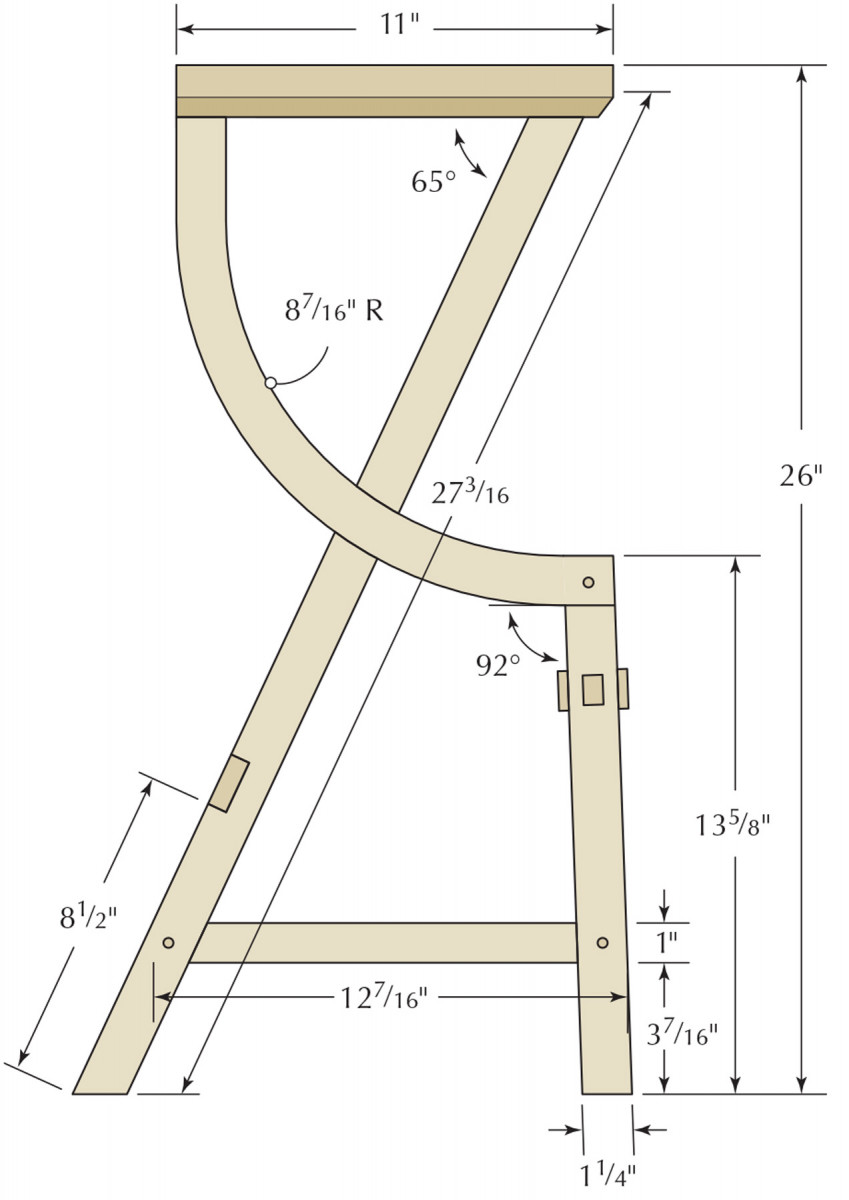
Profile
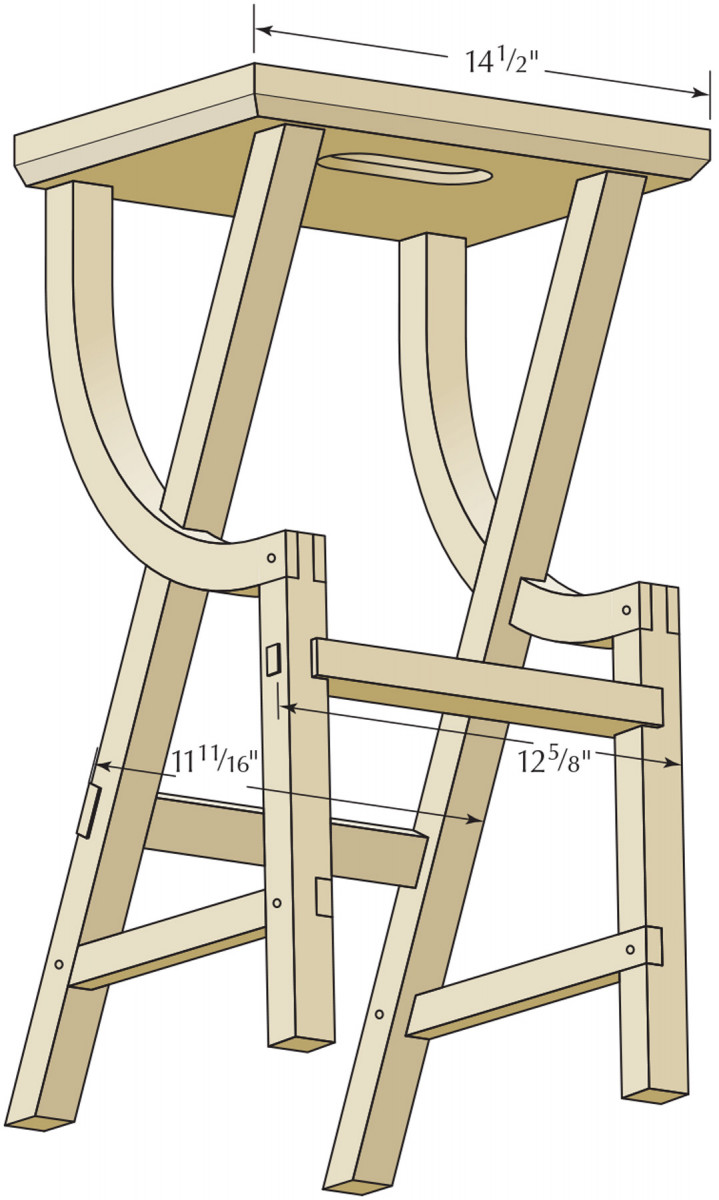
3D View
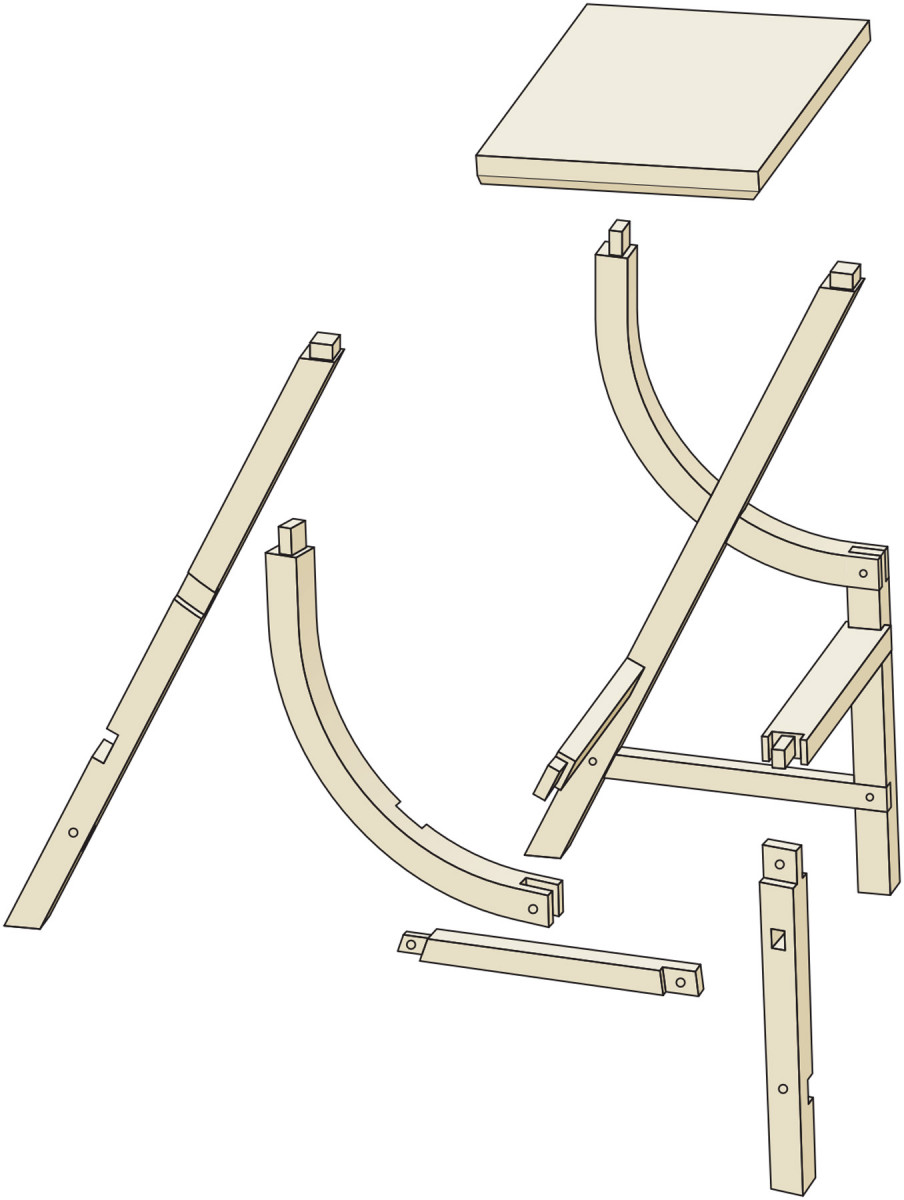
Exploded View
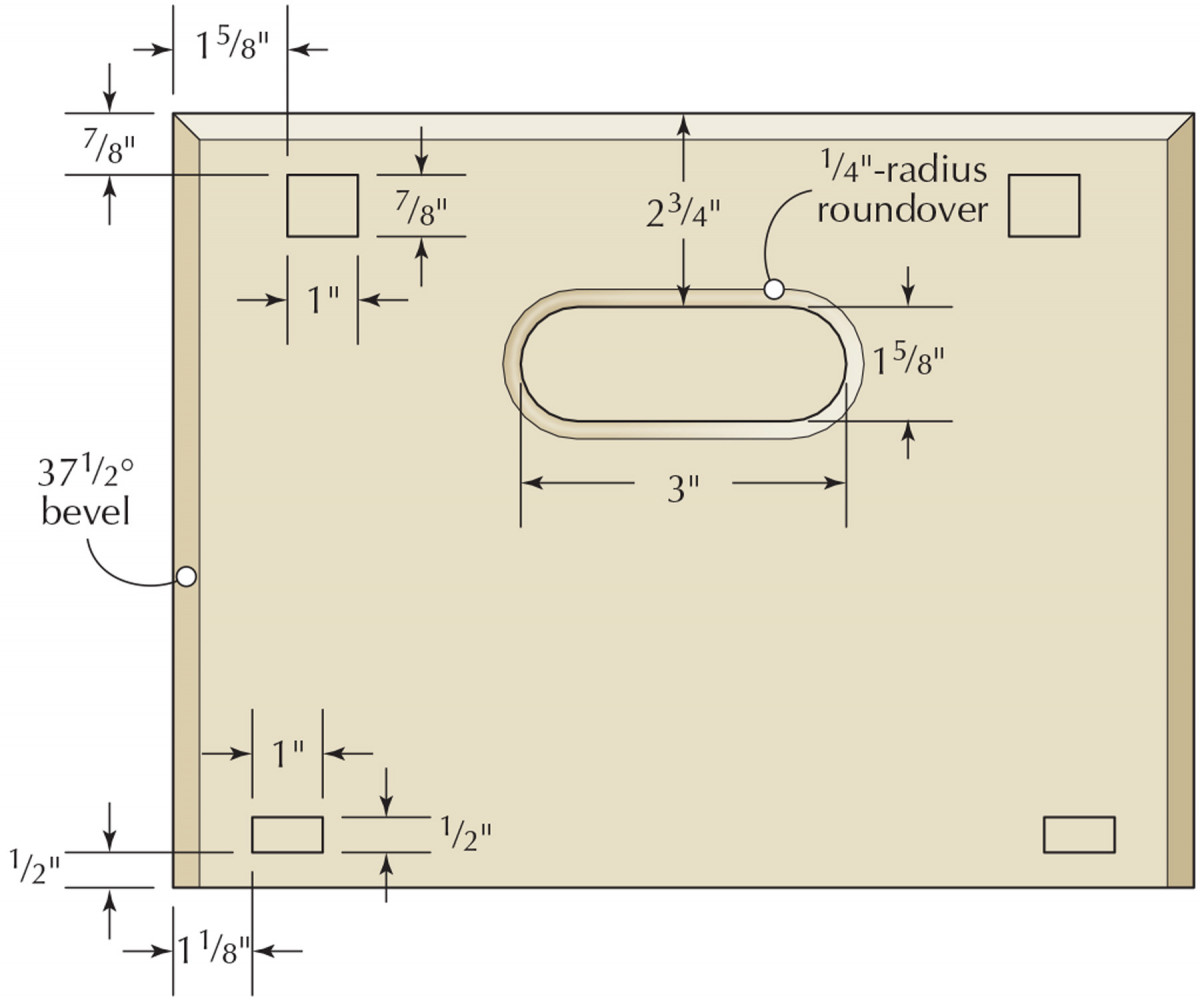
Seat Plan
Seat Mortises & Tenons
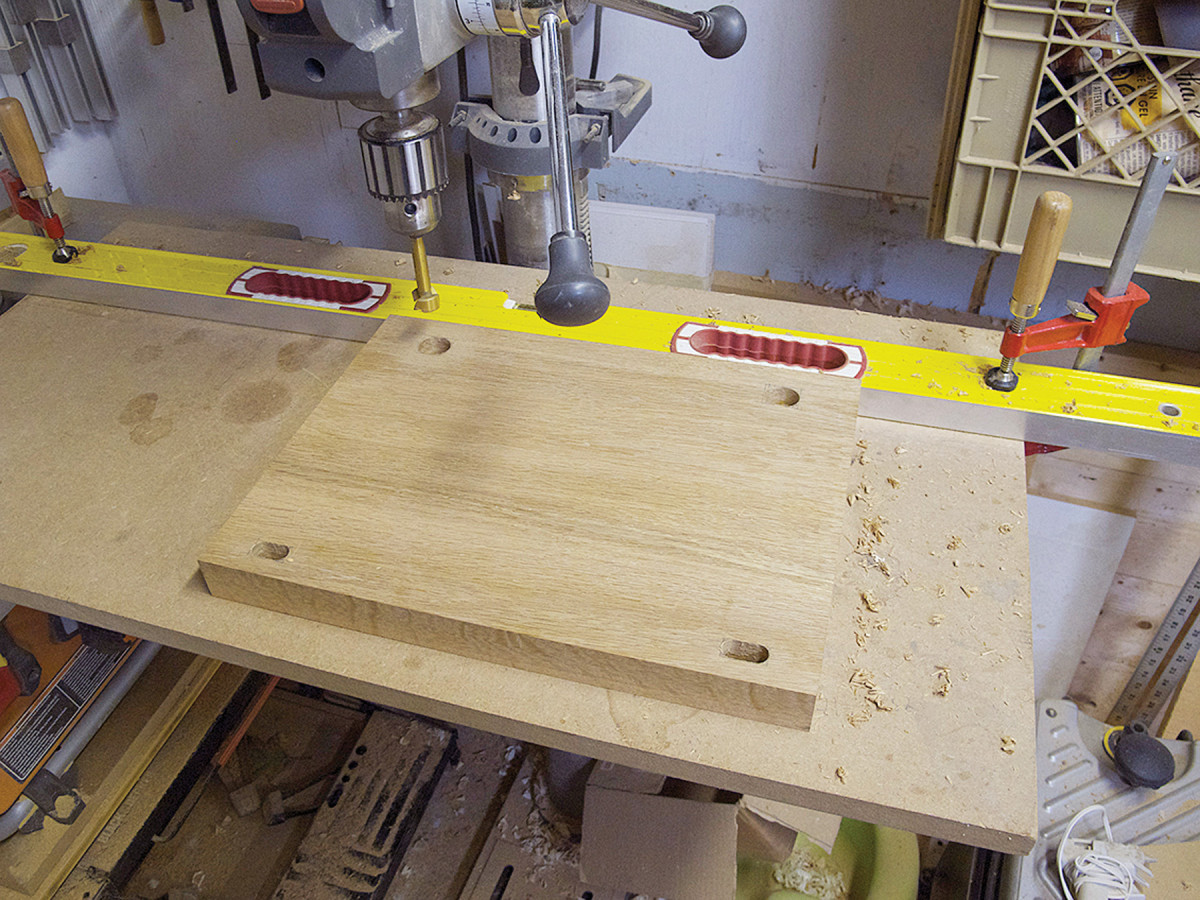
Waste away. A Forstner bit makes quick work of removing the bulk of the mortise waste on the underside of the top.
With the seat milled to final size, lay out the four mortises on the underside. The two at the back are 1⁄2” thick x 1″ wide, located 1⁄2” from the back edge and 11⁄8” from the sides; they get cut to a 1″ depth. The two at the front are 7⁄8” thick x 1″ wide, located 7⁄8” in from the front and 15⁄8” in from the sides; they get cut to a depth of 5⁄8“.
Remove most of the mortise waste with a Forstner bit at the drill press.
With the same setup, cut through-mortises on one edge of the plywood seat template, widening the one for the straight legs (at the front) to 31⁄2“. That way, you can use the same holes to lay out the half-lap locations for both the right and left leg intersections.
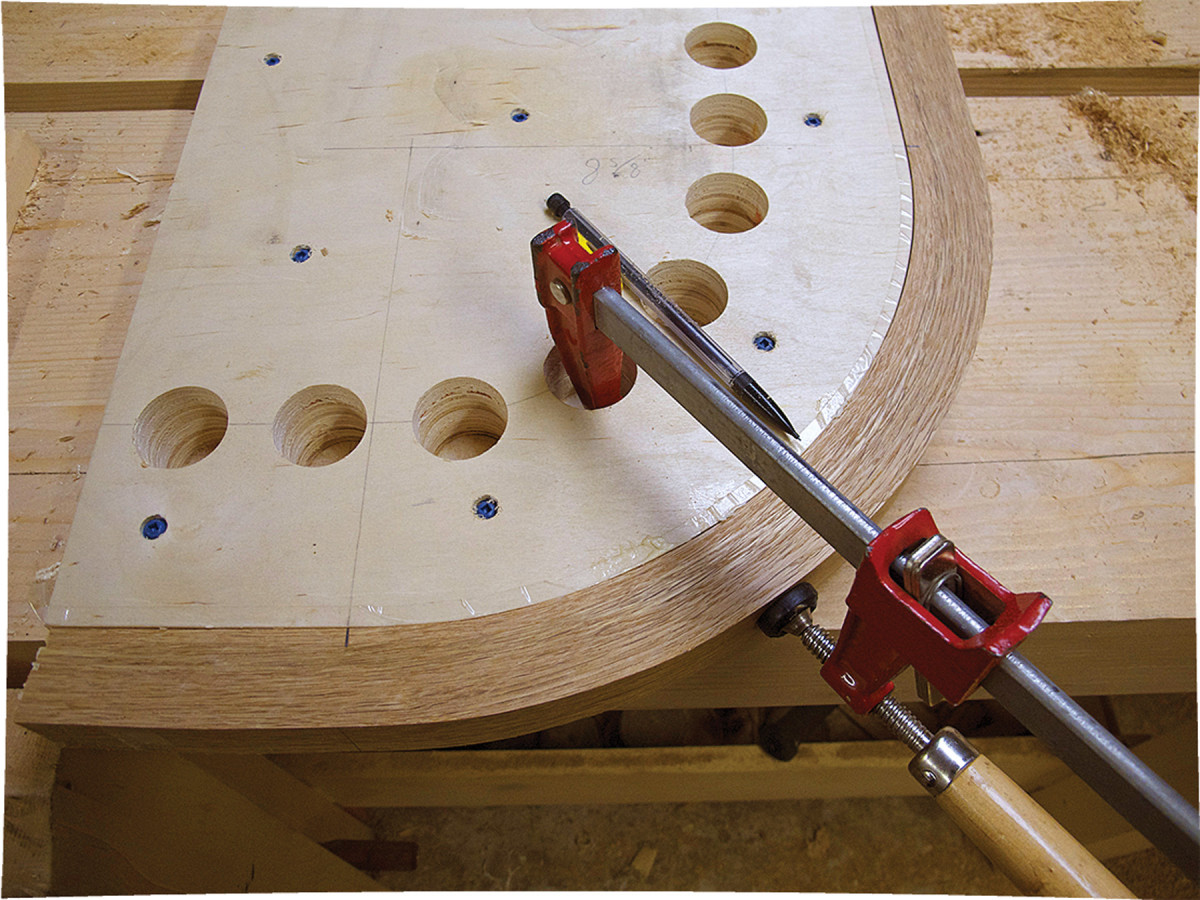
Reference mark. Before you take off the clamps, make a pencil mark where the flat starts.
Use a bench chisel to clean up the corners for the four mortises in the seat bottom and double-check to make sure they’re the correct depth.
Clean up the drilled mortise corners on your seat template, too.
Now mill the pair of straight legs to 11⁄4” square. Cut both ends to 25°, leaving an extra 1″ at the bottom to allow for leveling the stool after glue-up.
Before fully removing the clamps from the laminations (wait at least 24 hours), mark the edge where the flats start so you can easily match up the pair.
Now transfer the marks from the edge to the inside faces so you don’t lose them when the edges are jointed.
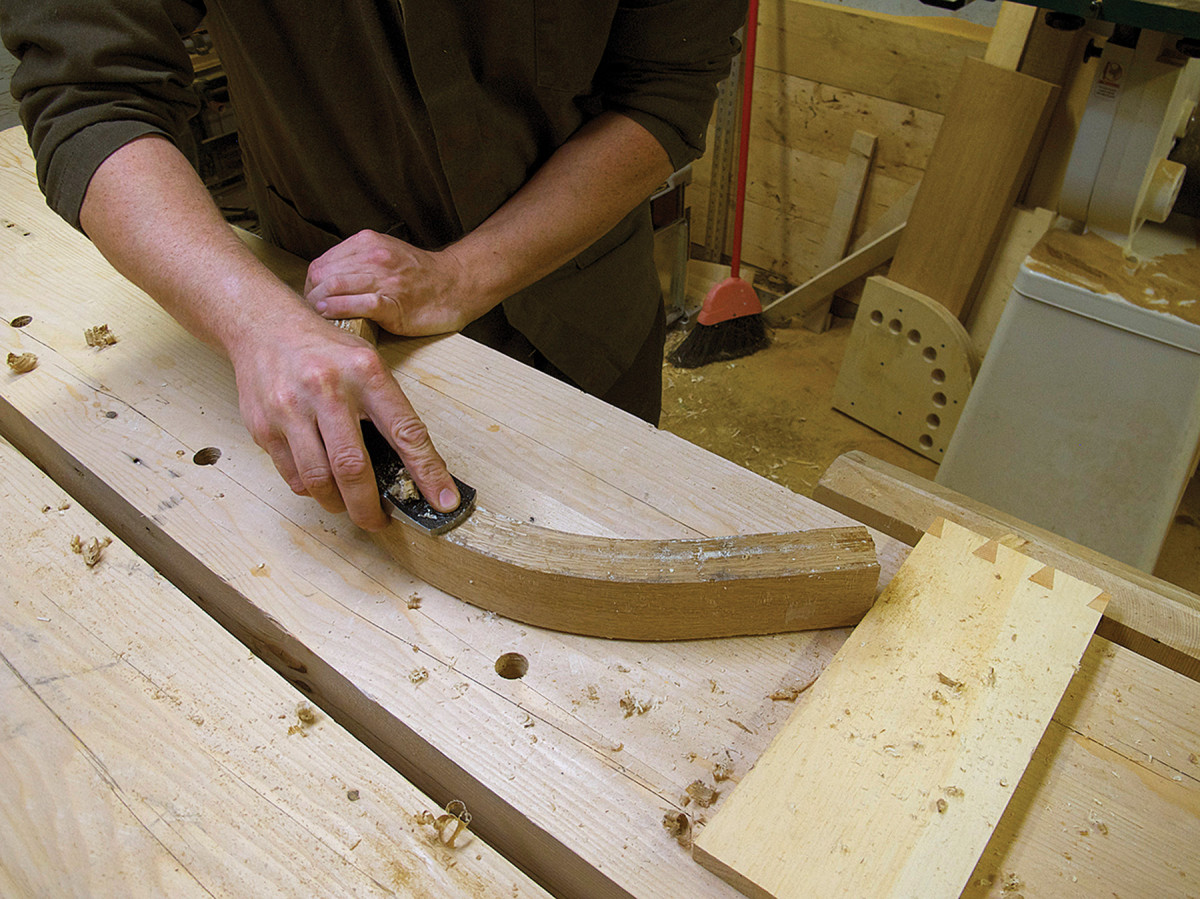
Cleanup. A small block plane makes quick work of cleaning off glue squeeze-out.
I use a block plane to clean up the foamy squeeze-out from the Gorilla Glue before jointing the edge with my power jointer.
Now edge-joint the bent laminations. Make sure the convex side is riding flat against the fence and confirm that the edges are square before planing them to a final thickness of 11⁄4“.
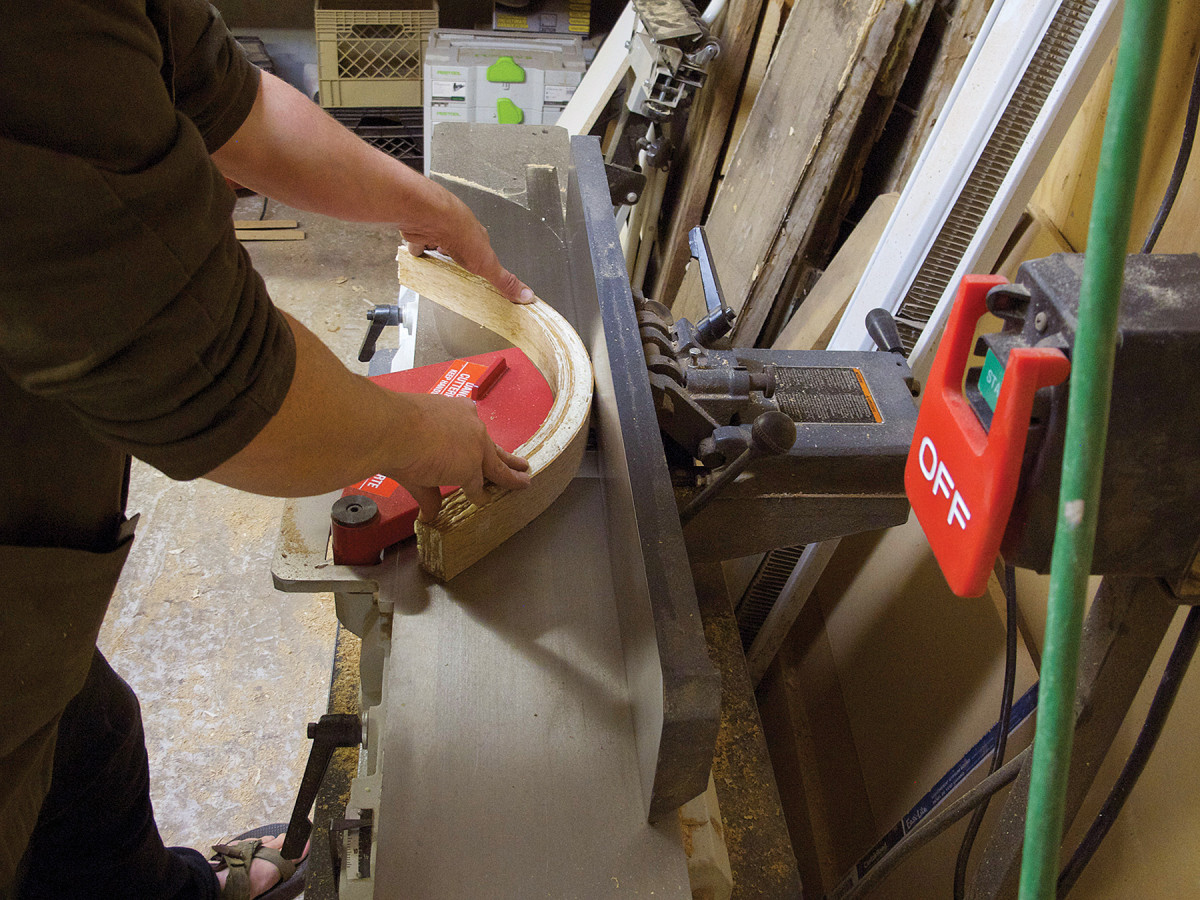
Joint. With the outside edge riding on the fence, joint the laminated glue-ups to 11⁄4″ thick.
Line up the marks indicating the starts of the flats on the bent laminations, then clamp and screw the ends together in the offcut area.
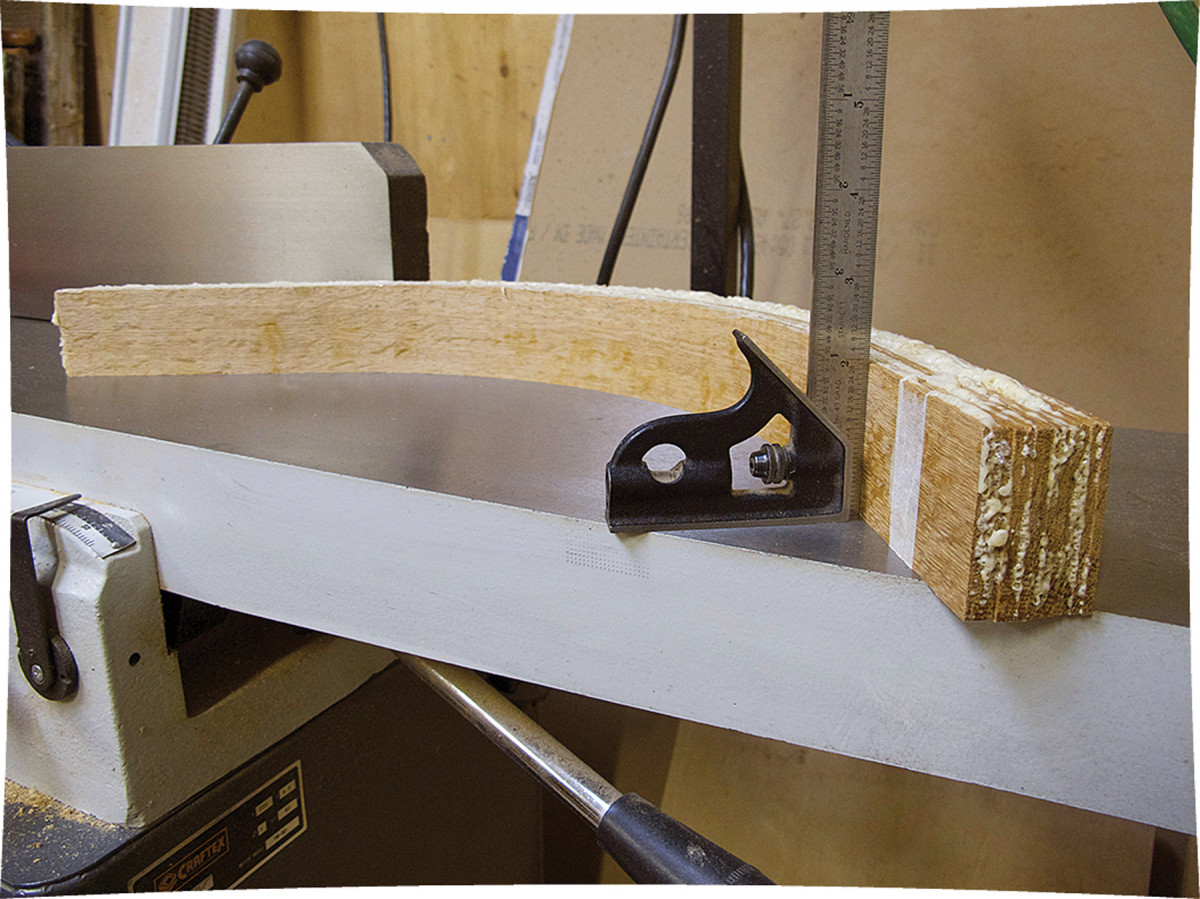
Make sure the pieces are square.
As is to be expected, I had a small amount of spring-back when I pulled the bent legs out of the clamps. To fix this, I simply used a block plane and spokeshave to remove a small amount of material where the front stub leg attaches, bringing the piece back into line with my template.
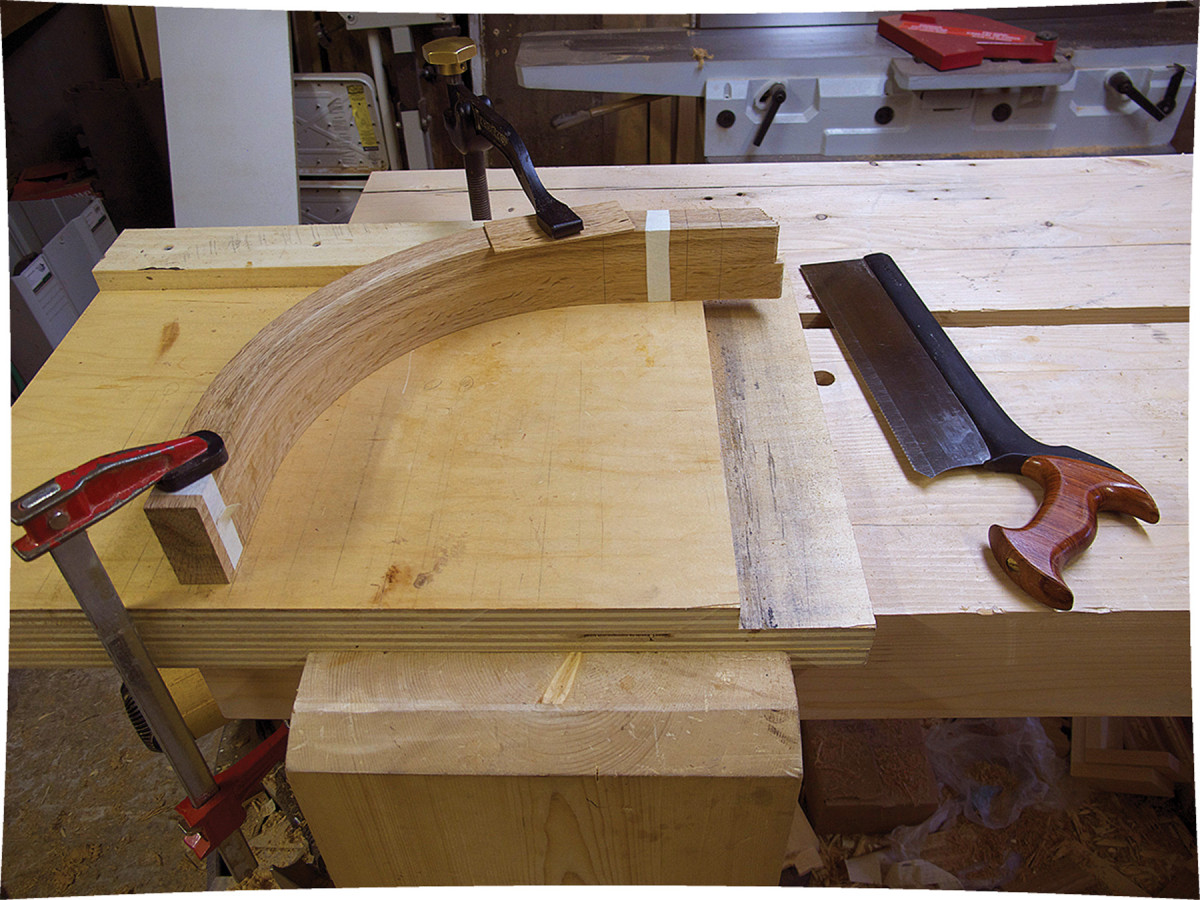
Taped up. Tape helps to hold the bent laminations together as you cut them to length.
With everything squared up, place the curved bits on the full-scale drawing and, with a marking knife, mark the locations of the 1⁄2“-thick x 1”-wide seat-tenon shoulders. Use a square to help carry the marks around both parts.
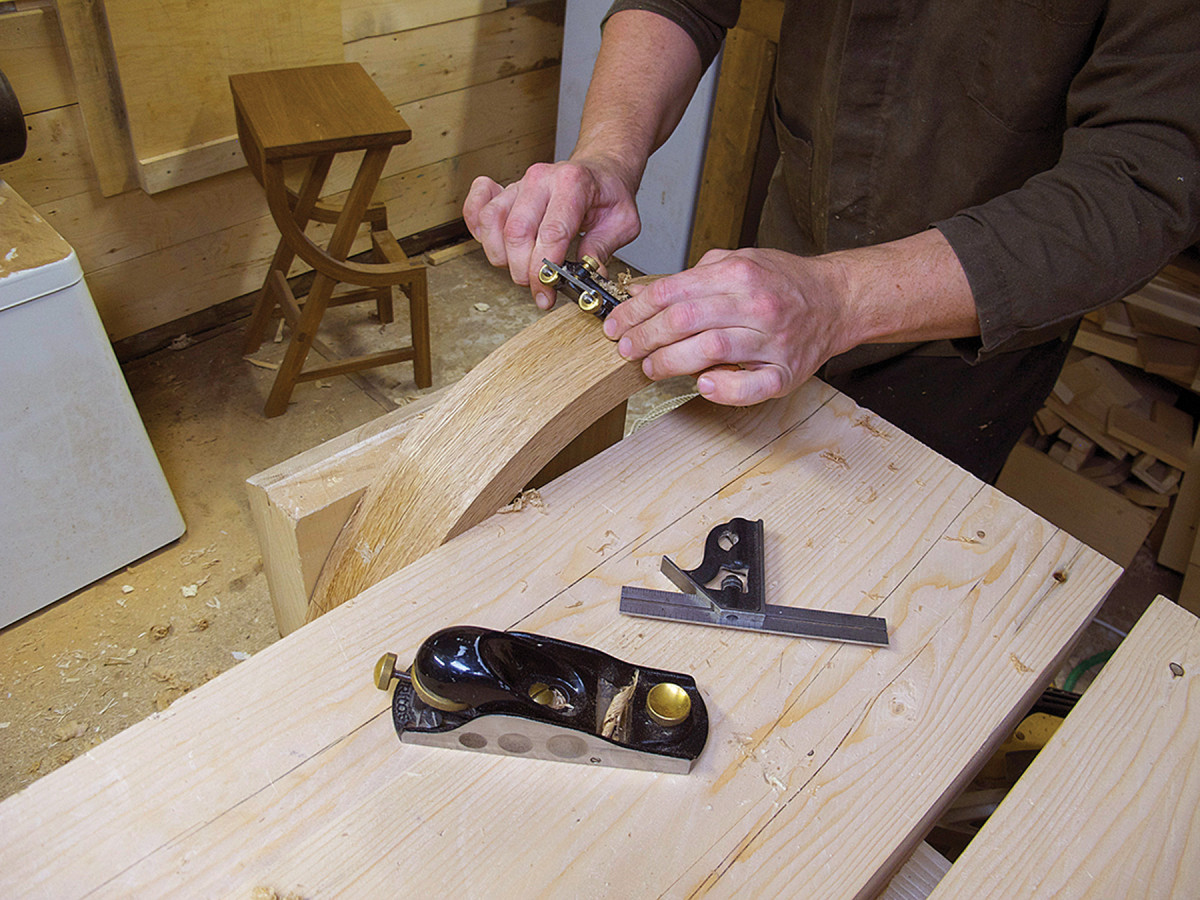
Small adjustments. With only minor springback at the joinery surface, it was an easy call to remove a small amount of material to flatten the joinery surface. Such minor adjustments are invisible in the finished piece.
For the female part of the bridle joint, knife in the shoulder of the joint on the bottom outside joinery surface, then use a bevel gauge set to 2° to lightly transfer that up the sides; use a square to mark the shoulder on the inside face of the curve. I use a pencil to mark the ends of the part, again wrapping around the pair.
I cut the bent laminations to length using a handsaw with the help of a bench hook, holdfast and clamp. Before cutting, wrap some tape around them to hold the pair together after the screwed ends are cut free.
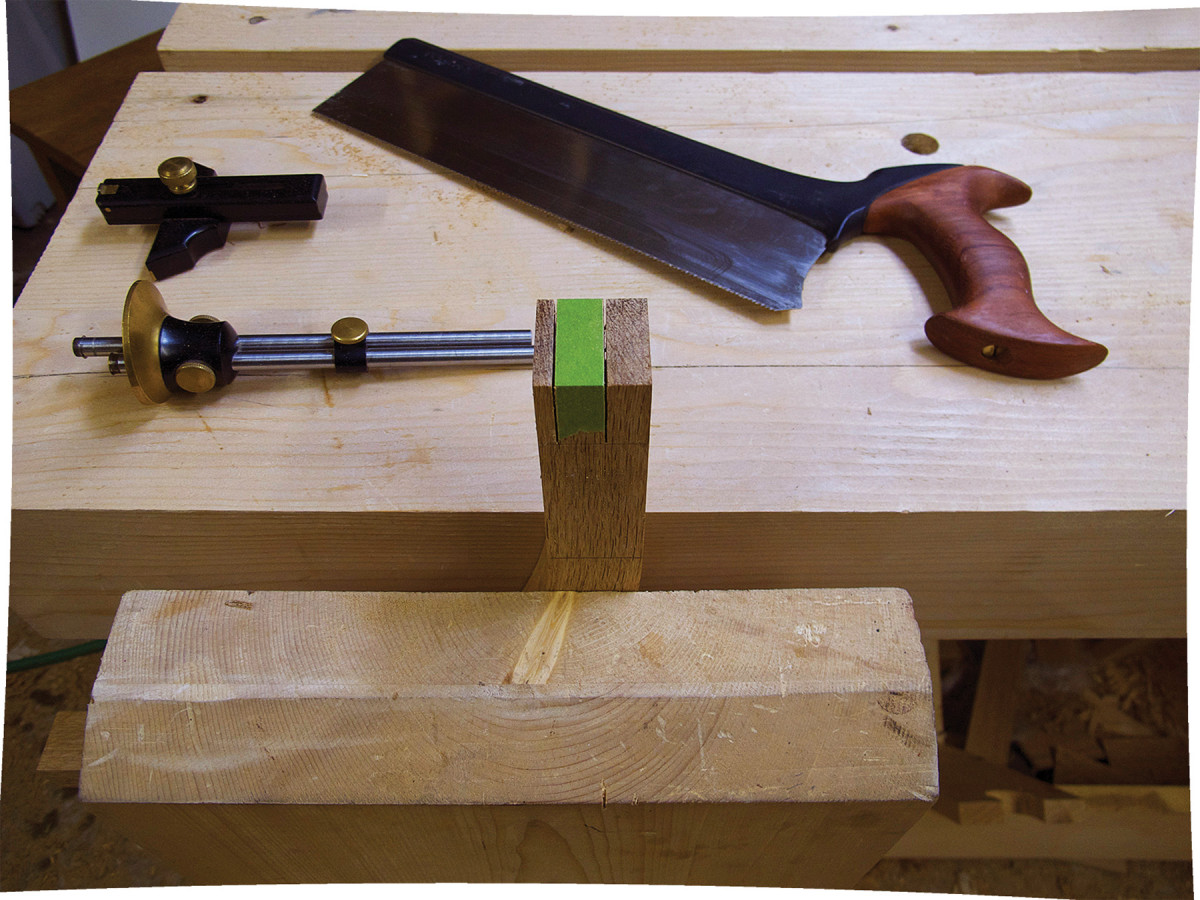
Cheeky. Colored tape helps me see and cut to my knife lines.
With the bent laminations and straight legs cut to size, and the tenon shoulders laid out, lay out the tenon cheeks on the top of the bent lamination. I find it hard to see gauge lines on white oak, so sometimes I put some green tape on the end grain before layout. When I gauge the lines, it cuts the tape; that makes the cutline easy to see.
For the straight-leg layout, use the full-scale drawing to locate and mark the tenon shoulders using a square and a bevel gauge set to 25° to wrap the line around. Show the legs to their seat mortises to mark out the cheeks. I use a square and marking knife to mark those lines from the end to the shoulder line.
I cut these with a handsaw then fit them to their mortises.
Join Stub Legs to Curved Legs
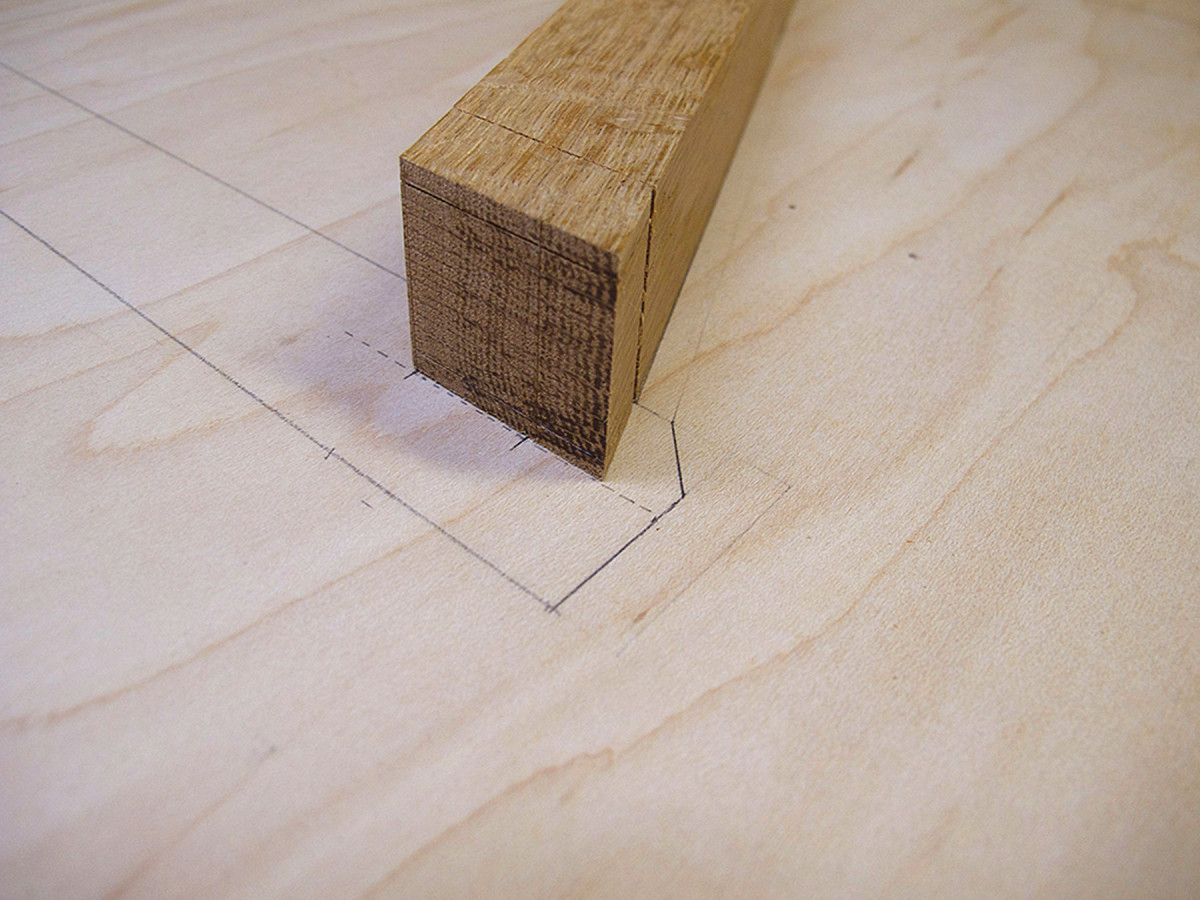
Straight-leg tenon. Use the full-scale drawing to locate the layout for the tenons atop the straight legs.
With the stub legs milled to 1 1⁄4” square x 14 5⁄8” long (that includes an extra 1″ for leveling), use a marking gauge set to the thickness of the curved legs (1 1⁄4“) to mark the square shoulder for the bridle joint on the backside of the stub legs.
Set your bevel gauge to knife in the angled shoulders of the male portion of the bridle joint, then square across the front.
To lay out a bridle joint, I like to use a dual-wheel marking gauge with both cutters set to the same measurement. With one bevel facing in and one bevel facing out, I can use it to lay out both the male and female parts of the joint with the same gauge. Use the stem with the cutter’s bevel facing the gauge’s head to lay out the male portion of the joint. Use the other stem to lay out the female portion of the joint. This gauge set-up will ensure accurate knife lines.
Lay out the cheeks using the gauge set to 3⁄8” – leaving 1⁄2” in the middle – then cut to those lines on the band saw or with a rip saw, depending on your preference. I cut the shoulders with a crosscut saw and used a coping saw to remove the middle waste. Clean up to the lines with a chisel.
To glue up this joint, make a curved block screwed and glued to a 1⁄8” plywood caul with the end cut square and in line with the joint. With a couple of notched cauls, glue up the joints with liquid hide glue. When the glue is dry, drill a 1⁄4” hole in the center of the joints, then pin them with a riven oak dowel.
Dovetailed Stretcher
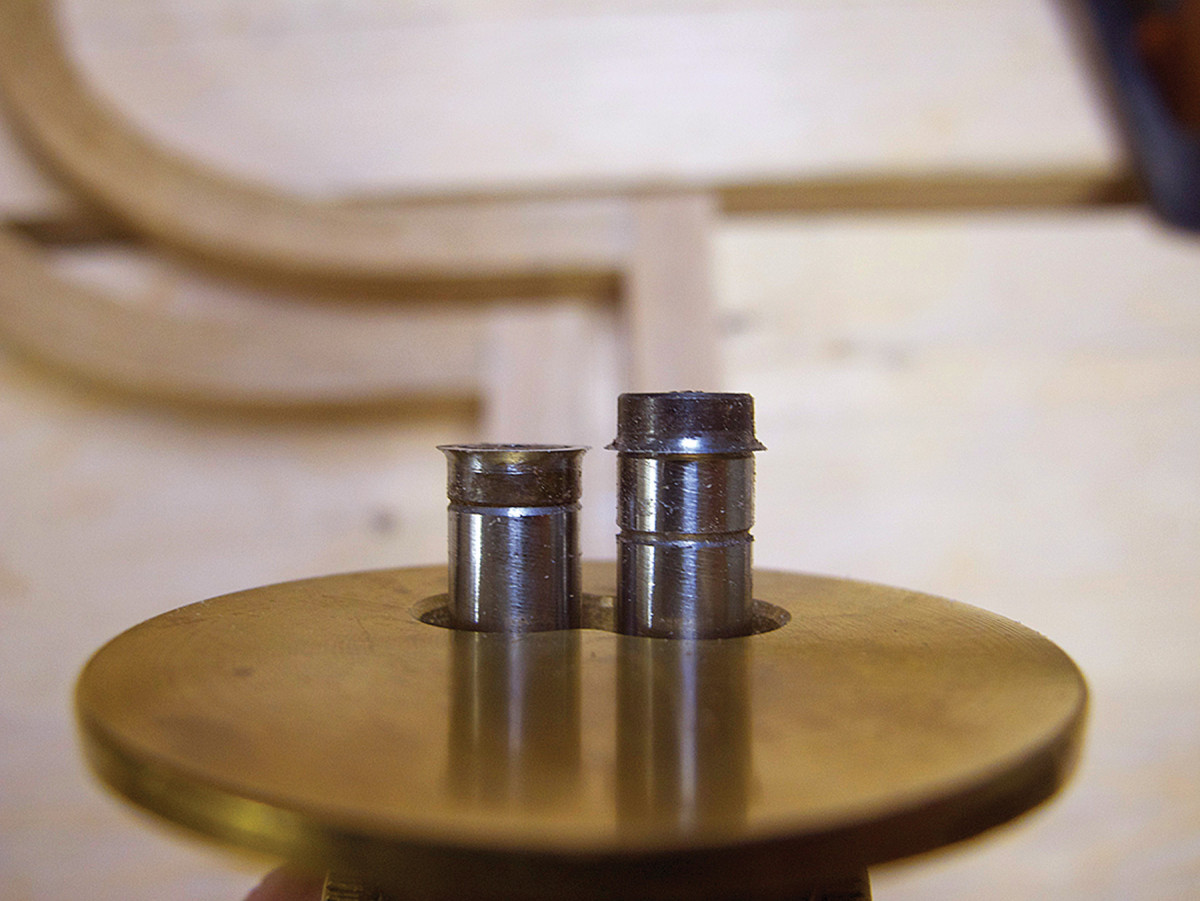
Dual cutters. Set both blades to the same measurement and use one gauge for the mating parts to ensure accurate lines.
For the dovetailed rear stretcher, cut a 1⁄4” deep rabbet, 1 5⁄16” from the end of the stretcher. This makes it easy to register the stretcher to the leg as you mark the baseline for the second tail. Plus, it reduces the thickness of the tail, so its socket is 1⁄2” deep to maintain the legs’ structural integrity.
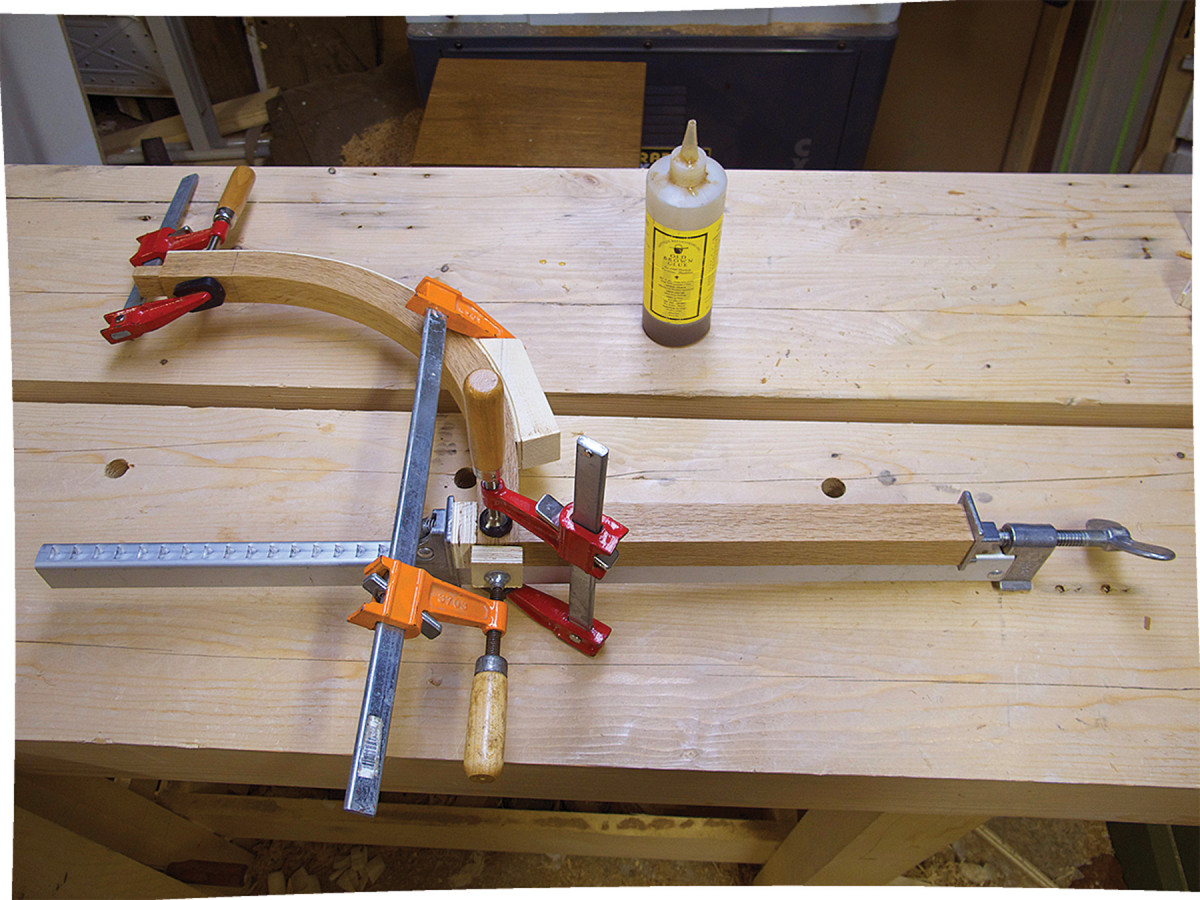
Bridle joint glueup. A curved caul with a “tail” that registers along the length of the curve will help you clamp this joint together as the glue sets.
Then, with the straight legs in their seat mortises, butt the rabbeted shoulder of the stretcher against its leg and mark the other shoulder with a knife.
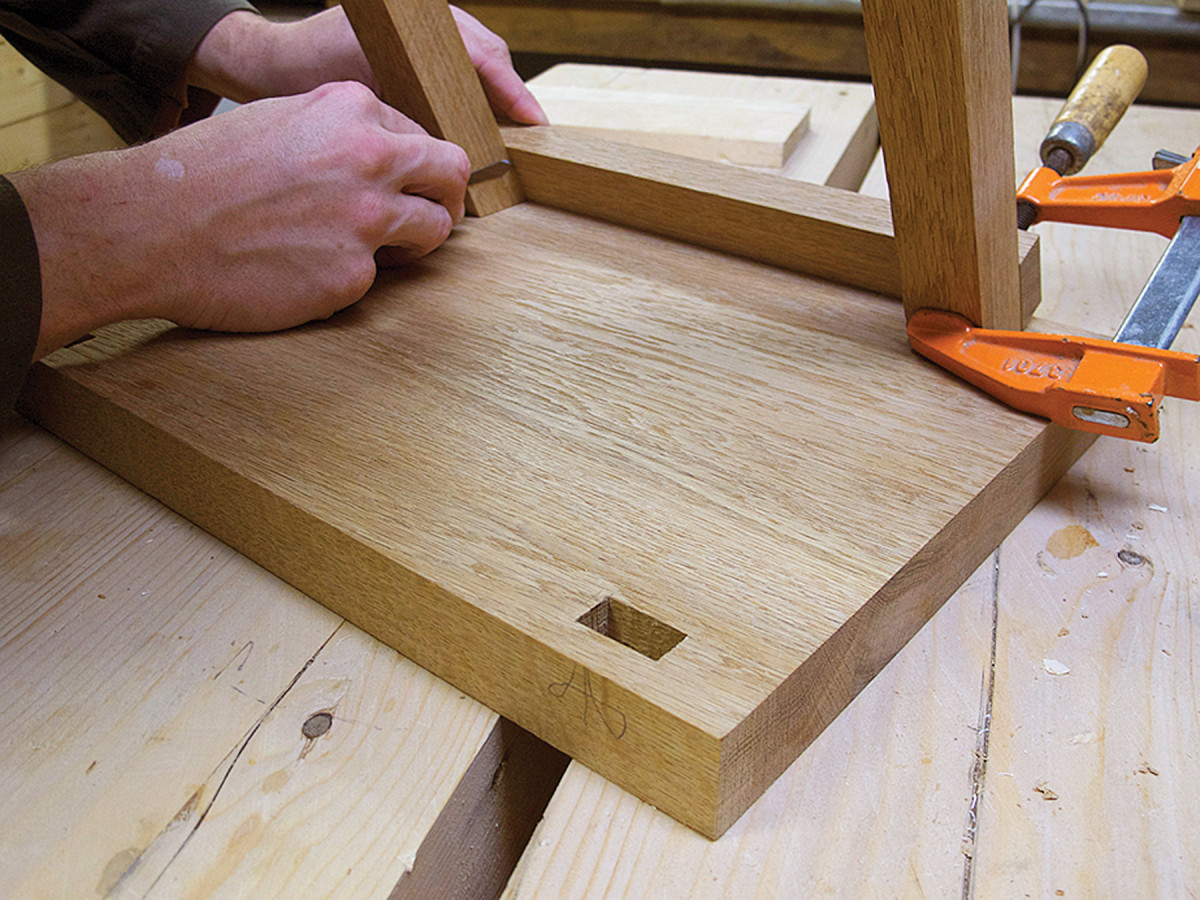
Mark the stretcher. A rabbeted shoulder on one end makes it easy to register the stretcher against the leg as you mark the shoulder location at the other end.
Mark that shoulder and again cut a rabbet. Now lay out and cut the dovetail pins (I like a 10° slope). Locate the stretcher at its final location across the straight legs, then scribe the sockets and mark the baselines on the legs.
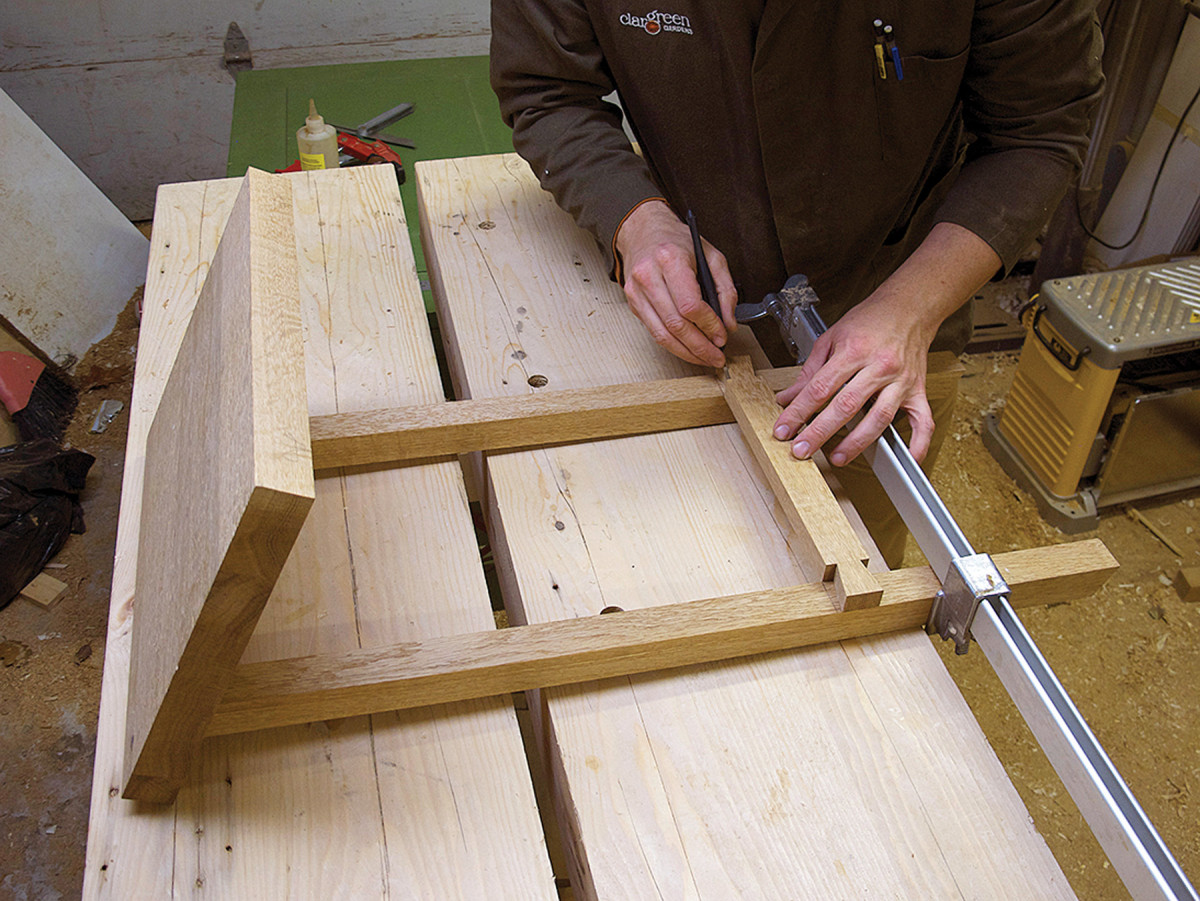
Sockets. Place the stretcher in its final location, then use a clamp across the legs to pull them tight to the rabbeted shoulders. Mark the dovetail sockets on the legs.
Remove the stretcher, cut the edges of the socket and add a few more kerfs in the waste to make it easier to chisel the waste out. After removing the bulk of the waste with a chisel, clean up to the baseline with a router plane. Fit the joint, but don’t glue it up just yet.
Leg Half-lap Joints
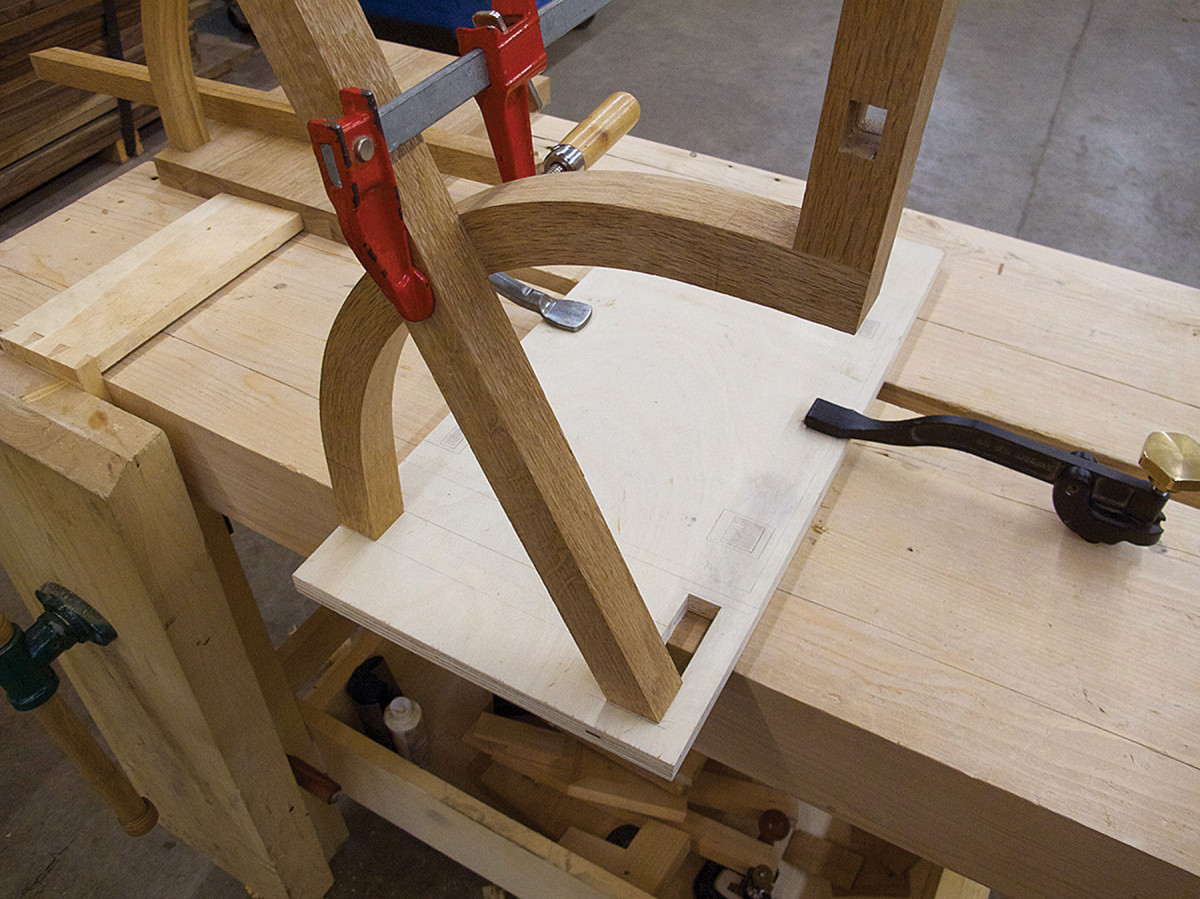
Lap layout. With the legs registered in the seat layout jig, clamp across where they meet, then mark the shoulder locations on each piece for the half-lap joint.
Using the plywood seat template, place the bent-lamination tenon into the tight-fitting mortise and place the straight leg into the slotted mortise, making sure the shoulders are tight.
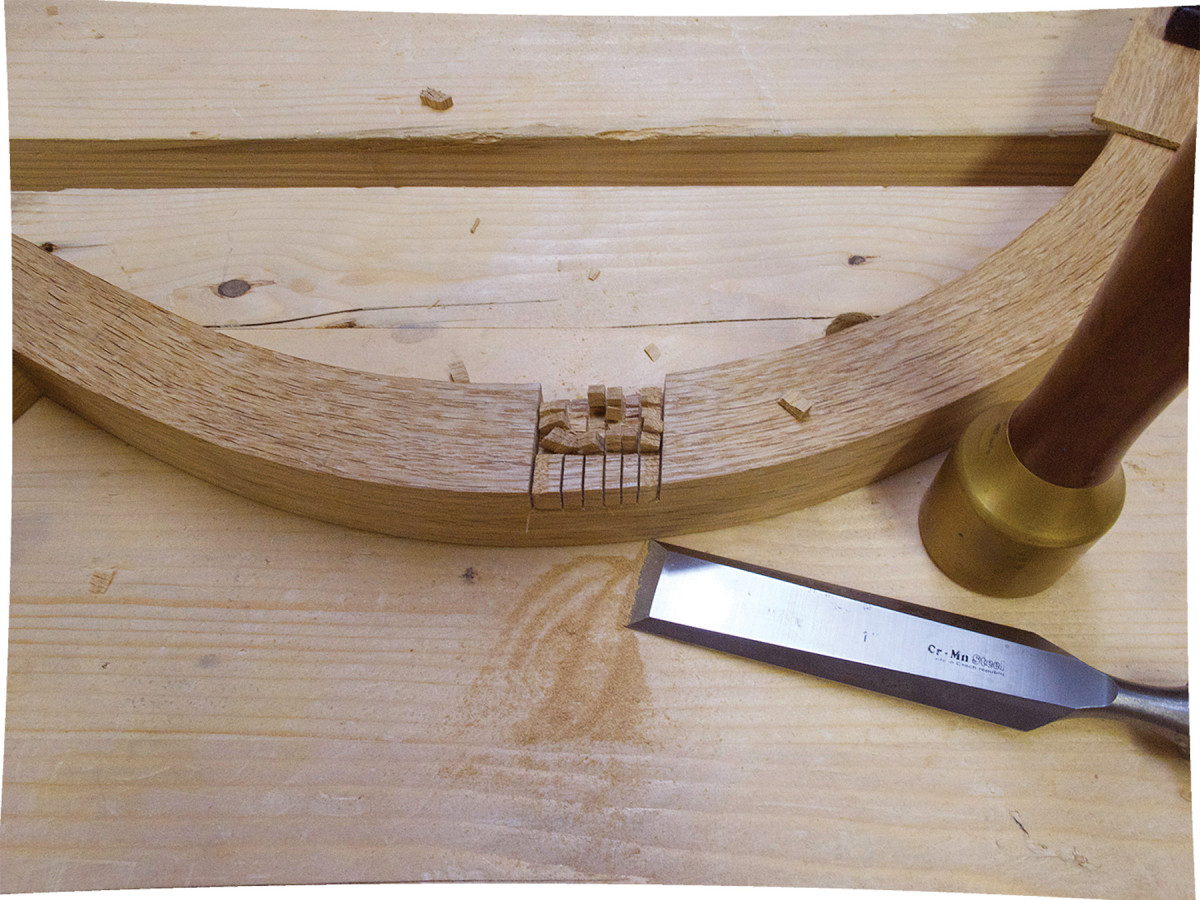
Half-lap waste. After cutting a series of kerfs with a handsaw, I use a chisel to remove the bulk of the half-lap waste. A router plane cleans things up for final fitting.
Place a clamp across where they meet. Lightly mark out the shoulders of the half-laps, then extend the lines down the edges and use a marking gauge set to 3⁄8” to mark the baselines.
I use a wide chisel to deepen and notch the straight shoulders on the curved legs; that creates a shoulder that serves as a guide for a perfect saw cut. On the straight legs, remove the bulk of the waste and pare with a small chisel to establish the curved shoulder. Use a router plane to clean up the floor on both halves.
Footrest: Wedged Tenons
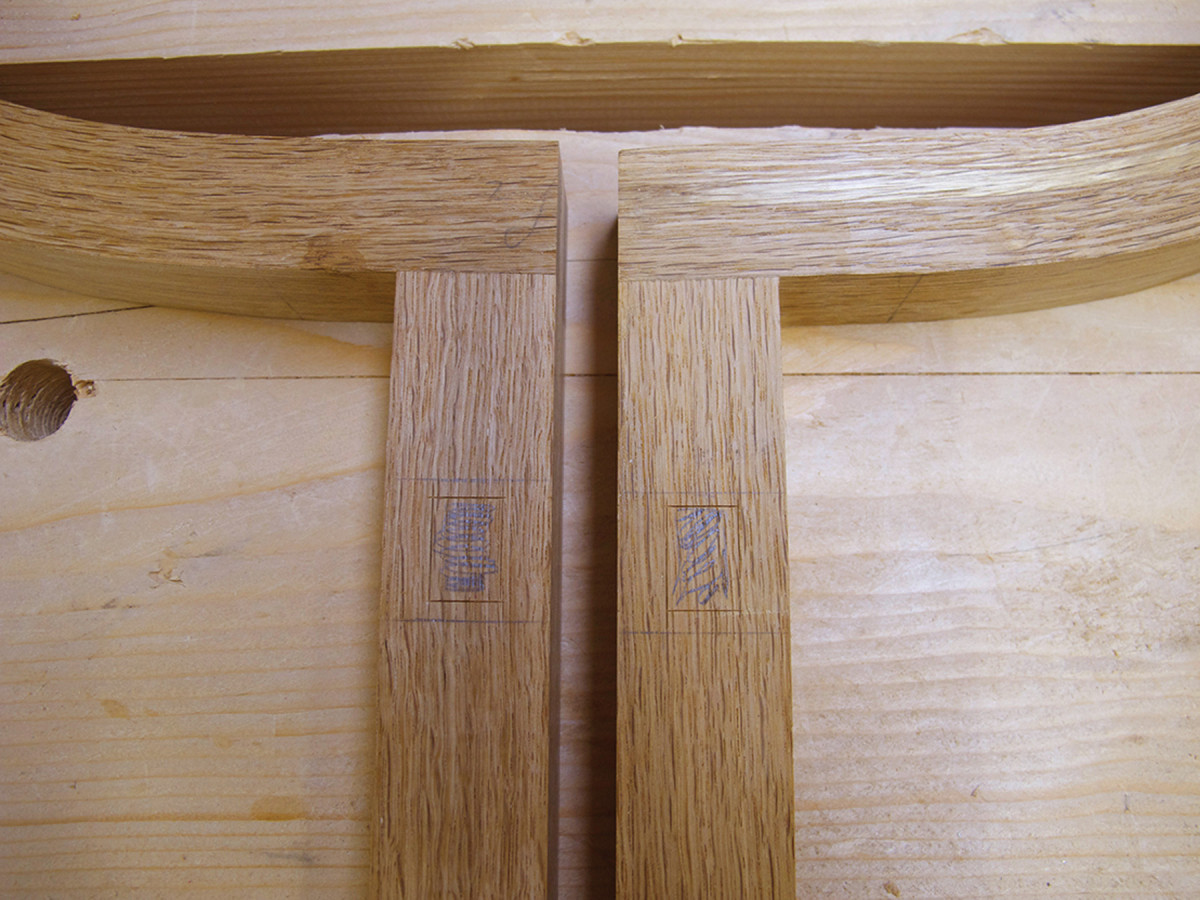
Through-mortise layout. Here’s the marked layout for the footrest’s mortises.
To lay out the through-mortises for the footrest’s wedged tenons, align the stub-leg tops and clamp them together.
Now mark 3⁄4“-long x 1⁄2“-wide through-mortises, 2 7⁄8” down from the top of the stub legs. I mark them on one face, then lightly wrap the lines around to the opposite face to ensure they align.
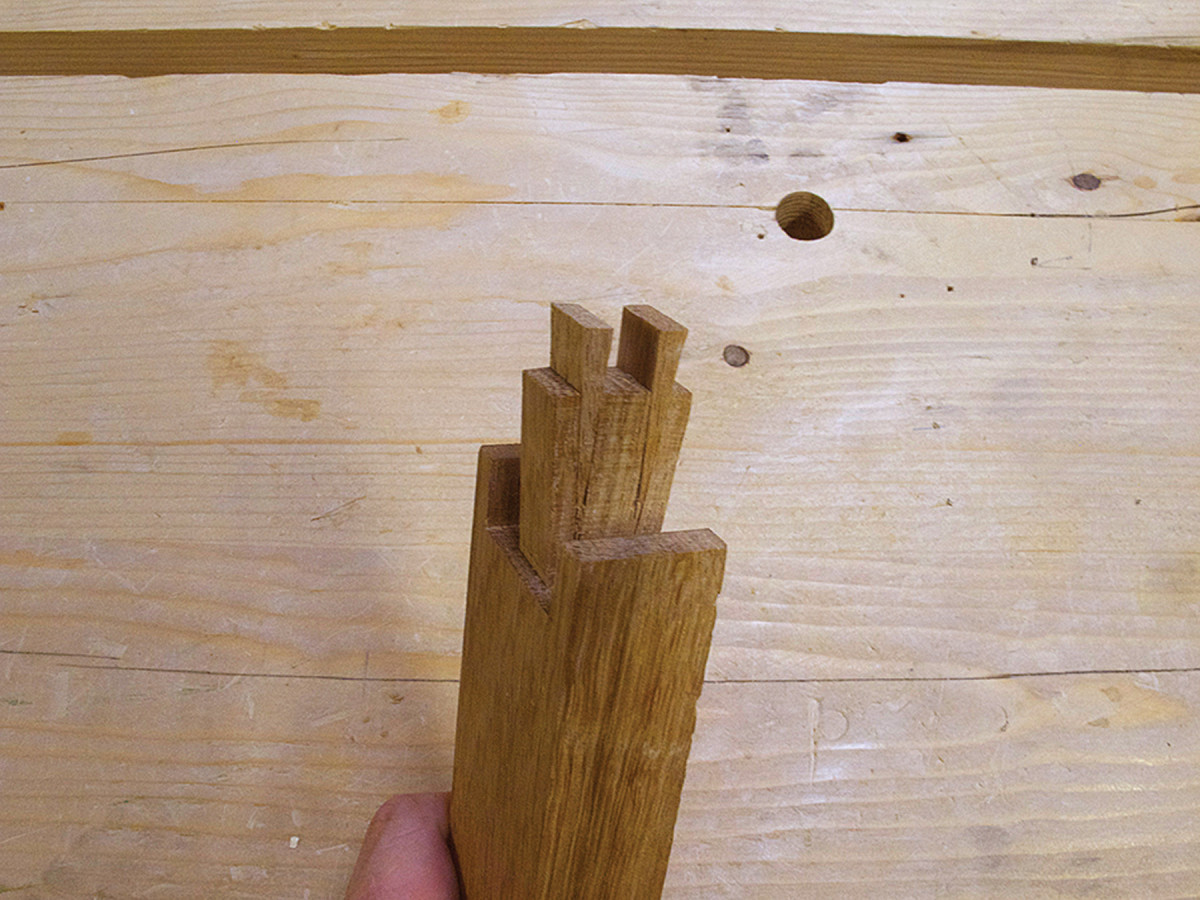
Measured flare. Insert the wedges into the unseated mortise, then measure the flare. Use a chisel to pare the mortise
Using a drill press and Forstner bit, remove the bulk of the waste coming from both sides, then clean up the corners with a chisel. Though this is a wedged mortise, I cut and fit everything straight, then flare the mortise.
The footrest has one through-tenon that will be wedged and two ears that wrap around the front and back of the leg; I call it a “triple tenon” (only the center portion is integral to the joint).
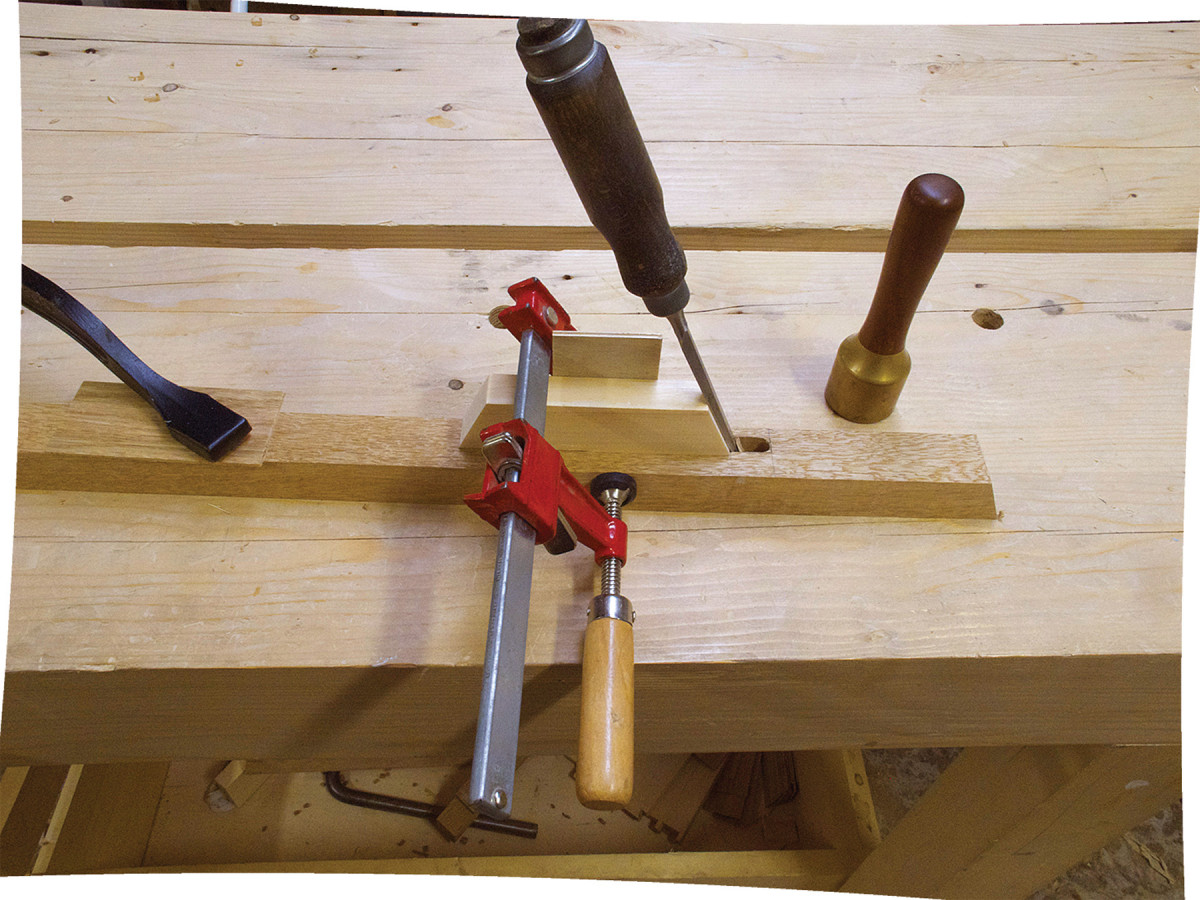
Guided paring. A block cut to the desired angle (in this case, 25°) helps guide your chisel for perfect paring.
To make it, cut the center tenon 1⁄2” wide, then cut the shoulders of the short ears. Cut the center tenon to final thickness with a handsaw, then fit it with a router plane as necessary. Slide the tenon into the mortise and mark the outside cheeks, then cut them with a handsaw. Remove the middle waste with a coping saw and chisel.
When wedging a tenon, I saw the tenon kerfs, insert the wedges, then measure the tenon width so I know how much to flare its mortise (in this case, 1⁄8“). Lay out the extents of the flare, then cut the slopes with a chisel.
Drawbored Side Stretchers
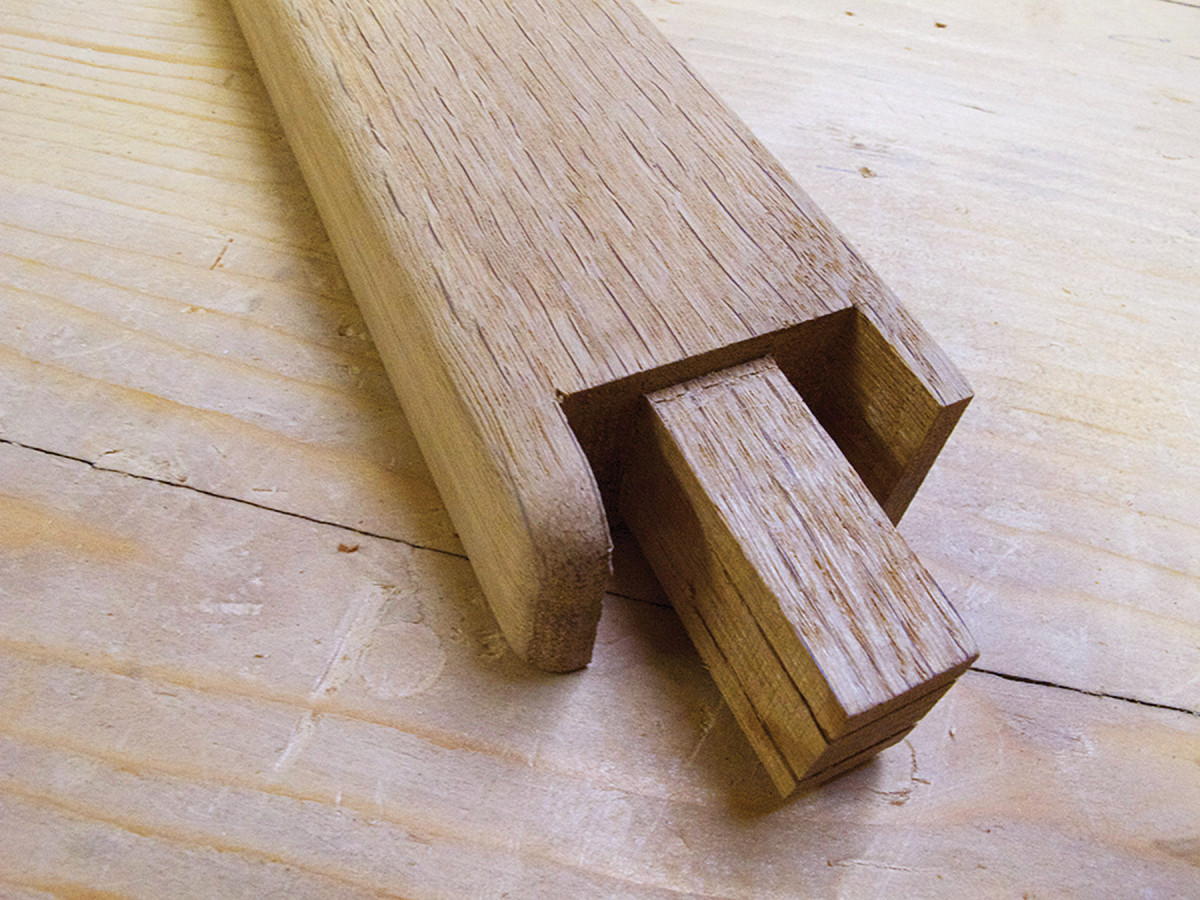
Eased corners. The ”ears“ of the footrest’s front get rounded with a rasp and files.
The side stretchers are installed with angled mortise-and-tenon joints that are drawbored into the straight legs and attached with a drawbored lap joint to the front stub legs.
Lay out the 3⁄8“-thick x 3⁄4“-wide x 1”-deep mortise, 1⁄4” in from the outside edge of the long straight legs. Hog out the angled mortises at the drill press, then use a purpose-made ramp to guide your chisel as you pare the 25° slopes.
Lay out the tenons to match and cut them. I cut the shoulders and cheeks with handsaws and tweak them as needed with a router plane.
This joint gets drawbored, so with a piece of scrap in the mortise (to help limit the depth), drill a centered 1⁄4” hole, 3⁄8” in from the edge.
To mark the drawbore, insert the matching tenon and, with the shoulders tight, use a 1⁄4” drill bit to mark the center of the hole.
Remove the tenon and offset the hole center 1⁄16” toward the shoulder, then drill.
Re-insert the rear tenon and pull it in place with a drawbore pin, then mark and cut the lap-joint layout on the front leg and stretcher. Drill 1⁄4” drawbore holes for the half-lap, too.
Shapely Seat & Footrest
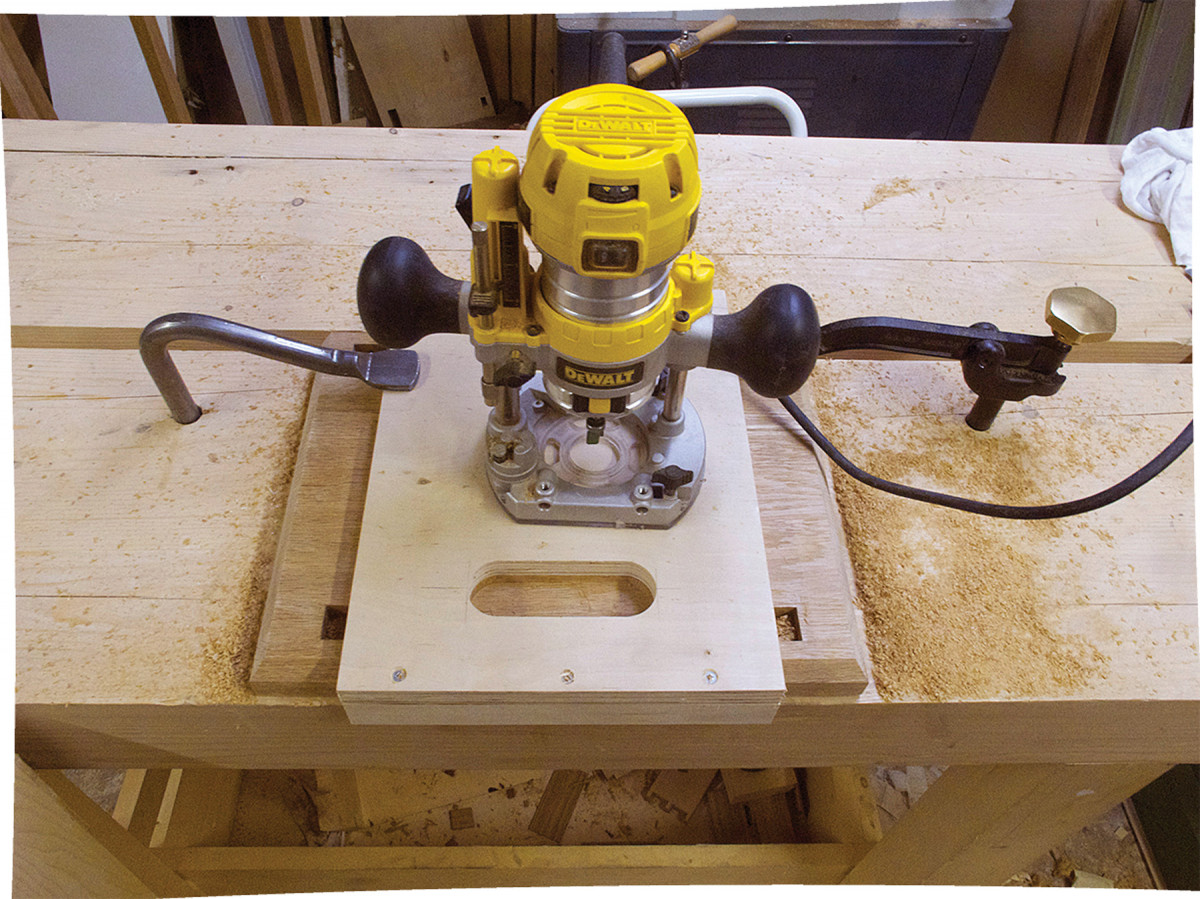
Get a handle on it. A router template makes it quick and easy to cut a handle on the underside of the seat.
Now you’re ready to excavate the handle on the bottom of the seat, bevel its underside edges and shape the footrest.
Make a handle template out of 3⁄4” plywood by drilling two 15⁄8” holes 3″ apart, 23⁄4” in from the edge. Cut the flats between them with a jigsaw and clean them up with a rasp. Attach a piece of 3⁄4” plywood to serve as a fence, then center the template on the seat and clamp it in place. Rout the waste with a template bit to a depth of 5⁄8“. I used a 1⁄4” radius bit to round over the edges.
To lighten the seat, cut a bevel on the bottom of the front and both sides. I set my table saw to 371⁄2°, and, starting with the end grain sides, made the cuts. Clean up the tool marks with a block plane.
With a block plane, rasp and file, round over the front edges of the footrest and chamfer the back edges.
All Together Now
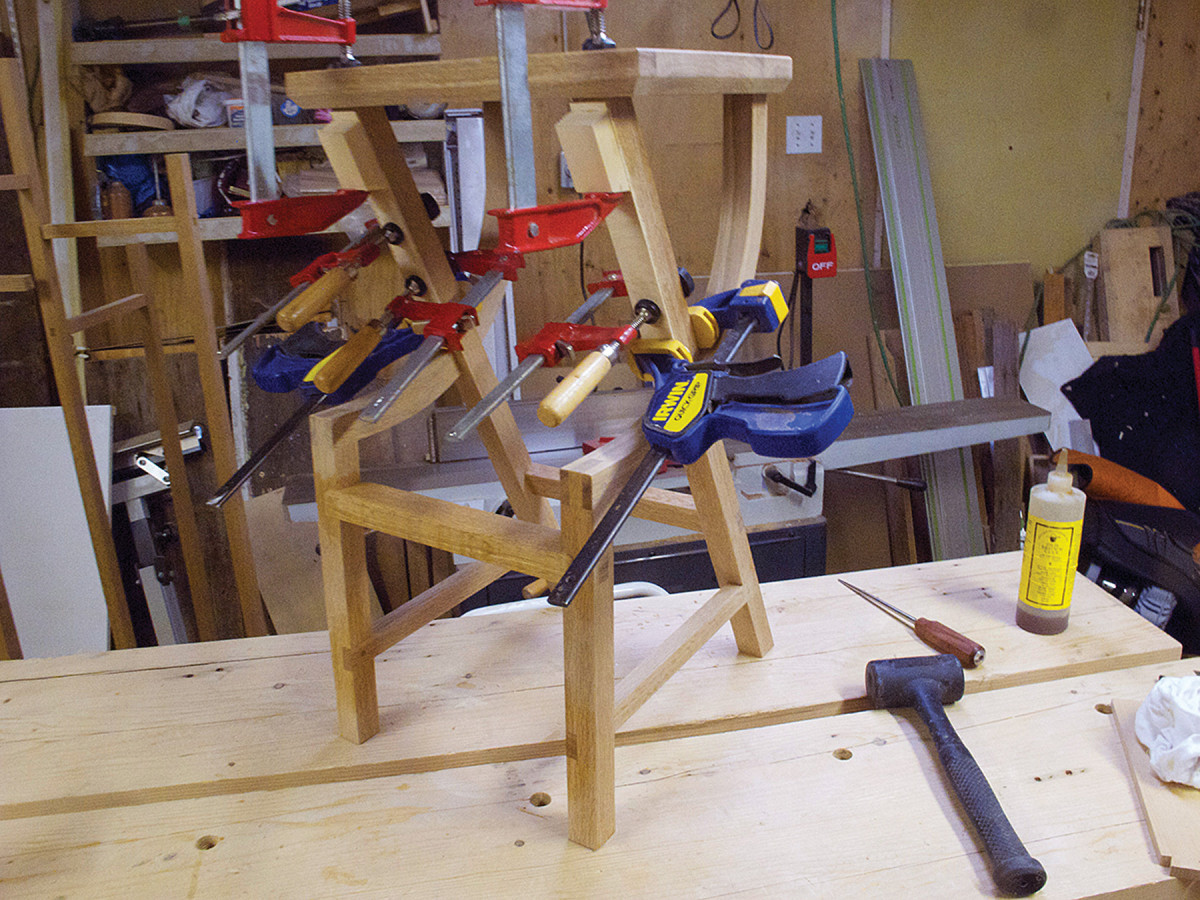
Take it in stages. Glue up is best done in a well thought-out order, and in stages.
Before gluing up, make sure all surfaces have been smoothed with a handplane, spokeshave or card scraper (or sandpaper, if that’s your preference).
As with most projects, this one is glued up in stages, with ample drying time between each.
With the legs in position on the seat to keep things properly aligned, glue up the wedged through-mortise footrest on the front legs, and the rear drawbored mortise-and-tenon joint of the side stretchers to the back legs. After the glue is dry, flush and clean up the joints as needed.
Next, glue up the leg half-lap joints, the front drawbored lap joint on the side stretchers and the dovetailed rear stretcher. (Again, after the glue dries flush and clean up the joints as needed.)
Finally, glue the legs into the seat bottom, using angled cauls to seat the clamps at the front and pull that joint tight (see photo at left). Drawbore the tenon atop the curved leg through the back edge of the seat; no clamps are needed there.
Before finishing, the stool needs to be leveled. To do this, I place it on my bench (a known level surface) and insert wedges under the legs as necessary until the stool is level to the bench.
Then, using a block of wood that’s just thicker than the wedges, set a pencil on that block, and mark around the bottom of each. Cut to the lines with a crosscut saw. (You might also wish to lightly chamfer the edges of the legs to keep them from splintering at the bottom corners as the stool gets dragged across a floor.)
Before applying a finish, break all the edges with #220-grit sandpaper and clean up any remaining tool marks or marks from the clamps. Also cast a close eye over the piece to look for any glue squeeze-out; clean up with sandpaper or scrapers as necessary.
To finish the piece, I applied a washcoat of one-pound-cut shellac, followed by two coats of polymerized tung oil (with ample drying time between coats) that I applied by wet-sanding with #600-grit wet/dry sandpaper for a smooth finish.
Plan: Download a free Sketchup model for this project
Here are some supplies and tools we find essential in our everyday work around the shop. We may receive a commission from sales referred by our links; however, we have carefully selected these products for their usefulness and quality.


