


We may receive a commission when you use our affiliate links. However, this does not impact our recommendations.
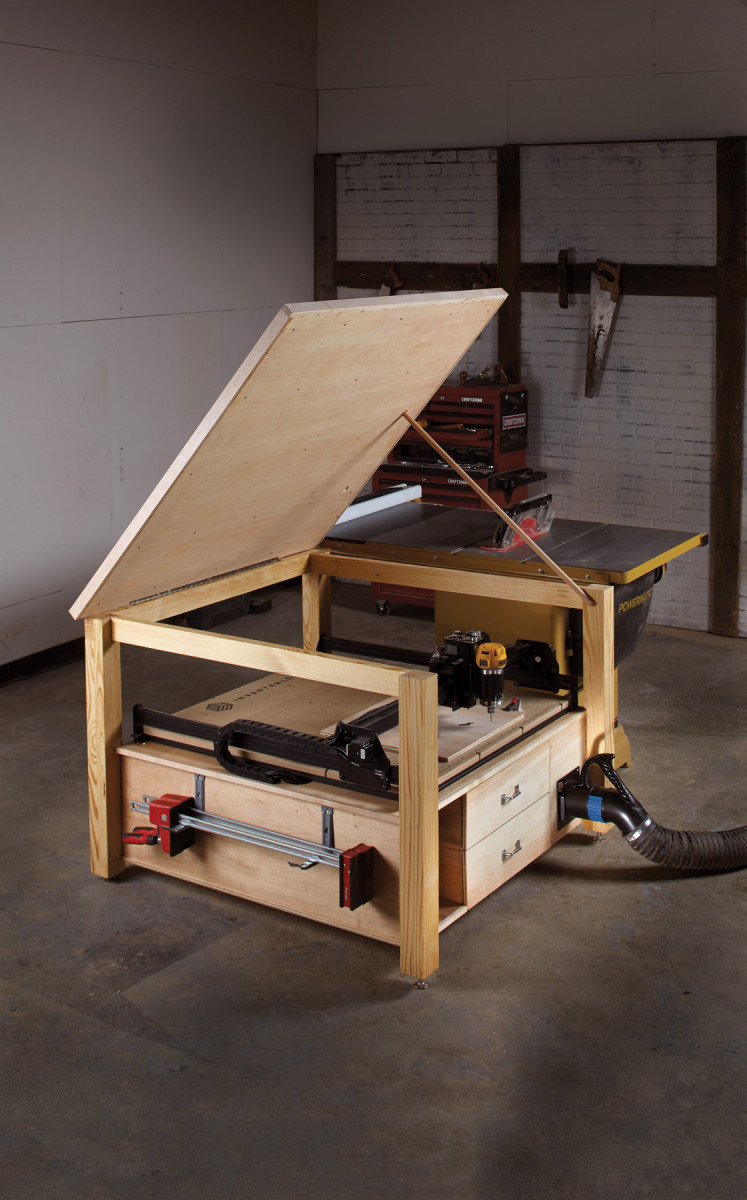
Optimize your shop space with this multi-function outfeed table that gives your CNC router a convenient home.
My one-car-garage-turned-shop doesn’t have room for a 4’x4′ CNC router. I just couldn’t imagine finding the space and dedicating it to a machine that while useful, won’t see everyday use. So after racking my brain for a few weeks, I came up with a design that would not only allow me to bring a CNC into my shop, but provide me with some much needed outfeed and assembly area.
 The key to this project is the hinged top, it provides plenty of room for the CNC in a discrete location and provides plenty of access to the work area. Bonus, I can start a cycle on the CNC, close the top and continue to use my table saw. Watching the router routine doesn’t eat up my precious shop time.
Design by Constraint
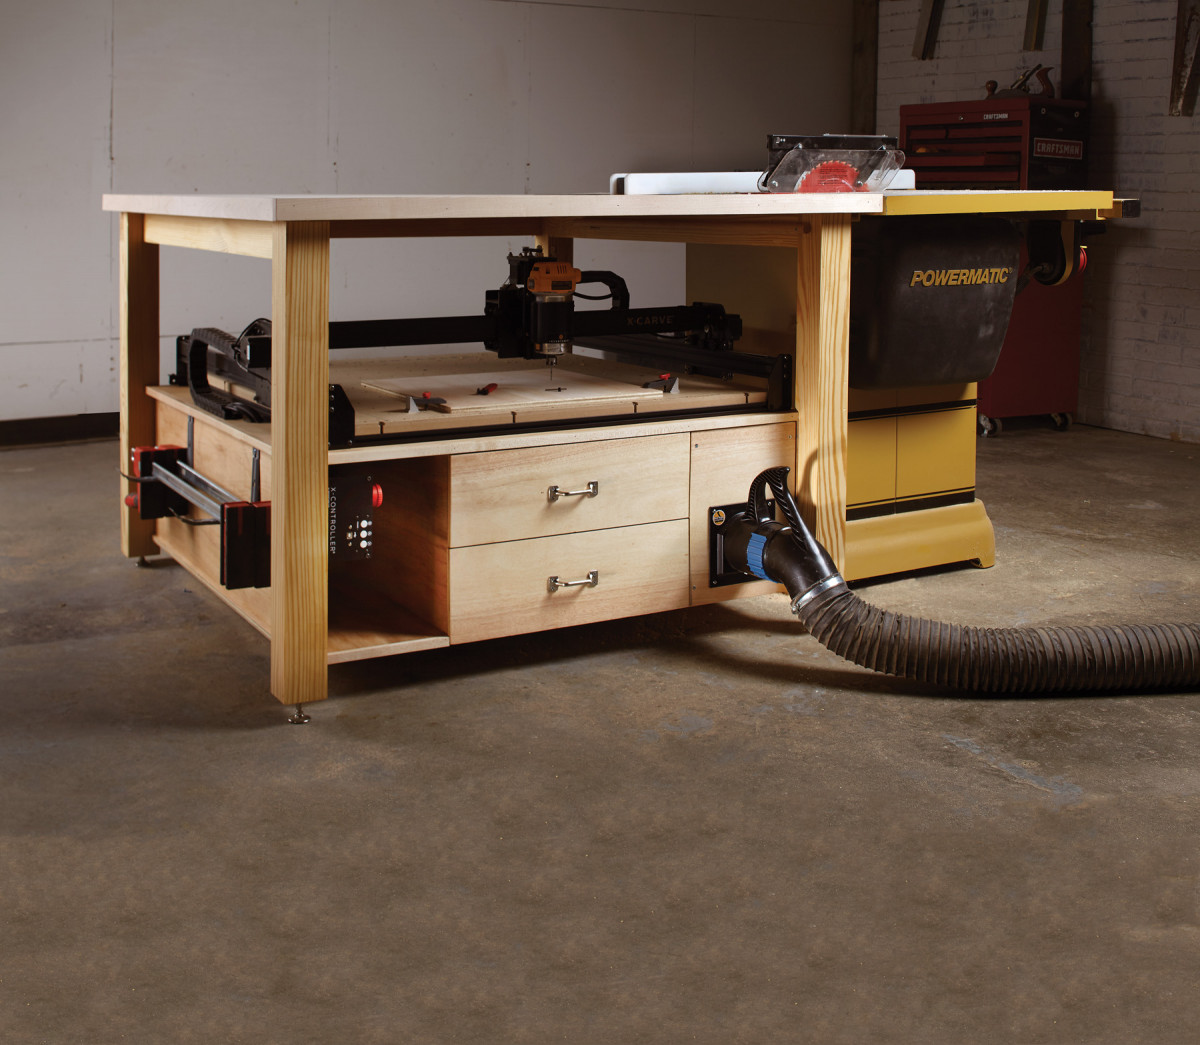
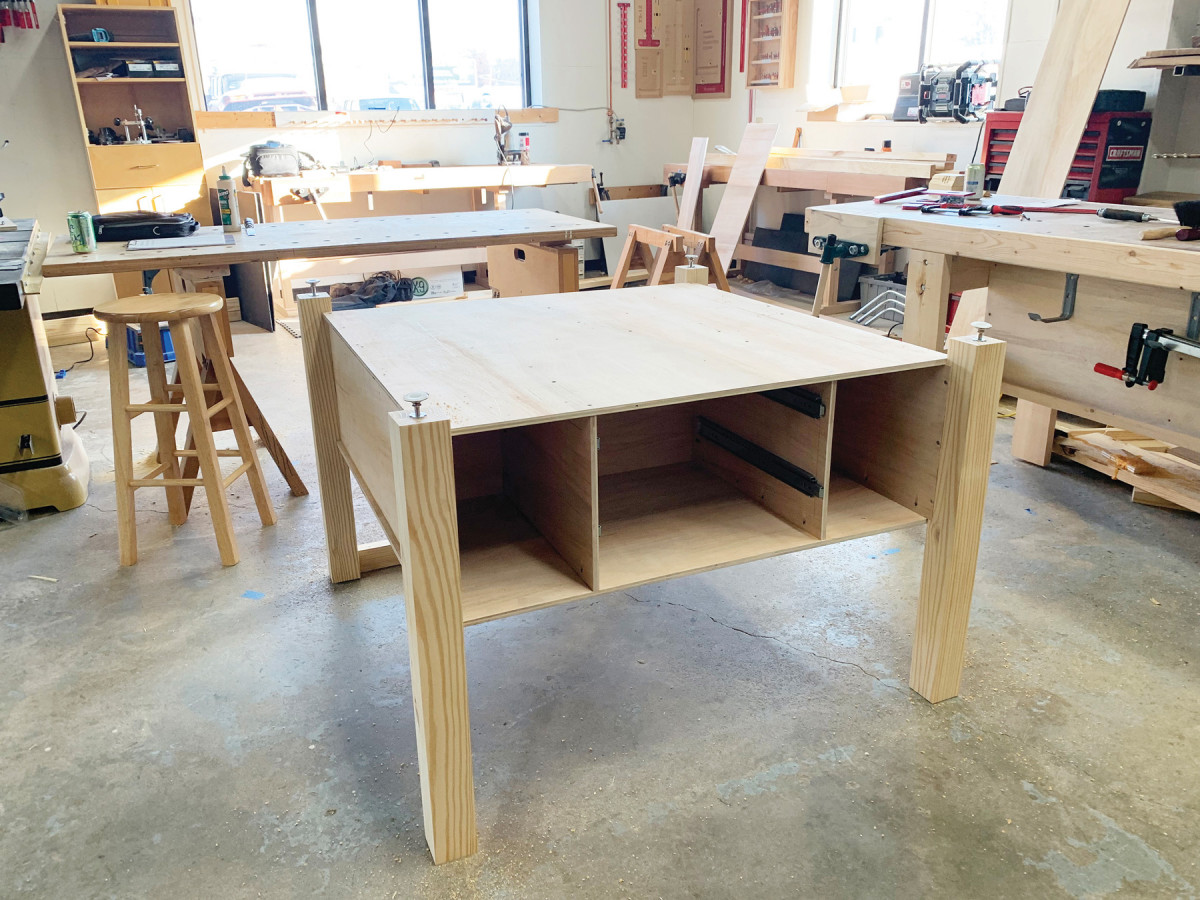
The form of this table was dictated by a few constraints. First, the lower shelf had to fit my 1,000mm-1,000mm X-Carve®, I rounded this to 40″x40″. The second constraint was the top of the table. I wanted to stick with 4’x8′ plywood from the home center and decided that a 48″x48″ top would be ideal with the size of the base. With the top and the shelf determined, I was able to draft some designs. I settled on an open-shelf concept. The legs are dimensional Southern yellow pine (SYP) milled up to 3″x3″ and the cabinet structure holding it all together is 1/2” Sande plywood.
The third constraint was access to the CNC. I had to eliminate the apron at the front of the table so that I could have unimpeded access to the CNC when the top was flipped up. In practice, I’m really happy with the design; I have access to the entire bed of the CNC.
The fourth constraint I contended with was dust collection on my table saw. In my home shop I use a quick-connect fitting with my dust collector. It’s really handy for shops like mine where the dust collector follows you to the tool instead of hard plumbing everything. However, crouching down to the bottom center of the table saw was never an enjoyable activity. So, I had the idea to plumb through the outfeed table to the center of the shop. This started to dictate the orientation of the drawers and structure of the bottom.
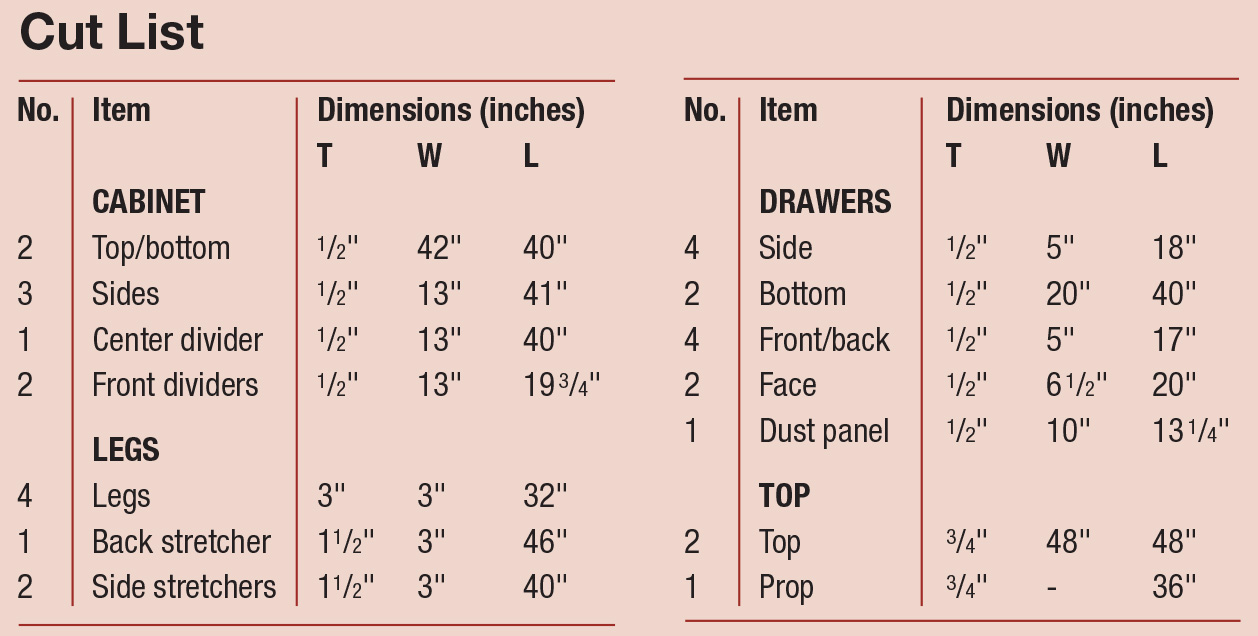
CNC Outfeed Table Cut List
 Cabinet First
1. Start assembling the cabinet with the top shelf bottom up. Align the long side of the cabinet to the outside edge, paying attention to the 1/2″ overhang on both sides.
The cabinet at the bottom of the table serves as a platform for the CNC, a housing for the drawers and torsion box to keep the whole assembly table from racking. Start by cutting the top and bottom of the cabinet to 40″ x 42″. Then rip the 13″ parts for the sides and dividers of the cabinet. Cut all of these pieces at once so that they’re perfectly consistent.
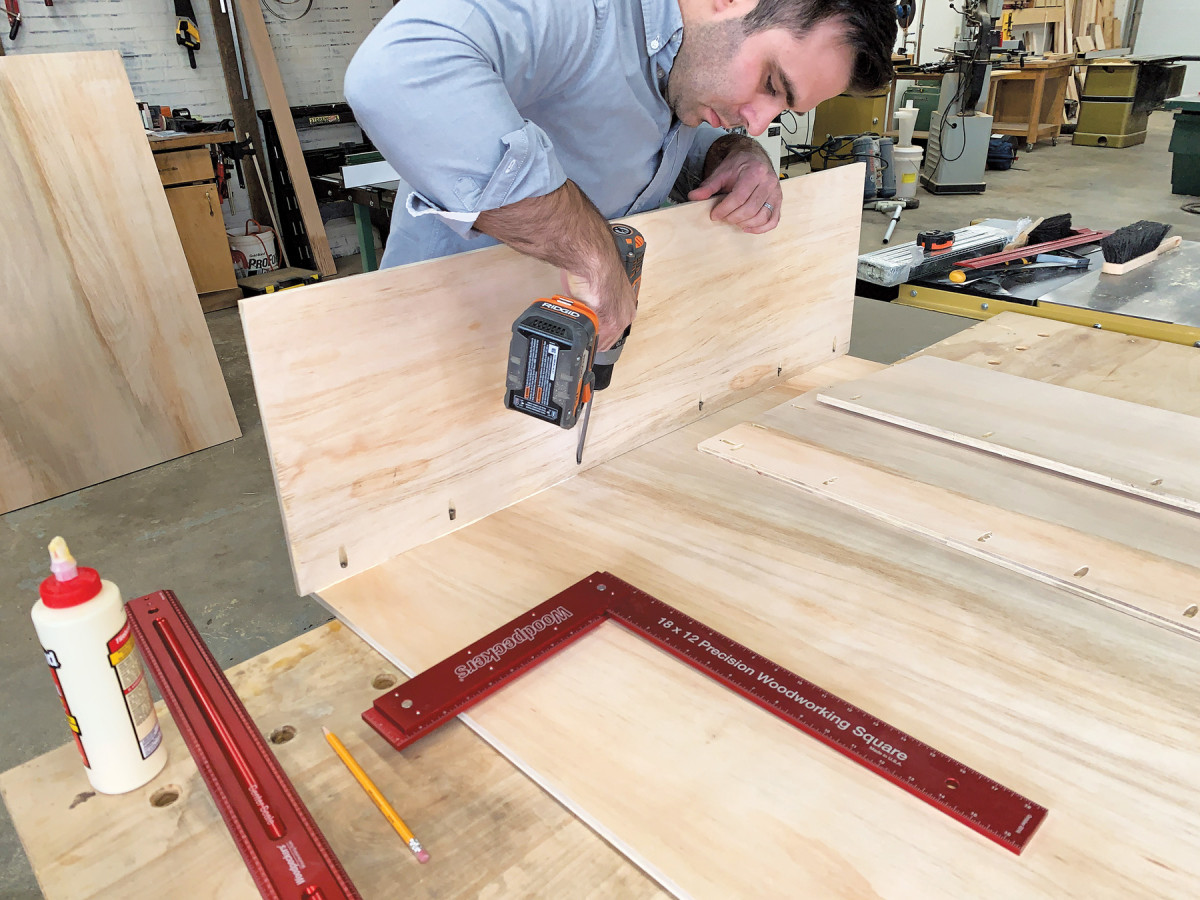
2. Pocket holes made for a clean top shelf and a quick assembly.
Start with the top of the cabinet upside on your workbench and work up (or down depending on how you think about it) from there. All of the components attach to the top with pocket holes to keep the top surface of the cabinet clean and smooth. I started with the long side that overhangs the top shelf by 1/2” on each side. Then I attached the middle divider to give myself a steady structure to attach the drawer dividers, the support behind the drawers and the other side panel. Double-check every joint for square as you move along. And, save yourself some frustration later by adding the drawer slides in the front of the case before you secure the top.
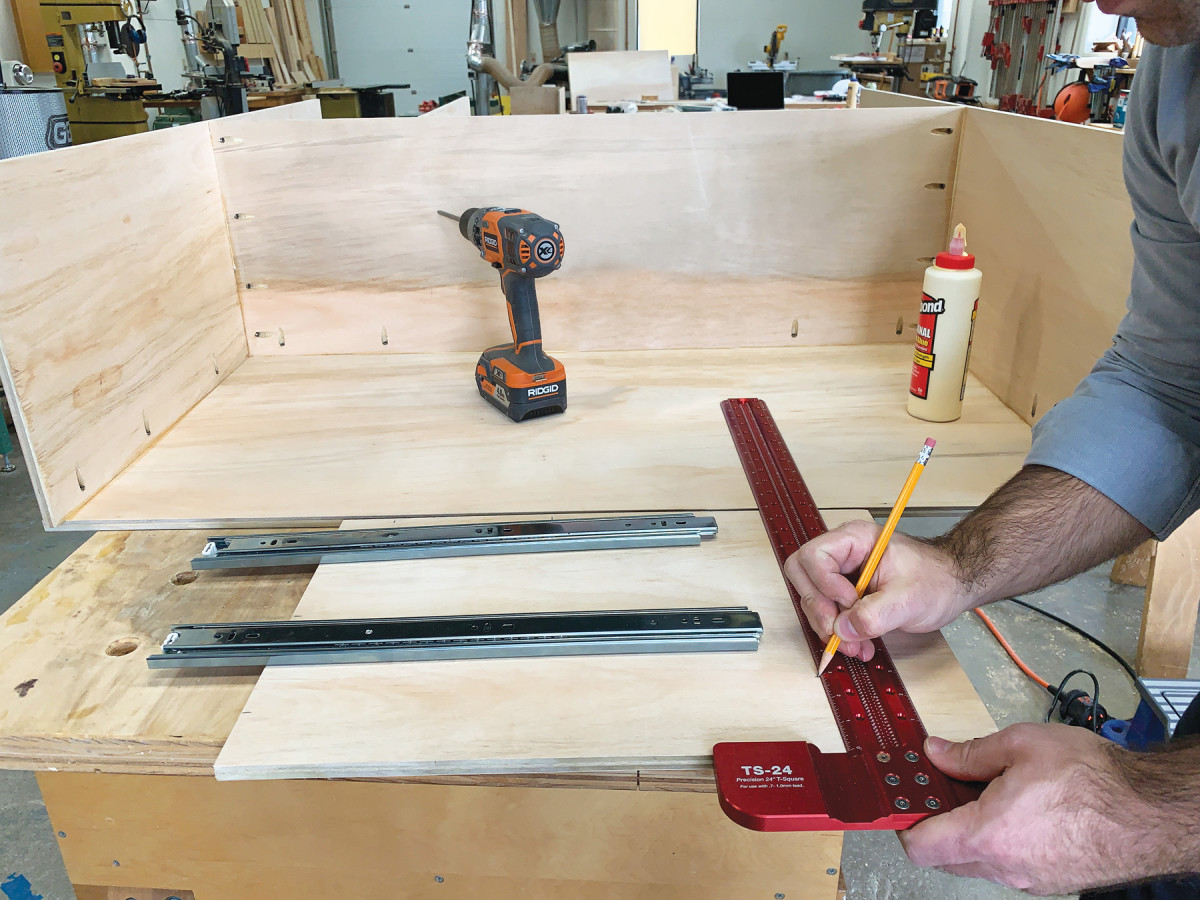
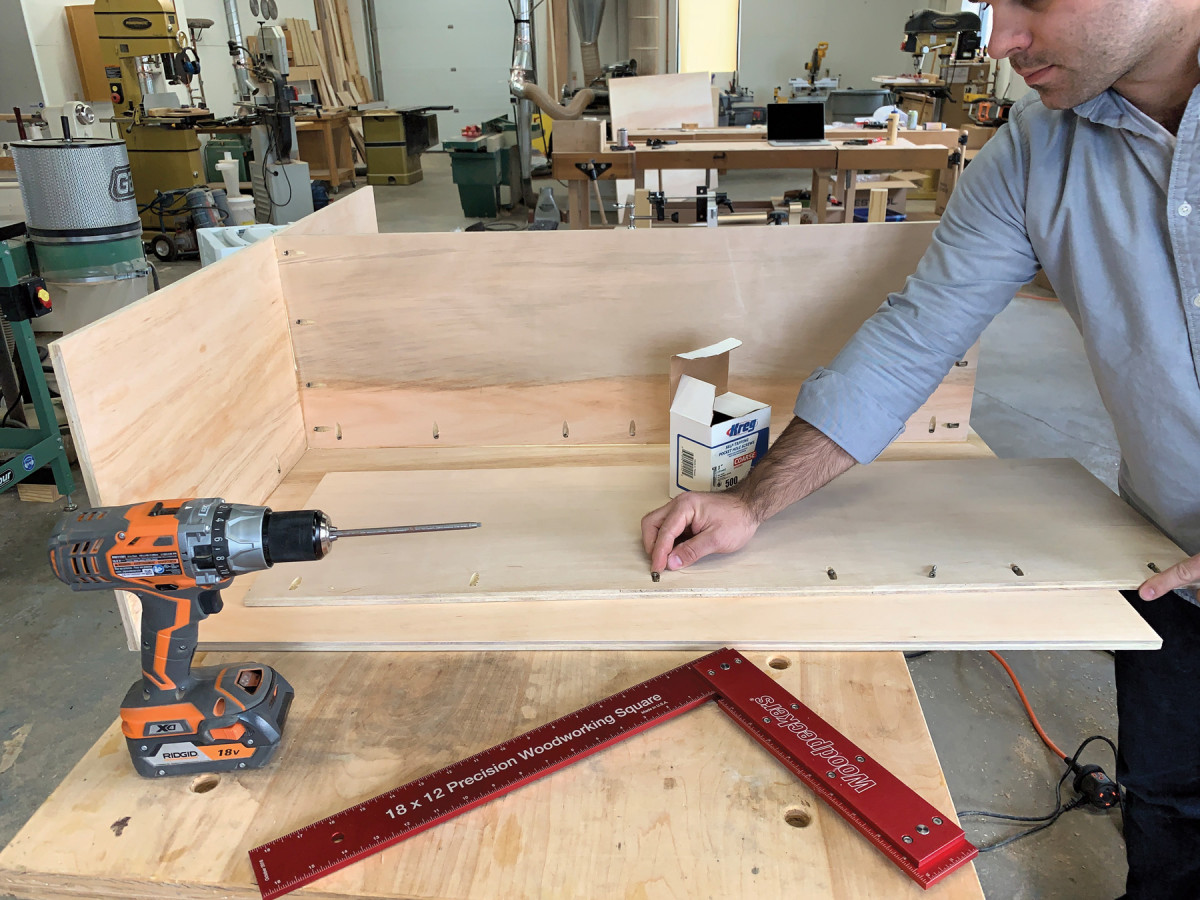
3. While laying out the slides, remember the cabinet is still upside down. Mark your slide location appropriately.
4. I used a complete bottom sheet of plywood instead of strips for stability. The cabinet is designed to prevent the table from racking in both directions.
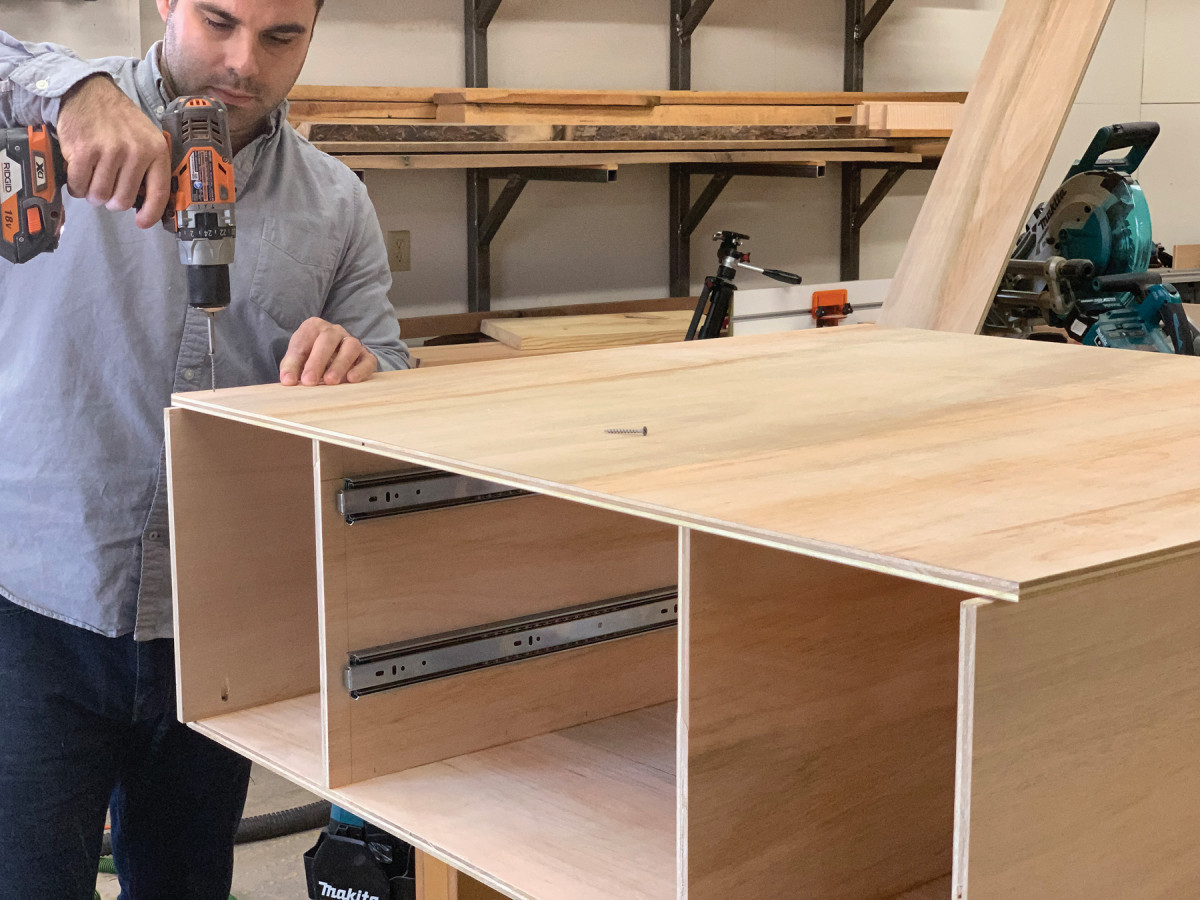
I allowed all these pieces to dry before attaching the bottom of the cabinet. I simply predrilled with a countersink bit and made sure I didn’t interfere with the 1/2“ overhang of the side panels and glued and screwed the bottom on. The bottom cabinet is done for now.
Plywood Top
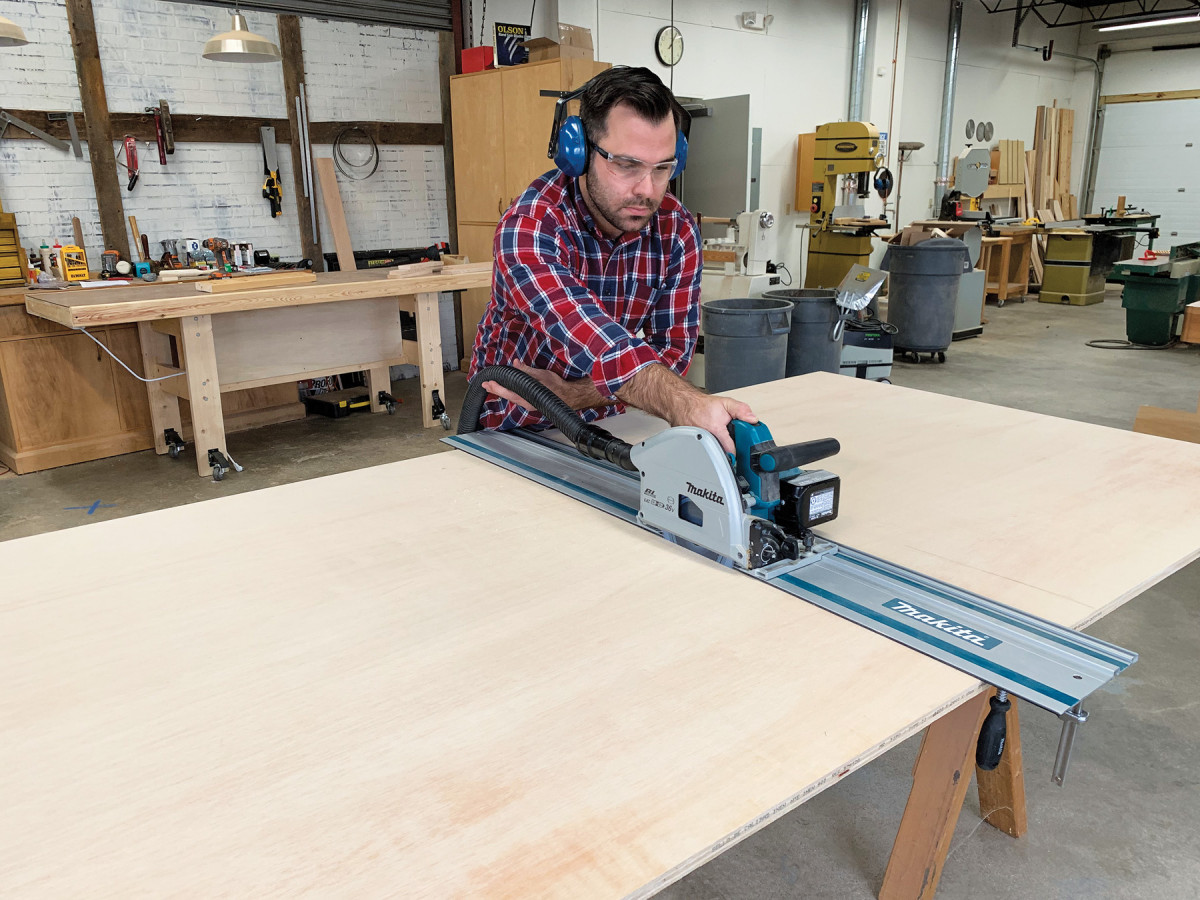
5. At this point, I can’t imagine living without a track saw. Cut the 4’x8′ sheet in half.
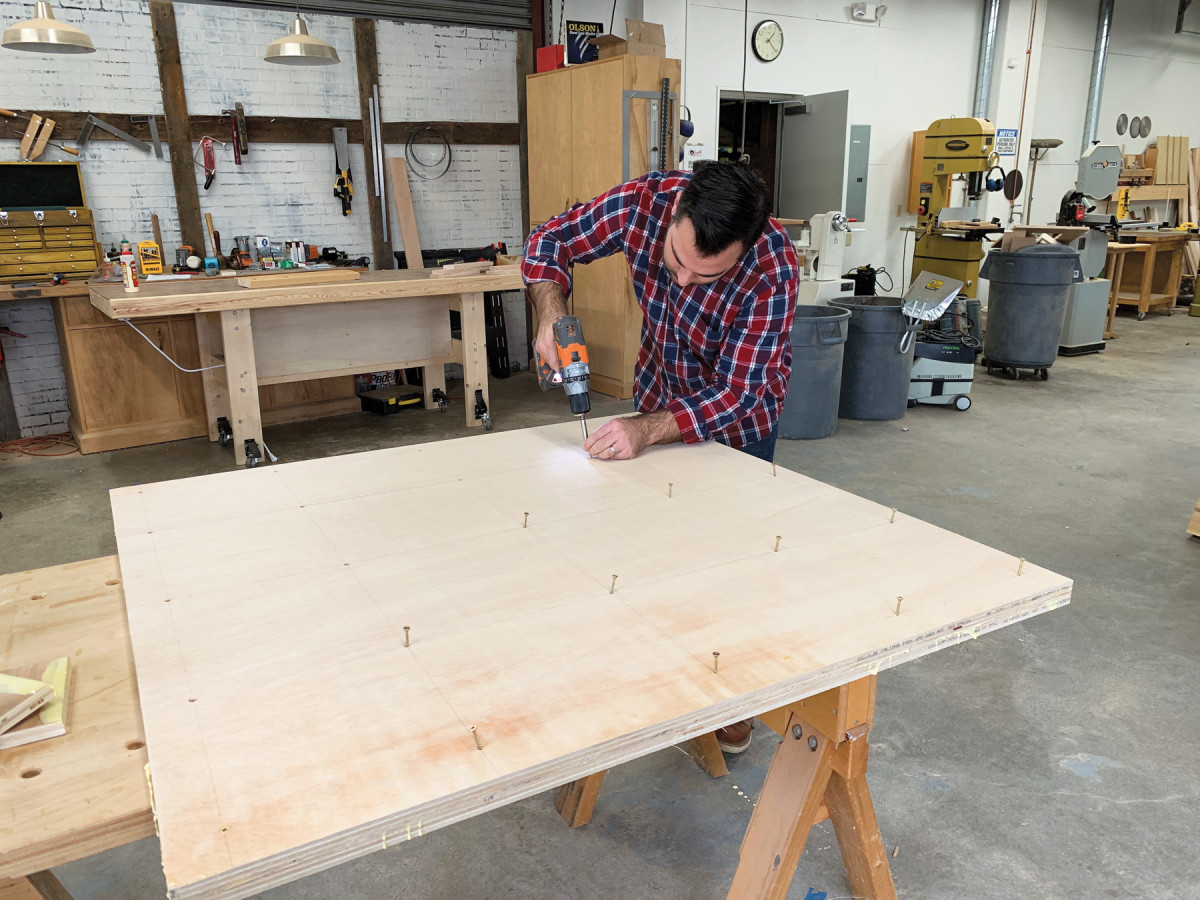
6. I used a grid work of screws to clamp the two pieces together. Take the time to predrill so that you can place screws into their respective holes before glue up.
The top of the outfeed table is doubled up 3/4” plywood. I cut one 4’x8′ sheet in half and glued it up. A grid work of 11/4” screws 8″ apart provided all the necessary clamping action. Remove the screws after letting the top dry for 24 hrs.
Make the Legs
Southern yellow pine is used for the legs and aprons, milled from 2″x10″ dimensional lumber. I found straight grain for the legs and aprons by avoiding the center of the boards, creating a little waste, but even so, SYP is a great material for shop projects. The 3″x3″ legs are glued up and cut to their 31″ length. The aprons will be cut after attaching the legs to the cabinet base.
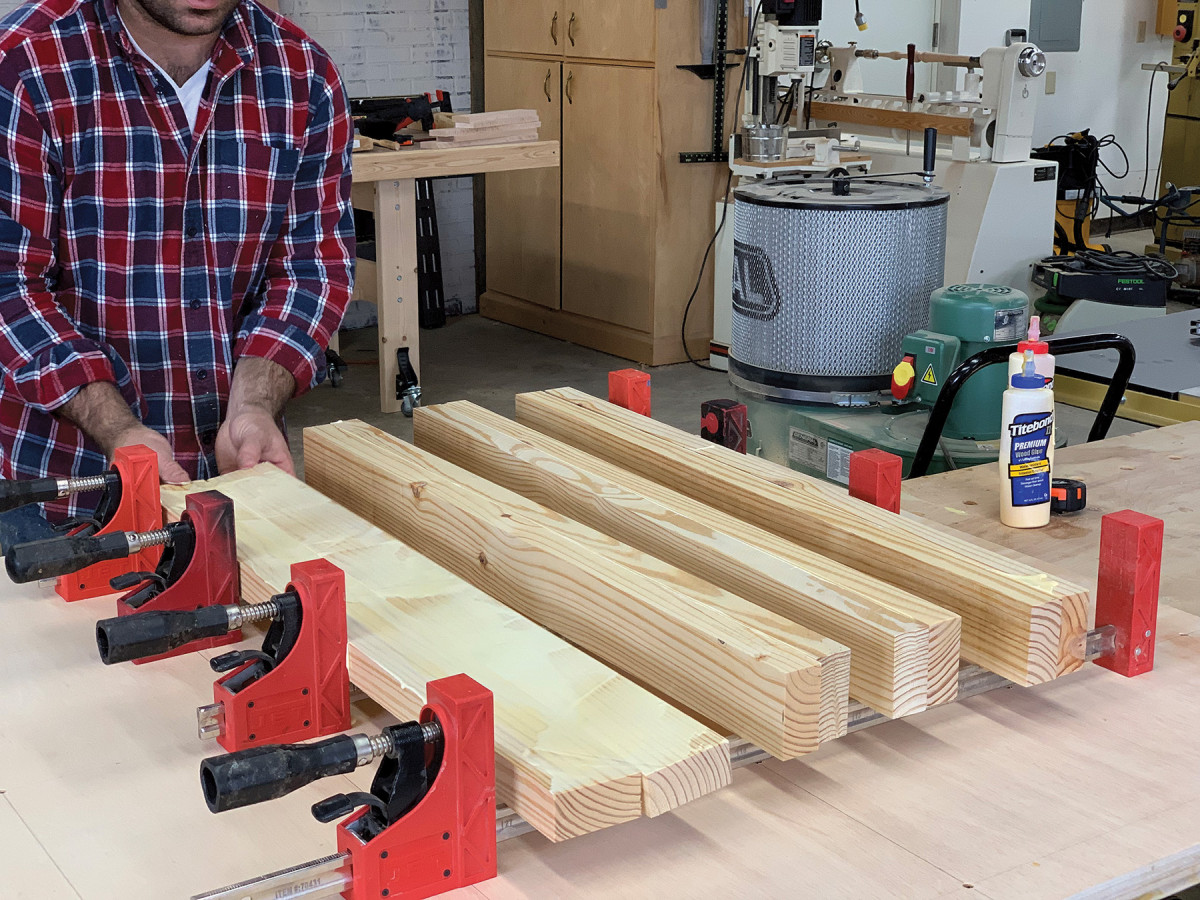
7. Glue and clamp the legs. Because this is shop furniture, I clamped all four legs as a batch.
Once the legs are out of the clamps, make note of their orientation relative to the front and sides of the project. I elected to present straight grain to the front of the project with the seam to the sides of the table.
8. With the first leg, I used a stop block, on the next three I ditched the block and just used the lines I had carried up from layout. Square up the rabbet with a chisel.
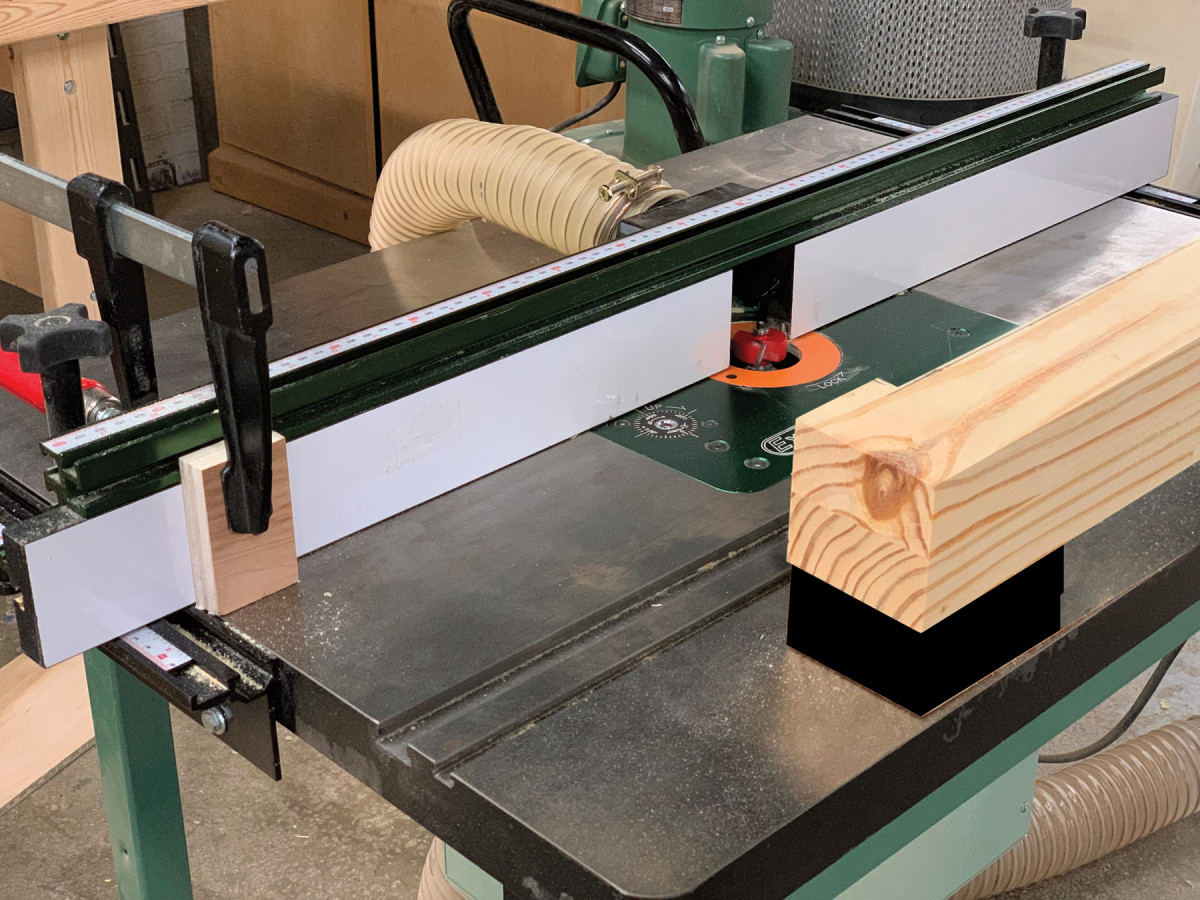
Next, you’ll need to rout the stopped rabbet where the cabinet will set into the legs. These are 1/2“x1/2” and completed on the router table. I made the cut as a single pass using lines that I carried up to the top of the workpiece.
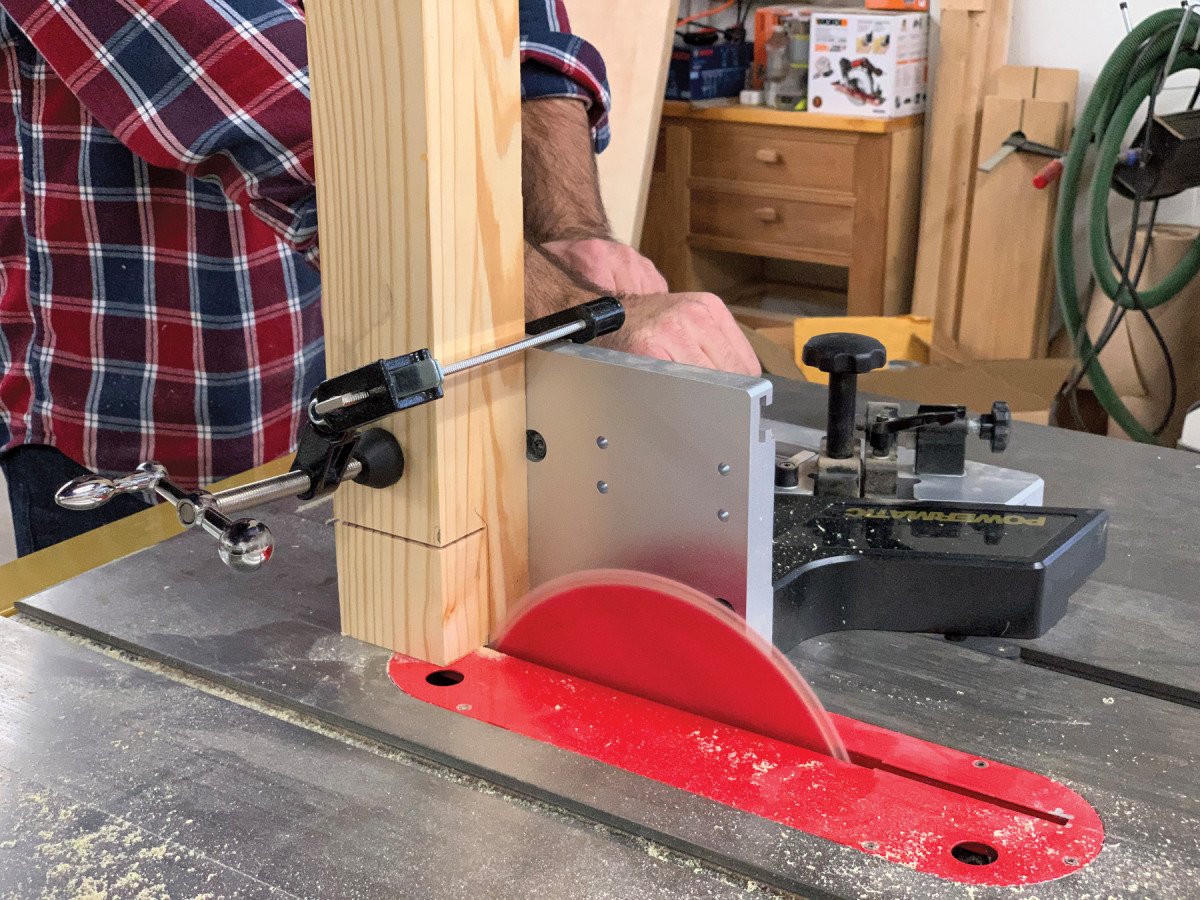
9. Make the crosscut, then the rip cut on the lap joint.
Finally, you’ll need to create the lap joint for the back apron. I completed this on the table saw with a tenoning jig. Size it to fit the stock you had milled up earlier. I ended up with a lap joint that was 1-1/4” deep.
10. The lap joints on the back leg are vital to the strength of the table because the front of the table doesn’t have an apron. Make sure the surfaces mate together without any gaps.
Add the Legs
The cabinet is just over 40″x40″ at this point, so it should span pretty much any workbench. With the cabinet upside down, attach your legs upside down. The sides of your cabinet should be 1/2“ longer than the top and bottom shelf. This allows them to sit in the stopped rabbets. I sank three 11/2” screws through the plywood into the legs. Then, add the adjustable feet while the table is still upside down on the bench.
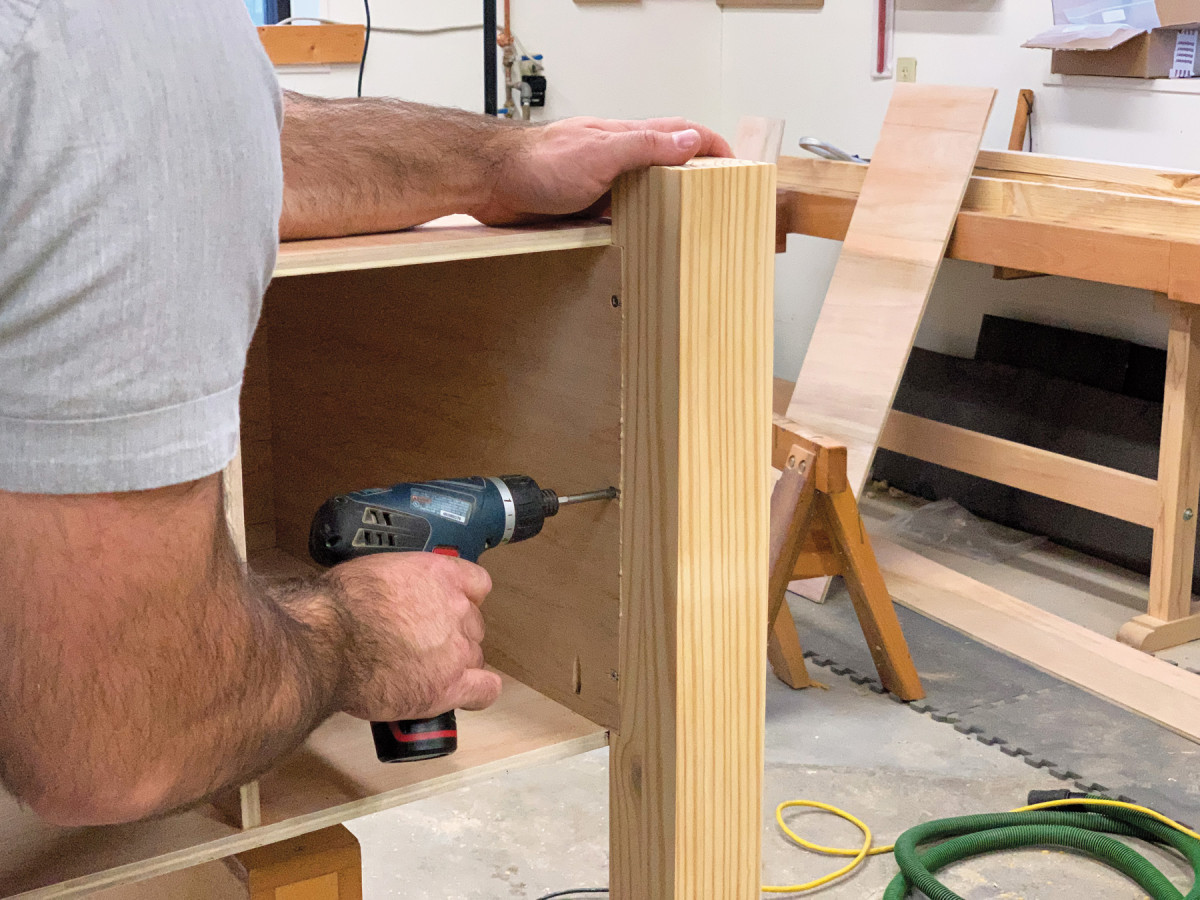
11. Glue and screw the legs on in the proper orientation. After double-checking, I found that I had swapped my left and right legs. Thankfully, I was still within the open time of the Titebond III I was using.
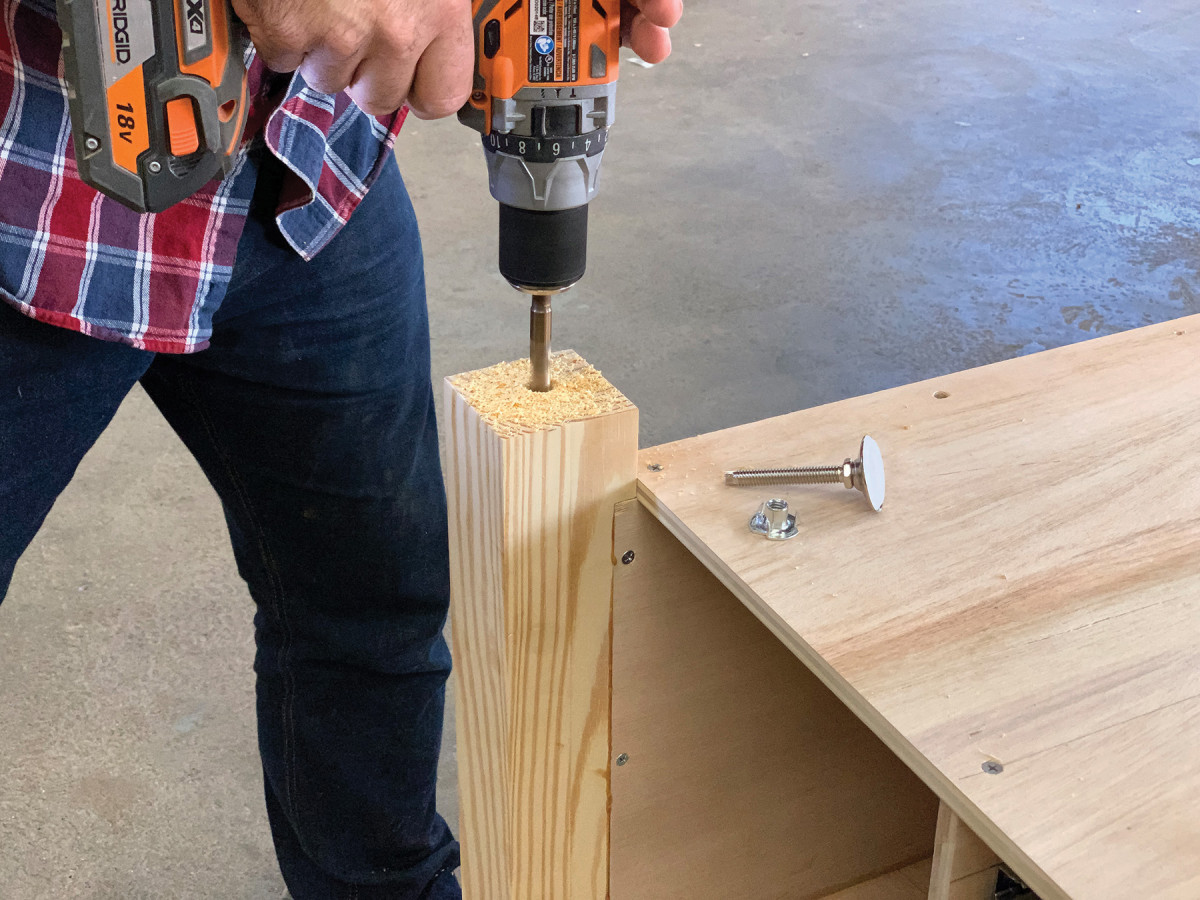
12. Drill a hole that fits the insert and is deeper than the entire length of the leveling bolt.
13. The assembly as it stands. Find a friend and flip the assembly onto its feet.
Aprons and Hinges
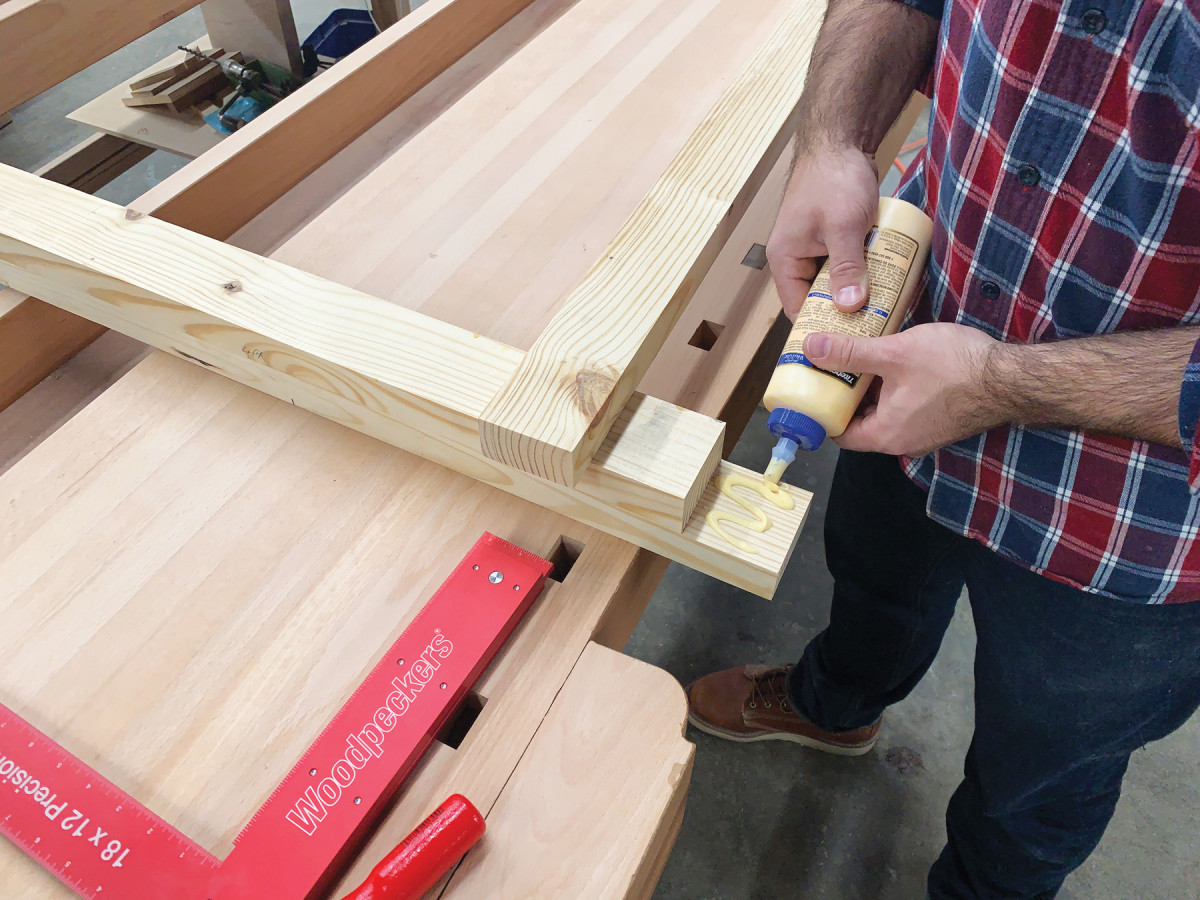
Measure between the legs on the left and right side and cut some of your previously milled SYP to length. Because the legs are fixed to the cabinet, your cut needs to be perfect–sneak up on the size. I used three pocket holes on each end of the aprons. For this material thickness, I used 2-1/2” screws.
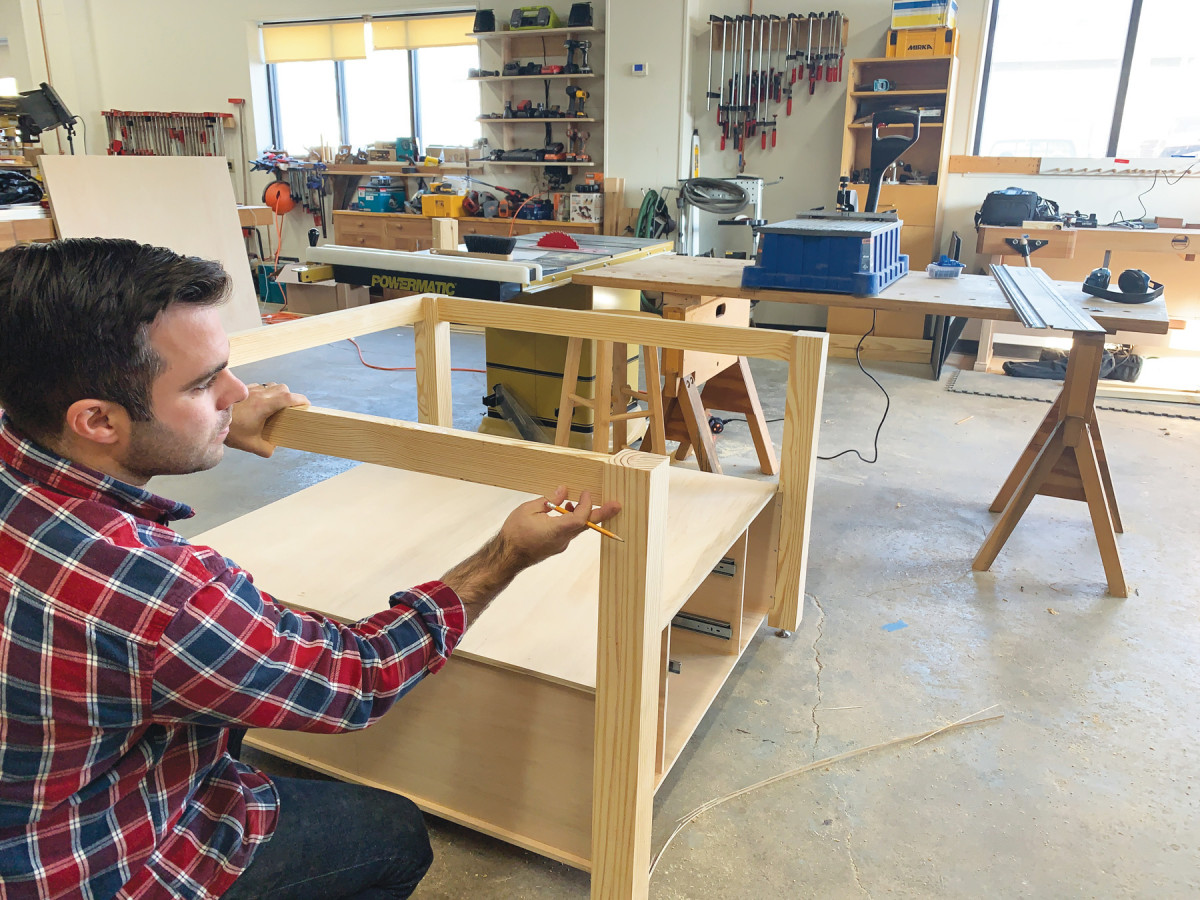
14. I elected to use pocket holes for ease and speed, but you could use dowels, floating tenons or regular mortise and tenon to attach the skirts.
A piano hinge secures the top. I had a 30″ hinge on hand, so that’s what I used. Rout a rabbet in the back apron. This is why I lapped the back apron on the outside of the legs—it provides a long back edge where the hinge can sit.
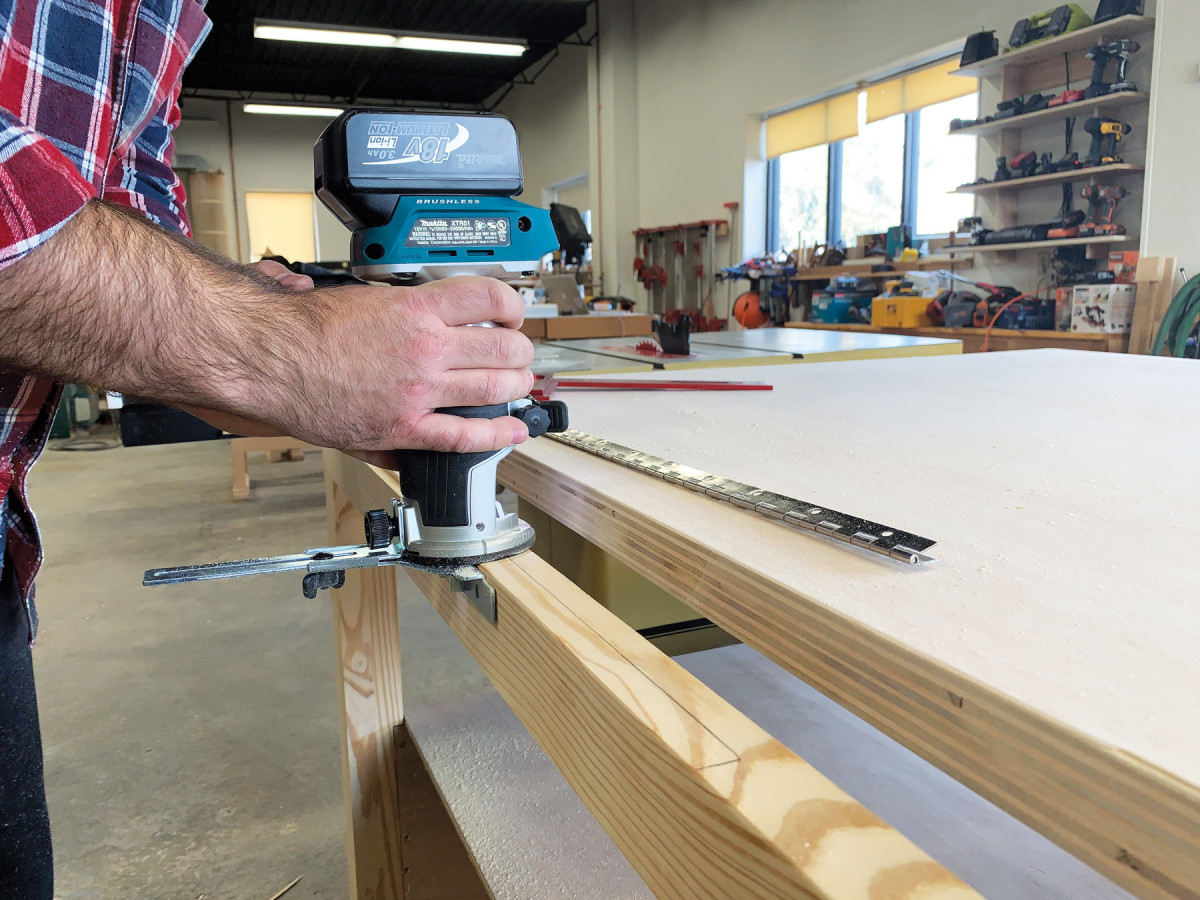
15. Use a spiral bit and edge guide to create the rabbet for the hinge to rest in.
Don’t use the screws that come with the piano hinge. Use your own 1-1/4” screws. The top is heavy and will put quite a bit of stress on the hinge while propped open.

16. Square up the rabbet with a chisel and make sure the hinge sits flush.
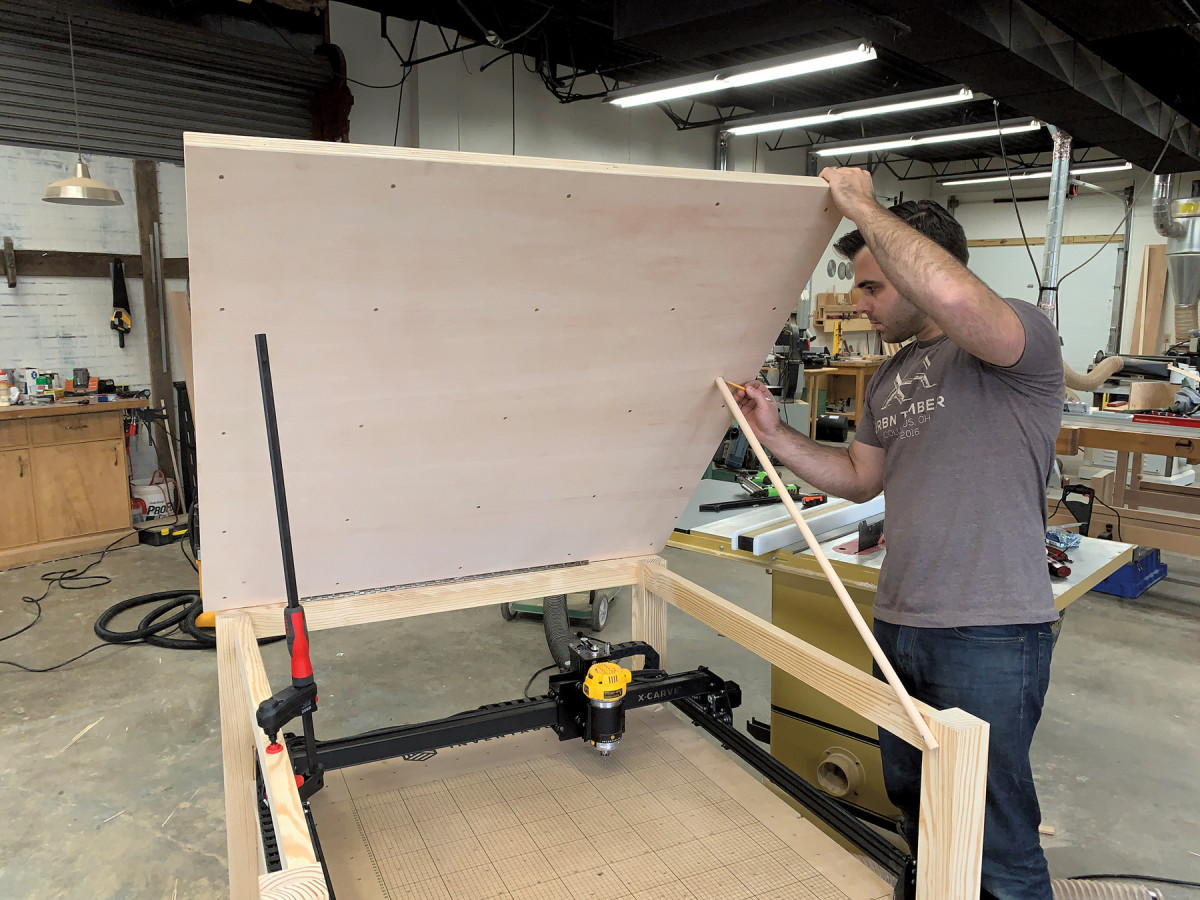
At this point, you can secure the top to the table. I found this to be a tough operation on my own. I laid the tabletop upside down on my table saw and brought the table base up to top, allowing me to screw the top easily. The table is functional now!
Trim Out the Details
The drawer box construction is simple: butt joints and brads. You may choose to use a different type of joinery for your drawers, but I have found this simple construction more than adequate for my shop furniture.
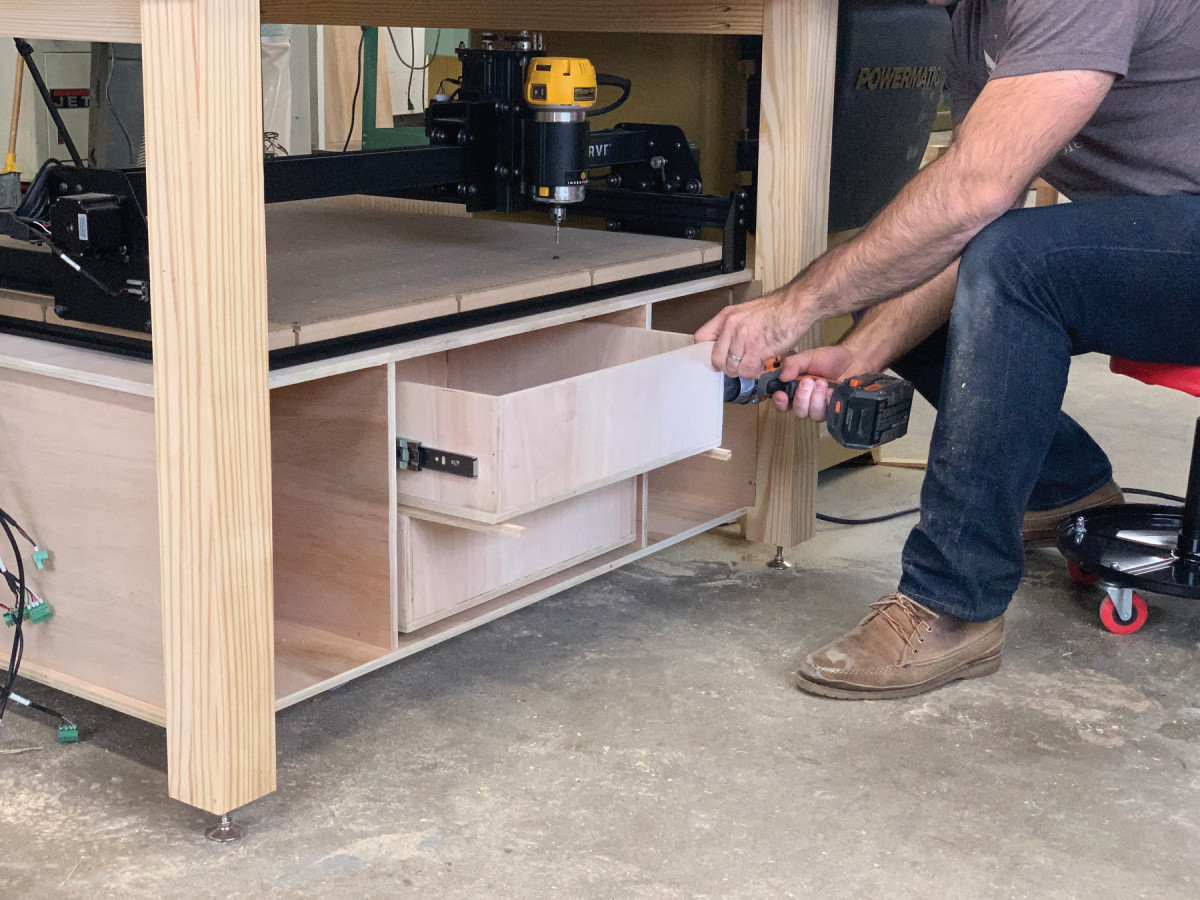
17. With the drawer boxes so low, you’ll be happy you installed the slides before assembly. Attaching the drawers was enough fun for me.
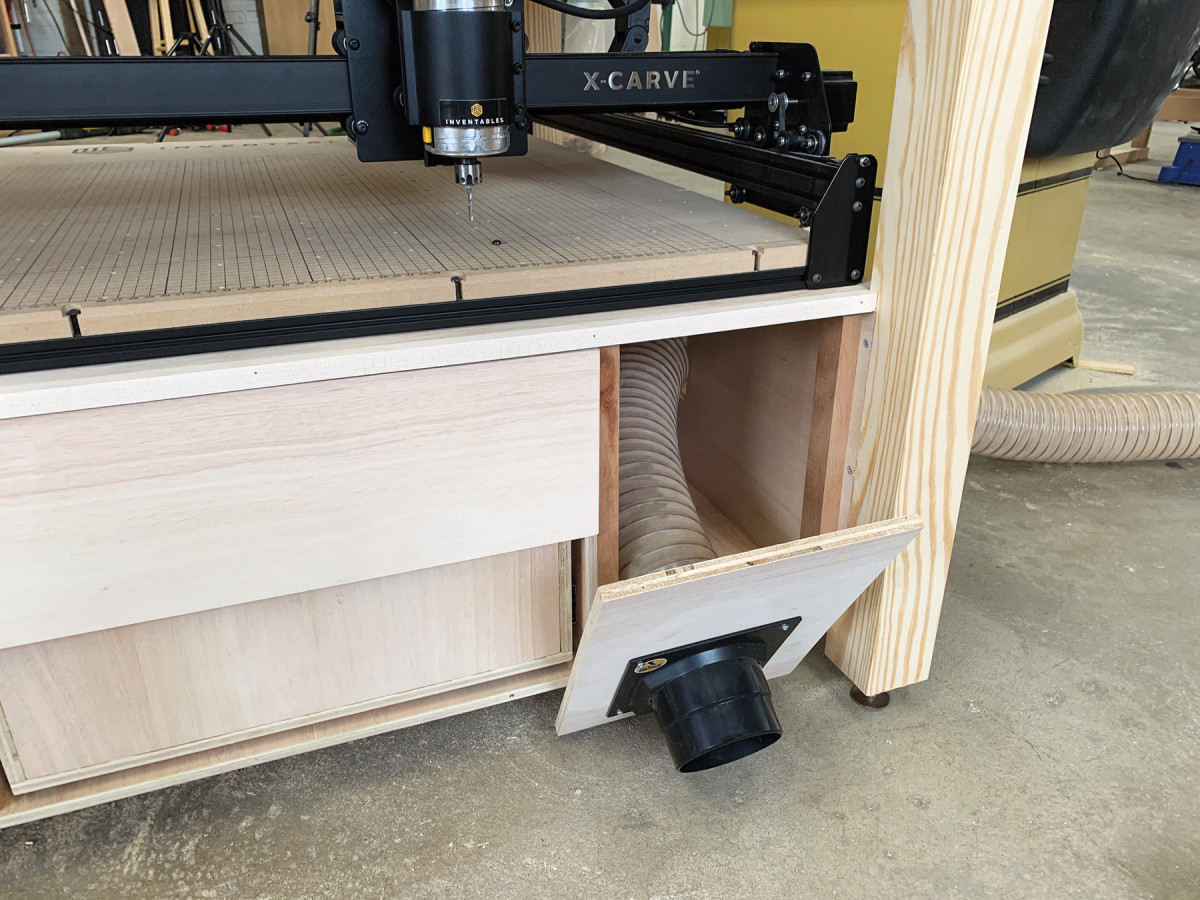
The dust collection for my table saw is routed through the side of the cabinet. In my home shop, I have my table saw against a wall and my dust collector on the far side of the shop. I use a quick release fitting to bring the dust collection hose to each power tool that I’m using as needed. While it’s a convenient fitting for this application, reaching under the table saw is never fun. Having the fitting on the outside of this cabinet will be save me a bit of twisting and stretching to swap dust collection.
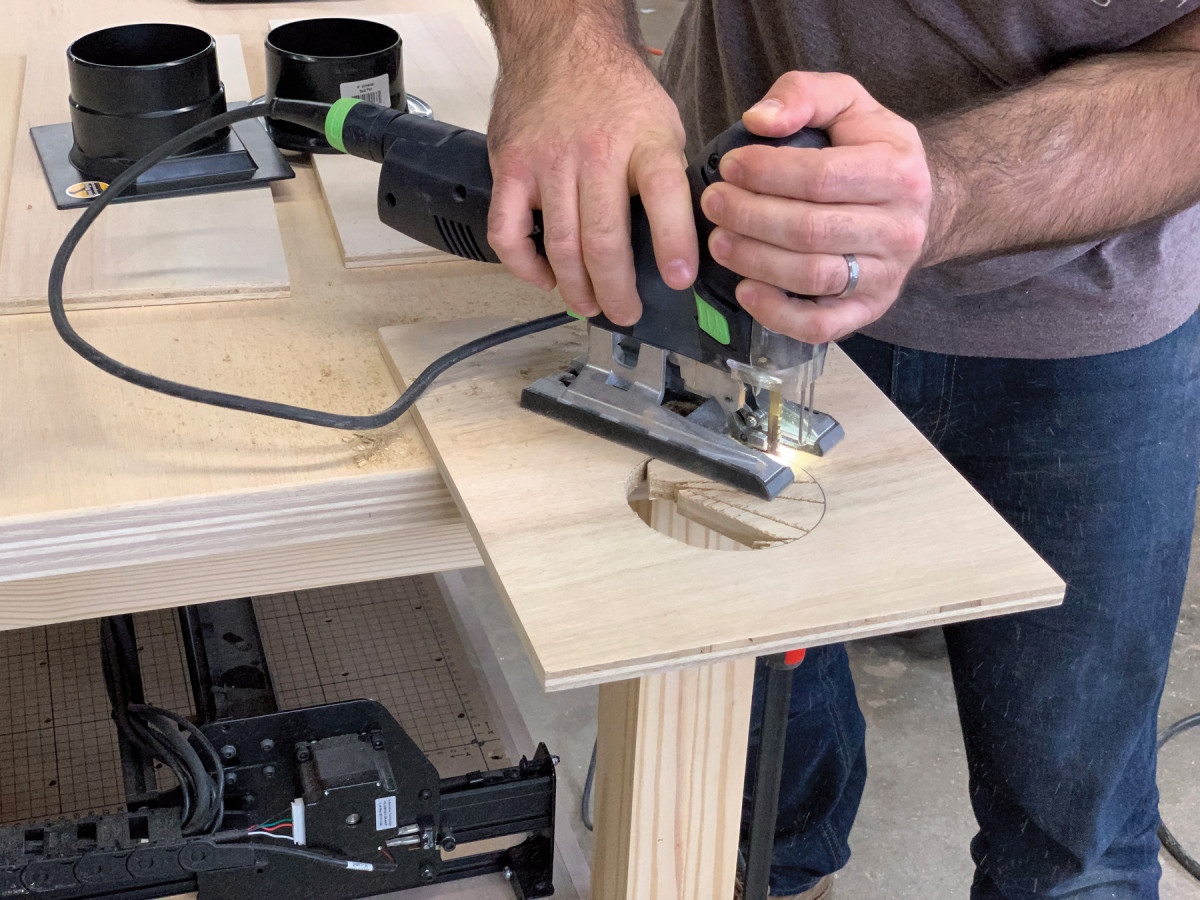
18. The Dust Right system uses 4″ hose. I simply traced around the inside of the flange and made the cut with the jigsaw.
Once I sized the board to the opening to the right of the drawers, it was time to cut the hole to accept the Dust Right fitting and the flange on the back of the board. You need both so that the hose coming from the back of the saw can terminate to the flange and the Dust Right hose can couple with the outside fitting.
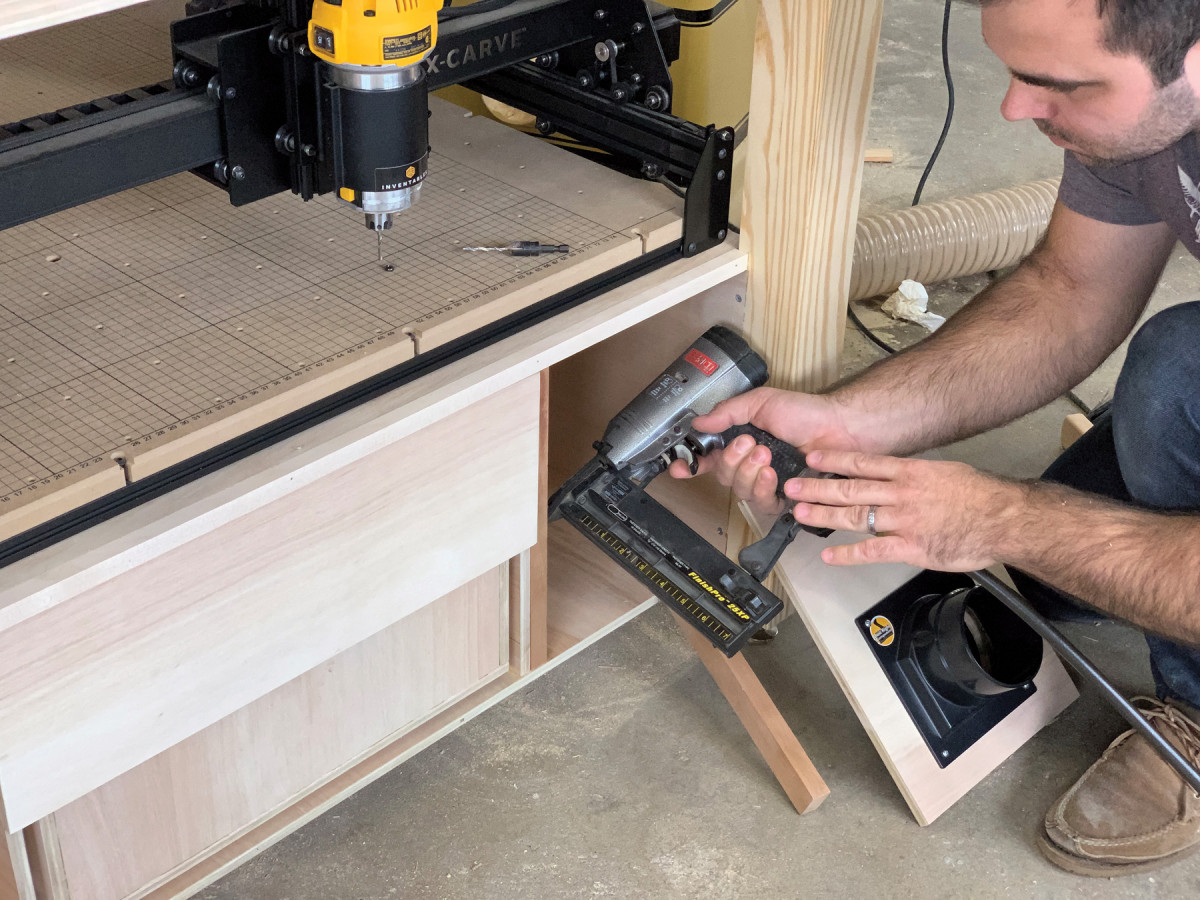
19. The dust collection board will need strips on the side of the compartment to attach to. I used four screws to attach the board to the strips for future repairs or modifications.
20. I was tempted to use the cabinet cavity to channel the dust, but I had extra hose on hand, so I opted to simplify the airflow.
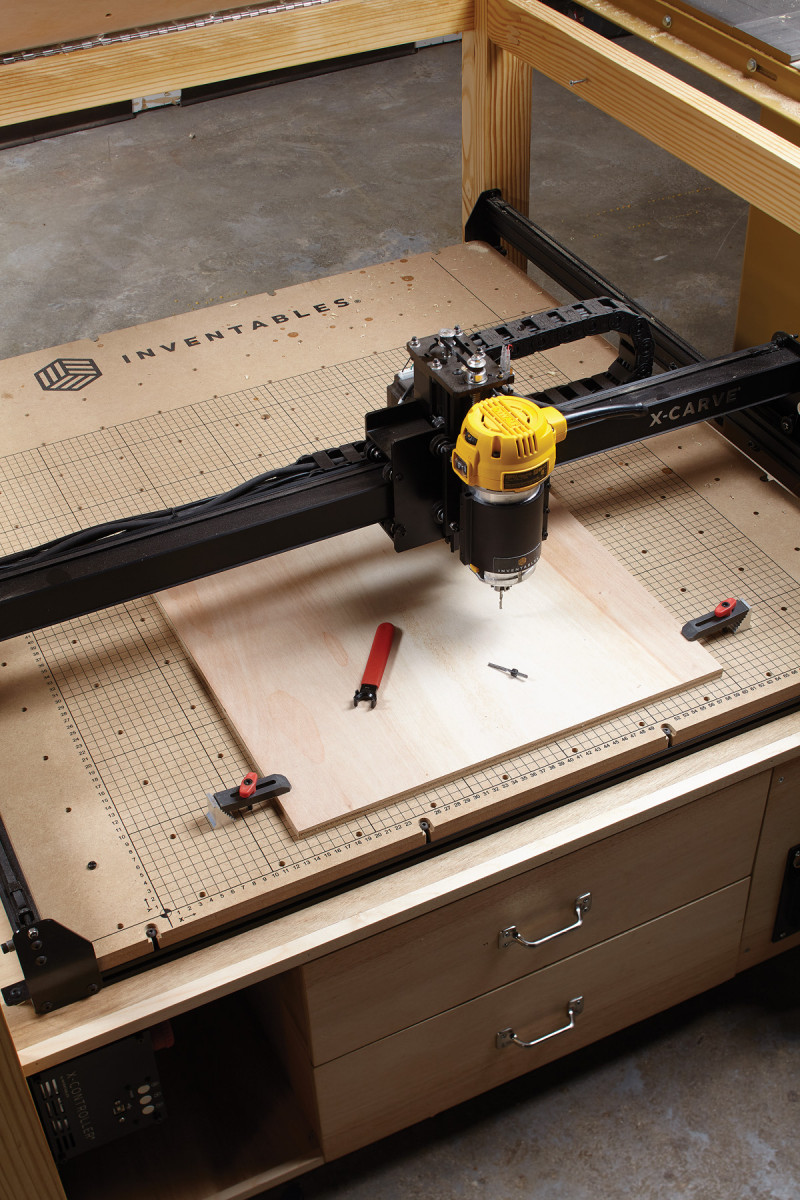
Use a 3″ cable grommet to route the cables for the X-Carve through the top shelf. The grommet will be partially covered by the CNC, so recess it into the shelf with bearing guided rabbeting bit. With it perfectly flush, the wires are able to pass through with ease. The X-Carve control box will mount to the side of the cabinet directly under here. The cables aren’t overly long, so you may find yourself creatively completing the wiring.
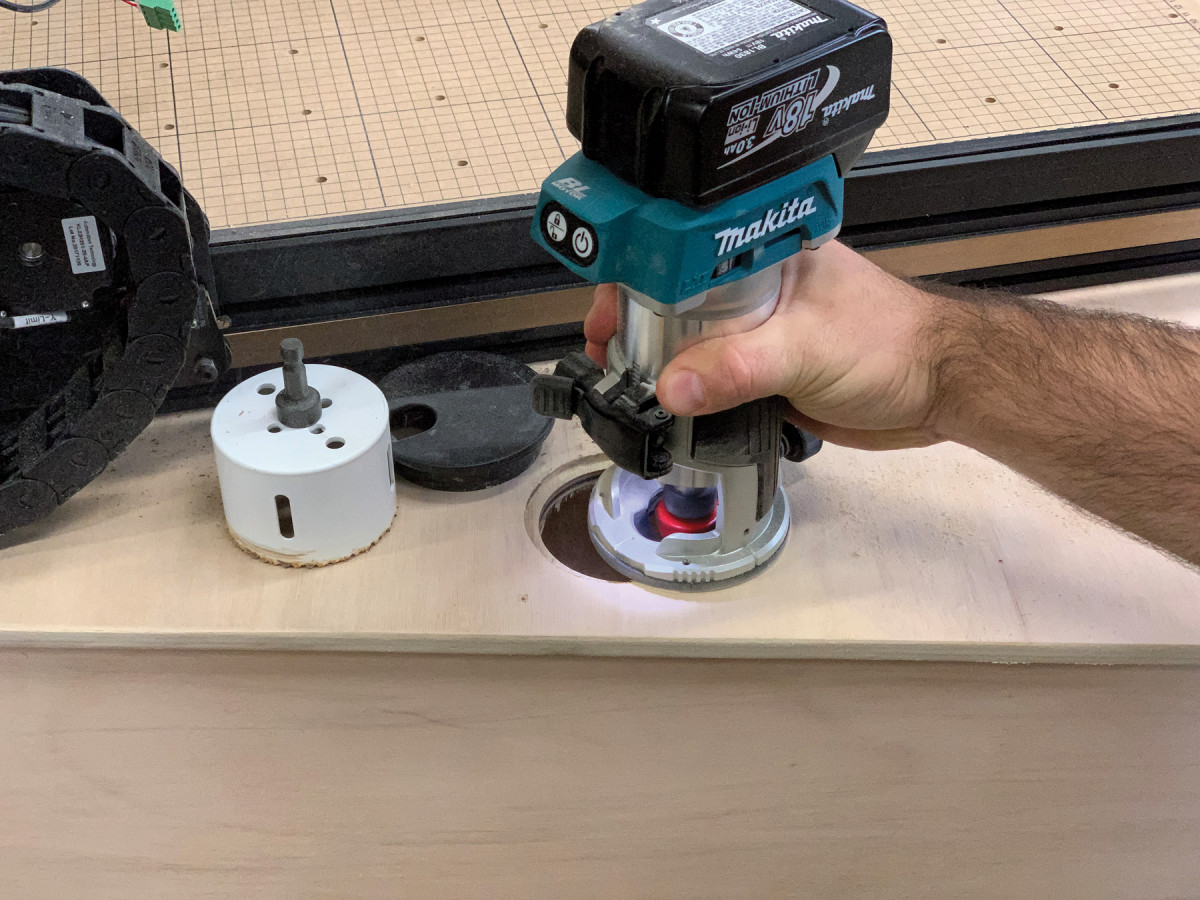
21. A hole saw and rabbeting bit in a palm router make quick work of adding a nice recessed grommet.
One of the last steps is to add the stick that’ll prop your table top up. I didn’t over engineer this step, though I was tempted to. I simply used a 3/4” dowel attached with a lag screw. The dowel rests in a 1″ hole that’s 1/2” deep; drill with a Forstner bit.
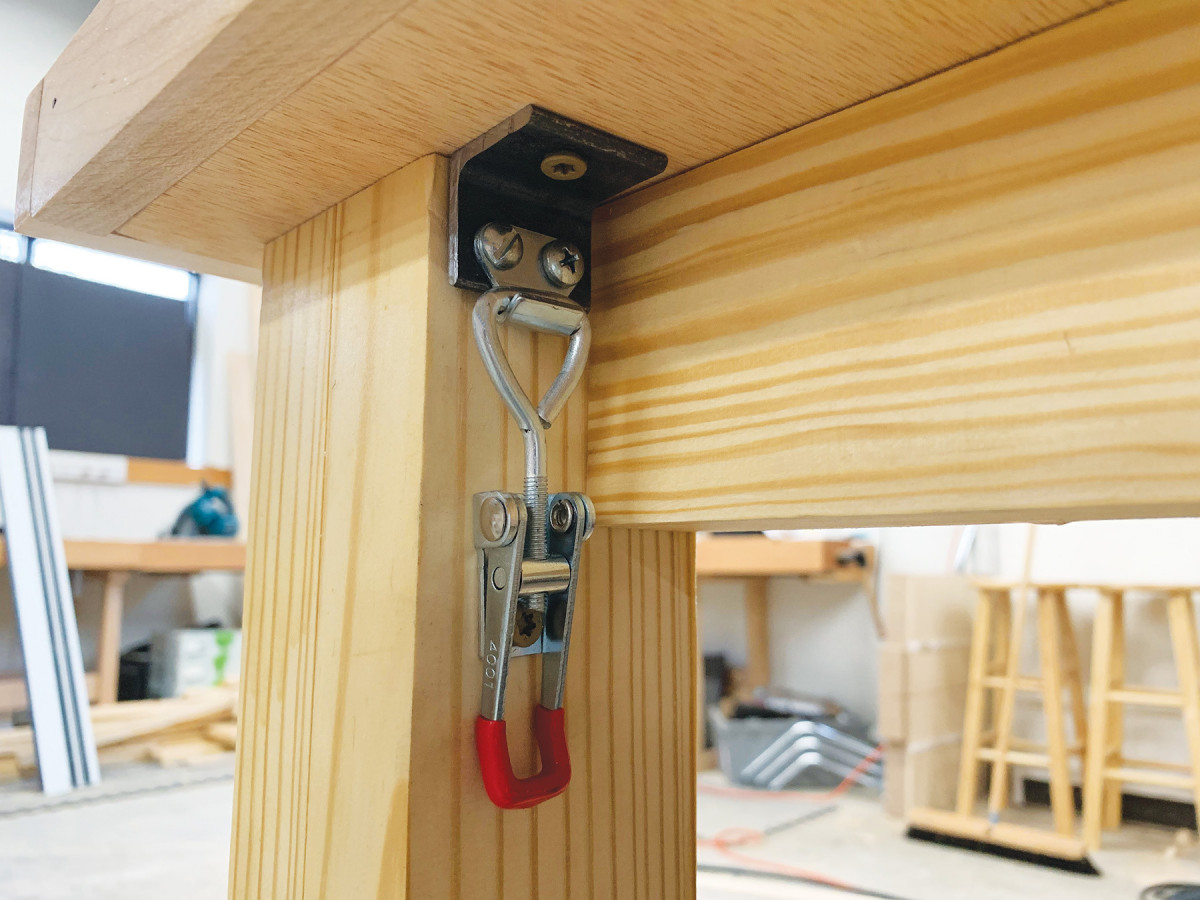
22. Toggle latches attached to angle iron allow me to lock the top to the front two legs.
Finishing
I sanded everything to #180 grit and applied two coats of wipe-on satin polyurethane. You’ll need to route miter slots that accommodate your particular table saw and adjust the height of the legs until they’re perfectly aligned with your table saw top.
23. It’s tempting to over-engineer this lid prop, but I figured if it’s good enough for my Toyota, it’s good enough for my outfeed table.
After stepping back and looking the table over, I decided to add some maple edge banding and a sheet of laminate to the top to improve the durability of the top.
Had this table lived in the secret of my home shop, I would’ve left this step for that mystical day when my kids are grown and I have hours to spend edge banding everything.
Otherwise, this table is ready to serve you as a graciously sized outfeed table, an appropriately sized assembly table and a really convenient CNC station.
Here are some supplies and tools we find essential in our everyday work around the shop. We may receive a commission from sales referred by our links; however, we have carefully selected these products for their usefulness and quality.


You had this as the main article on your web page weeks ago.
Repetitious.
A CNC machine is something that has been on my wish list for awhile now. My buddy and I were suppose to make one. Just never happened.