We may receive a commission when you use our affiliate links. However, this does not impact our recommendations.
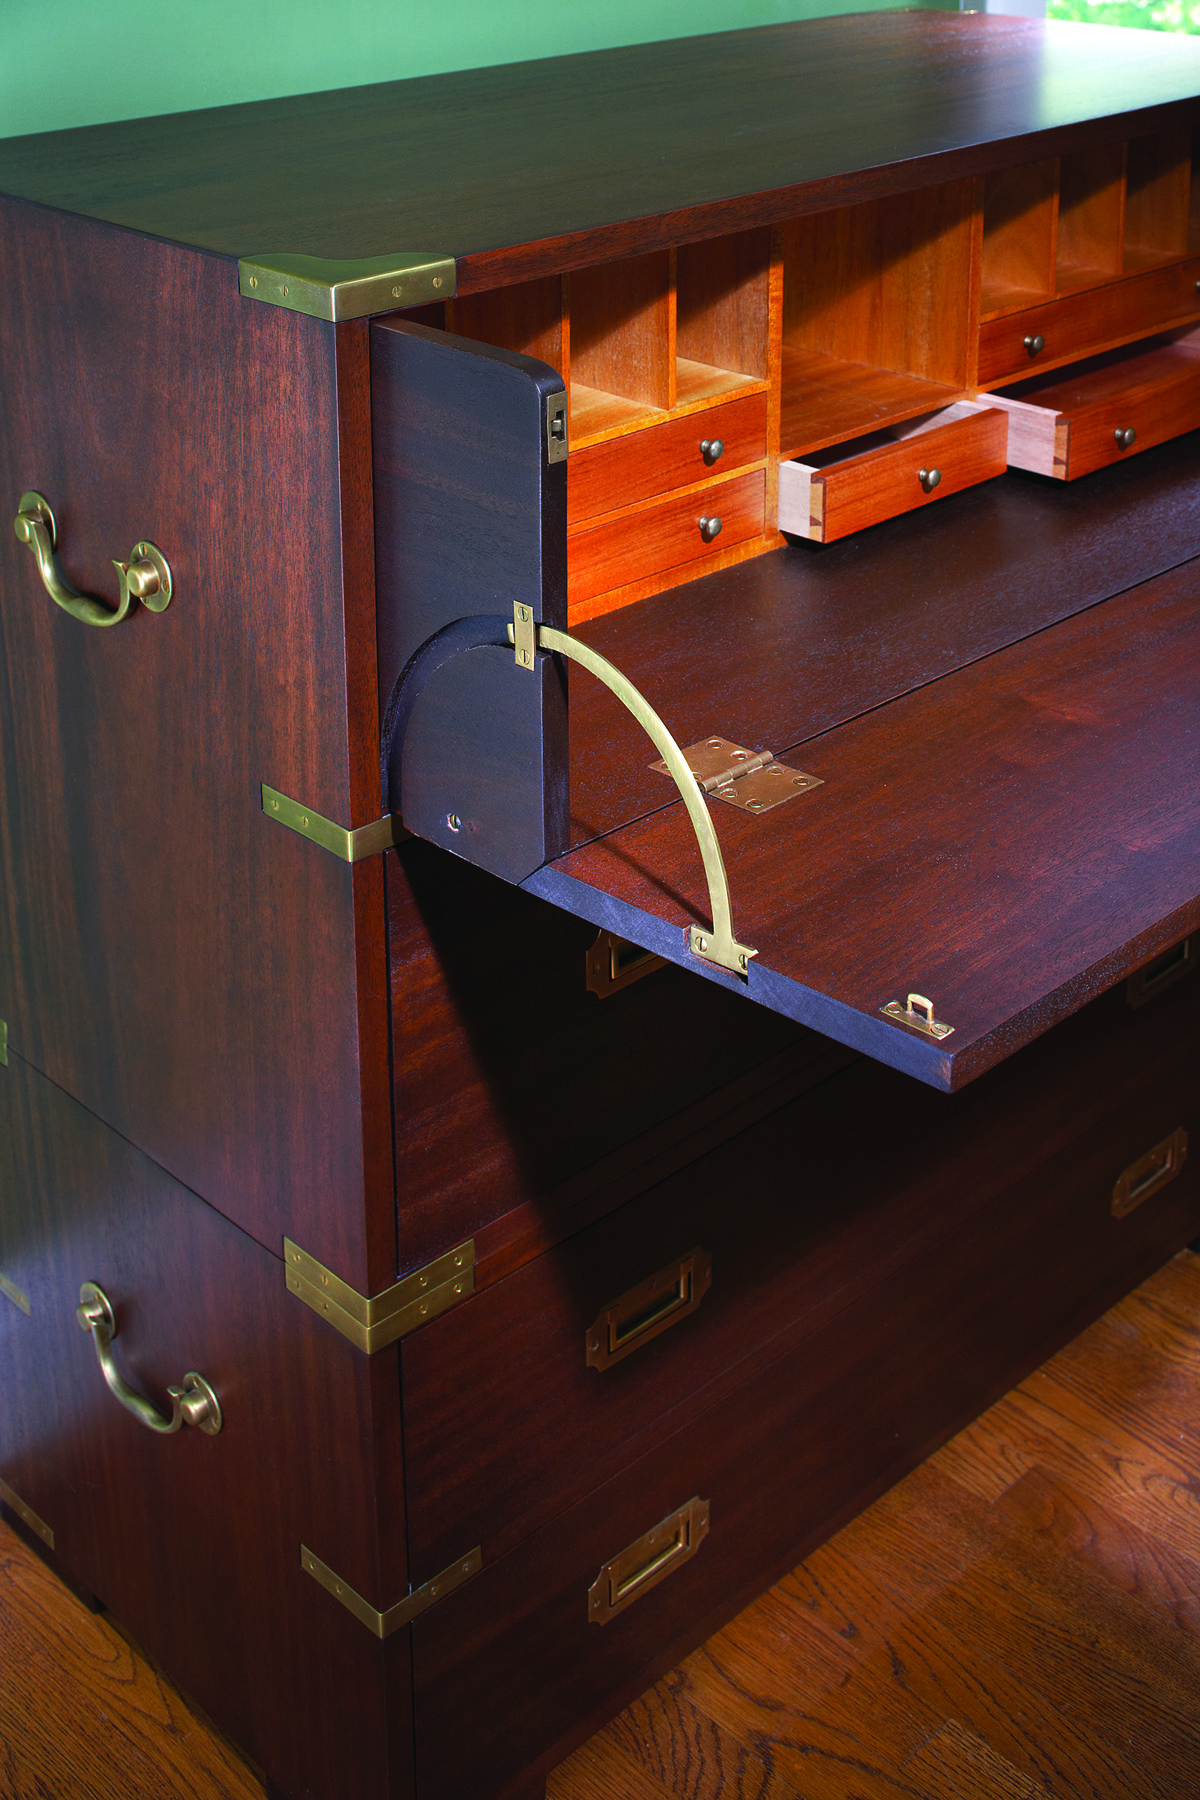
Contrast. Many galleries in campaign secretaries would have contrasting woods or be finished in a different color than the exterior.
Campaign-style furniture is as sturdy and simple as Shaker. It is as masculine as Arts & Crafts. And it is free of adornment, like Bauhaus pieces. Yet many woodworkers are unaware of this furniture style, which was popular for more than 150 years in Great Britain, its colonies and North America.
Perhaps the problem is that campaign furniture goes by many names: military furniture, “patent” furniture or traveling furniture. Perhaps enough original examples of the style haven’t survived or been featured at major museums. Or maybe there just aren’t enough books written about it. For whatever reason, campaign furniture is rarely discussed or built by modern woodworkers, and I would like to change that.
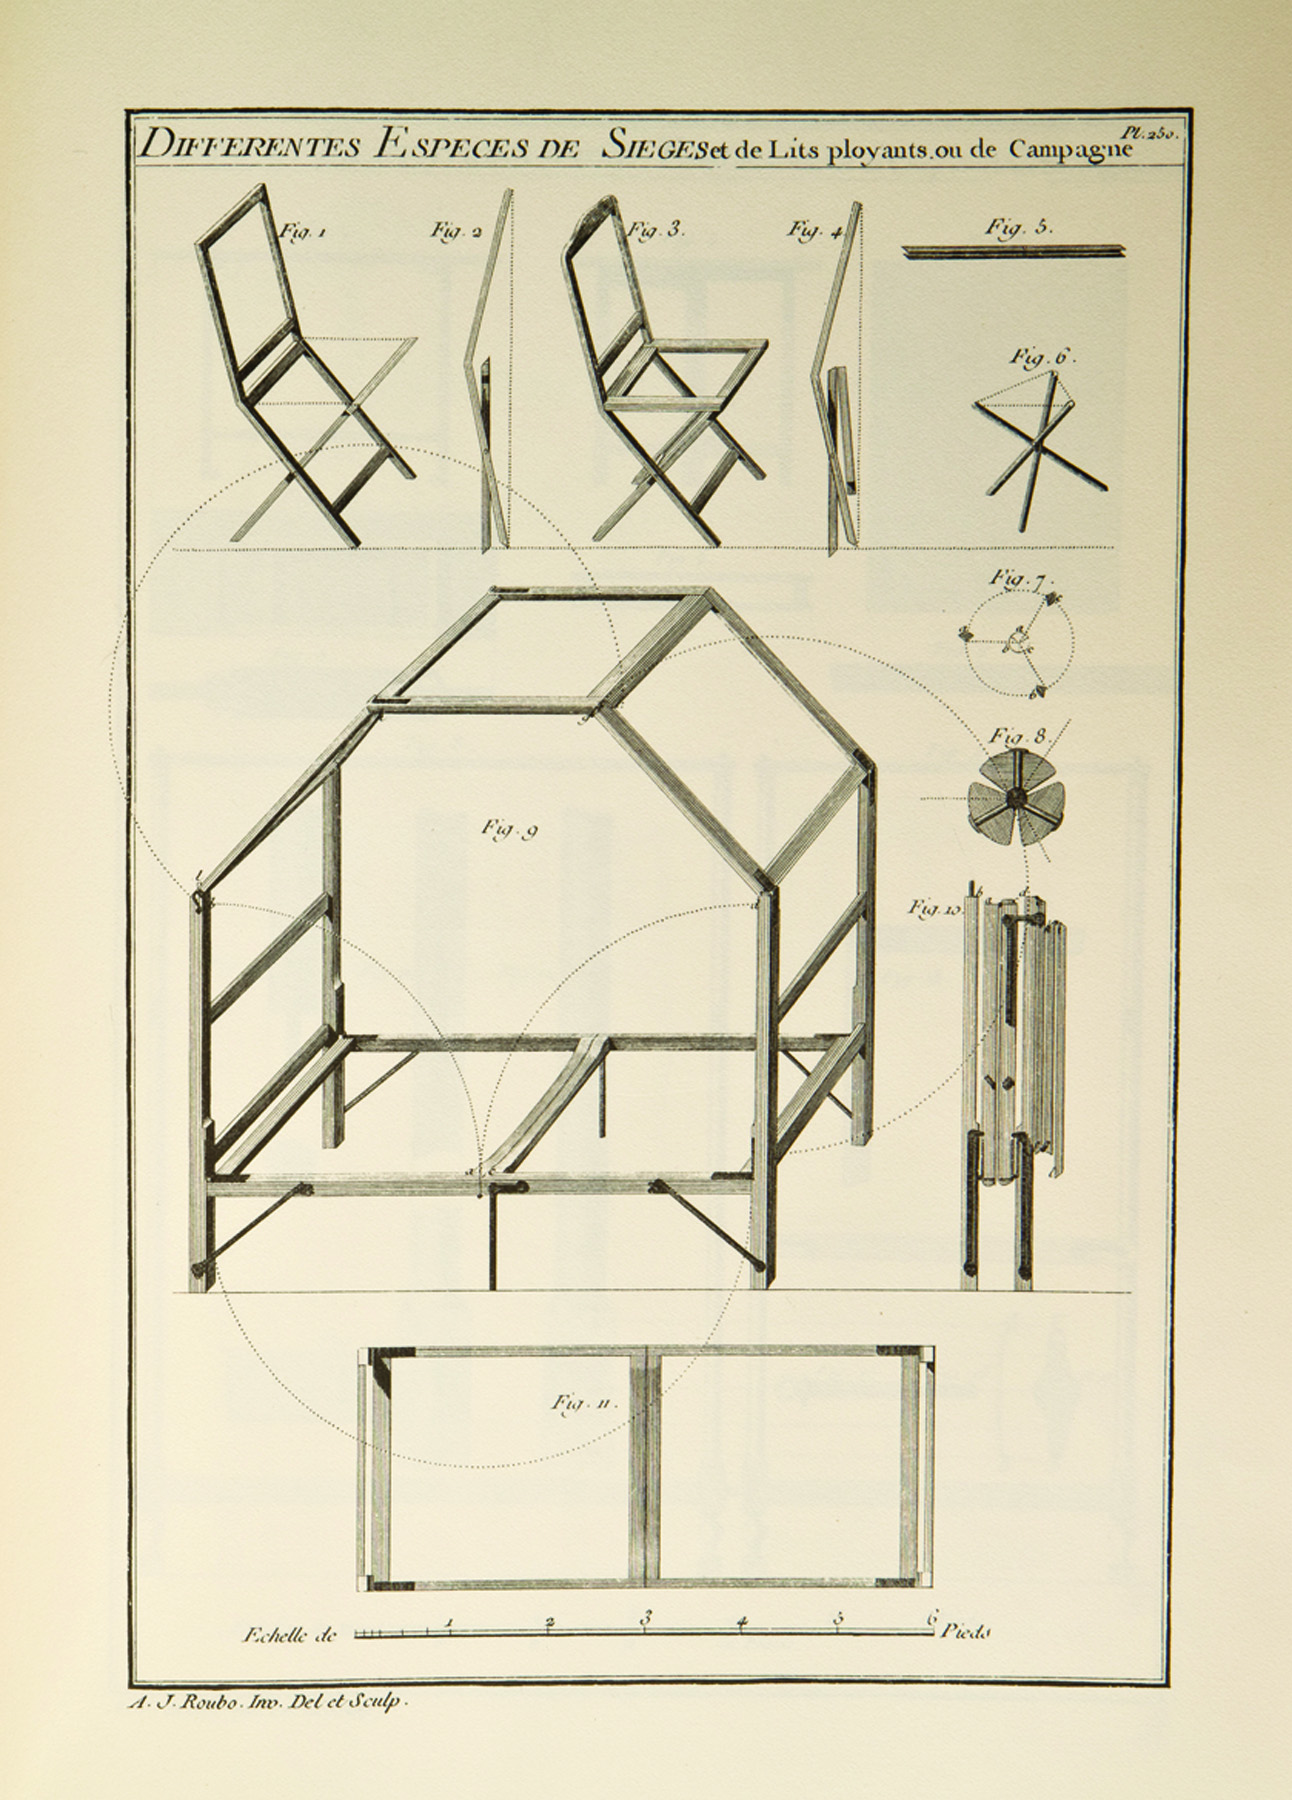
For a mobile military. André Roubo’s 18th-century book on woodworking featured designs for several pieces of campaign furniture, including a folding bed, chair and stool (left). The drawing below, attributed to a Lieutenant Wilmot, depicts a Bengal Regiment of Infantry in Scinde, India, on the move circa 1843. Note the furniture packed onto the camels.
 I grew up surrounded by the style, which has roots in both Great Britain and Asia. My grandparents collected the stuff, and my grandfather built several pieces in the style, including some campaign chests and at least two coaching tables. Coaching tables, by the way, are folding tables with a graceful X-shaped base that were used to serve refreshments at carriage stops in the pre-Industrial world.
After my grandfather died, I inherited a box of his leftover pieces of cast brass campaign hardware. And after stumbling upon this box in 2011 in my basement, I decided to embark on building a number of campaign pieces, including a chest of drawers with a secretary in the top drawer.
A campaign chest is a great project – a classic campaign-style piece. But instead of focusing this article entirely on its straightforward joinery and simple construction, I’d like to introduce you to the campaign style, its history and its important details. Though many joints are similar to those in Shaker pieces, there are many construction points that are unique to campaign furniture. So let’s get started in medieval Europe.
Furniture of War – at First
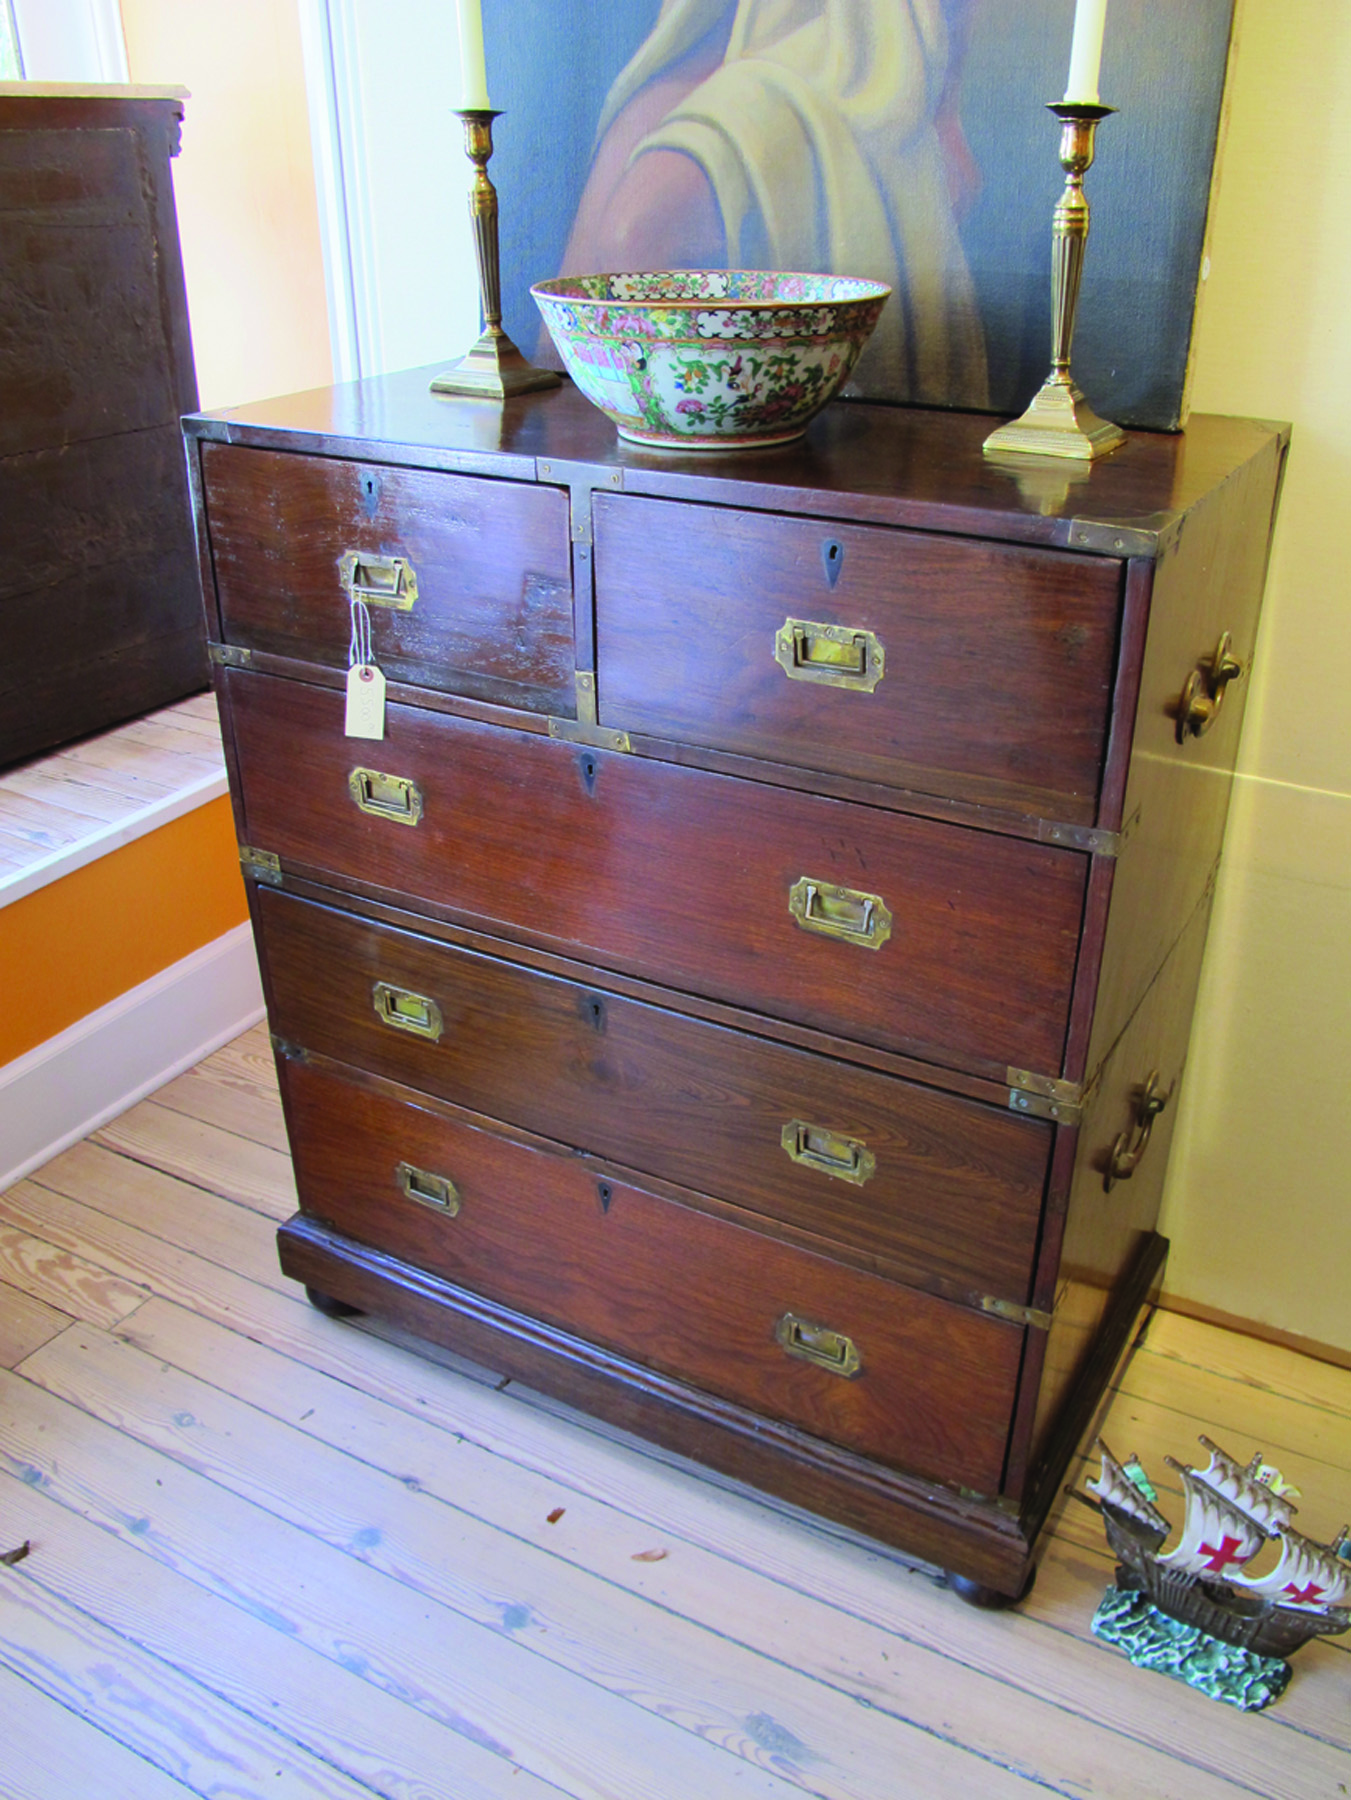
Drawers & feet. On this period example you can see that the smaller drawers are on the bottom and the bigger ones are at the top. Also note the turned feet added below a traditional plinth.
 Invading armies have to travel, so it makes sense that they would own furniture that was lightweight, portable and rugged. And indeed there is documentary evidence of special field beds for officers during the Renaissance and even earlier, according to published research by William Rieder, a curator in the Department of European Sculpture and Decorative Arts at the Metropolitan Museum of Art.
But it wasn’t until the European wars of the 18th century and early 19th century that we encounter a fully formed and separate style of military furniture. British officers purchased their own furniture, and so an entire industry developed to supply them with beds, fold-up tables, collapsible chairs, campaign chests, writing slopes and commodes.
With such strong demand, many leading furniture designers published their own versions of furniture for the military, including Thomas Chippendale, Thomas Sheraton, André-Jacob Roubo and George Hepplewhite.
And many British firms patented their collapsible mechanisms – there were quite a number of these patents issued between 1790 and 1830. Hence, sometimes this style is called “patent” furniture. Many of these mechanisms are ingenious: The seat of a chair folds up and the chair’s front apron folds flat against the chair’s back – like an accordion. The Morgan and Sanders “patent metamorphic library chair” is one famous example of patent furniture – it changes from a chair to library steps in an instant. Plus there are all manner of dining tables that fold down into the size of a suitcase.
These pieces of furniture became popular with civilians. Students purchased folding bookcases for school. And the limited space in urban centers in England made folding, stow-away furniture quite handy, according to Nicholas A. Brawer’s “British Campaign Furniture: Elegance Under Canvas 1740-1914,” one of the few books on the style.
But one of the most popular and enduring pieces of campaign furniture was the chest of drawers – usually called a campaign chest. These chests were typically made in two pieces that stacked on top of one another. Why two pieces? Well, there were several reasons. The British Army General Order 131 (d) from 1871 states that the maximum size for a chest of drawers was 40″ wide x 26″ x 24″. So two pieces would create a typical chest of 40″ to 42″ high. Also, according to Brawer, the two halves of a single chest could be strapped over a mule’s back to create a balanced load on the animal.
As a result of this rough treatment, the chests needed to be rugged. Dovetails alone would not be enough.
Dovetails for Casework
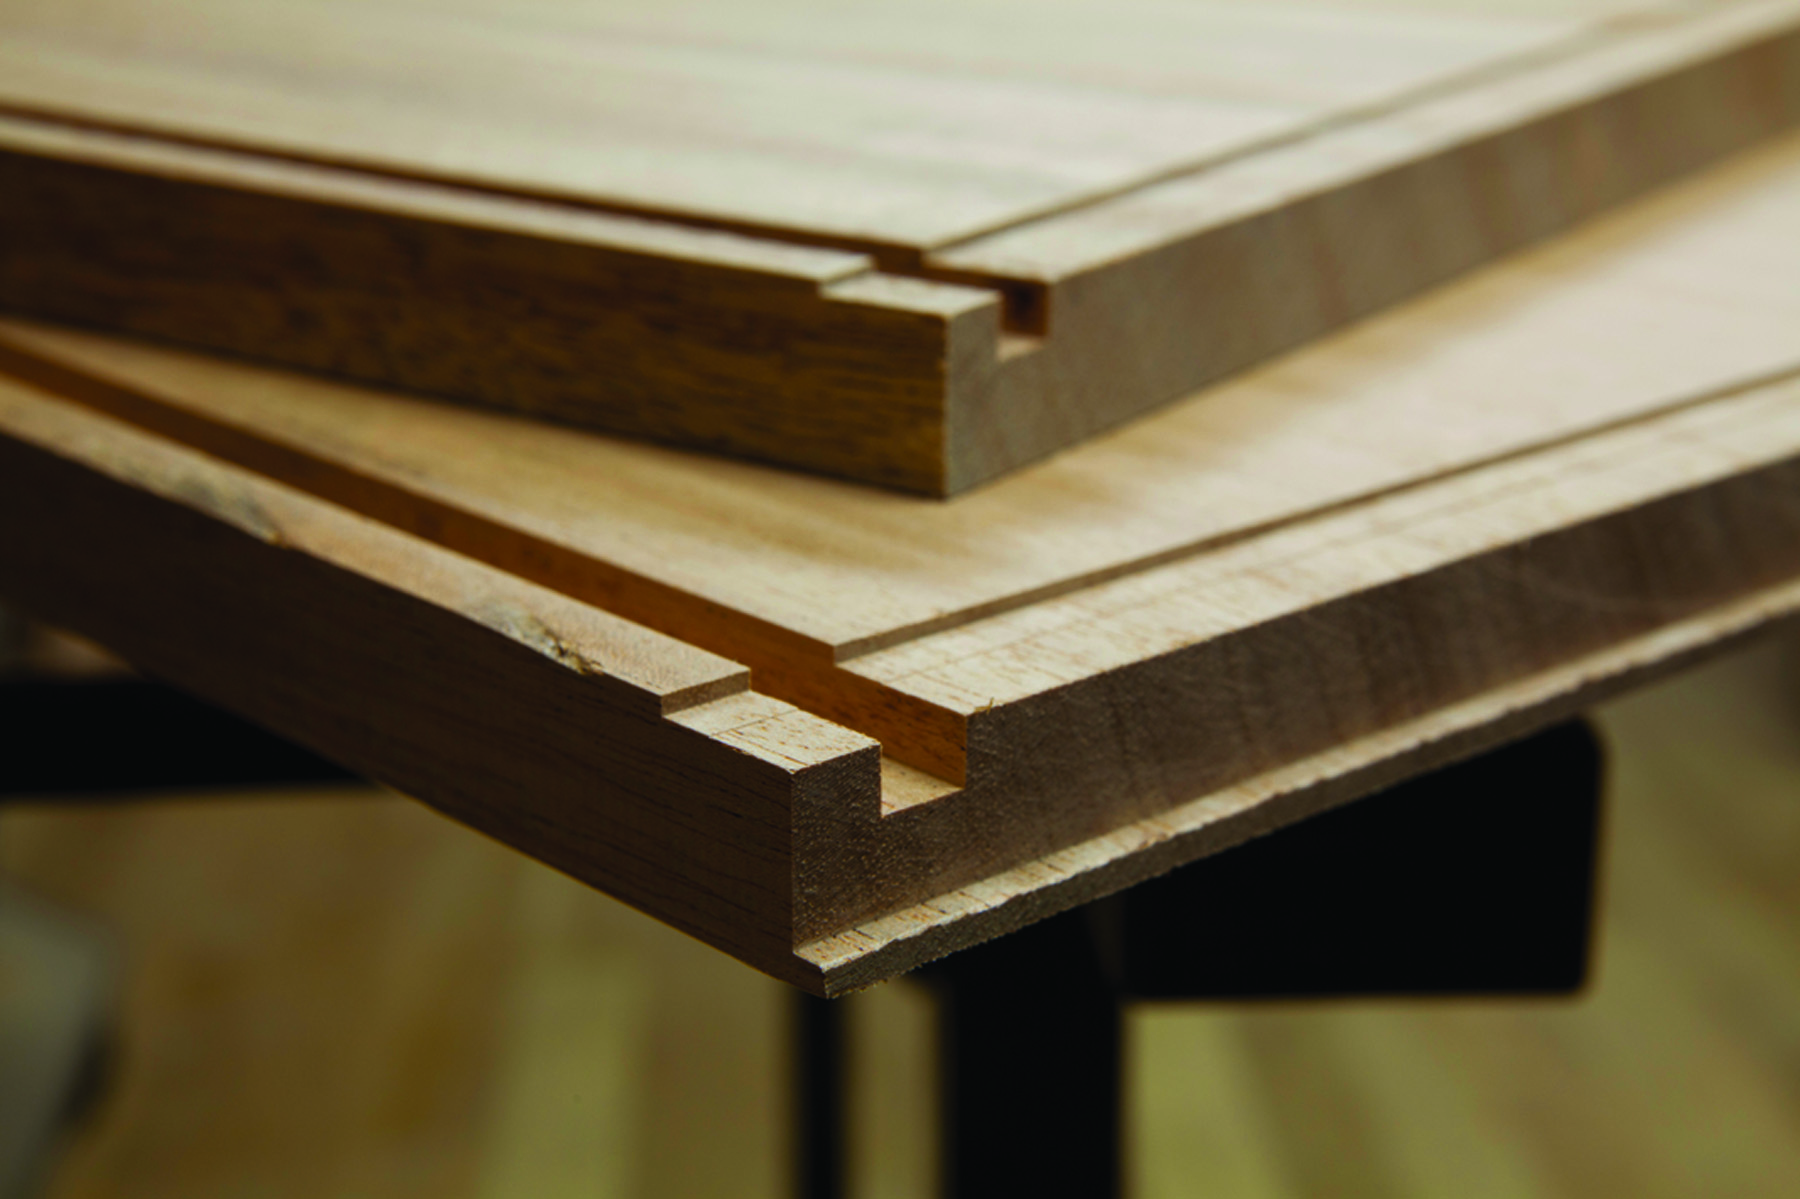
1. Rabbets. There are two rabbets for this joint: a narrow one that lips over the sides of the carcase, and a wide one that helps register the top onto the sides while cutting the joint.
When dovetailing drawers, most people tend to prefer skinny pins. But when you are dovetailing casework and the dovetails will be hidden, the rules change. For a typical 18″-deep carcase, I’ll lay out five or six tails, which will result in considerably bigger pins. That’s OK – six dovetails offer plenty of strength.
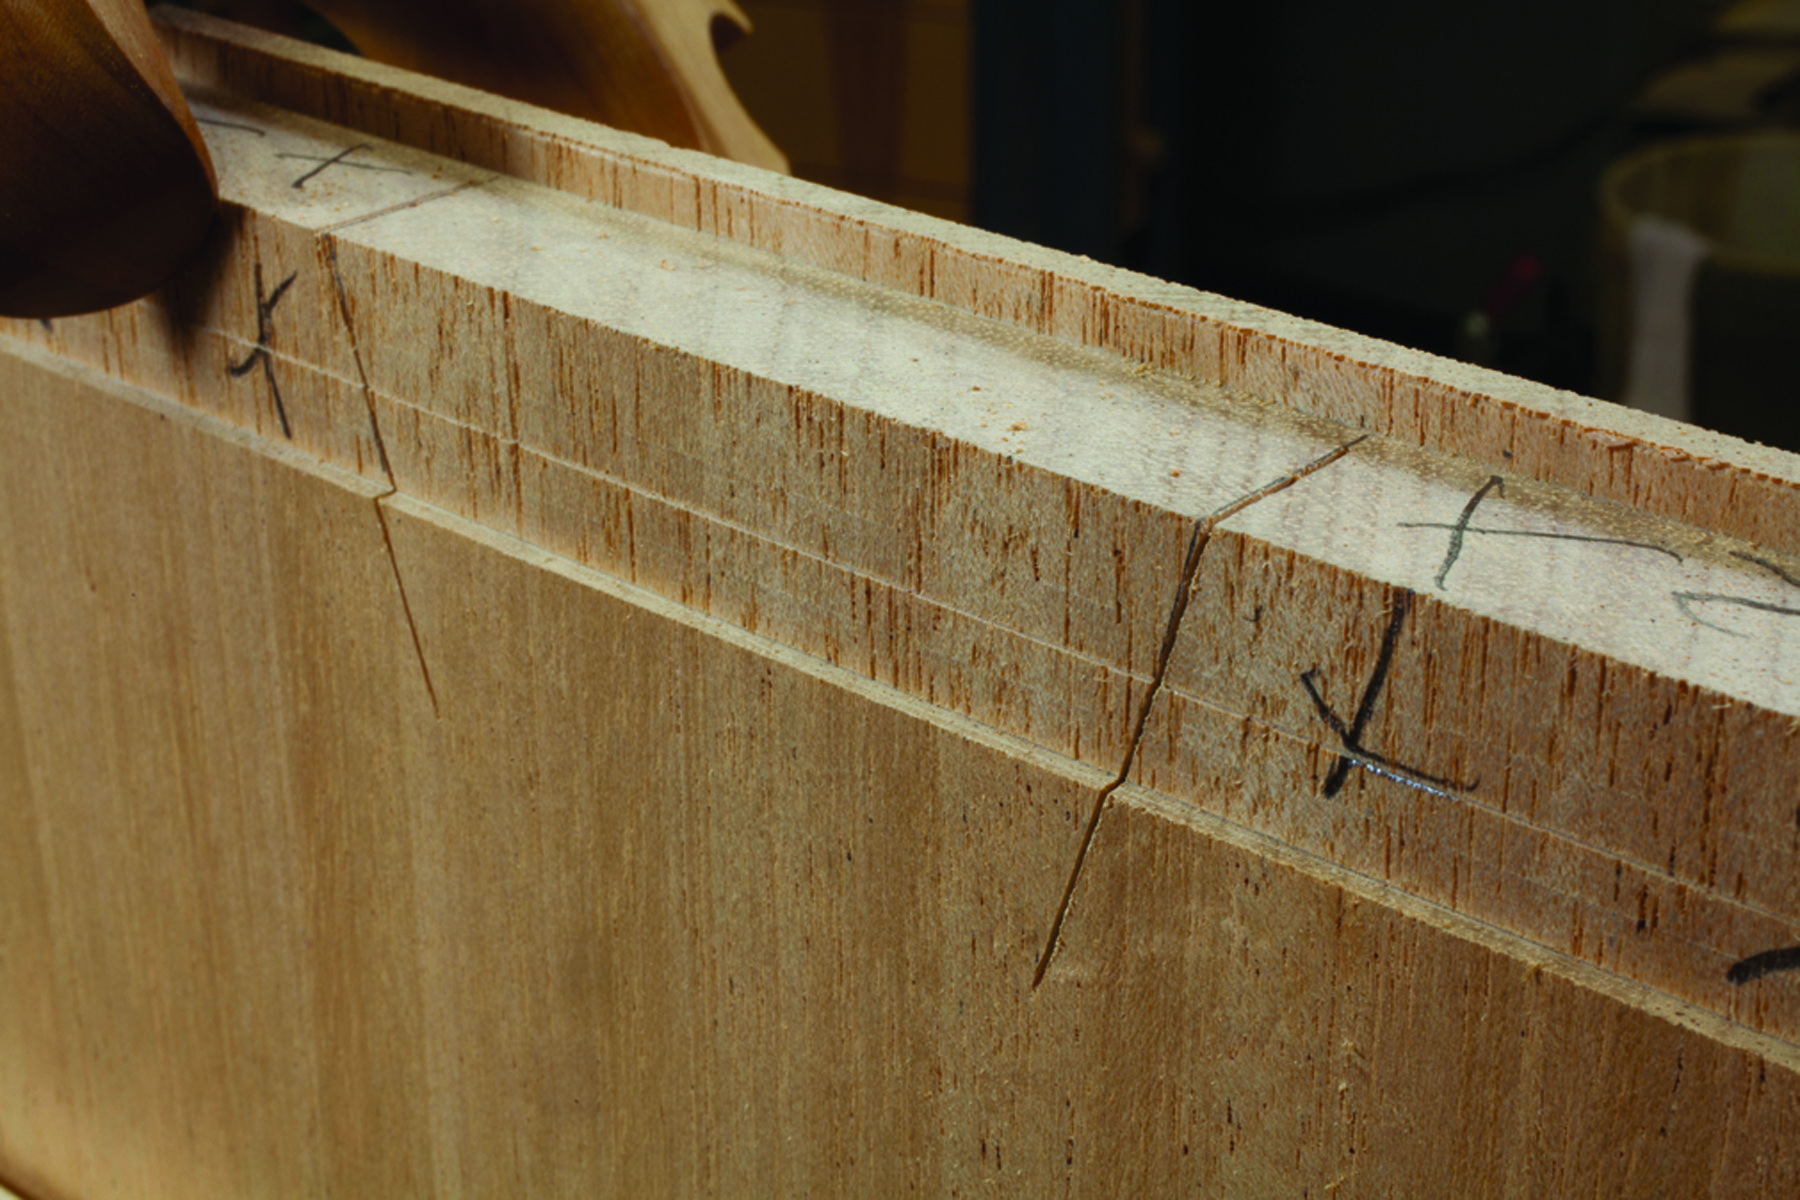
2. Avoid & overcut. To cut the blind tails in the top, overcut your baseline. But don’t nick the narrow rabbet, because that would show when the joint is assembled.
With this project, there are three kinds of dovetails: through-dovetails for the backs of the drawers; half-blinds for the drawer fronts and the hidden parts of the carcase; and full-blinds for attaching the top of the top carcase.
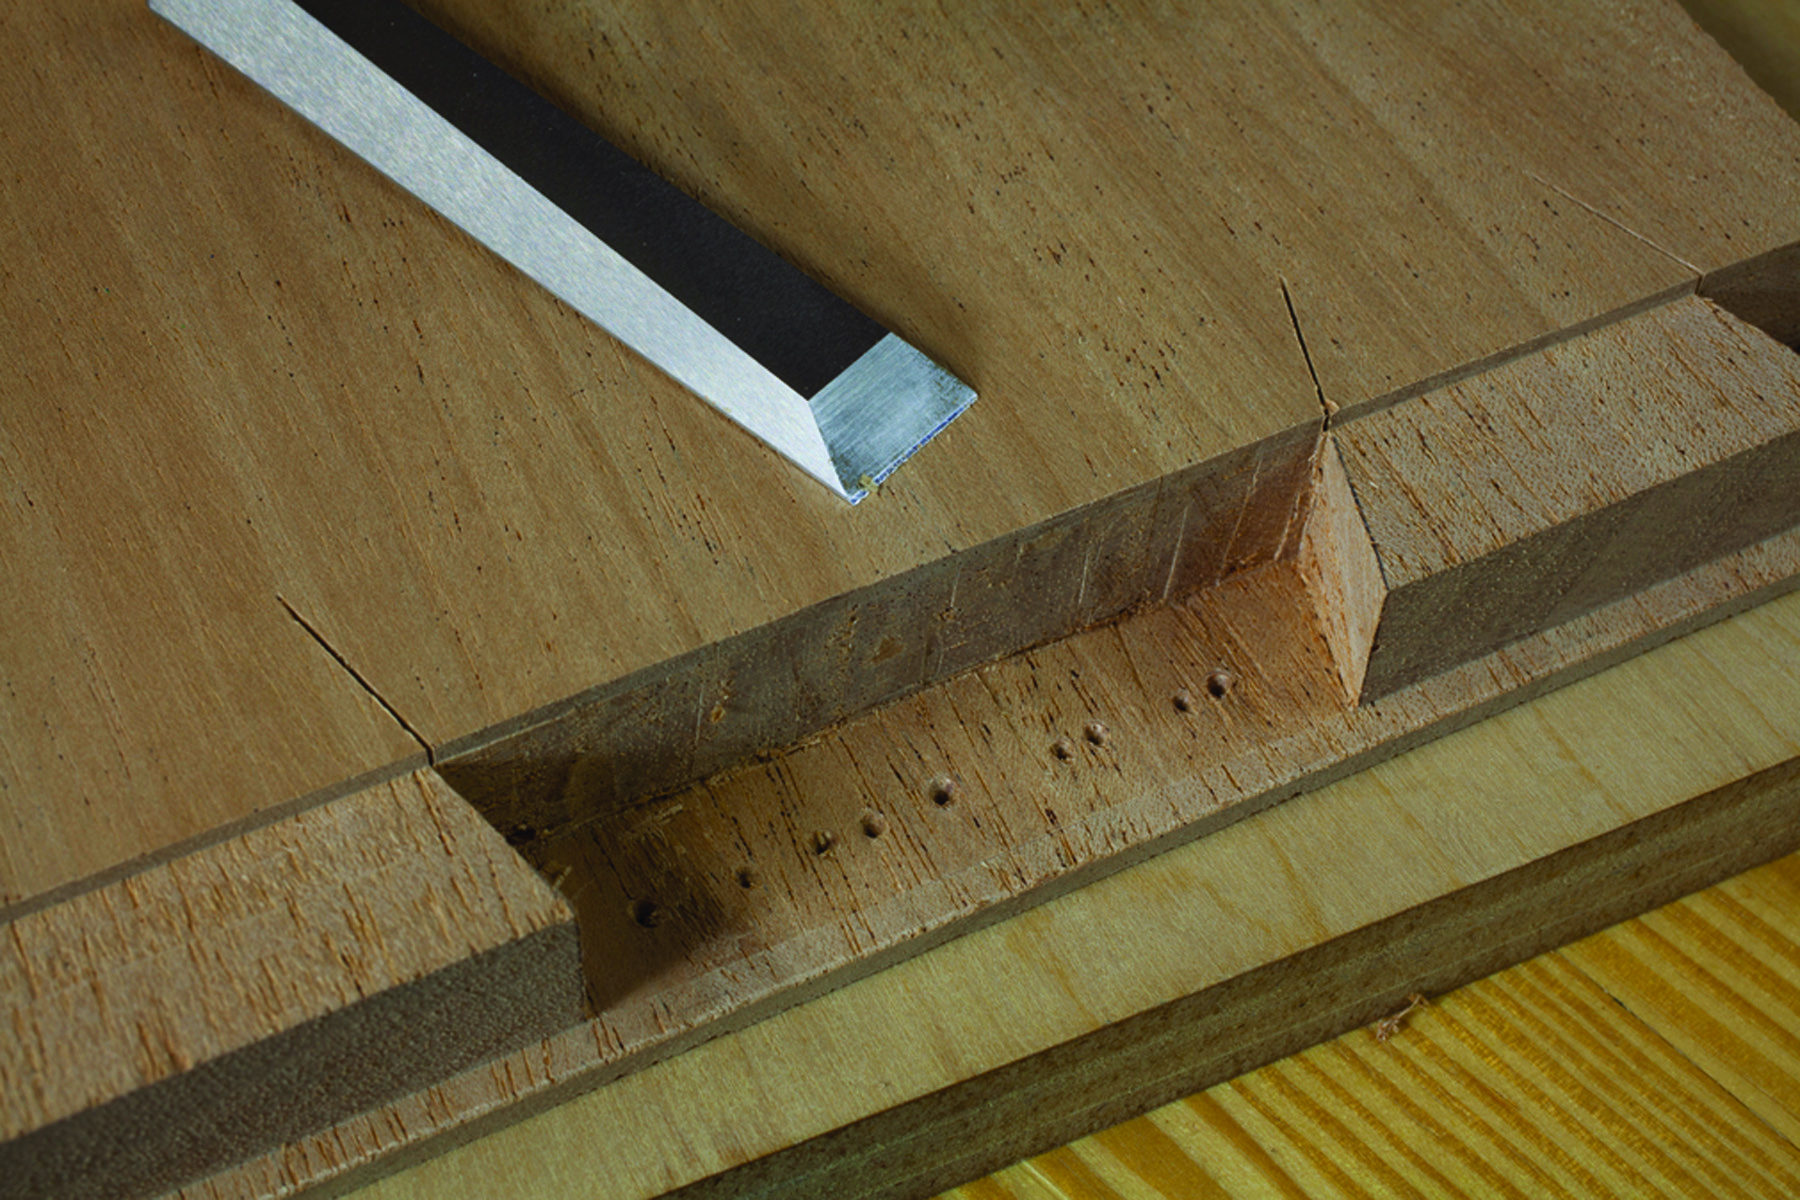
3. Clear out. Remove the waste between the tails with a Forstner bit and a chisel. Don’t worry about the overcuts on the tails. Those will be hidden inside the carcase. Only a conservator will see them.
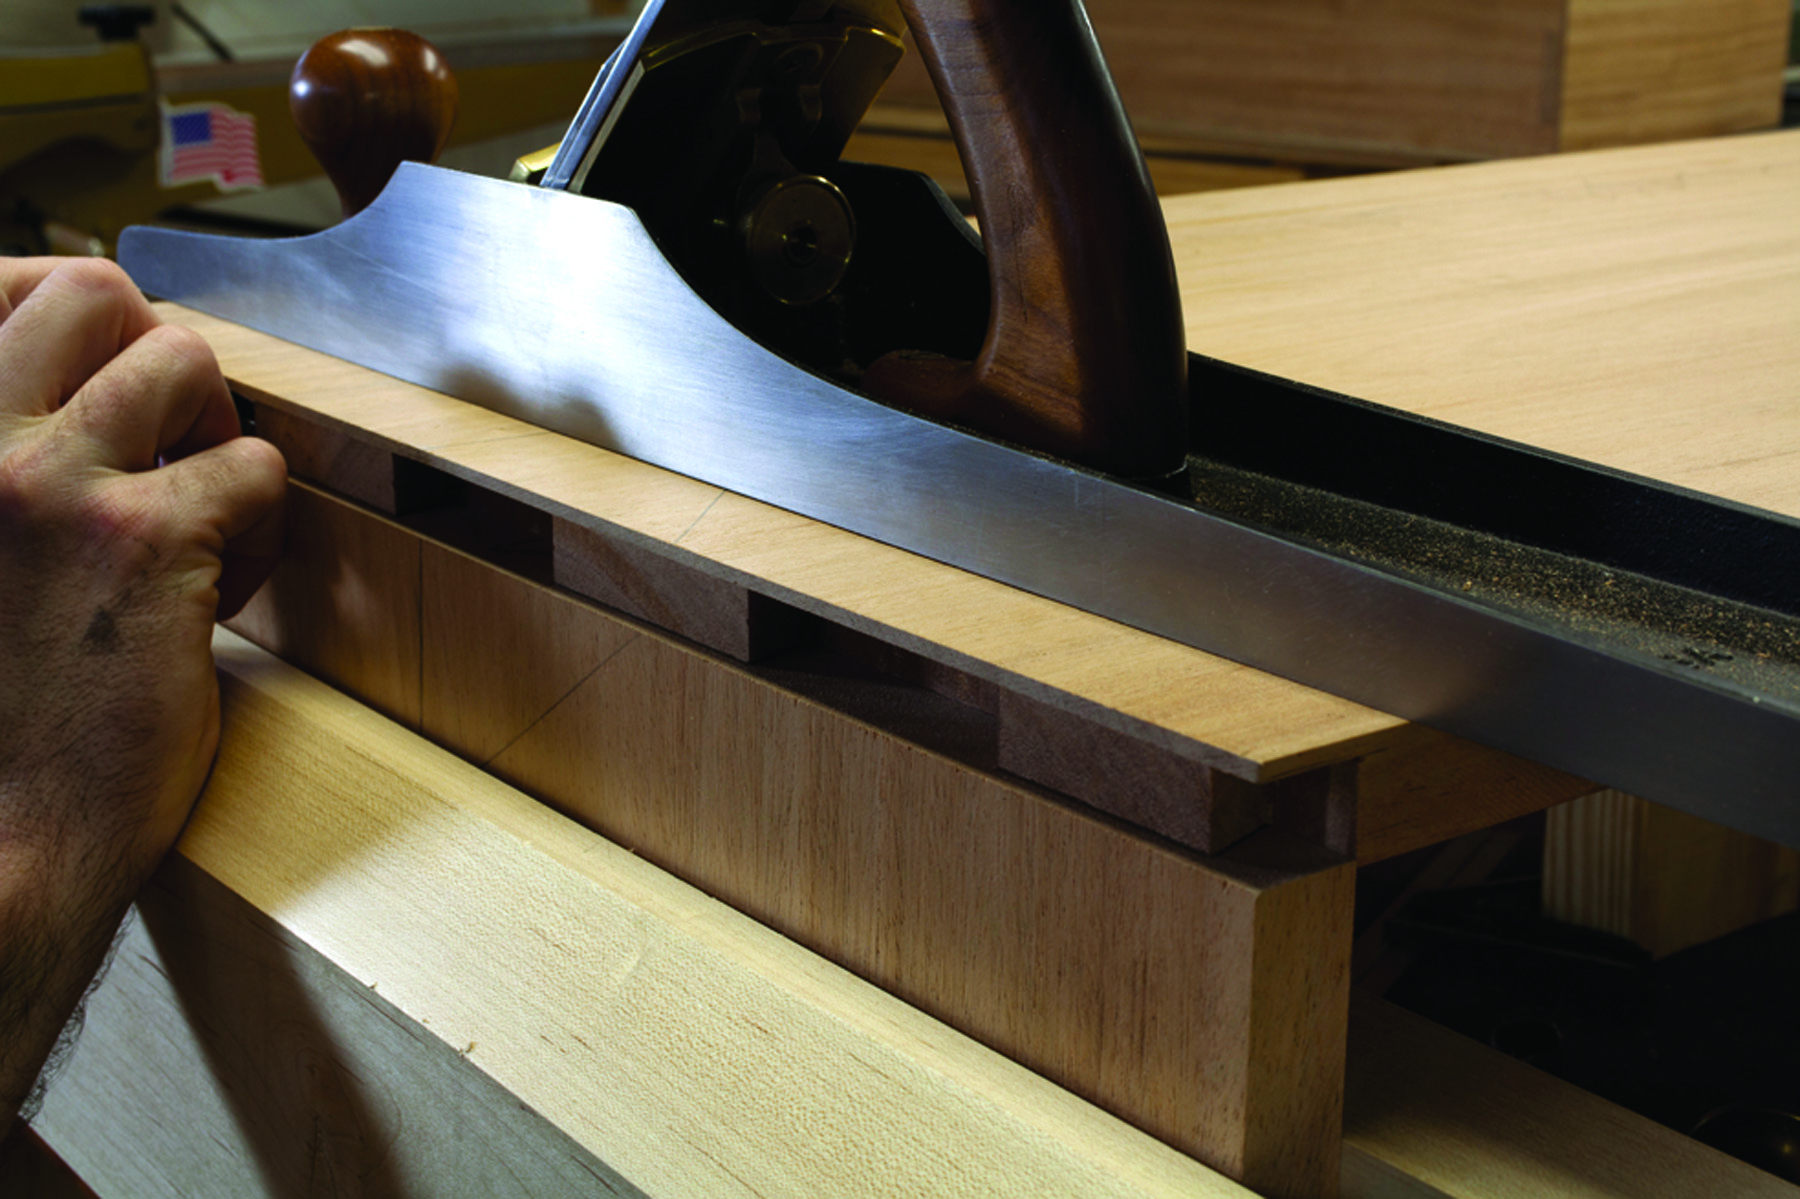
4. Transfer the weight. A jointer plane is used to hold the tail board securely on the pin board while marking out the pins with a knife. Then you saw the pin waste and remove it just like you would when you build a drawer.
Most woodworkers will scratch their heads about cutting the full-blinds. Stop scratching. They are easy and forgiving. Here’s how to do it.
— CS
Design of Campaign Chests
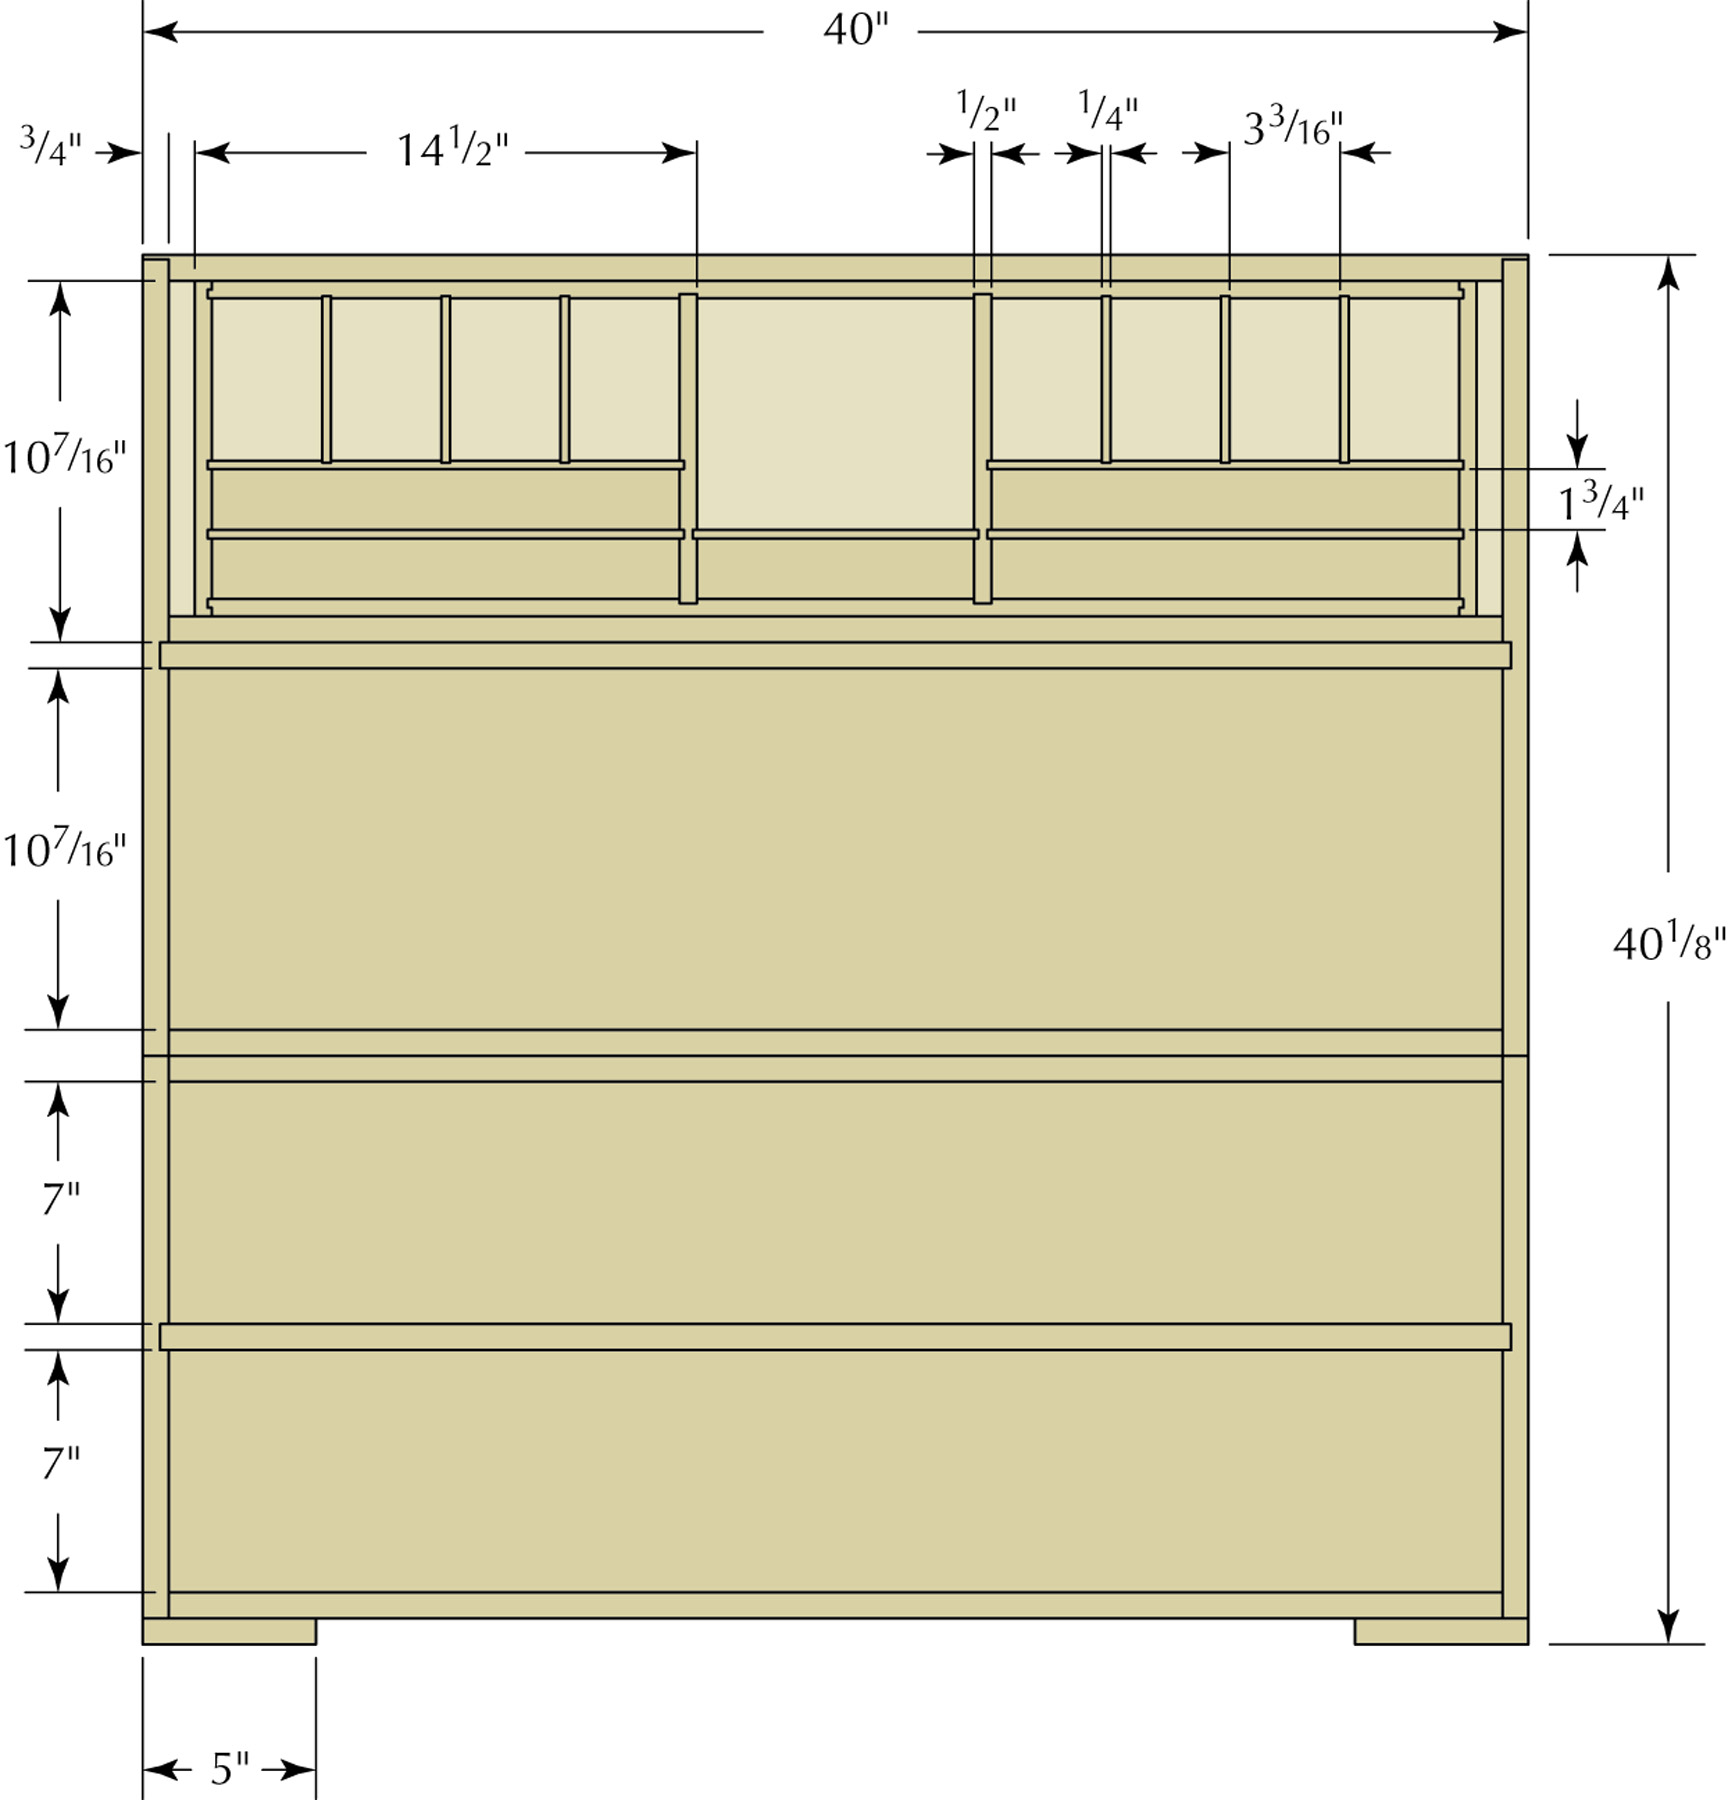

 I’ve inspected a fair number of these original chests, plus I’ve collected photos and measurements from auction catalogs of many more. When designing your own campaign chest, here are some guidelines to follow.
When stacked and in use, most of the full-size chests are 40″ wide, sometimes a little less. Their height is usually about 40″, though sometimes they are as tall as 43″, especially the ones with turned feet. The depth of a campaign chest tends to vary – 17″ to 18″ is typical, though some are as deep as 23″.
There are a few different kinds of bases, or plinths, on these chests. The one shown in this article is the simplest – it’s just four square feet screwed to the underside of the bottom case. While that base was fairly typical, I’ve encountered many campaign chests with four turned feet. These turnings are removable and have a wooden screw at the top that threads into the base. You’ll also find campaign chests with bracket feet, like a traditional chest of drawers, though many of these have been added to the chests later on in their lives. And finally, I’ve seen a few weird chests that combine two of these kinds of bases. You’ll have square feet or a bracket base plus turned feet below.
The other curious design feature of campaign chests is the way the drawer sizes are graduated. While some campaign chests have a typical drawer-graduation scheme – the taller drawers are at the bottom and the shorter ones are at the top – many chests do not.
Instead, the two drawers in the lower section are short and the drawers in the top section are tall – it basically reverses the design scheme to which we are accustomed.
After many years of looking at these campaign chests, I actually like this reverse-graduation scheme. Some people do not. In the chest I built for this article, the two lower drawers are each 7″ tall; the two upper drawers are each about 10″ tall.
Why are the drawers sized like this? Usually it’s because the chest also functions as a secretary, or desk, for its owner. One of the drawers in the chest opens up to offer a writing surface and that needs to be 30″ off the ground. That dictates all the other drawer sizes. A typical arrangement is for the front of the drawer to fall forward and lock flat – revealing a host of internal drawers and cubby holes.
A less-common arrangement is for the second drawer to pull out and reveal a writing surface that is actually a lid on the drawer. Lift the writing surface and you can get to your writing supplies below. Close the lid and you can begin your correspondence.
The other prominent feature of campaign chests is the flush hardware. And there is a lot of it. Some of the hardware protects the corners; some of it is in the form of brackets that reinforce the joints. The hardware is flush-mounted so that chests could be stacked closely together on ships, according to an article by Jerome Phillips in the June 1984 issue of Antique Collecting magazine.
The furniture also had to be tied down, and so the ends sometimes have handles that accommodate ropes. And some antique chests have indentations from ropes. Other chests were packed inside wooden crates to protect them from abuse while traveling.
How to Keep the Cases Aligned
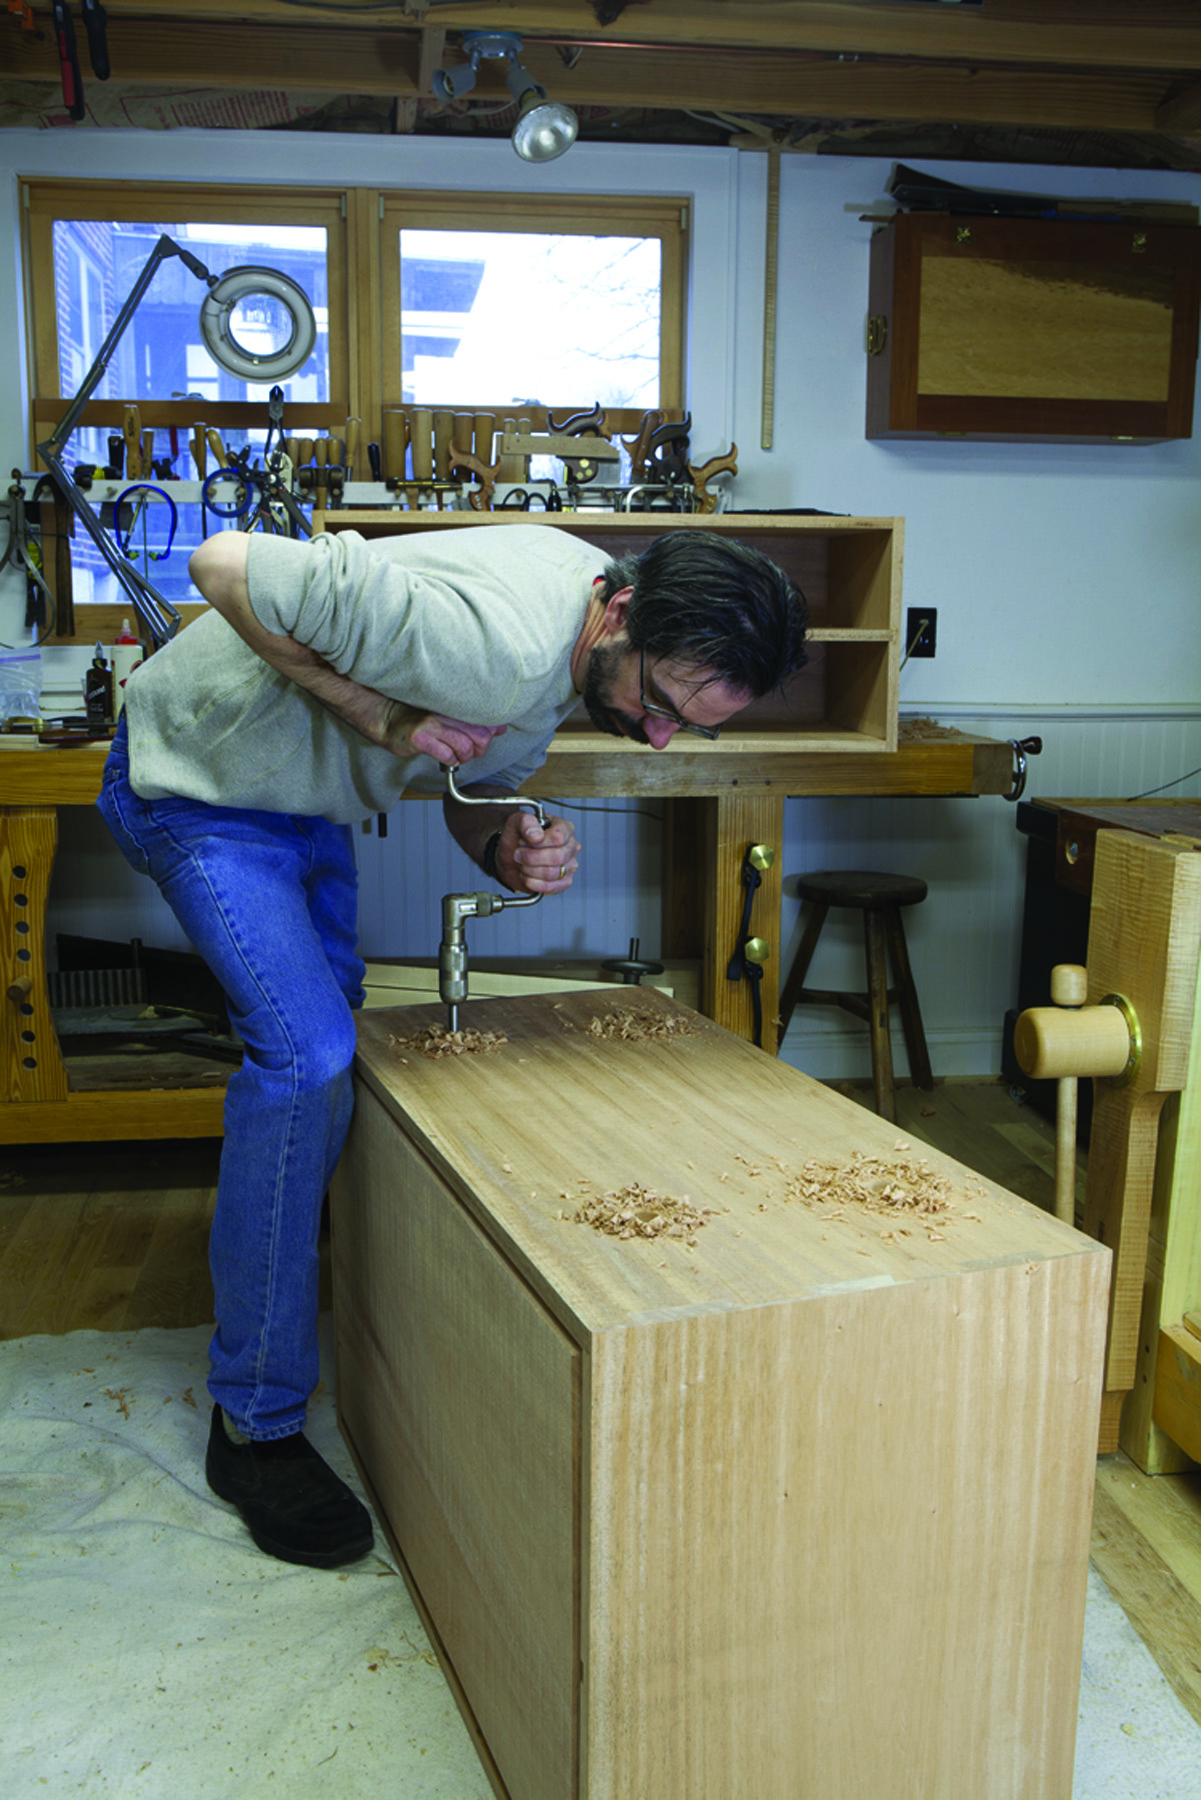
Holes & pegs. The 11⁄2″ holes were bored using a modern Forstner bit and a brace (yup, that works). Before inserting the dowels into each hole, the ends were chamfered a bit to make the units’ docking procedure easier.
With campaign chests you need to keep the top unit from sliding off the bottom unit when you open and close the drawers. Some chests were screwed together. Others used gravity and four wooden dowels to keep the top unit in place. And that’s what I opted to do.
 The top surface of the bottom unit has four 11⁄2“-diameter holes that are about 1⁄2” deep. Then I glued and screwed in a 1″-long section of 11⁄2” dowel into each hole. The underside of the top case has four matching 11⁄2” holes. So the top case just drops in place on the bottom one and stays put unless lifted off. — CS
Wood Selection & Joinery
Campaign chests were built using a wide variety of domestic and tropical woods, from oak and beech to mahogany, teak and camphorwood. Most examples I’ve seen use solid wood as opposed to veneers. What is particularly interesting about the wood selection is that in many campaign chests there is no secondary wood. Every scrap – even the drawer bottoms – are solid mahogany or teak.
Why would they use such expensive wood inside a case? Simple. To defend against bugs and rot, according to Brawer’s book on the style. In fact, their owners would occasionally set the feet of their furniture in ceramic bowls of water or oil to prevent bugs from eating their furniture. Of course, soaking the wood in water led to rot, which is why you will find many pieces with missing or shortened feet, according to Brawer.
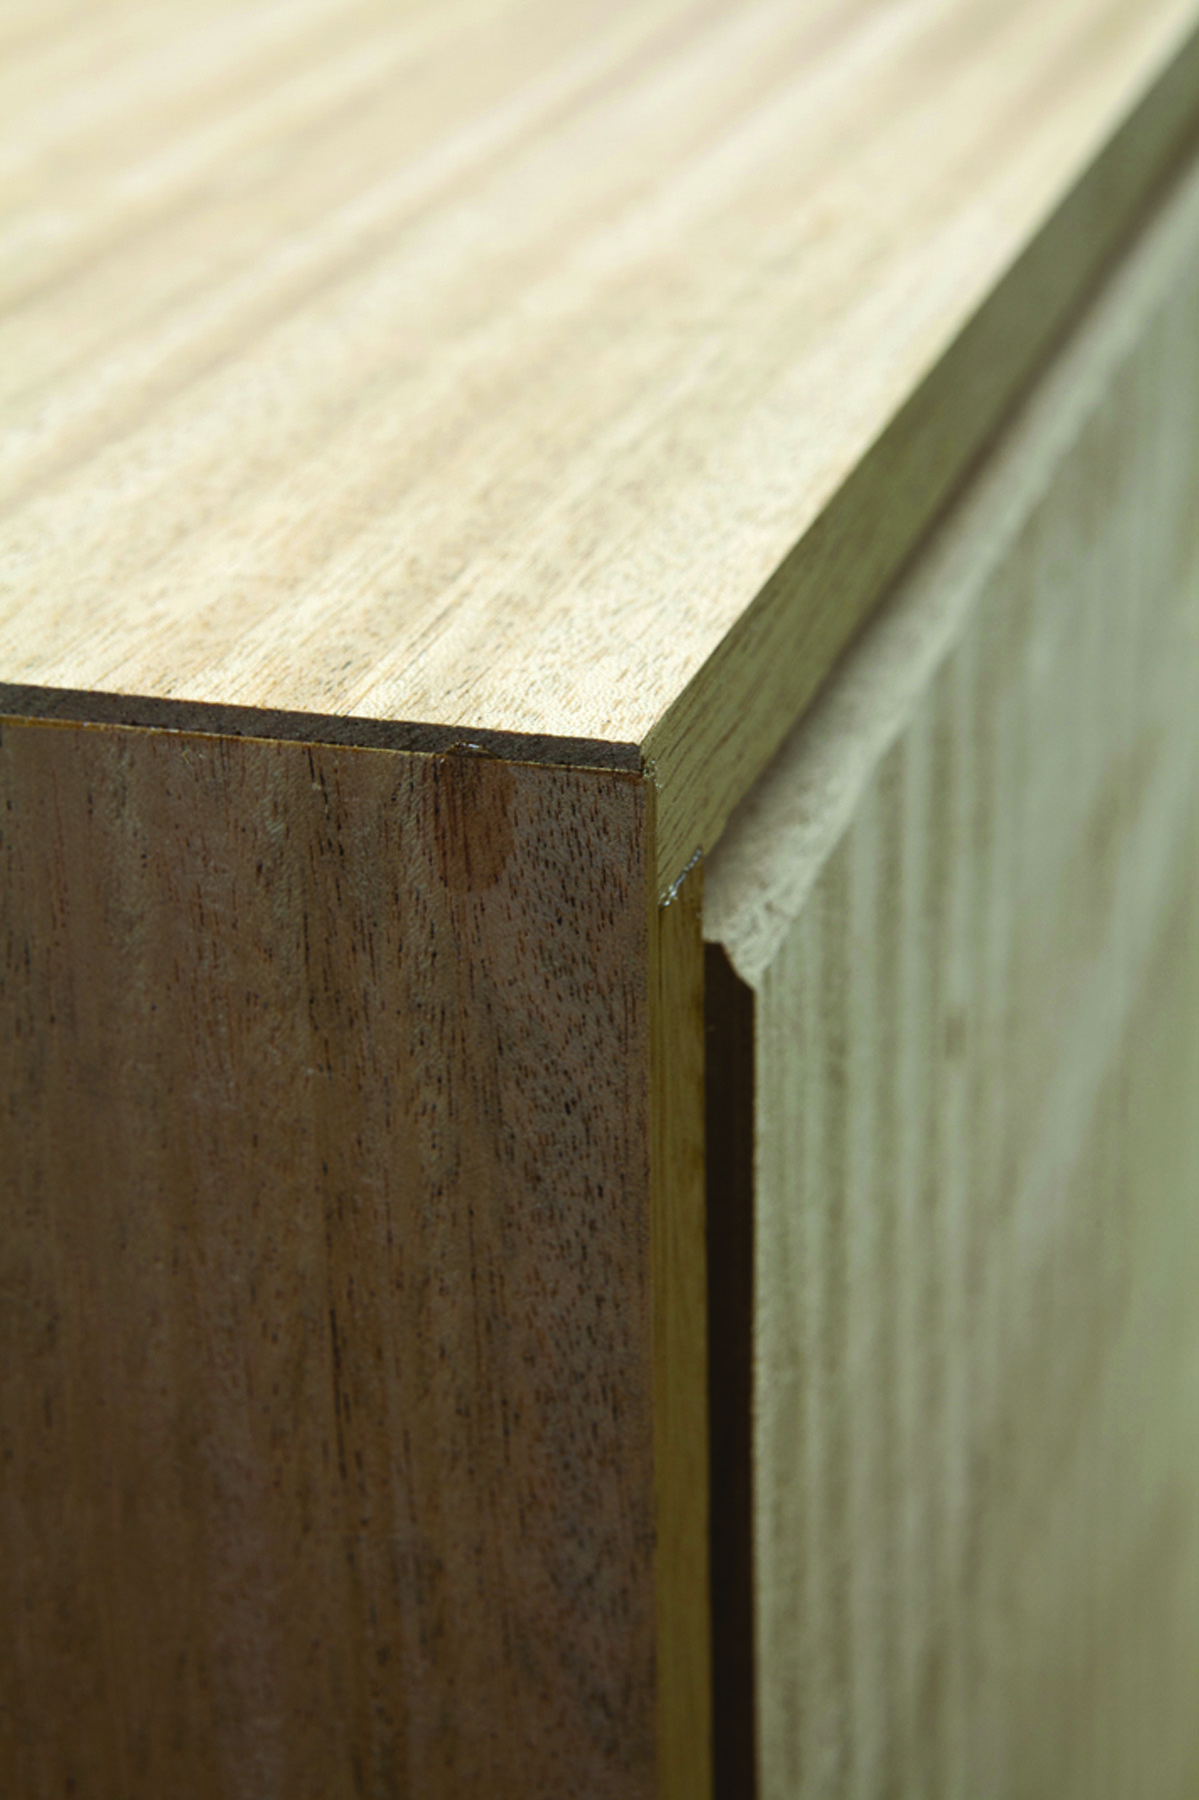
Full blinds. Here are the dovetails for the secretary’s top. Note the small rabbet at the end. When the joint is assembled the rabbet is the only part of the joint that shows.
When it comes to joinery, most campaign chests were assembled using dovetails, though the joints aren’t obvious. While some campaign chests have through-dovetails or half-blinds that show at the corners, most chests do not. It’s only when you unstack the chests that you can see that the tops and bottoms are dovetailed to the sides.
The biggest question for most woodworkers is how the top of the top chest is connected to the sides. From the outside, it looks like the top is rabbeted to receive the sides. Some chests have nails through the top and into the sides, which has led some people to think the chests were just nailed together.
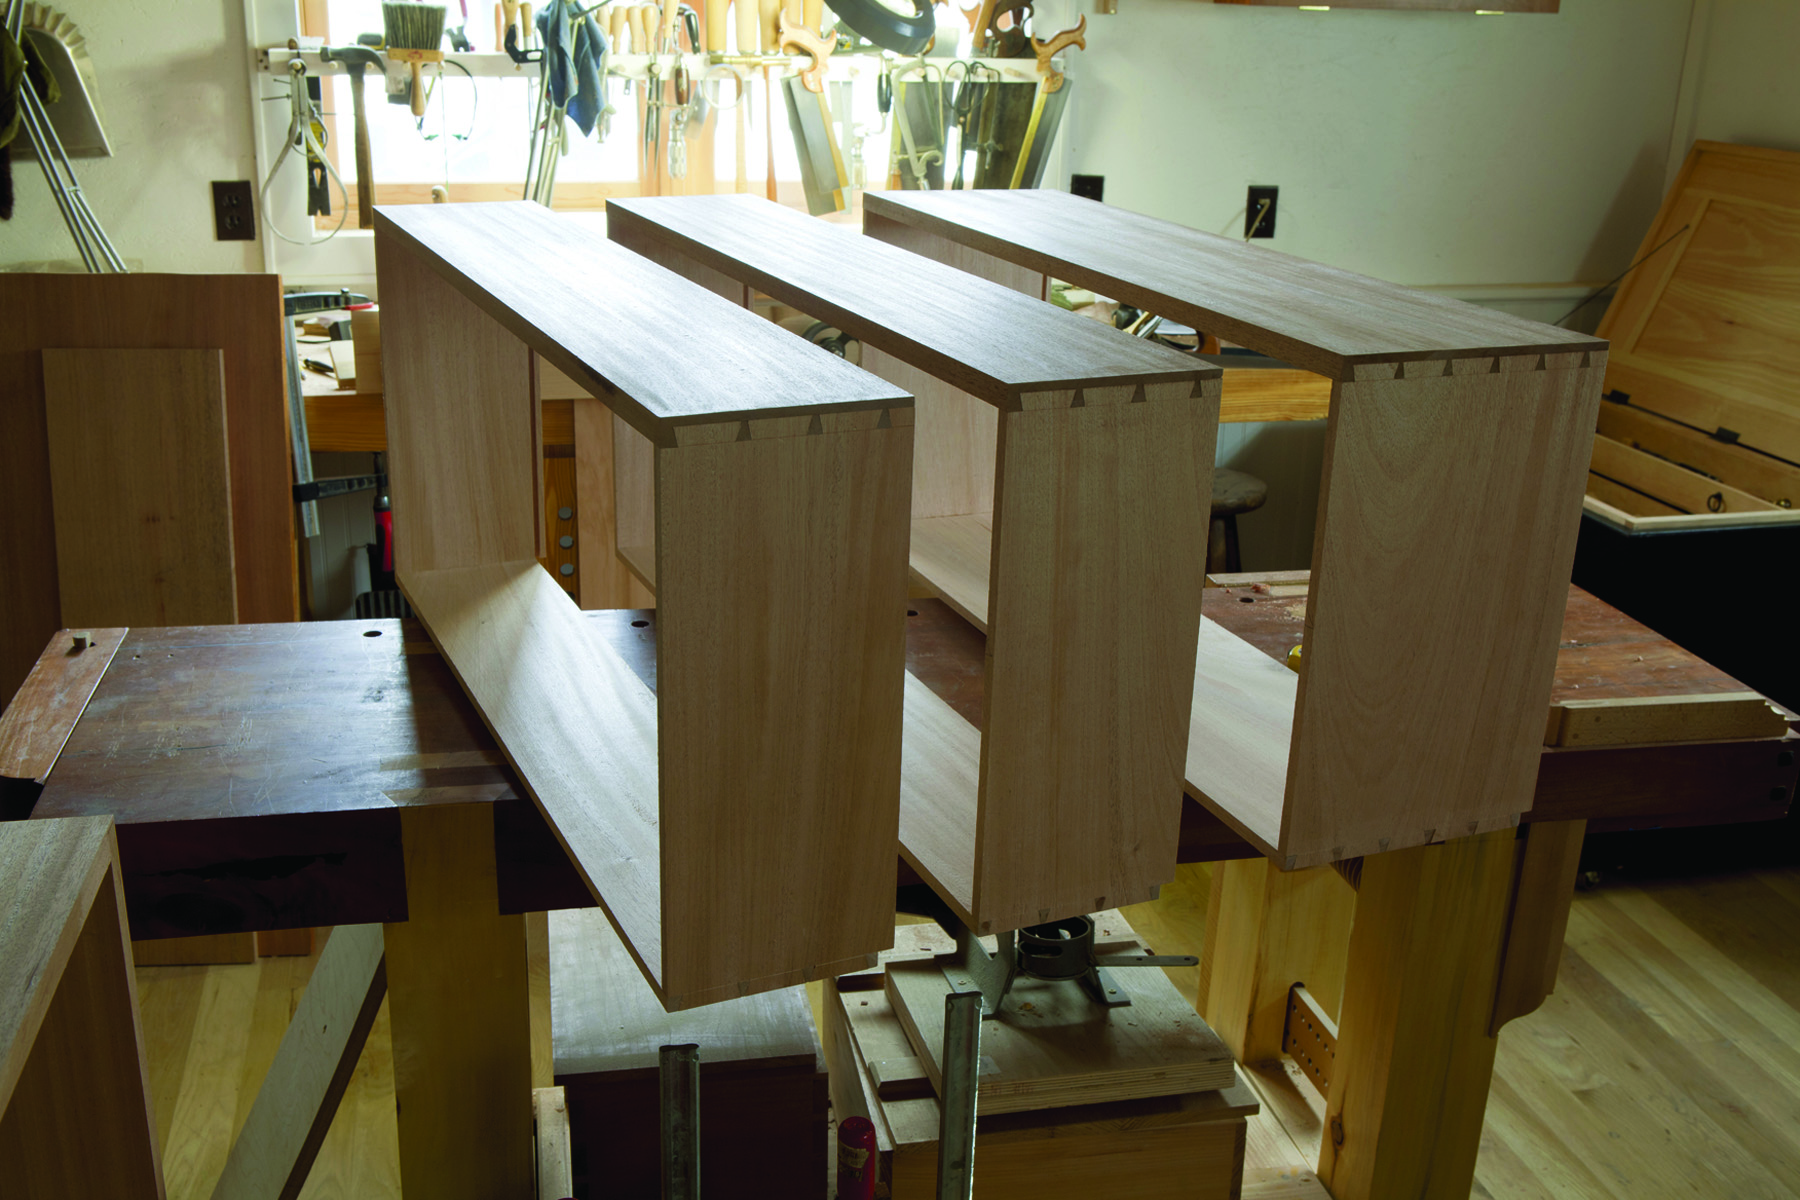
No surprises. The lower drawers have half-blind dovetails at the front and through-dovetails at the back. The drawer bottom sits in a groove.
When you look inside the top chest, you can usually find the answer: The top can be connected to the sides using full-blind rabbeted dovetails. You can see evidence of the maker overcutting the tails on the inside of the top. Or you can see small gaps where the pins go.
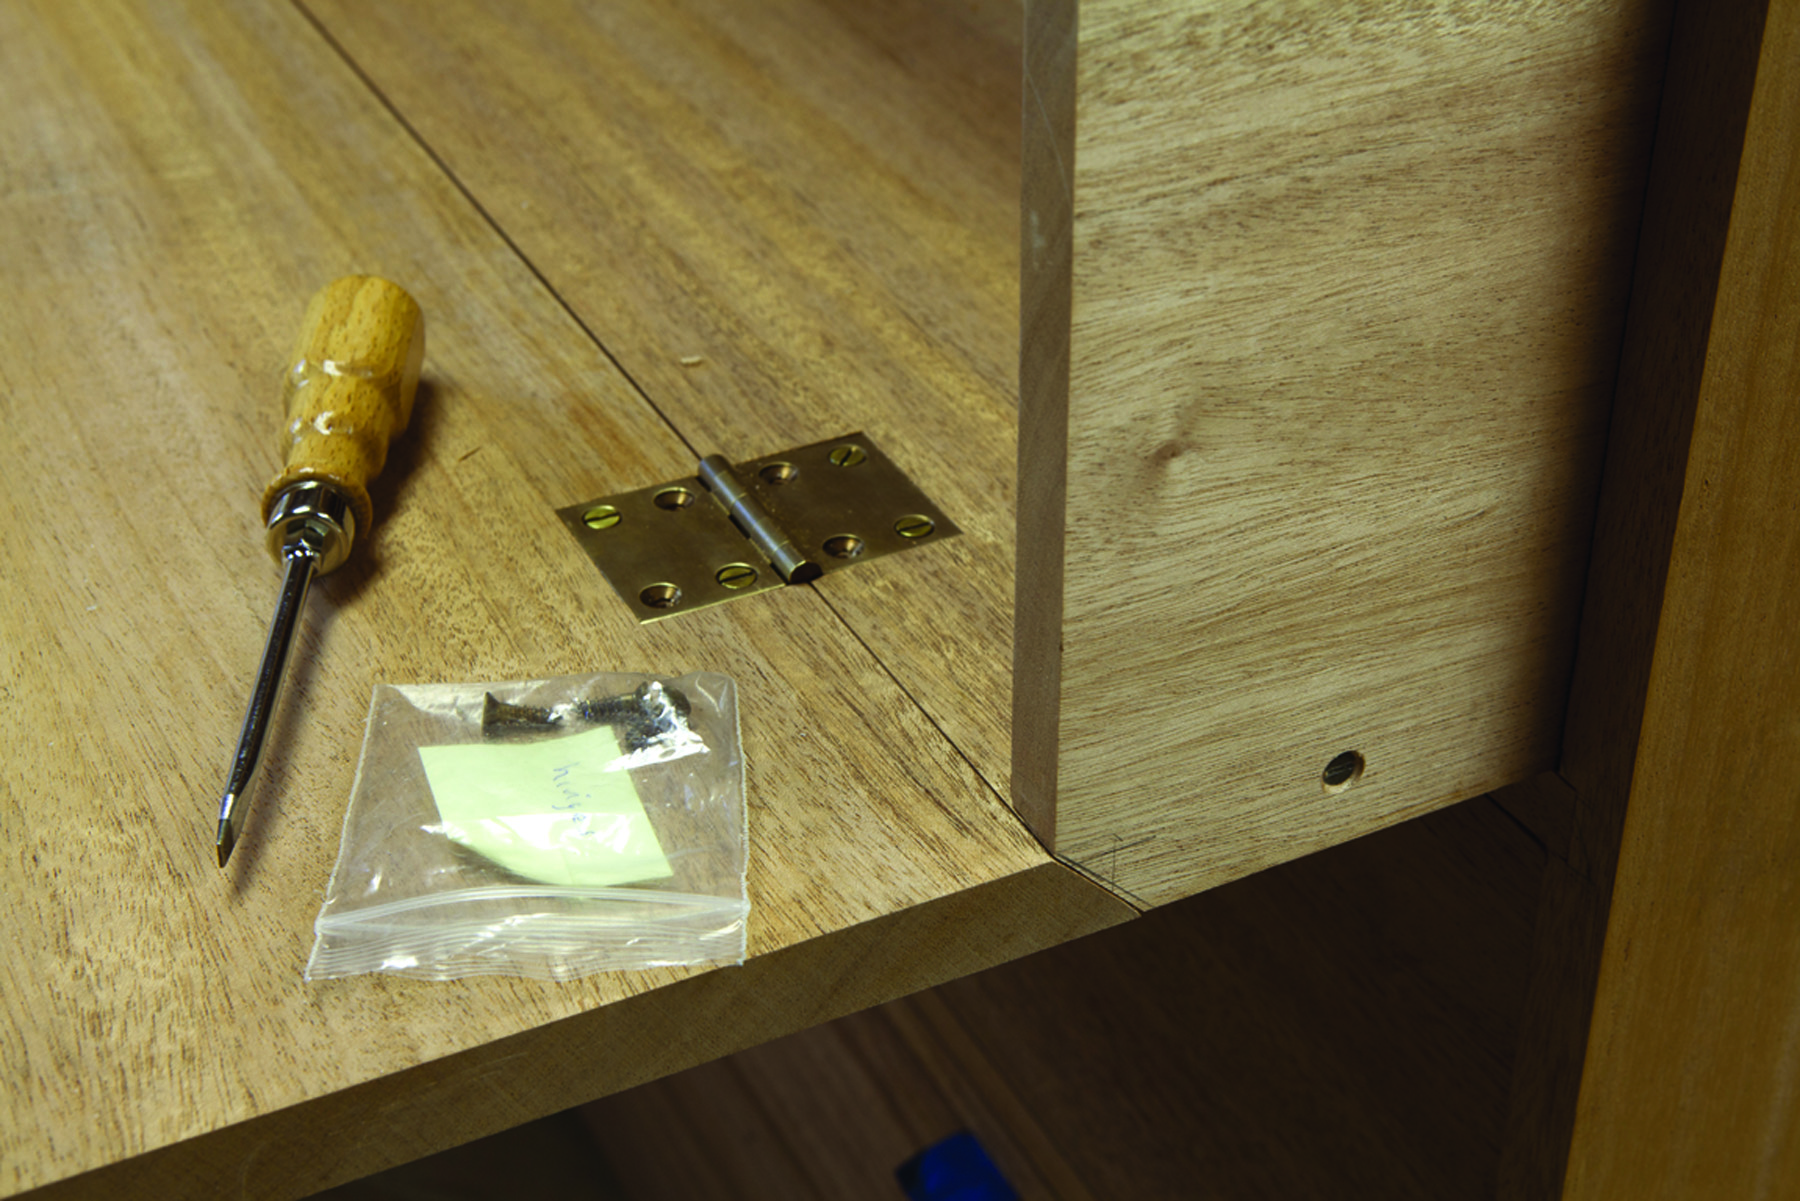
Critical bevel. A bevel on the desktop and the drawer’s bottom allows everything to fold down flat and fold up neatly.
This joint gives the exterior a clean appearance and offers a lot of strength. Plus, it’s a forgiving joint to execute. You cut the tails, transfer the shape onto the sides and cut the pins in the sides. When you assemble the chest the only gap you have to worry much about is where the rabbet on the top board meets the side board.
The rest of the joinery in these cases is fairly standard stuff. The drawer dividers, which are typically solid panels, are dadoed into the sides. The back is nailed on (in cheaper versions) or secured in a groove in the top and sides of the chest – then nailed to the bottom.
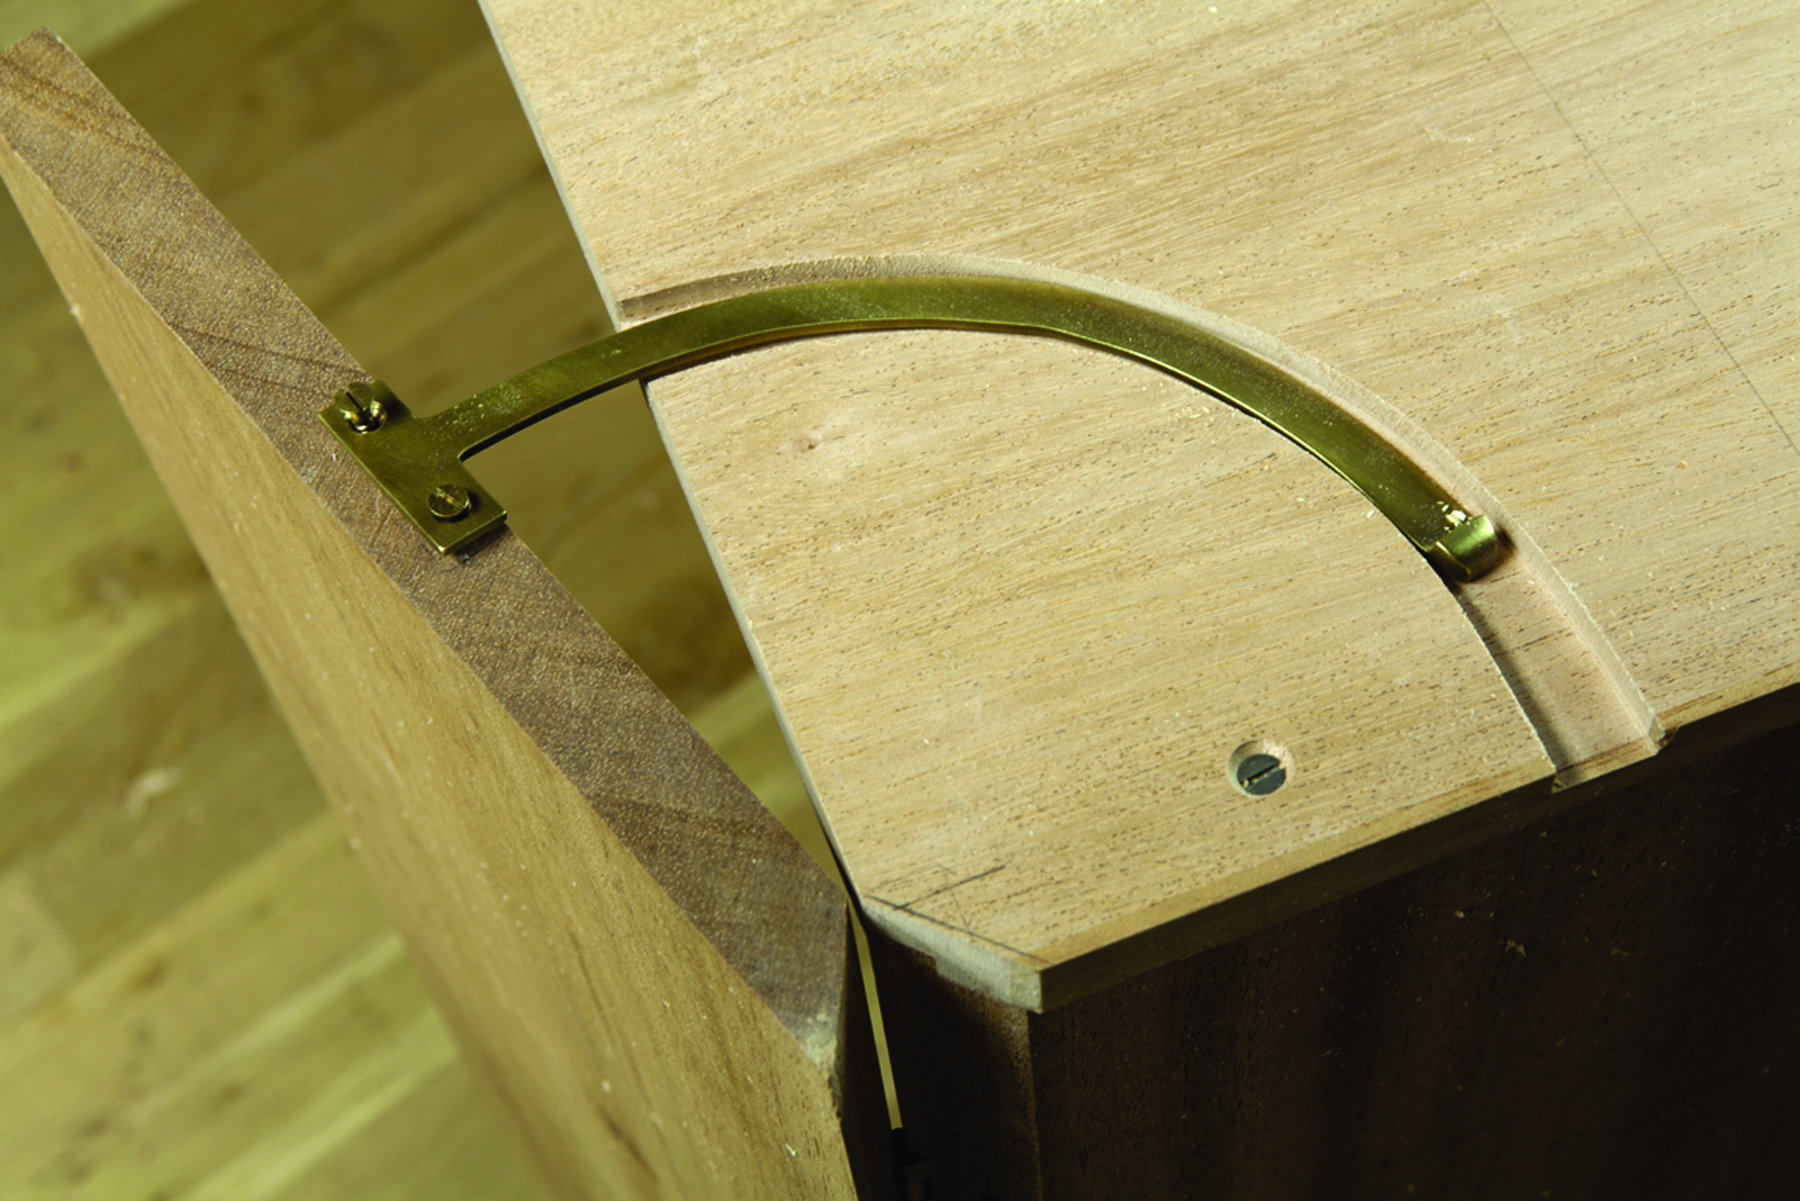
Router work. Many campaign chests have a desktop reinforced with quadrant stays. Lay out the channels for the stays with care and cut them with a router guided by templates.
The drawers have typical joinery – dovetails at the corners with the bottom secured in a groove in the front and sides. Some of the drawers use slips to secure the drawer sides.
Install Flush Hardware
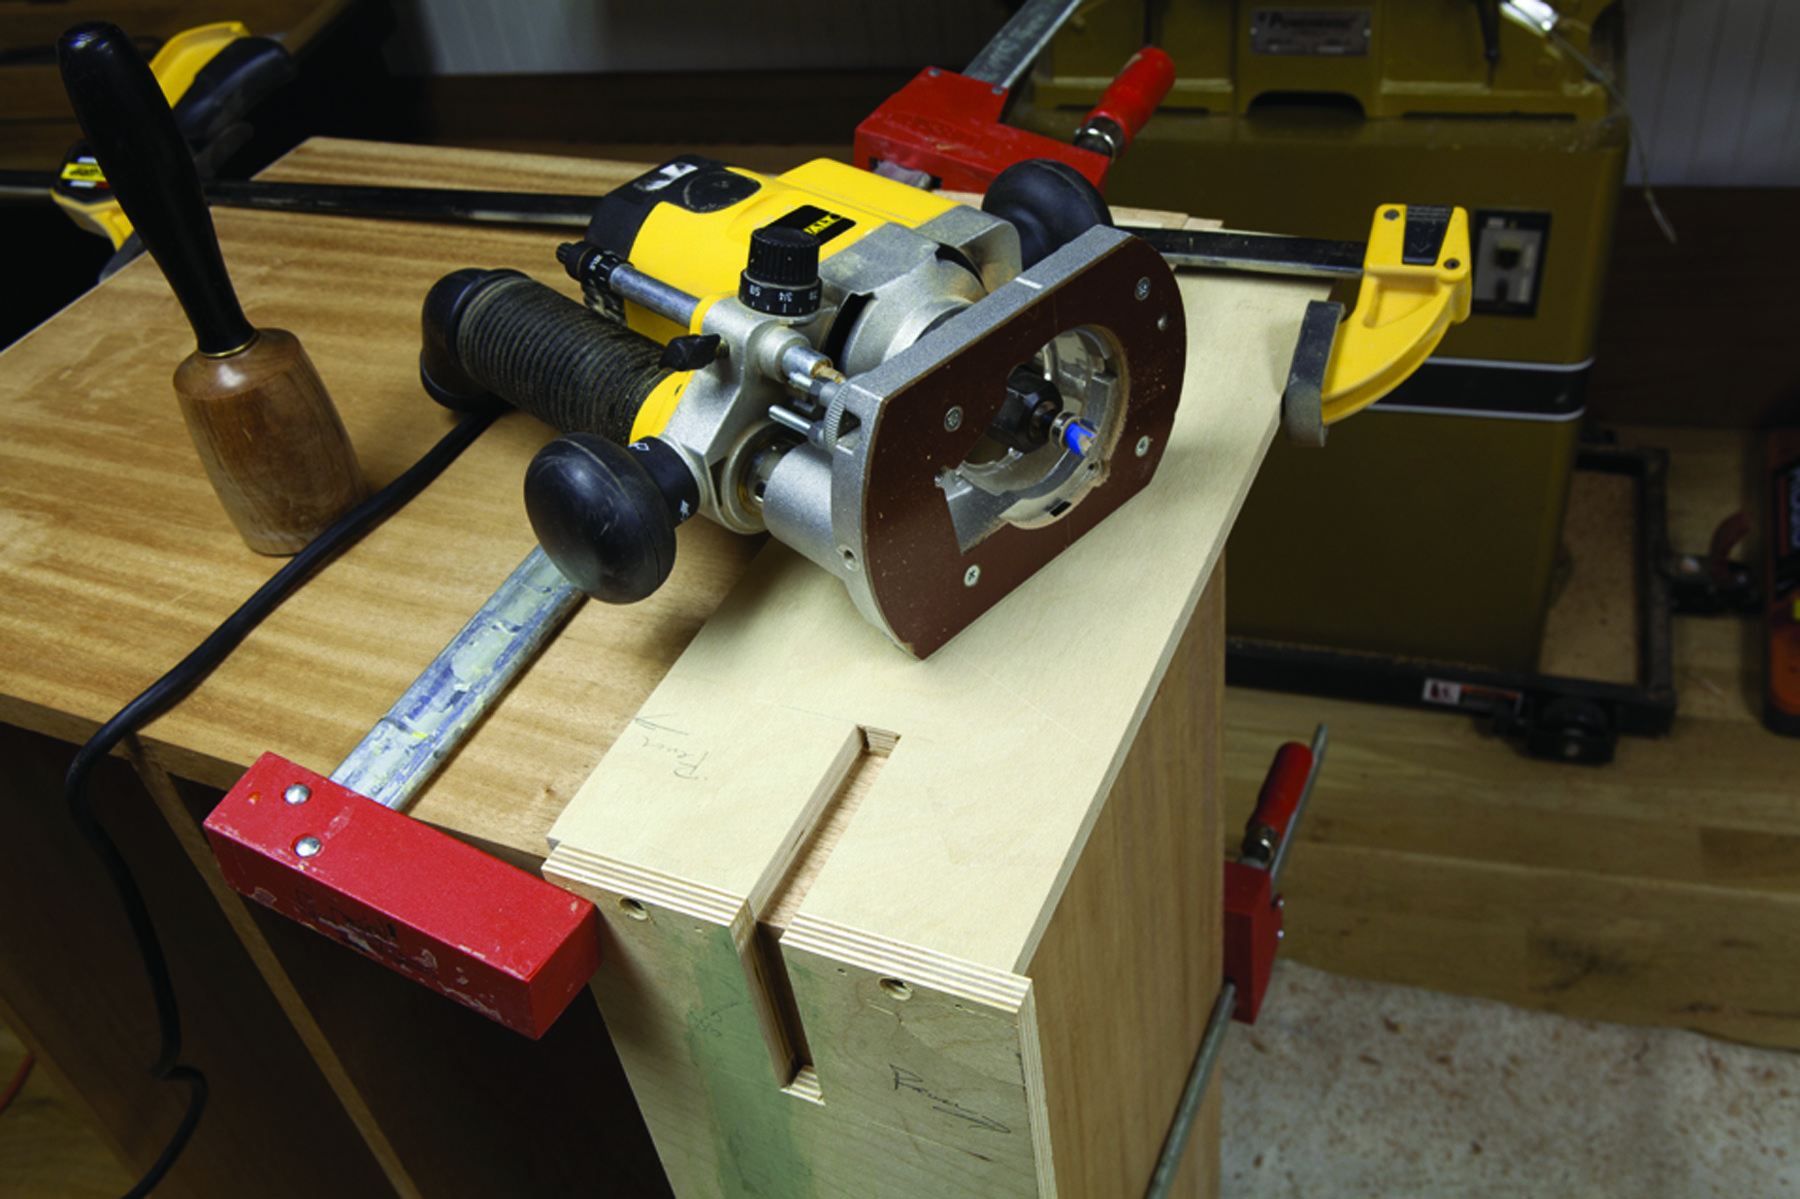
In two dimensions. For the L-brackets, an L-shaped template is clamped to the carcase to guide the router.
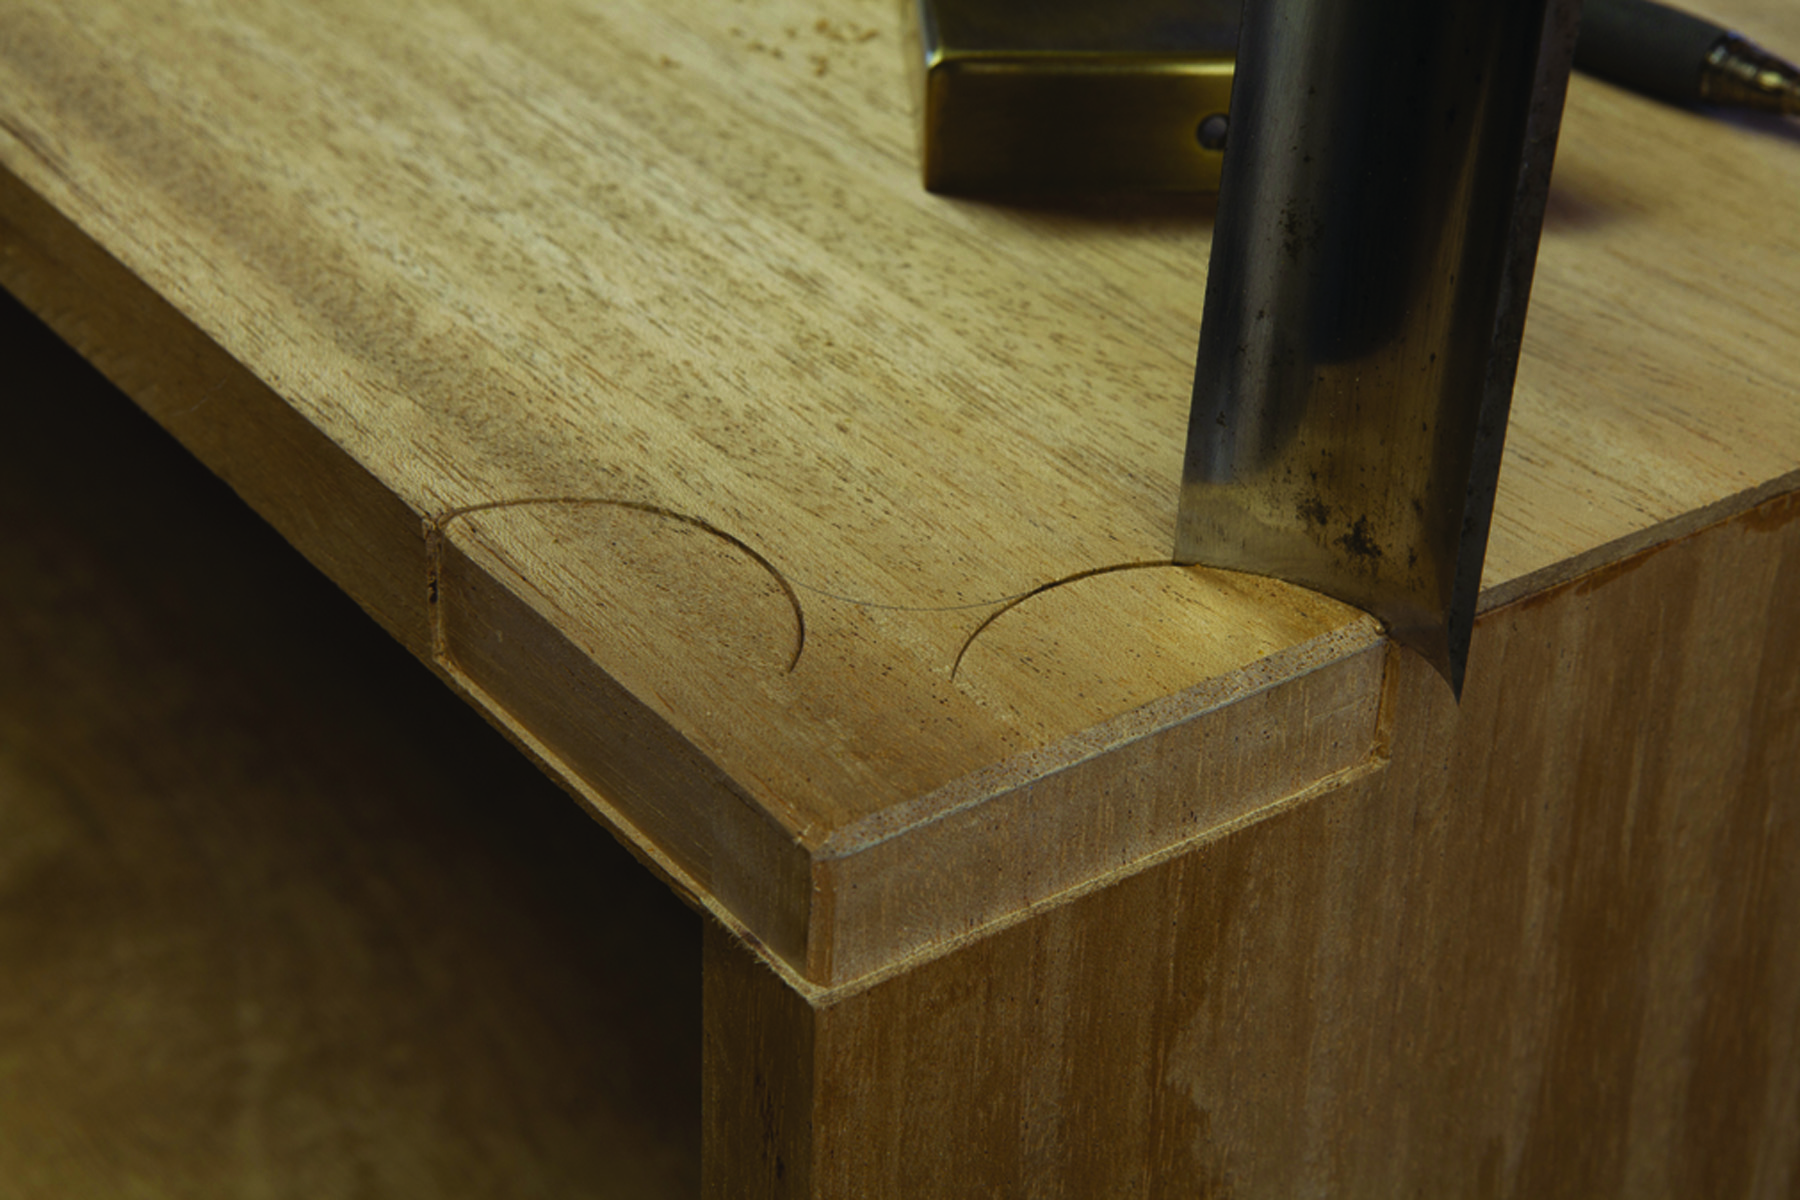
Gouges are better. You could make a template for the corner brackets, but if they have a cyma shape as this one does, you are better off doing the work with a firmer gouge.
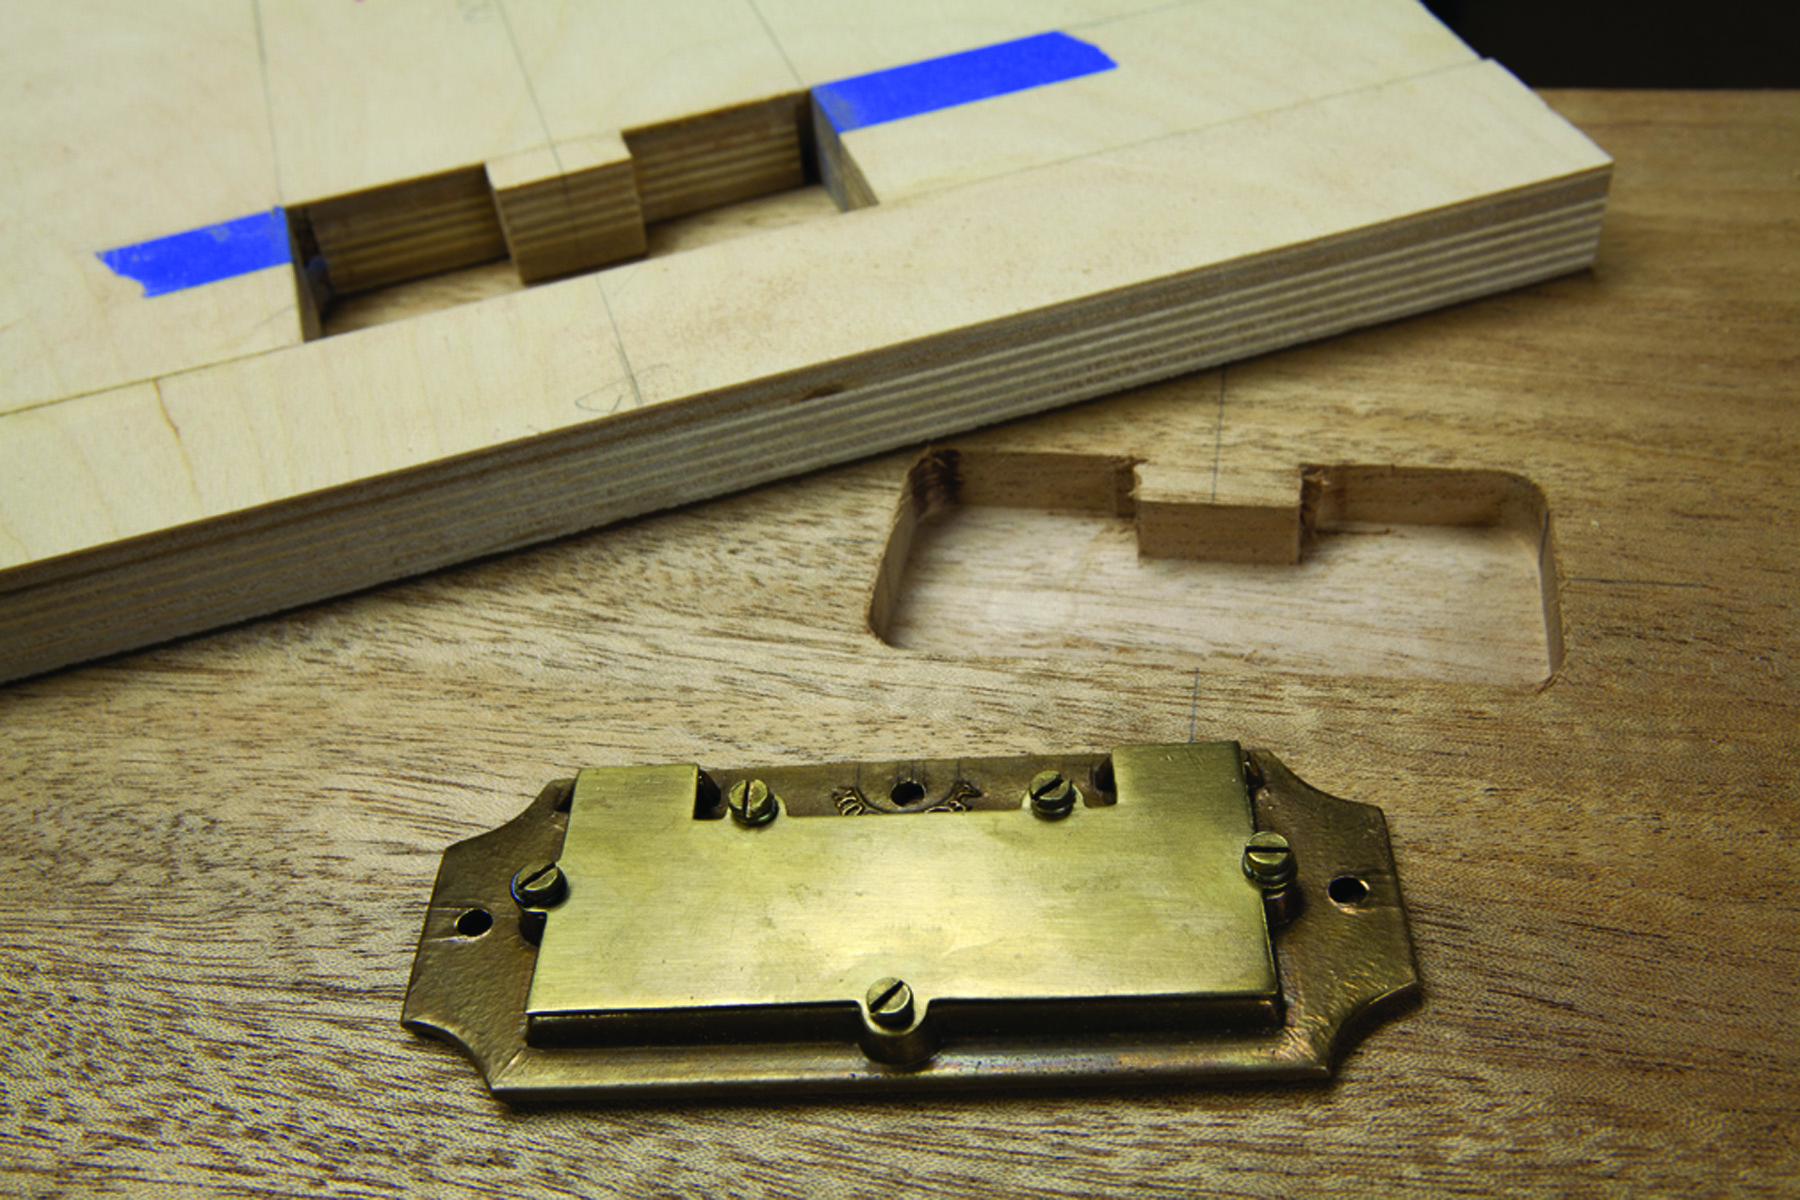
Two templates. The flush pulls required two recesses. The first template made room for the pull’s back plate. The second template made room for the part that shows. The shape was roughed out with a router and the work was finished with chisels.
A typical campaign chest can have about 20 L-shaped brackets, four corner brackets and eight flush pulls. And all of these pieces are recessed flush to the case. Though I would normally install hardware like this with hand tools, the number of pieces of hardware pushed me into using the router and some custom templates. Each piece of hardware had its own special challenge, as you can see in the photos.
— CS
About the Gallery
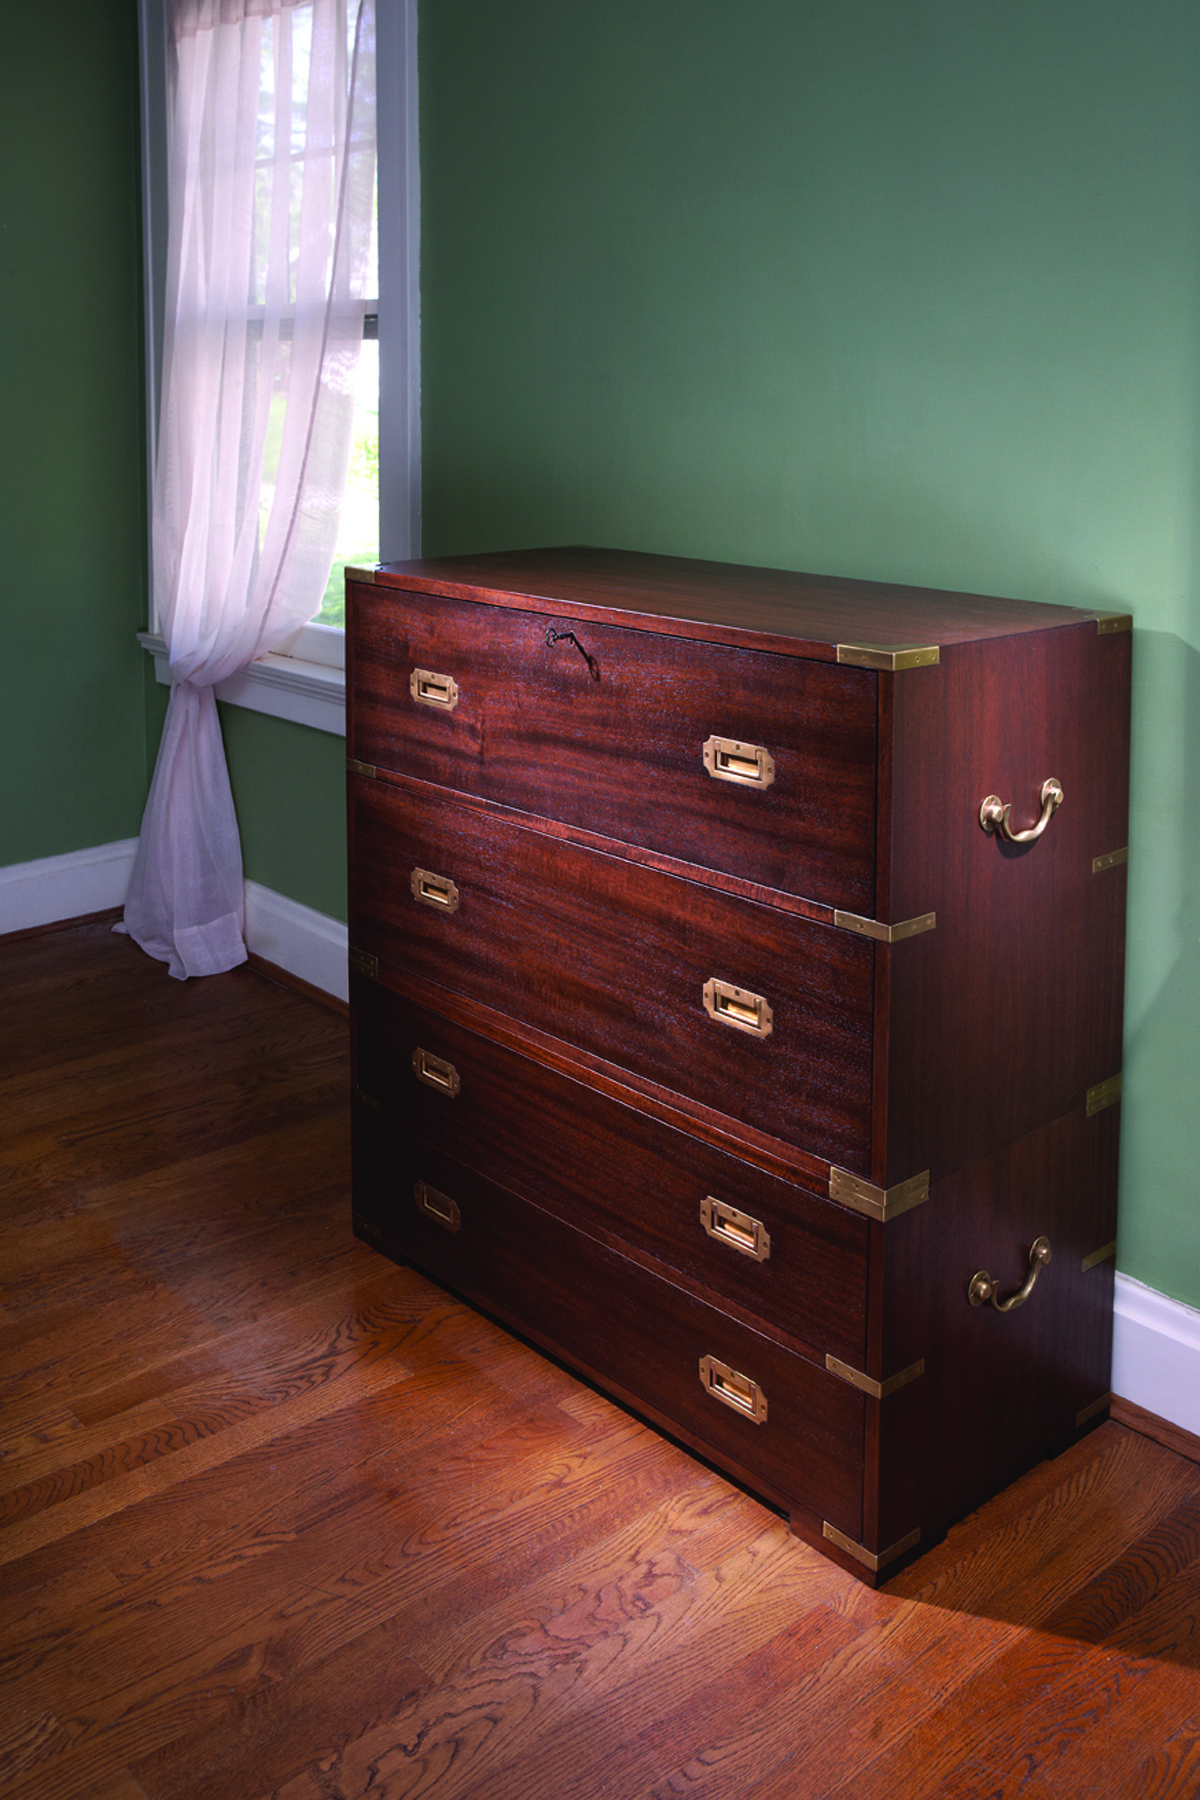
For use or show. Campaign furniture is simple enough that it fits in with almost any home’s decor, from Colonial to contemporary.
Campaign chests that have a gallery are a little trickier to construct. But once you understand the mechanism, it’s pretty standard stuff. The gallery is a separate assembly that is inserted into the top drawer of the chest. The top drawer’s sides are dovetailed to the back piece. The front of the drawer is attached to the rest of the assembly with desktop hinges.
What makes everything work smoothly is that the bottom edge of the drawer front is beveled, as is the front edge of the drawer’s bottom. When the drawer front is folded down, these two bevels touch, which stops the drawer front. For extra security, many secretaries also had brass quadrant stays – the quarter-circle pieces of hardware in the photographs.
The fussy part is getting the bottom edge of the drawer front sized so that it folds down easily yet looks like a plain drawer front when closed.
Other than that, the gallery is typical of what you will find in old work. The dividers are either dadoed into each other or connected with a V-groove. Some chests have secret drawers in the gallery; others do not.
Finishes
Extant campaign chests have a wide range of coloring. I’ve seen plain pine with a clear finish, all the way to a stain that looks like ebony. Because of the age of these pieces, it’s difficult to know what was original. But because they exhibit a full range of hues, we have a lot of choices that will look correct on a modern campaign chest.
The Decline of Campaign Furniture
Most furniture historians place the time period for campaign furniture as beginning in 1790 and lasting until the Boer War (1899 to 1902) against the Transvaal and Orange Free State in South Africa. It was “the last of the gentlemen’s wars,” according to Brawer. The British were outmaneuvered and humiliated by the quick-moving Boers. Soon after that, the British Army and Navy began producing their own forms of simple traveling furniture, and the firms that built the high-style stuff went out of business.
But that’s not the end of the story of campaign-style furniture. British military men still had a sense of style, and that led to the development of the Roorkhee chair, which in turn influenced a generation of contemporary furniture designs. And it is the direct ancestor of the chair you probably take with you when you go camping or on a picnic. So the campaign furniture style lives on, even if we don’t realize it.
Video: Watch a video of the author installing the L-brackets on this chest.
Blog: See an array of historical campaign chests with unusual drawer arrangements.
Blog: The author reviews several brands of campaign hardware here, here and here.
Hardware: The hardware used on this chest is from Horton Brasses.
Here are some supplies and tools we find essential in our everyday work around the shop. We may receive a commission from sales referred by our links; however, we have carefully selected these products for their usefulness and quality.


