We may receive a commission when you use our affiliate links. However, this does not impact our recommendations.
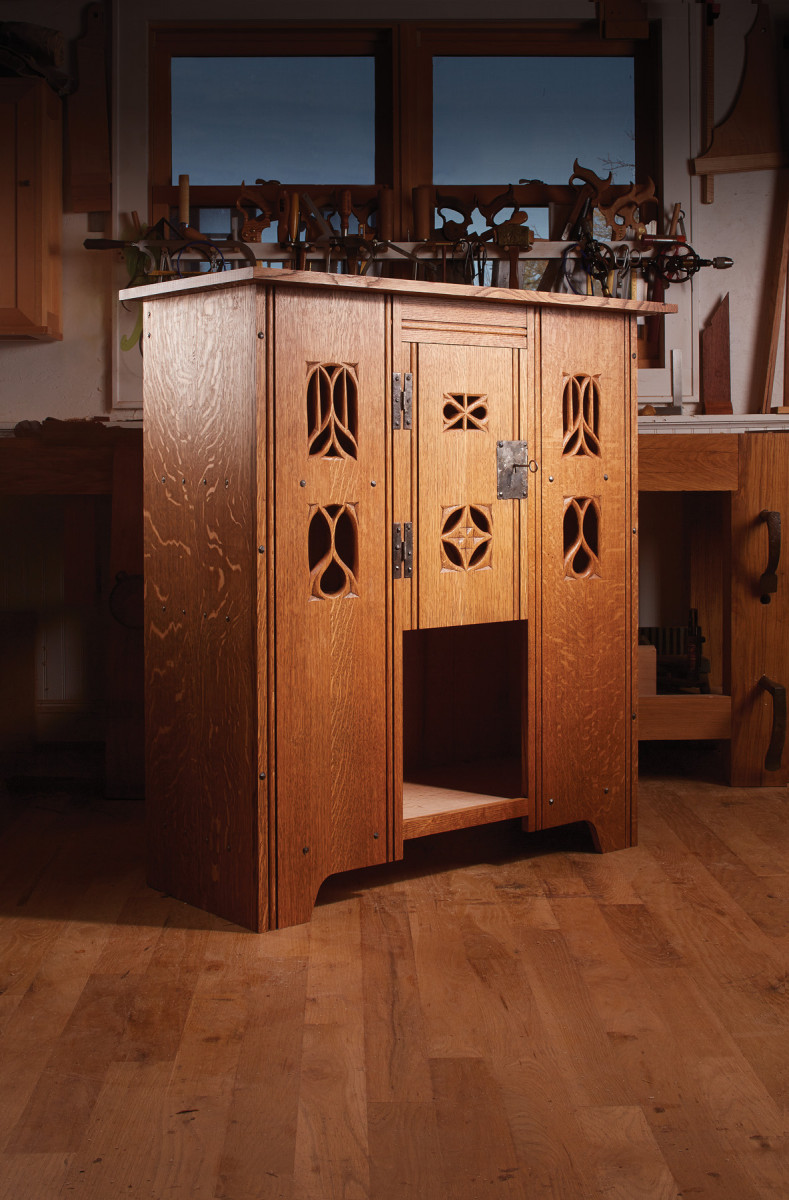
This early form – an aumbry – spawned many different types of furniture.
It is easy to forget that many of our favorite pieces of furniture are recent innovations. Forms such as coffee tables, bookcases and desks are – archaeologically speaking – new objects brought on by incredible modern wealth.
When you cast your eye back on the furniture record, the forms become simpler, fewer in number and (in some cases) quite unfamiliar. One of my favorite types of early furniture is the “aumbry” – sometimes called a dole or livery cupboard. It is the honored ancestor of the bookcase, hutch, cupboard, armoire and common kitchen cabinet.
Today the word “aumbry” is used to refer only to a liturgical piece of furniture or place in a church that holds the sacrament. But the word, and the piece of furniture, were both common and secular in the 1400s and 1500s. This enclosed cabinet held things that were precious – food, books, china and anything else that had to be locked up.
One of the defining features of aumbries is that the front of the cabinet is pierced by Gothic tracery. These piercings are not just decorative. They allow air to circulate inside the carcase, like a modern pie safe. To stop insects from getting inside the cabinet, the piercings were covered with cloth fastened to the inside of the case.
Aside from the pierced tracery, these cabinets are straightforward to build using simple tools and construction methods. Most aumbries are knocked together using basic joints – rabbets, dados and nails made from wood or iron.
This particular aumbry is based on a circa-1490 piece that was part of the Clive Sherwood collection sold at a Sotheby’s auction in 2002. To make the piece more approachable, I simplified some of the tracery and removed some of the chip carving and knifework that festoons the front of the original. Despite these simplifications, this aumbry would look at home in any Medieval English or French homestead.
Start with the Oak
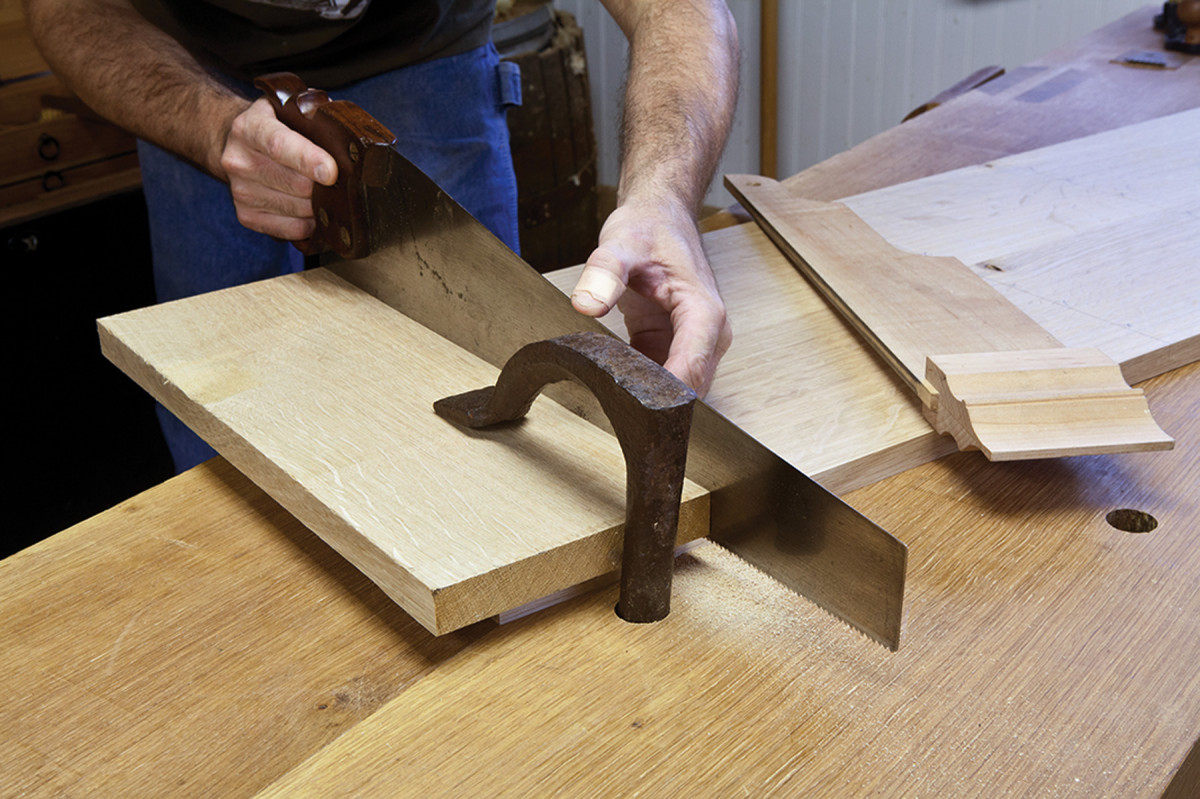
First wall. Clamp a batten on your layout line and saw the first wall of the dado. Press the sawplate against the batten to create a vertical cut.
Most aumbries were made of oak. And because wide English oak is nearly impossible to get, I chose quartersawn American white oak for this aumbry. The original was made with planks that were 12″ to 14″ wide – a tall order these days. So I glued up the sides, top, stiles, shelves and door from two narrow pieces, taking care to match grain and color.
Because I built this aumbry almost entirely by hand, I took care to also make sure the grain direction in the panels was consistent. This detail makes life a lot easier for those who prepare wood for finishing with a handplane.
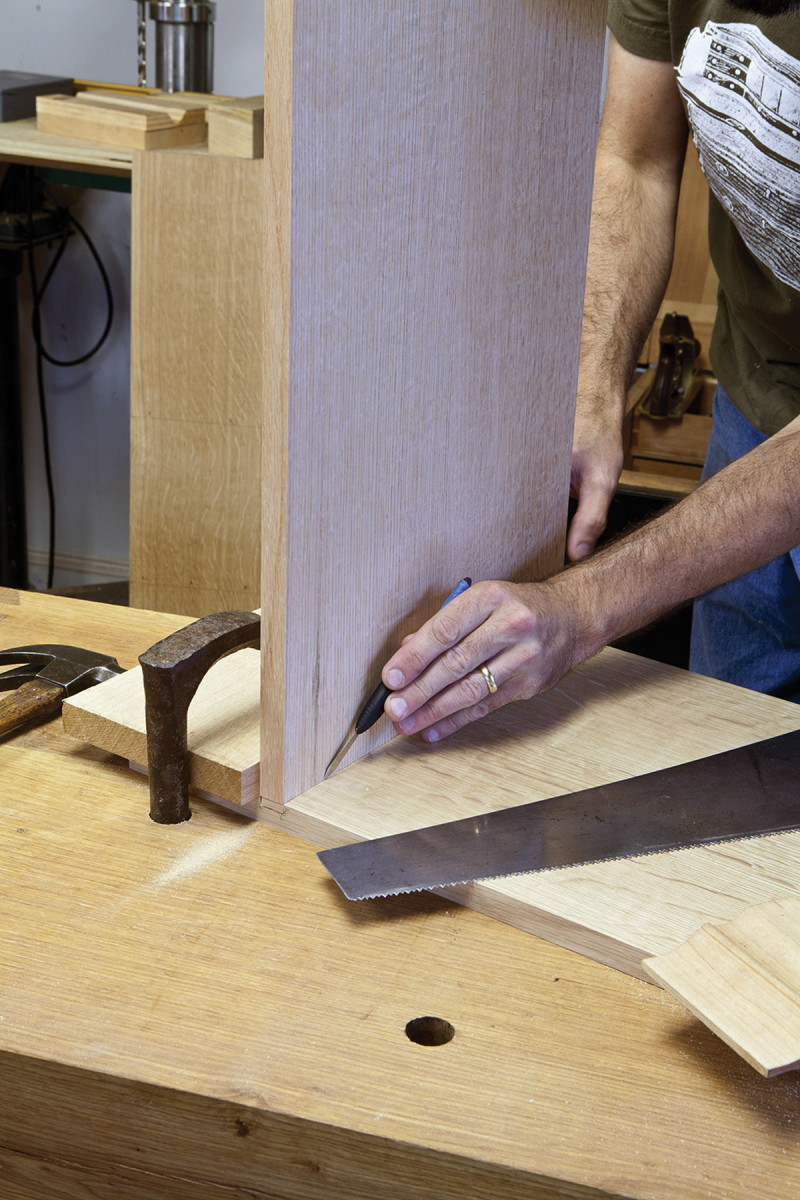
Don’t measure. Use the mating shelf to strike the second wall of the dado. Use a pencil or knife to mark this wall.
The case itself is as simple as it gets. The shelves are nailed into dados in the sides. The face frame, backboards and top are nailed to the carcase. The only complex bits are the mortise-and-tenon joints that hold the face frame’s rails and stiles together.
And then there are the Gothic piercings. These are simple to make with a drill bit, a chisel and a couple of rasps. Don’t be intimidated by them – they are easier than they look. To get started on your aumbry, glue up the panels for the entire case, then cut the two sides to their final size and get ready to cut the carcase joinery.
Handmade Dados
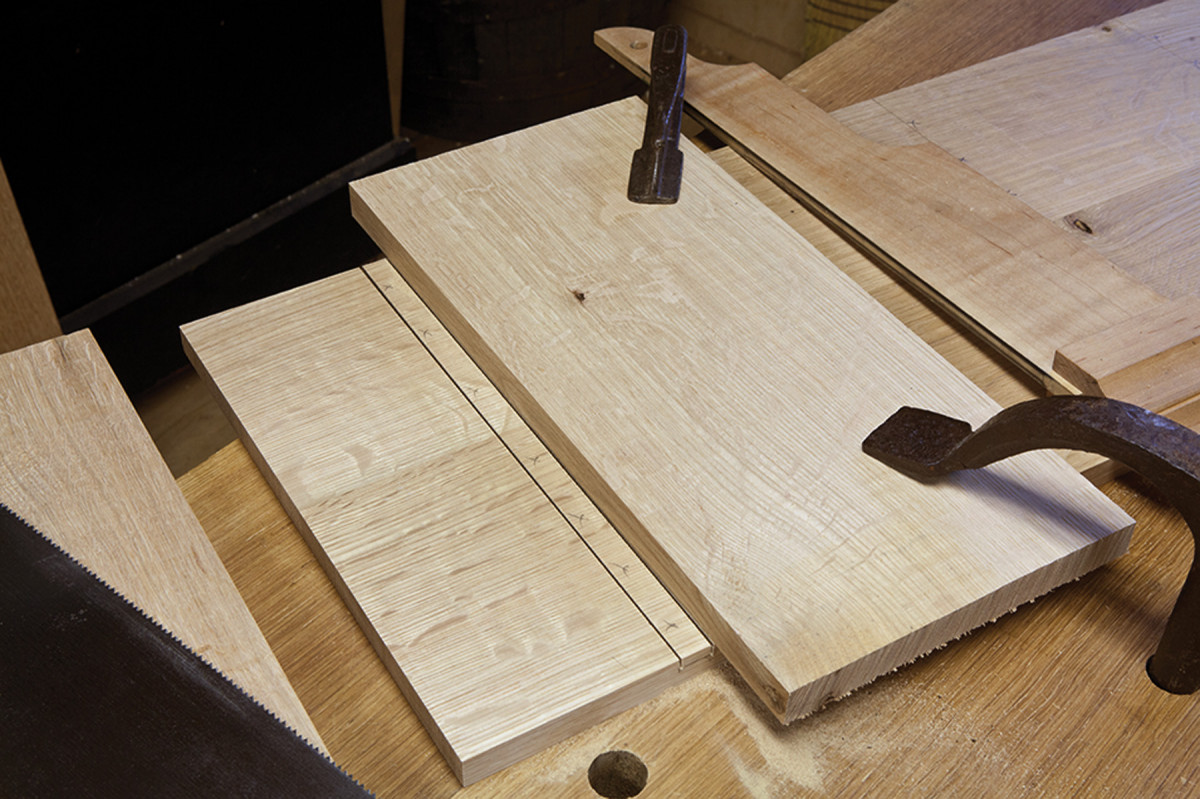
Second wall. Because of the set of the saw’s teeth, clamp the batten so it covers your layout line for the second wall. This will ensure your dado isn’t too loose.
The 1⁄4“-deep dados in the sides that hold the shelves are simple to make with a handsaw, chisel and a router plane. Begin by laying out one wall of each dado on the side pieces. Then clamp a scrap right on the layout line and use it as a fence for your saw. Saw down 1⁄4” into the side to create the first wall of the dado. Do not remove the batten.
Place the mating shelf against the batten and use it to lay out the second wall of the dado. Reposition the scrap so it covers the pencil line, clamp it in place and saw the second wall of the dado on the waste side of the line.
Remove the majority of the waste with a chisel, then flatten the bottom of the dado with a router plane. Check the fit of the shelf. If the dado is too tight, rabbet the end of the shelf. If it’s too loose, make some wedges to knock into the gap at assembly time.
Cut all the dados, fit all the shelves then prepare all these boards for finishing, inside and out. Assemble the case using hide glue and 6d rosehead cut nails. Cut nails were invented a few hundred years after the original aumbry was built, so they aren’t authentic to the core. However, because blacksmith-made nails are expensive (about $1.50 to $2 apiece) and the roseheads look (fairly) authentic, I decided to use them.
A second option would be to fasten the sides to the shelves using glue and “trenails” or “trunnels,” essentially tapered oaken nails.
A Rail for the Backboards
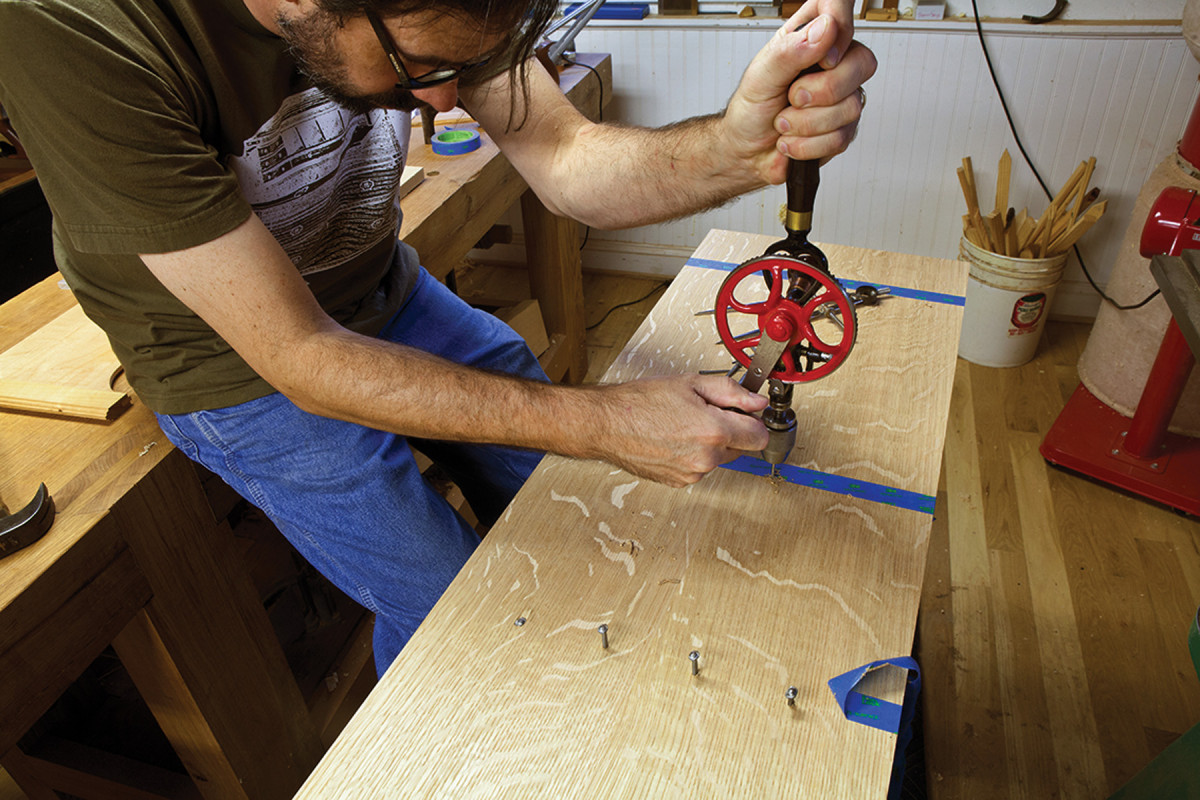
Square nails. Use wrought nails or rosehead cut nails to fasten the sides to the shelves. Use tape to remind yourself where the nails go – the tape is easier to remove than a pencil line.
To make the carcase a bit sturdier, add an interior rail to the inside of the case. This rail, located at the back of the carcase, helps hold the backboards in place. To hold the interior rail in place, cut 1⁄4“-deep stopped grooves for its ends. Make these stopped grooves just like you did your dados: Saw the walls, chop the waste and clean the floor with a router plane.
American Gothic Aumbry Cut List
No.ItemDimensions (inches)MaterialComments
t w l
❏ 1 Top 3⁄4 x 17 1⁄4 x 40 Oak
❏ 2 Sides 3⁄4 x 14 x 42 1⁄8 Oak
❏ 2 Stiles 3⁄4 x 12 x 42 1⁄8 Oak
❏ 1 Door 3⁄4 x 12 x 20 Oak
❏ 1 Top rail 3⁄4 x 3 1⁄4 x 14 1⁄2 Oak 1 1⁄4” TBE*
❏ 1 Bottom rail 3⁄4 x 1 1⁄4 x 14 1⁄2 Oak 1 1⁄4” TBE*
❏ 1 Interior rail 3⁄4 x 3 1⁄4 x 35 Oak
❏ 3 Shelves 3⁄4 x 13 1⁄2 x 35 Oak
❏ 1 Back 1⁄2 x 34 1⁄2 x 39 Oak Shiplapped
*TBE = Tenon both ends
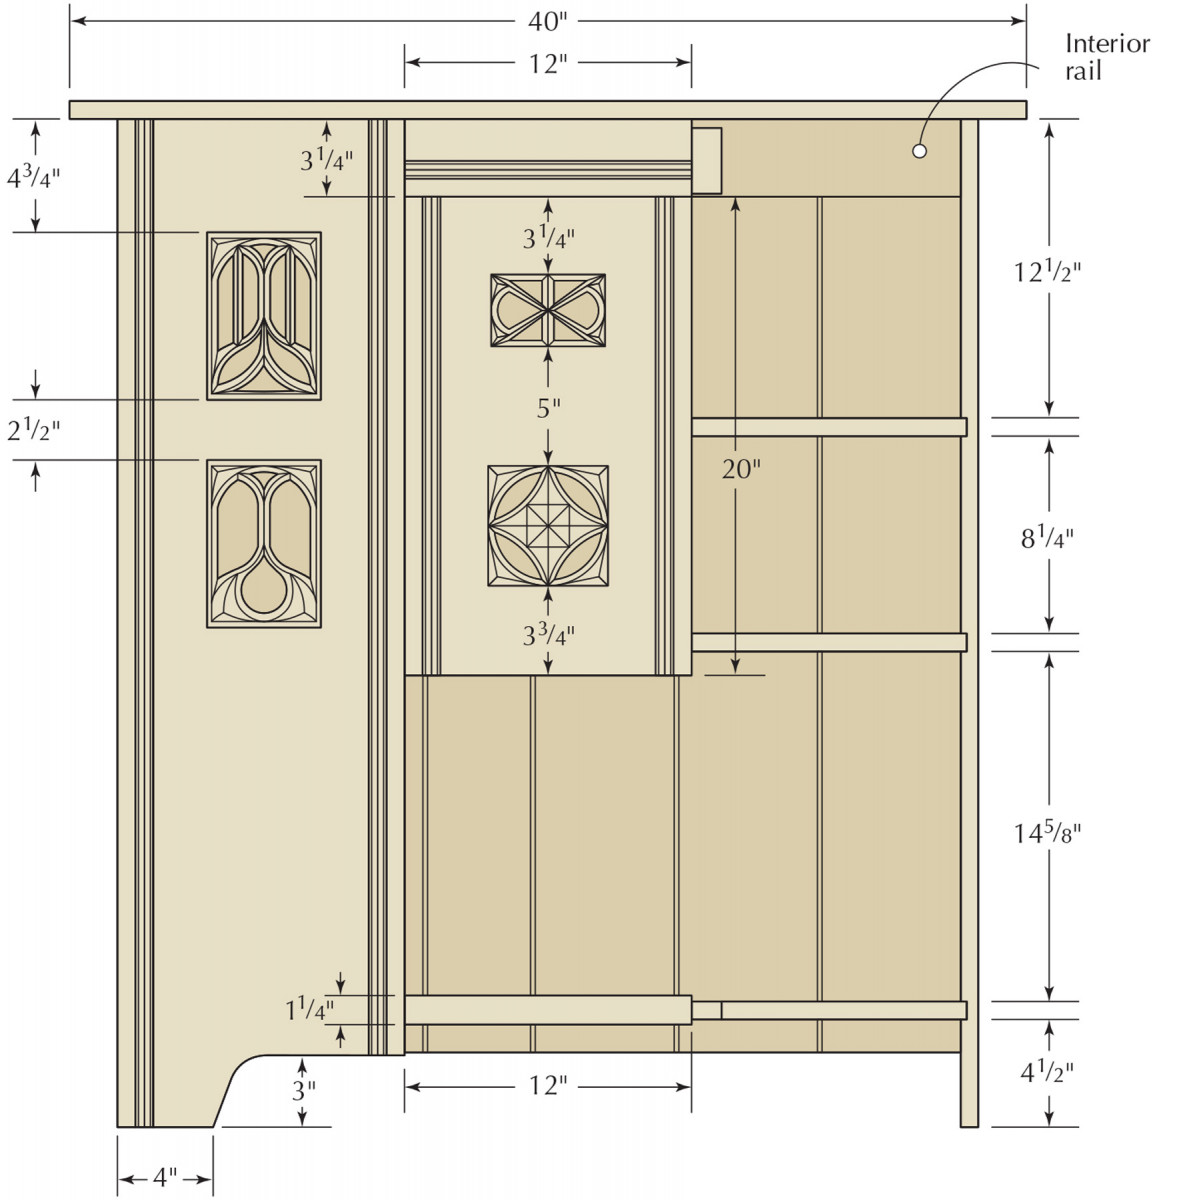
Elevation (right stile removed)
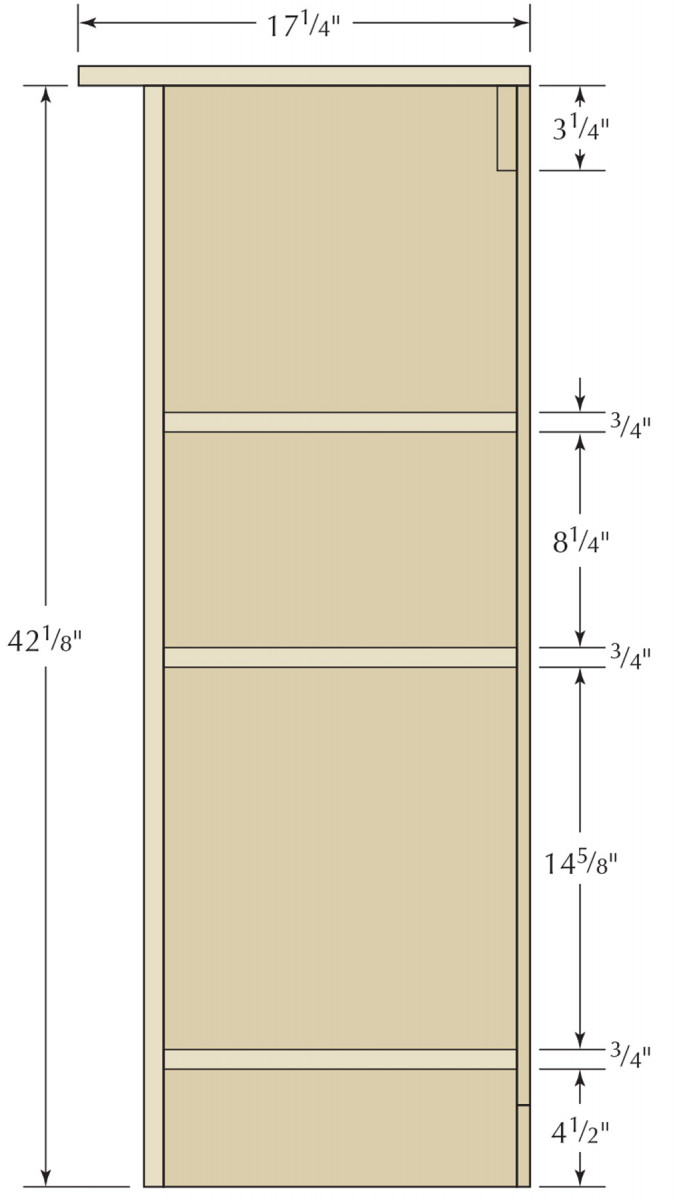
Profile Section
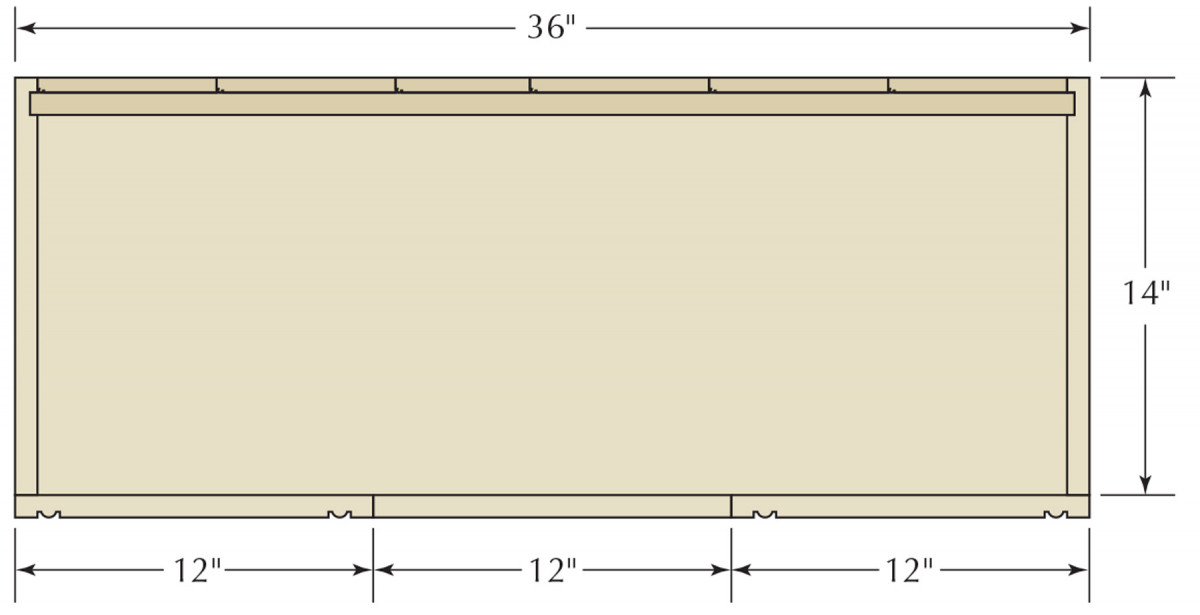
Plan Section
Add the Back
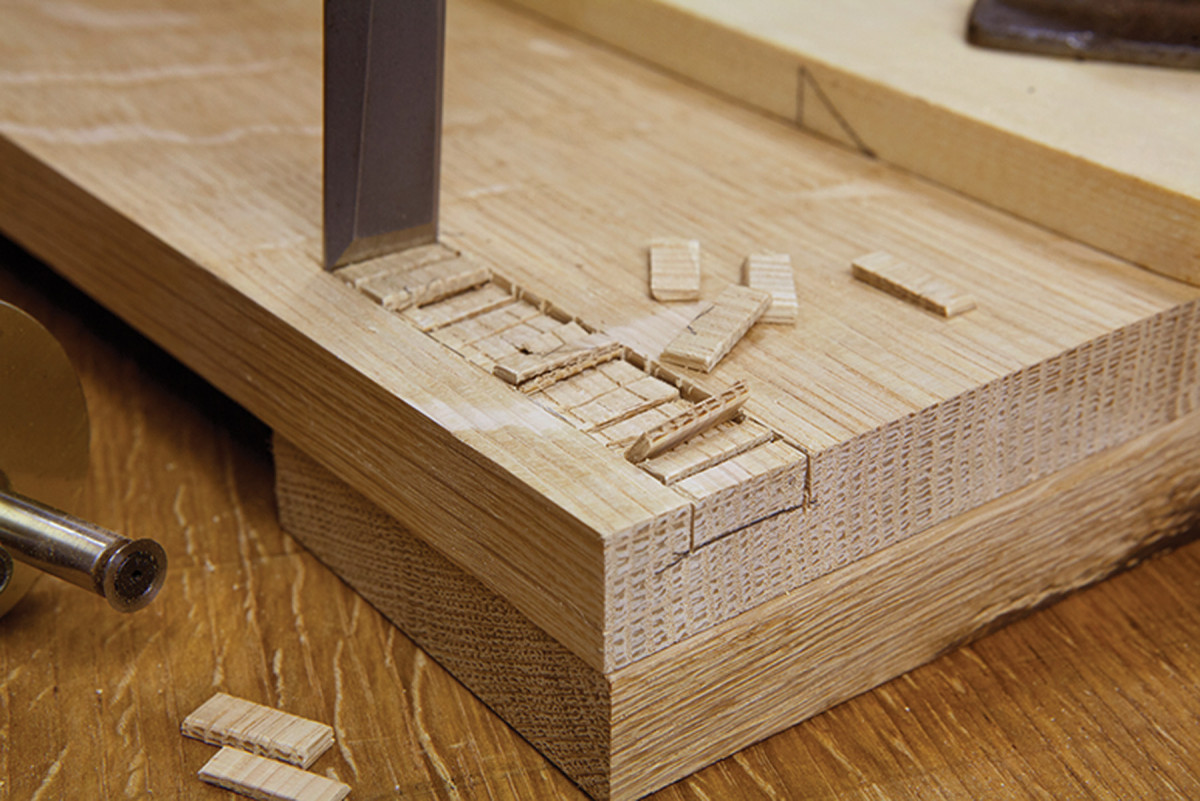
Chop & stop. The stopped groove for the interior rail is made the same way you made the dados for the shelves.
The back of this piece is assembled using several narrow boards. On many originals, the backboards were merely butted against one another and nailed on, as shown in the drawings. This works, but you will have ugly gaps there when the boards shrink.
To avoid that, cut shiplap joints or tongue-and-groove joints on the long edges of the backboards. I used shiplaps.
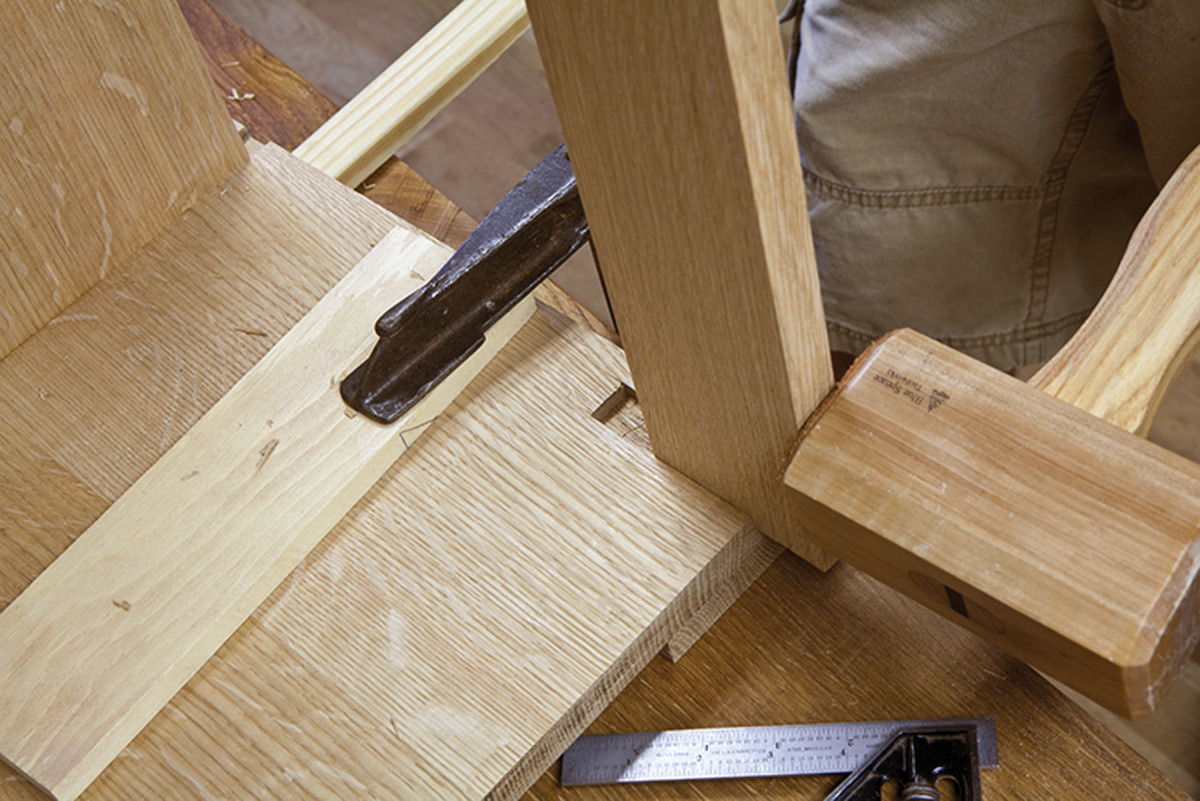
Knock & nail. Drive the interior rail in place. Then fasten it from the outside of the case with two 6d rosehead nails at each end.
When attaching the backboards with nails, first use clamps to pull the carcase square. Then nail the backboards to the shelves and interior rail using 4d rosehead nails. The nailed-on backboards will hold the carcase square, making it easier to fit the face frame and the door.
Build the Face Frame
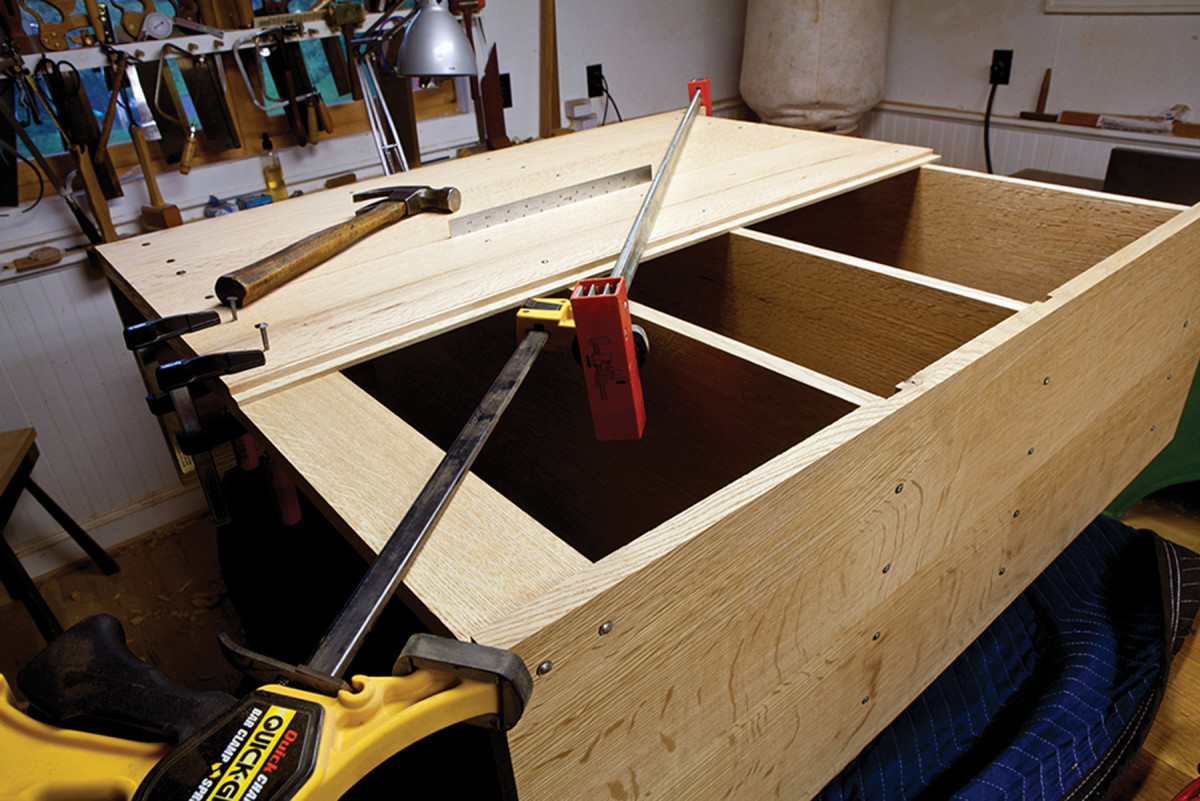
Rack with the back. Here I’m pulling the case square with two clamps. I then nail the backboards in place. When I release the clamps, the carcase will remain square.
The pieces that adorn the front of the aumbry are much like a modern face frame. The wide stiles join the narrow rails with mortise-and-tenon joints. I chopped the 1⁄4“-wide x 11⁄4“-deep mortises first, then sawed the tenons to match.
With the joints fit, you can cut the “crease moulding” that runs parallel to the long edges of the stiles and top rail. This is easy to make with simple tools. The crease moulding begins 3⁄4” from the long edge of the board and is 3⁄4“wide.
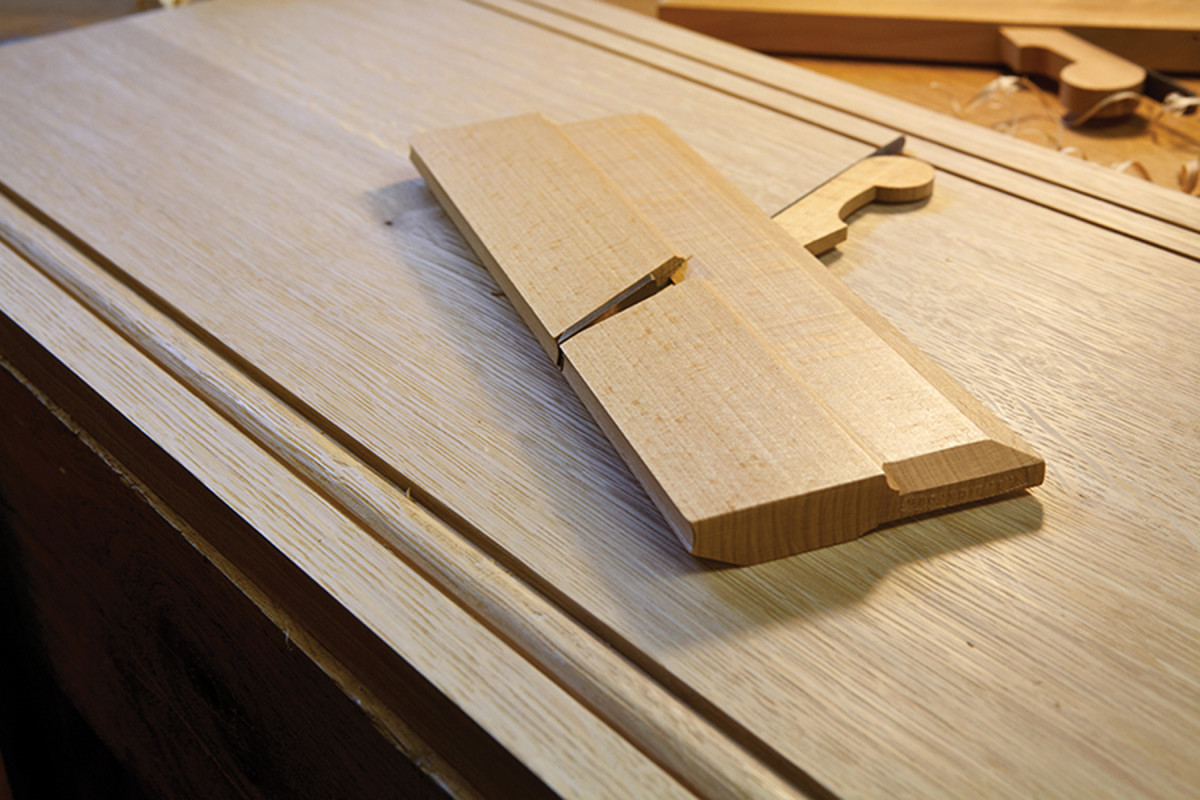
Simple moulding. After plowing two grooves in the stiles, shape the interior bit into a curve with a rabbet plane. Then finish up with a small hollow plane.
To begin, plow 1⁄8“-wide x 3⁄16“-deep grooves on either side of where the moulding is located. Then shape the material between the grooves with a rabbet plane and – if you have one – a small hollow plane, such as a No. 6.
The last bit of work on the face frame before the piercings is to saw out the feet. Cut them with a frame saw and clean up the cuts with rasps.
Gothic Tracery
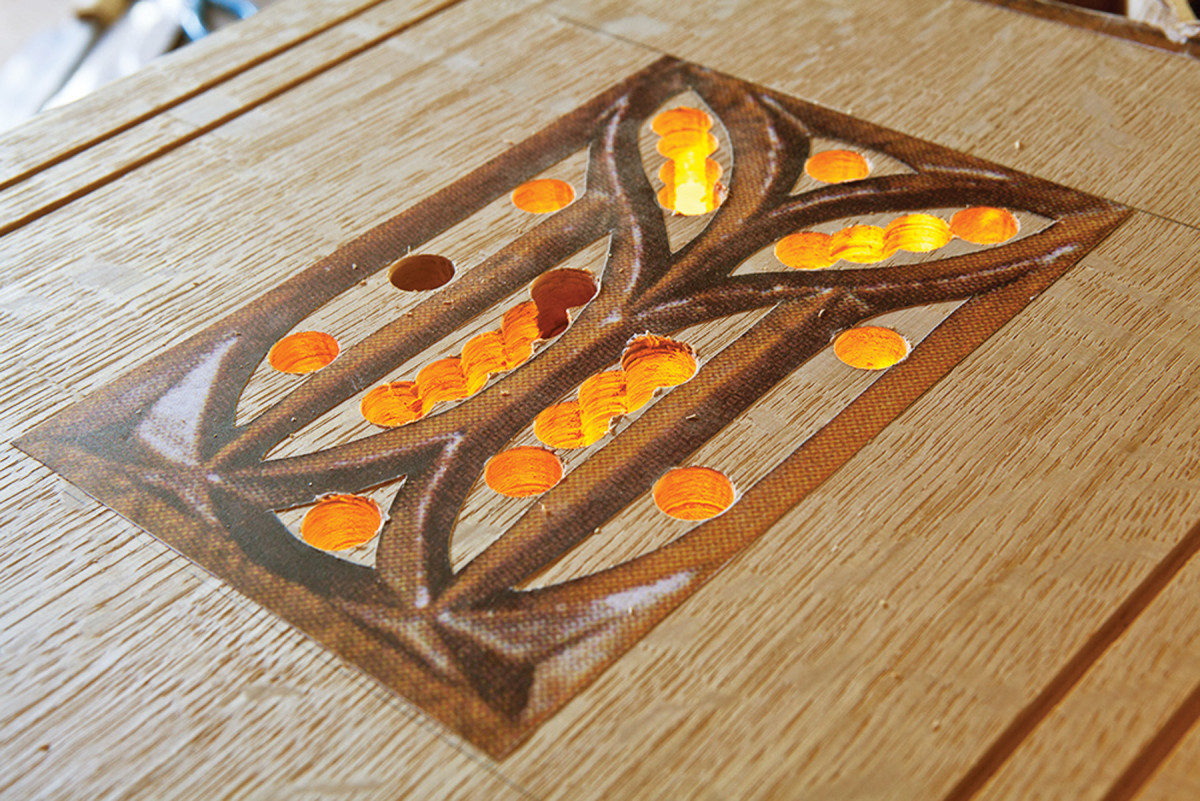
Pattern & piercings. Apply the pattern with spray adhesive and drill out the waste with a 1⁄2″ Forstner bit.
The geometric pierced shapes in the stiles are easy to make, even if you’ve never carved before. You don’t even need carving tools to do the job. Here are the tools I used:
■ A 1⁄2” Forstner bit to poke holes in the waste.
■ An electric jigsaw to remove most of the waste.
■ A coarse cabinet rasp to shape the openings.
■ 1⁄4” and 1⁄2” chisels to bevel the edges and make the triangular chip carvings.
■ A fine rasp to clean up the details.
You can create patterns for the piercings using a compass and straightedge or you can download the full-size patterns for free right here. Apply the pattern directly to the work using spray adhesive, then bore out most of the waste with a drill.
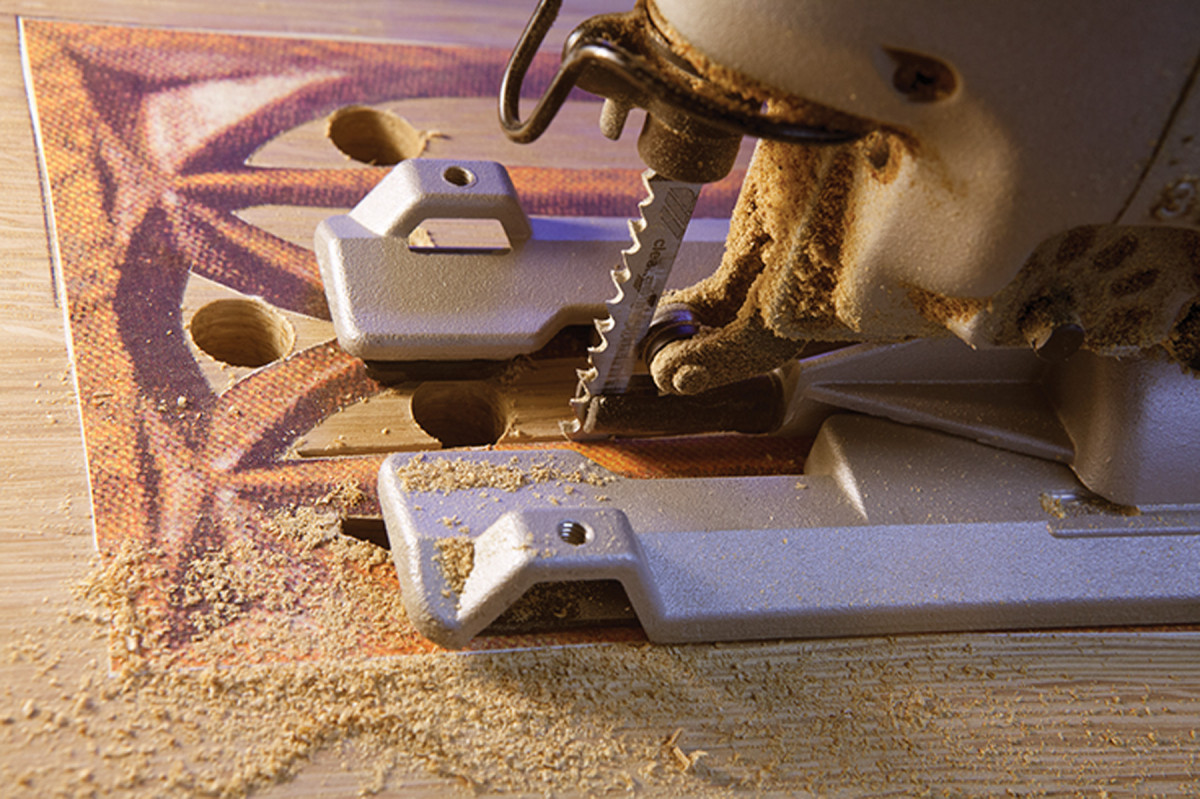
Saw out the windows. Use a jigsaw set with minimal orbit to remove waste as close to the line as possible. I used a standard jigsaw blade for this. I tried using a narrow blade intended for scrollwork, but it deflected too much.
After sawing out the waste, clean up the openings with a cabinet rasp. I used a 10″ rasp with hand-stitched teeth that were fairly coarse – a 9 grain. The goal is to make the walls square and the lines fluid.
With the openings shaped, bevel their interior edges with a 1⁄2” chisel, working bevel-down for the most part. The bevel should be only about 1⁄4” deep to create the three-dimensional effect. If you are using oak, you should sharpen the chisel frequently for the best results.
Then, clean up the cuts with a fine rasp, shaping the bars of the Gothic windows. I used a 7″ modeler’s rasp with 13-grain teeth. Follow up with sandpaper if you like.
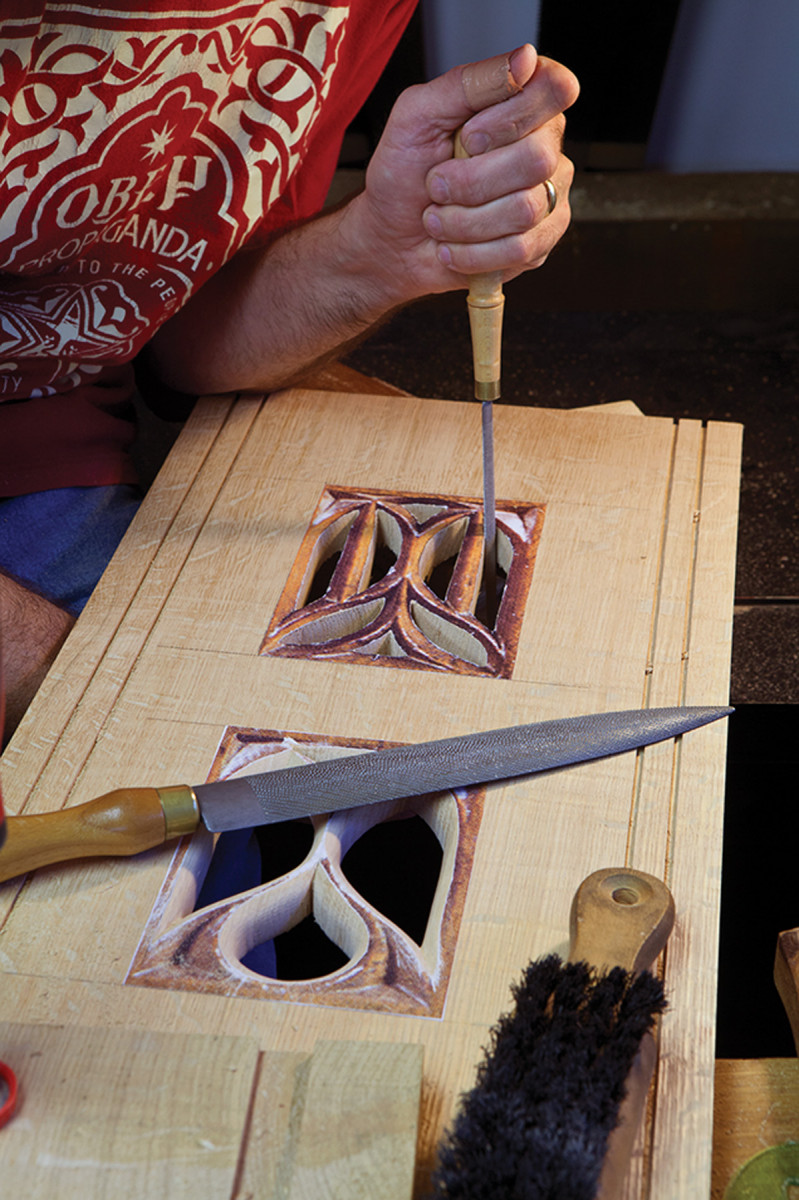
Rasping right. It’s easier to rasp vertically if you hold the handle with one hand and the tip of the rasp with the other. Check your work with a square until you get a feel for the operation.
Many of the corners of the tracery have triangular chip-carved details. These are easily made with bench chisels. Chop straight down on the three facets of the detail. Then pare out the waste toward the chops. Repeat these two operations until the detail is as deep as you want it – mine are 3⁄16” deep.
With the piercings complete, glue the face frame together and attach it to the front of the carcase with 6d wrought nails. Because the wide stiles will expand and contract significantly, I would not glue the stiles to the sides of the carcase. The wood movement might crack the carcase.
If you do want to use glue, apply it to the shelves near the door opening only.
The Door
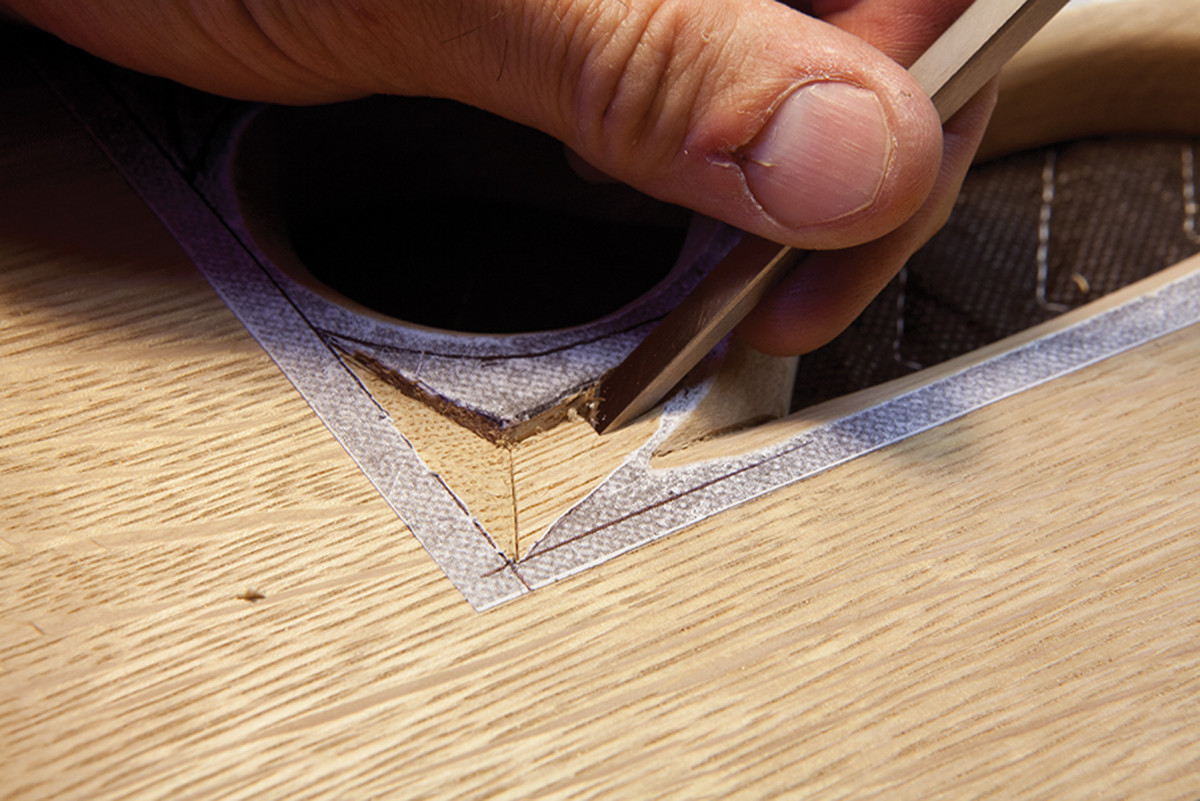
Quick chips. The triangular depressions at the corners of the piercings are easy to make with a chisel and mallet.
Most aumbries have a single door. There is evidence that this aumbry had two, and the lower one is missing. I like the open space below, so I made only one door that enclosed the top two shelves.
The door is just a slab of oak with two geometric piercings. Make the crease mouldings and piercings using the same techniques as on the face frame stiles. I used a blacksmith-made lock and H-hinges, which were installed with wrought nails.
Installing hardware with nails is a bit stressful at first because there are no do-overs. Once you clinch the nails, prying them out can damage the door or stile. So you need your door to fit right the first time and clench the nails with confidence – loose nails are no good.
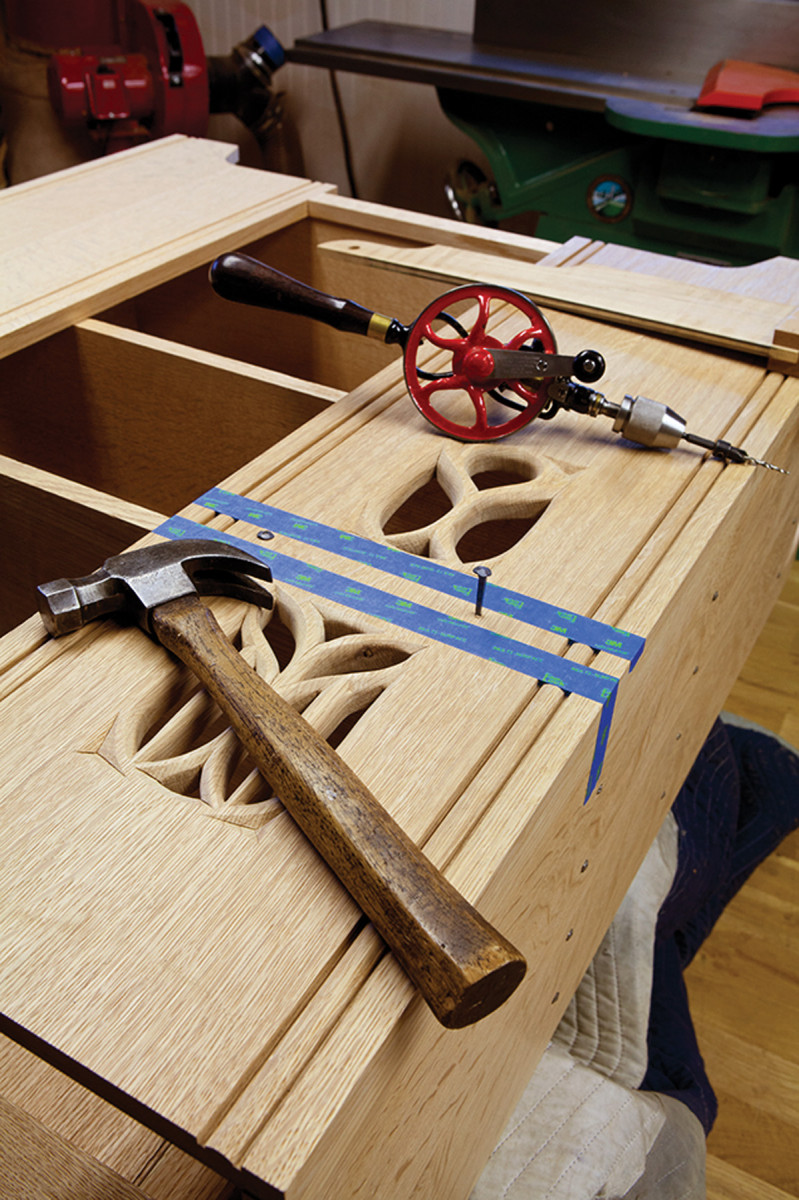
Nail job. The pilot holes for the nails should be about two-thirds the length of the nail. That will give the nail the holding power it needs to keep the face frame on.
The finish is simply boiled linseed oil. Apply thin coats and allow each coat to dry thoroughly before adding another – about two hours is typical. After five or six coats, add a coat of beeswax and buff it out. That’s one traditional finish for early pieces such as this.
If you want more protection, consider adding a little varnish and mineral spirits to the oil to make a wipe-on oil/varnish blend. It’s not traditional, but it will offer more protection and look the part.
And speaking of looking the part, if you want to go 100-percent authentic, cover the interior piercings with some undyed linen that is secured with iron tacks.
Plan: Download a free SketchUp model of this project
Web: Download full-size patterns of the Gothic tracery
Blog: Try making the tracery with a router
Here are some supplies and tools we find essential in our everyday work around the shop. We may receive a commission from sales referred by our links; however, we have carefully selected these products for their usefulness and quality.


