We may receive a commission when you use our affiliate links. However, this does not impact our recommendations.

As I wrapped up the work on an article for the June issue of Popular Woodworking Magazine (a dressing table copied from an antique that has the easiest interior construction I’ve ever seen and a piece in which I used a couple patterns to create the details), Bob Lang asked about my propensity to work with patterns.
I discovered patterns and router pattern bits a long time back. I had just started my career as a “for pay woodworker” and knowing (hoping) that my pieces would need to repeated numerous times, I made patterns for most designs. To say I went a little overboard would be an understatement, but the pattern wall in my shop sure looked complete.
Throughout the years, I’ve tempered my need for patterns but I do find times when patterns are great assets. Patterns provide repeatability, and that is the single-best reason to make and use them. They allow you to work out details and can make your time in the shop more productive. Patterns are also a great place to store pertinent information for the project such as panel sizes and hole locations and sizes.

I make most of my patterns with 1/2″ Baltic birch plywood, especially those that will be routed designs (layout designs are mainly thin plywood, Luan or hardboard), but in a pinch, hardboard works when routing , if you’re careful when setting the bit’s height and you keep the router base tight to the pattern. Plywood eliminates the grain factor in your patterns; there’s little need to worry about shards snapping off your patterns or pieces breaking if your pattern is dropped on the floor.
A pattern is shaped to its final design and routing transfers that design to your work. It’s easy to shape, square and clean up the edge of your plywood pattern. Working a 1/2″ edge is much easier than working the edge of your workpiece, which can be as thick as 1-3/4″ in some cases, and a sharp router bit leaves a smooth, square cut that requires little touch-up work, especially along the bottom edge of an apron.
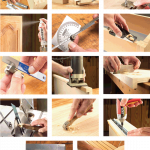
Also, either face of the pattern is usable. For example, the dressing table has a complicated apron design (shown at the top). It’s a Queen Anne period piece, so the profile is symmetrical; thus, I need only make half the pattern to reproduce the entire apron design.
To use the pattern, place it in position then trace the design onto the workpiece. Rough cut the design, getting as close as you dare to the layout lines. But don’t nick them. Clamp the pattern in position before you run the bearing-guided router along the profile. After the half is routed, flip the pattern, realign it to your layout line then complete the profile.
Best of all, if you have trouble and screw up a workpiece (or if you decide to build the project again), you won’t have to do the layout a second time. Just grab the pattern off your wall display and go at it.
Here are some supplies and tools we find essential in our everyday work around the shop. We may receive a commission from sales referred by our links; however, we have carefully selected these products for their usefulness and quality.


old rule of thumb: if you make more than one of anything, use a fixture (or pattern). It works!
I’ve always made my patterns out of 1/2" MDF. It’s a lot easier to shape, but is definitely more fragile, particularly on thin sections. It is also a lot less expensive in the long run.
Blaine
Tom,
I use a spindle sander on anything curved and work right to the layout line. On the straight areas, I work just as you do, with files and sandpaper. A sharp bit makes a difference, and if you work in a consistent, smooth motion, I think you’ll see a smoother surface.
How do you make your pattern curve smooth? I use sanders and files but your edges look much better than mine.
And one of the better part of working from patterns is that you can design templates in Sketchup, print them out, make a scaled copy on the copy machine, and stick them on the ply you’ll use for your pattern. Follow the lines with your bandsaw and then shape the pattern to your lines. Then use your pattern bit to mill your piece.