


We may receive a commission when you use our affiliate links. However, this does not impact our recommendations.
You can hold anything on your workbench with just pegs, wedges & notches – no fancy vises required.
It’s difficult for most woodworkers to imagine a workbench without screw-driven vises. But for most of human history, that’s how you worked. No matter what you were building – furniture, wagons, barrels or houses – the workbench was typically a strong table with a collection of pegs, wedges and notches.
While screw-driven vises have existed since Roman times, they don’t show up on workbenches until about the 14th century. And even in the 18th century, many woodworkers still preferred simple benches without screw-driven vises.

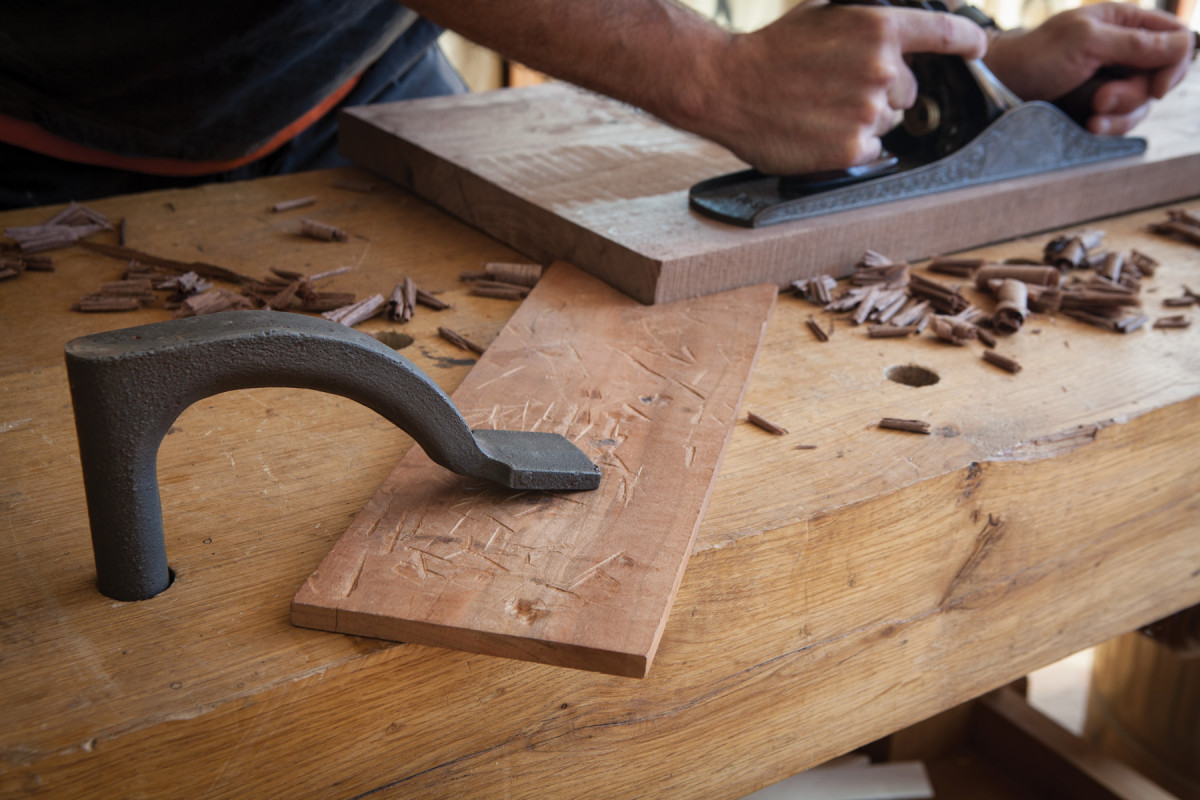
The lockjaw stop. This French bench uses rusty nails to secure the work. I have yet to cut myself on a metal planing stop during the last 12 years. So, this looks worse than it really is.
For today’s woodworker, I think there are many reasons to understand and consider alternatives to the modern workbench. For one, they let you transform almost any surface into a workbench – even a picnic table. So, you don’t have to leave your shop behind while on vacation.
They also are a great way to get a fully functional bench without spending much money. All of these contrivances use scraps – plus maybe a holdfast or clamp. So, you don’t have to spend $3,000 on a bench to build your first birdhouse.
Finally, these workholding methods are just as effective as modern vises. In some cases they are actually superior. Let’s begin with my favorite – the single-point planing stop.
The Planing Stop
Wide planing stop. Add a thin batten in front of your planing stop, and you’ve made an effective planing stop for wide panels.
On early workbenches, the planing stop is the foundation for all the other bits of workholding. In fact, some benches are equipped with only a planing stop.
Most planing stops are comprised of a square stick that’s long enough to penetrate the benchtop and give you enough height for planing boards on edge – 3″ x 3″ x 12″ is typical. The stop is adjusted up and down with mallet blows so it needs to be a durable wood and dry.

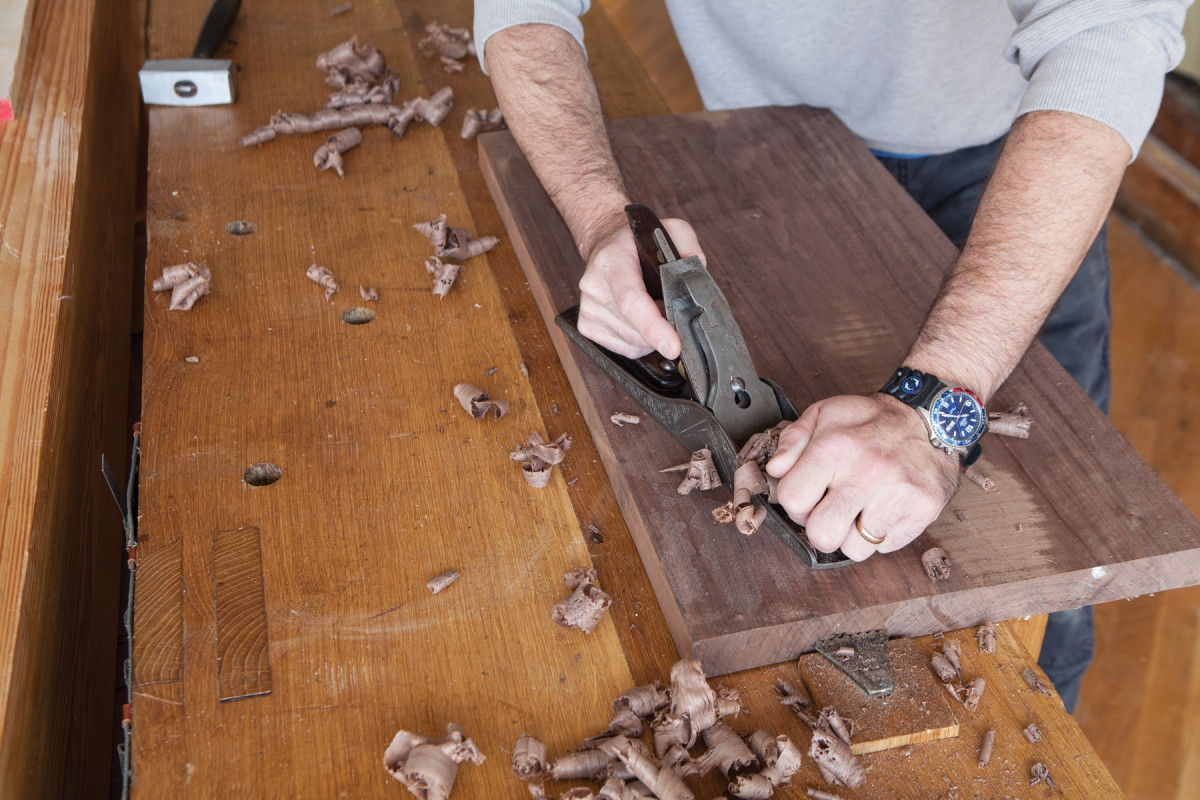
It’s in the hip. This is how I typically deal with wide stock.
You might think that fitting the planing stop requires you to consider how wet the benchtop is and the current season. Will the stop and benchtop (or both) shrink as they dry? There are formulas and lots speculation for how tight or loose to make things. Ignore them.
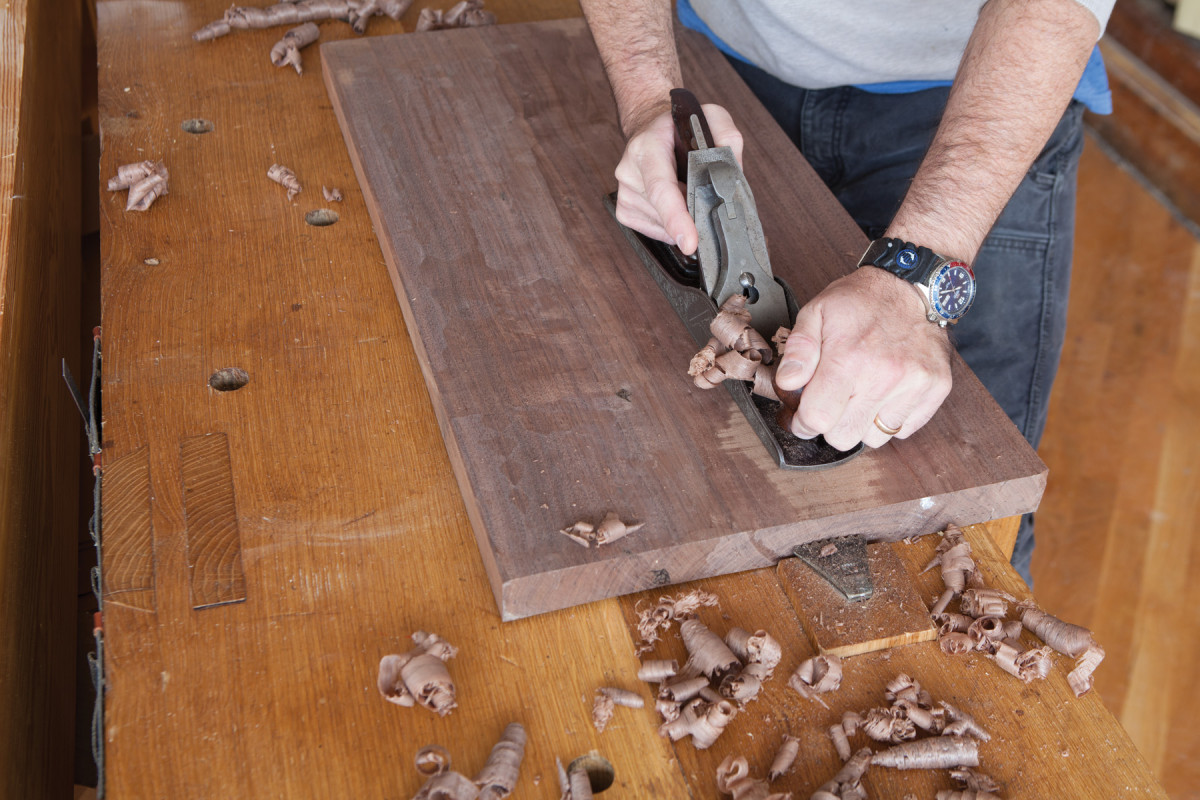
Keep the plane in line with the planing stop and shift the board toward you as you work. When you reach the far edge, use your hip to press the board against the stop.
When I fit a planing stop, I assume that I’m going to have to adjust it later on if it becomes too tight or make a new one if things get too loose. So, I focus on getting a good snug fit that day. I want the stop to move about 1⁄8” with each heavy mallet blow.
If you have a face vise, move its jaw out to help support the board as well.
After I get that fit, I simply pay attention to how it functions. If the stop becomes almost impossible to move, I remove it and plane it a tad. If it’s too loose, you can glue some veneer onto the existing stop or make a new one. In time, the wood will settle down and your planing stop will do the same.
The Bitey Bits
A kick to your backside. With the doe’s foot behind the work you can plane wide panels parallel to the grain or across it.
Most planing stops have some toothed metal on their tops to help secure the work. This can be as simple as a few nails driven through the stop. Other woodworkers attach a bit of saw steel to the top of the planing stop and file teeth into it. Still others use a blacksmith-made stop or a commercial version.
They all work. File the teeth sharp and your work will move a lot less. And before you start planing a board, give the board a whack on its far end with a mallet so the teeth bite hard into the end grain of your work.
Every little bit helps. This shallow mortise in the underside of the palm helps prevent the palm from coming loose from the planing stop.
If you want to avoid getting teeth marks in a particular piece of wood, muzzle the teeth with a stick of wood. I use a stick of wood that is as long as my benchtop is wide. One end goes against the teeth. The other end is secured with a holdfast. It’s an instant wide planing stop.
The wide planing stop is a crutch, and sometimes you really need it. But I suggest you try to plane wide boards with the stop alone and see what you can get away with. By slightly shifting the work, you can control fairly wide boards. With practice, 8″-wide boards are no problem. Then shoot for 12″.
Once you install a planing stop, the first accessory you should make for it is a “doe’s foot,” a simple appliance that plays nice with the planing stop. I covered the doe’s foot in the November 2017 issue (#235) if you want to read about it in detail. The doe’s foot is simply a piece of wood of almost any size with a 90º notch cut into its end. The device works by allowing your workpiece to get snagged in the notch between the two “toes” of the foot, immobilizing it from behind.
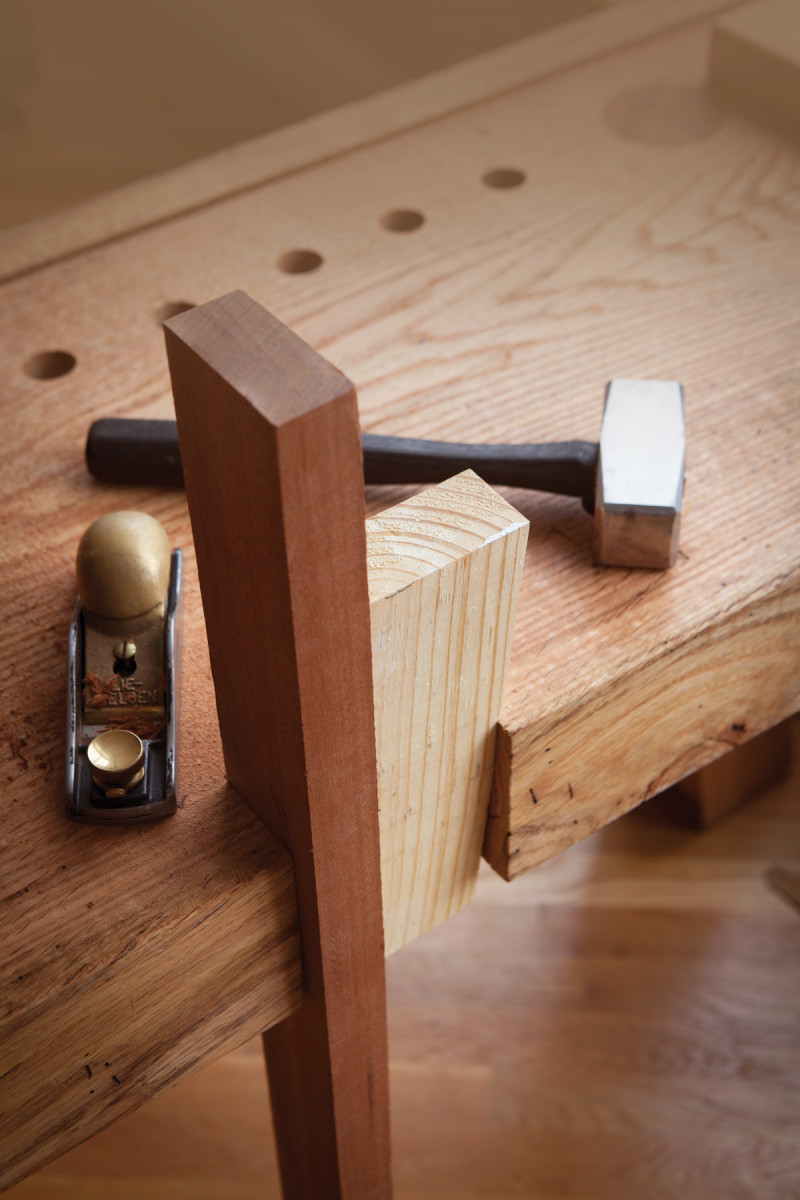
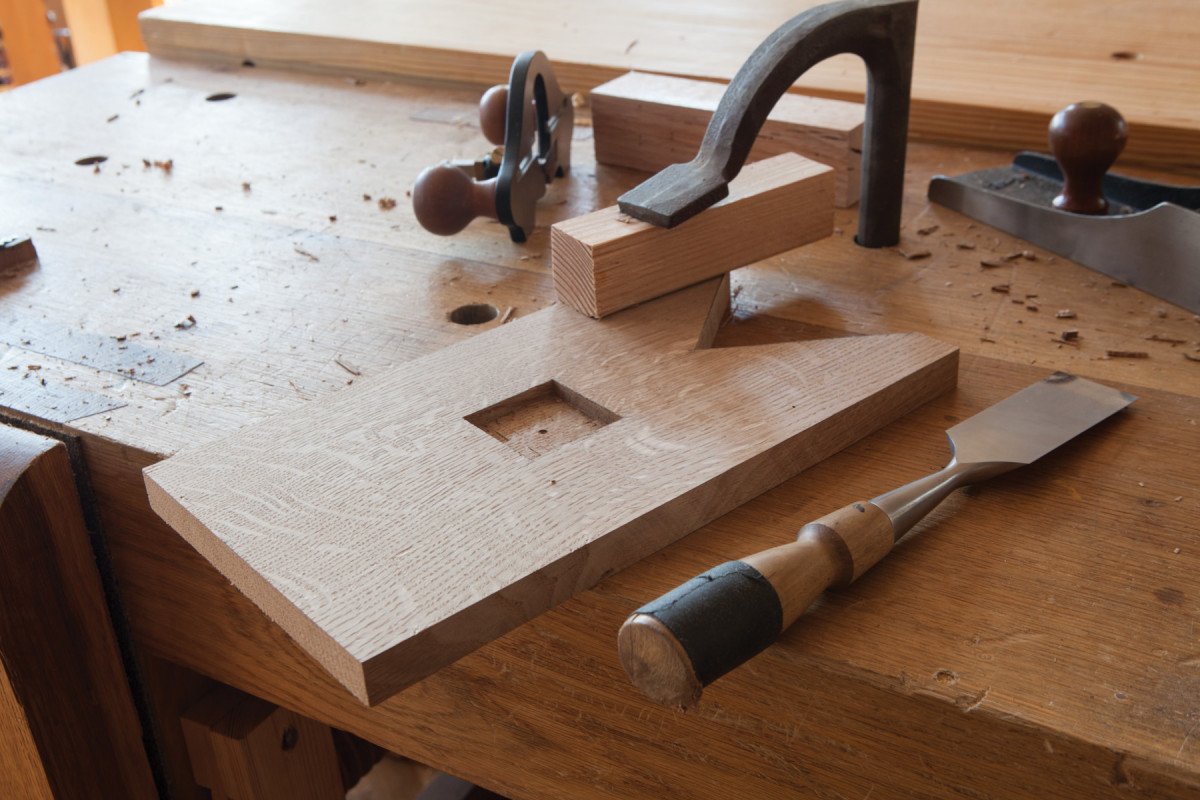
The Movable ‘Palm’
The palm. This versatile planing stop can be used for dressing faces or edges of boards.
When a doe’s foot is used in front of the work instead of behind it, it’s sometimes called a “palm.” The word comes from the Chinese legend of how planing stops were invented. (Hint: It involved making a device instead of using a person’s palm to secure the work.)
Palms show up on many early workbenches and are an extra-fancy version of a planing stop. I made one that can be moved up and down like a planing stop, and it works great.
It’s about 1⁄2” x 7″ x 13″ with a “V” cut into one end. I attached the palm to the top of a 2″ x 2″ x 8″ planing stop with glue and nails.
Because the palm is thin, I took pains to attach it to the planing stop so it wouldn’t be wrenched off – planing stops take heaps of abuse. So, this palm is attached via a shallow mortise, glue and two beefy Roman-style nails.
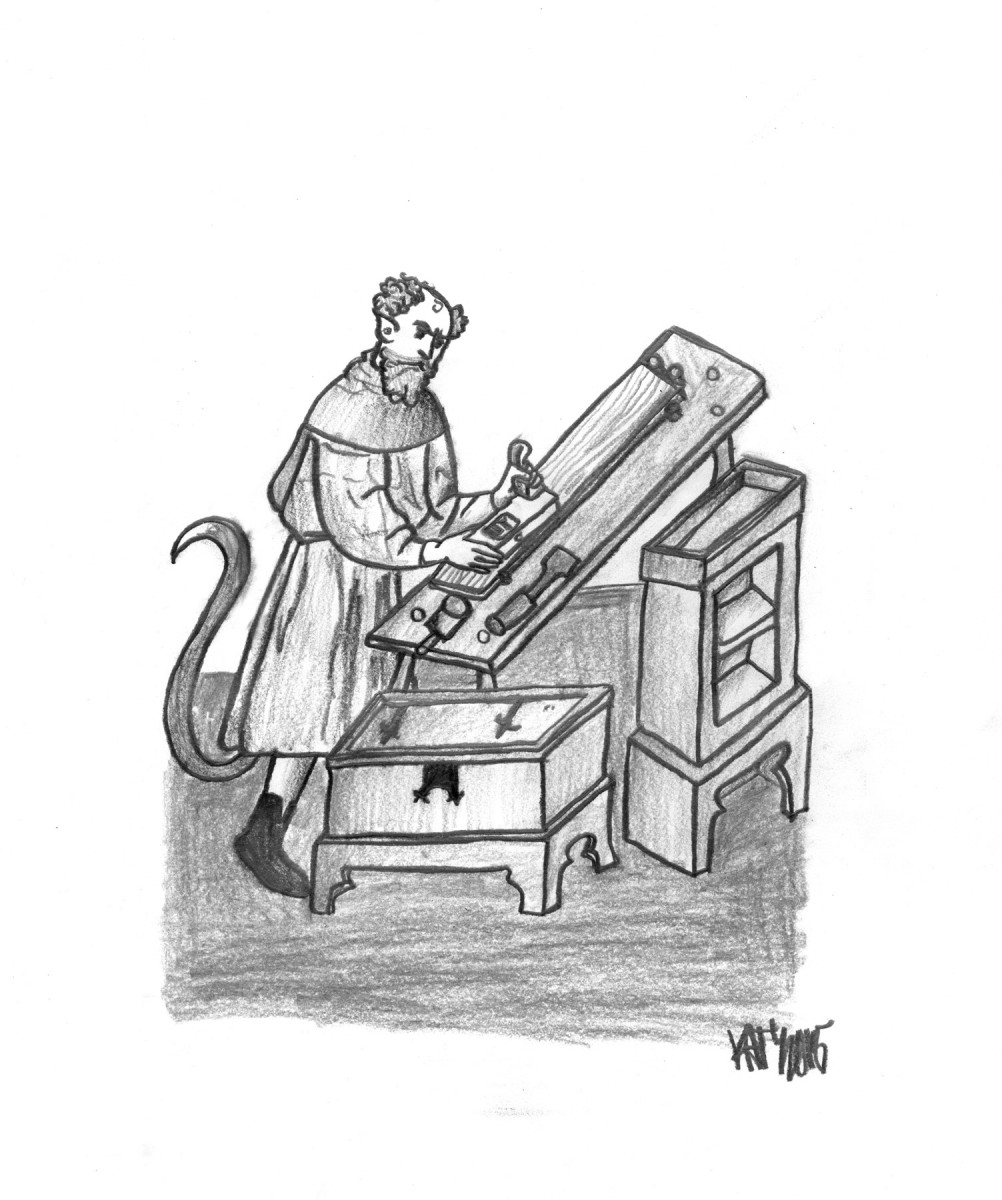
Don’t monkey around. Here is a reproduction of the painting of Karl Schreyner made by my daughter, Katy Schwarz. Note that Schreyner wasn’t a monkey – Katy just drew him that way.
Chop a 1⁄4“-deep mortise in the underside of your palm to receive the end of the planing stop. Use a router plane to ensure the bottom of the mortise is flat so the palm and planing stop will join at right angles.
Roman nails hold like the dickens but will split the work if you are careless in drilling pilot holes and clearance holes. While the palm is disassembled, drill clearance holes in the mortise for two beefy nails.
Glue the planing stop into the mortise, checking to ensure the stop is perpendicular to the palm all around. Once the glue is dry, drill pilot holes into the end of the planing stop. The depth of the holes should be equal to about two-thirds the length of your nail (about 11⁄2” deep in my case) and slightly smaller than the shaft of the nail. Nail the palm to the planing stop and you are done.
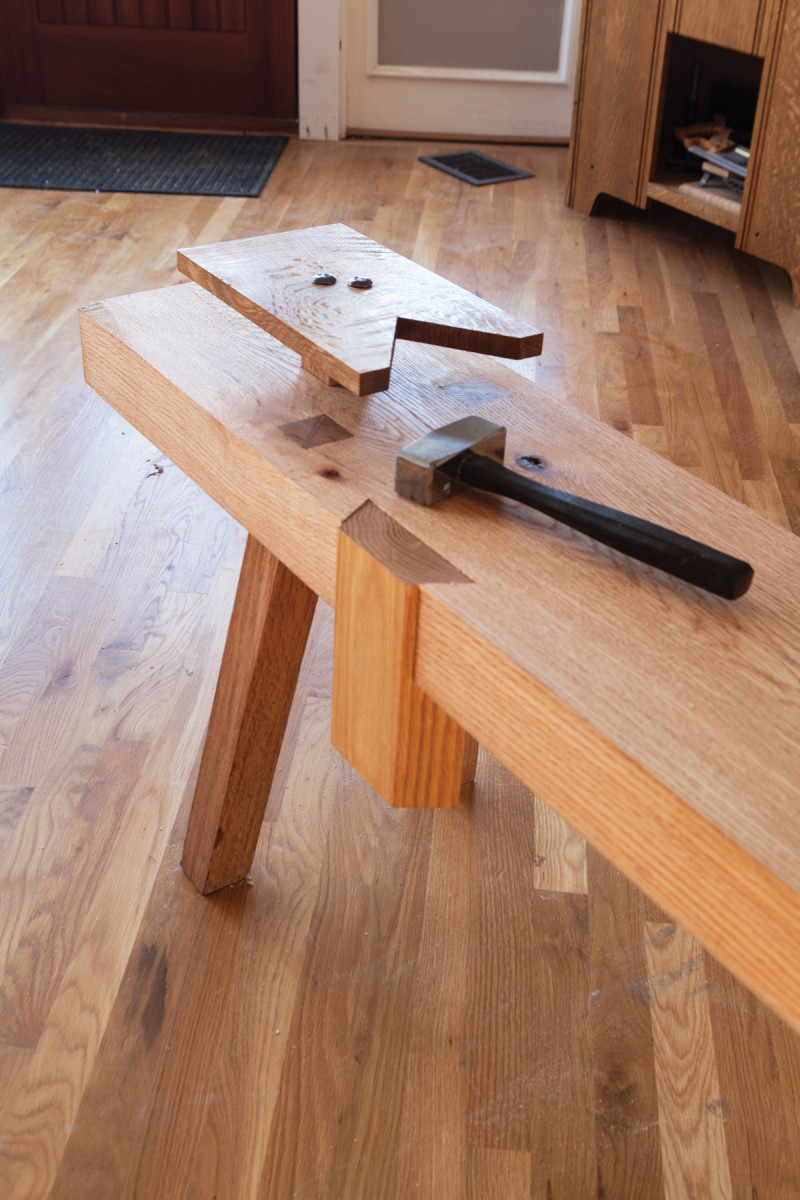
Side Stops – the Schreyner System
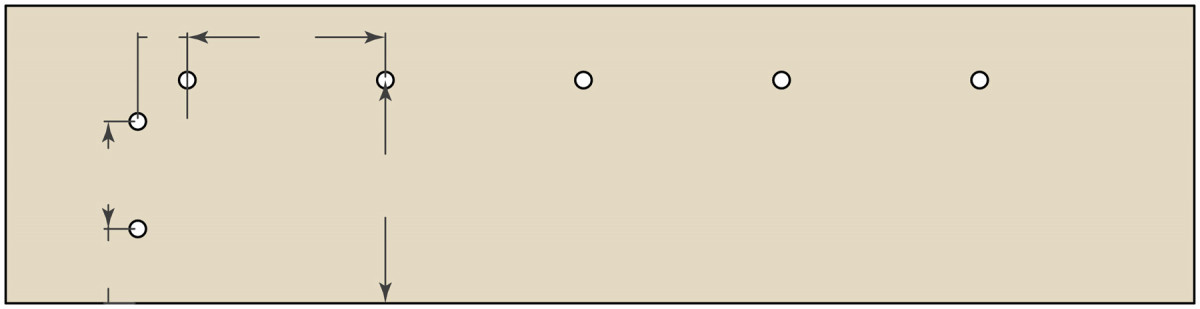
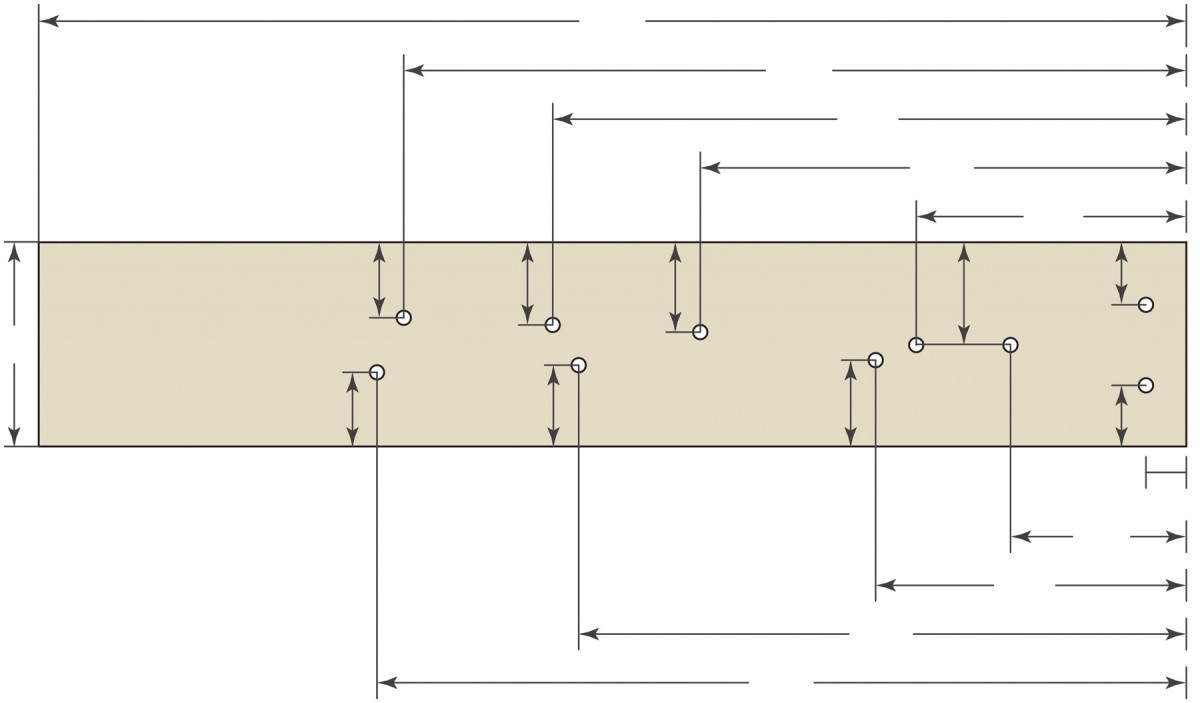
Schreyner Peg Layout
In addition to the doe’s foot and palm, there are other ways to prevent the work from spinning to the side while you plane it. One of the simplest is a method shown in a painting circa 1425 of woodworker Karl Schreyner at his bench.
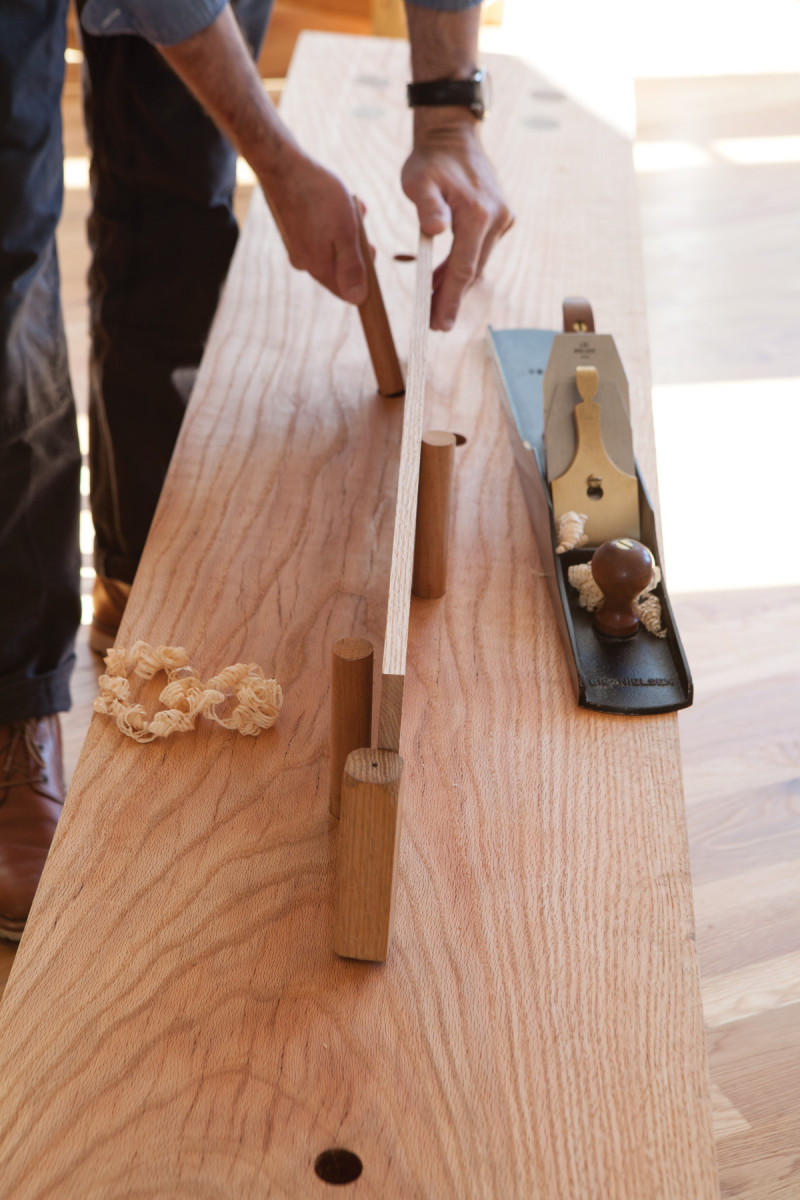
His bench shows two round pegs at the end of the bench that work like simple planing stops. Then there are two additional pegs that restrain a board from the side. This painting is part of a series of 1,171 famous paintings of Nuremberg craftsmen now called The Mendel and Landauer Hausbücher, and are a rich source of information on early crafts.
Across the board. For short boards, you’ll need to shift the work left or right occasionally to keep the board under control. This is not a big deal.
While many craftsmen are shown in the Mendel and Landauer Hausbücher working at their benches, the painting of Schreyner is the only one I’m aware of where the workbench has these pegs to the side of the work. And so I call these “Schreyner pegs” until I find an earlier source (or a catchier name).
With the board. Planing boards 6″-10″ wide can be a little tricky because the work is restrained by only one end stop and can rotate. You can fix this by putting a batten in front of the two end stops, making a wide planing stop.
Here’s how I installed the Schreyner pegs on my benchtop. I started with a 1″-diameter x 36″-long oak dowel I bought for $4.99. Then I sawed it into seven 5″-long bits. Then I laid out the positions of the 1″ holes. The end stops are located where a simple planing stop would usually go. One is 41⁄2” from the front edge of the bench. The second is 11″ from the front edge.
Be seated. When traversing boards on a low bench, sit on a sawbench (or any low seat) to get the job done. Yes, it’s OK to sit when you work.
The pegs for the side are all 131⁄2” from the front edge of the bench. The first peg is 3″ to the right of the end stops. The remainder are positioned on 12″ centers.
Drive the 1″ pegs into the holes. They should require mallet taps to move them up or down. Now you have a system of pegs that can handle traversing or planing with the grain.
The Roman Side Stops
Roman Bench peg layout
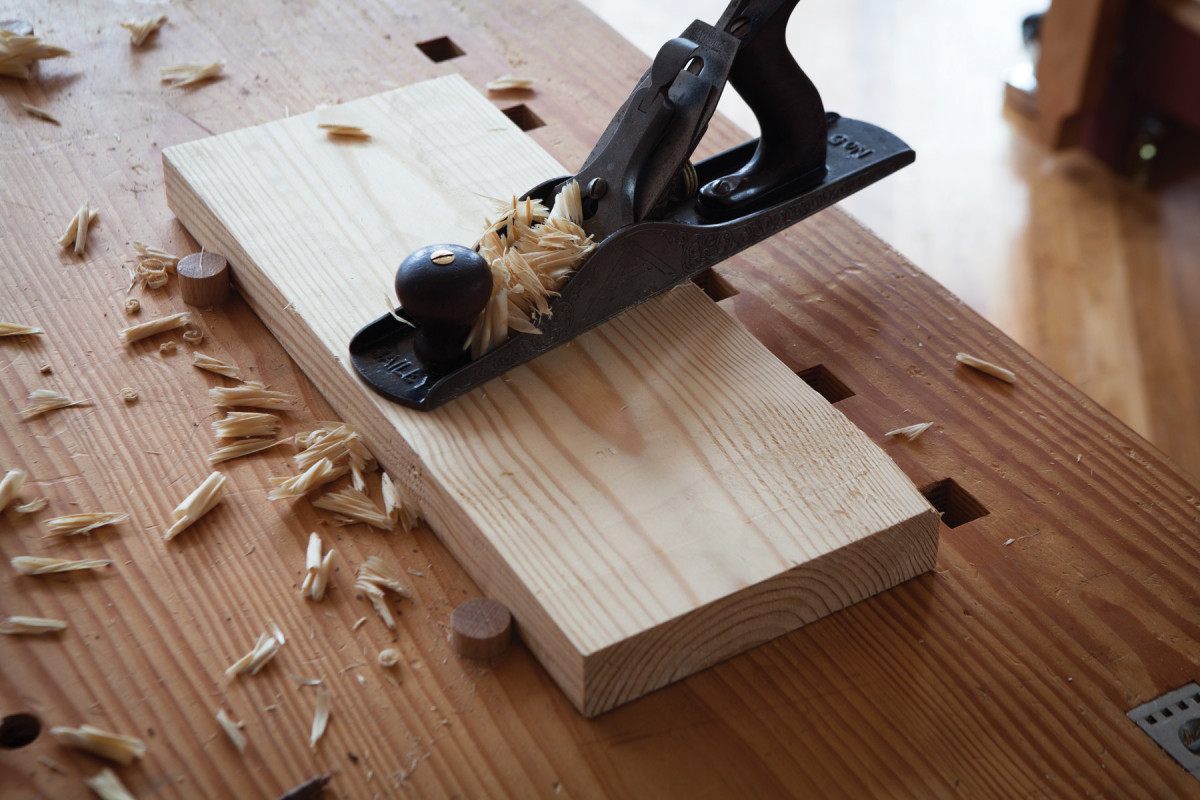
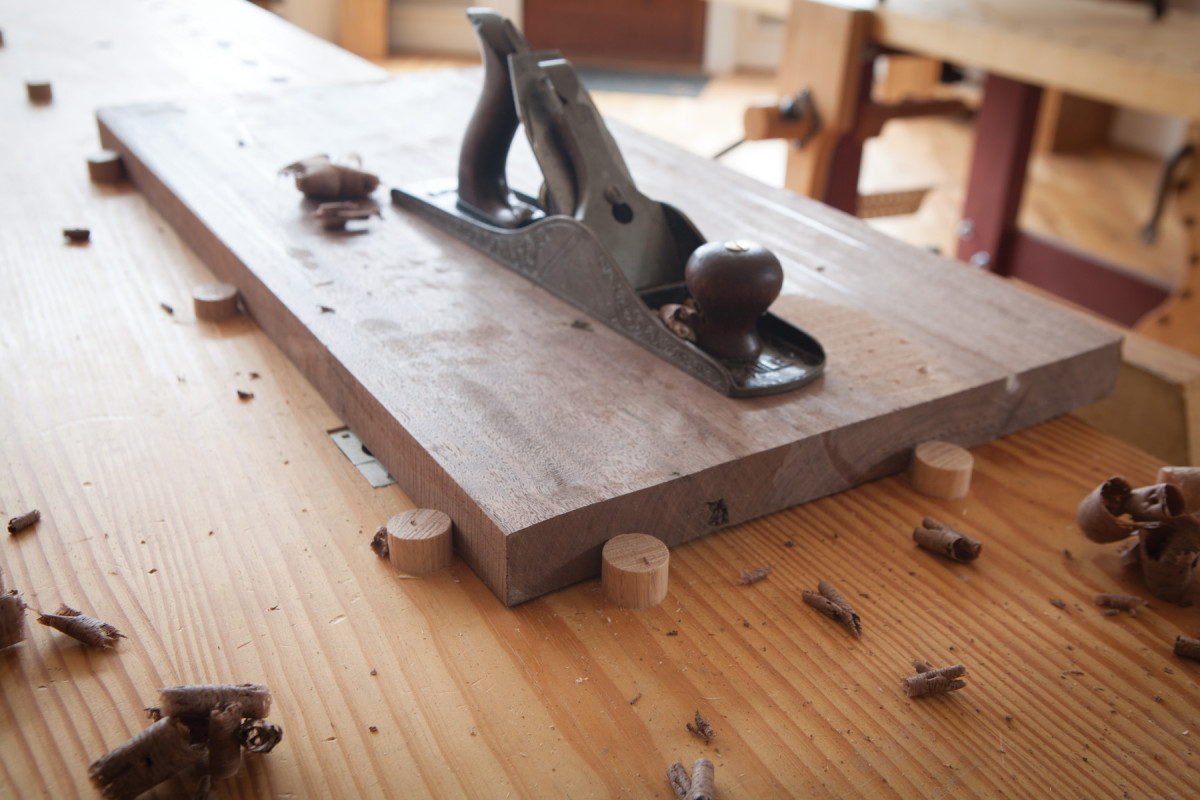
Similar to the Schreyner pegs are the “side stops” found on the earliest surviving workbench (circa 187 A.D.) at the Roman fort in Saalburg, Germany. Like pegs, these stops move up and down and restrain the edges of boards and work in conjunction with the planing stop.
I’ve got this pegged. By having a selection of pegs that vary in length and girth you’ll find it easy to secure most boards on the benchtop.
I first found these Saalburg side stops on a Roman bench that was both low and narrow, but they can be installed on workbenches of any height (they show up in historical paintings on taller benches). Like the Schreyner pegs, they can be used on their own for traversing boards with a handplane. Or they can be used in conjunction with a planing stop to prevent wide boards from spinning while planing them.
They also can be used like a bench hook for sawing joinery. Press the work against the side stops and cut tenon shoulders or dado walls.
Other Ways to Use Pegs
Double planing stops. Face planing a board against two adjustable stops embedded in the benchtop (from “Woodworking in Estonia”).
Many early benches, especially knee-high ones, feature a series of peg holes that form a long and shallow V-shape down the middle of the benchtop’s length. I’ve been working with this system of holes and pegs for a couple years and have found it surprisingly versatile.
The pegs for these holes can be as much as 6″ tall, which allows them to support work when you work on the edge of a board. Here’s how that works: Put one peg at the bottom of the “V.” Place your board on edge against that peg. Now look down the two legs of the “V” for two holes – one on each face of the board – and put pegs in those holes. These pegs support your work from both sides. Now you’ll find it remarkably easy to edge plane boards.
For working on the faces of boards, many of these benches had two movable pegs at the end of the bench that could be used much like the Schreyner pegs mentioned above. While many of the operations are the same as with the Schreyner pegs, you also use your body to restrain the work when you plane long boards.
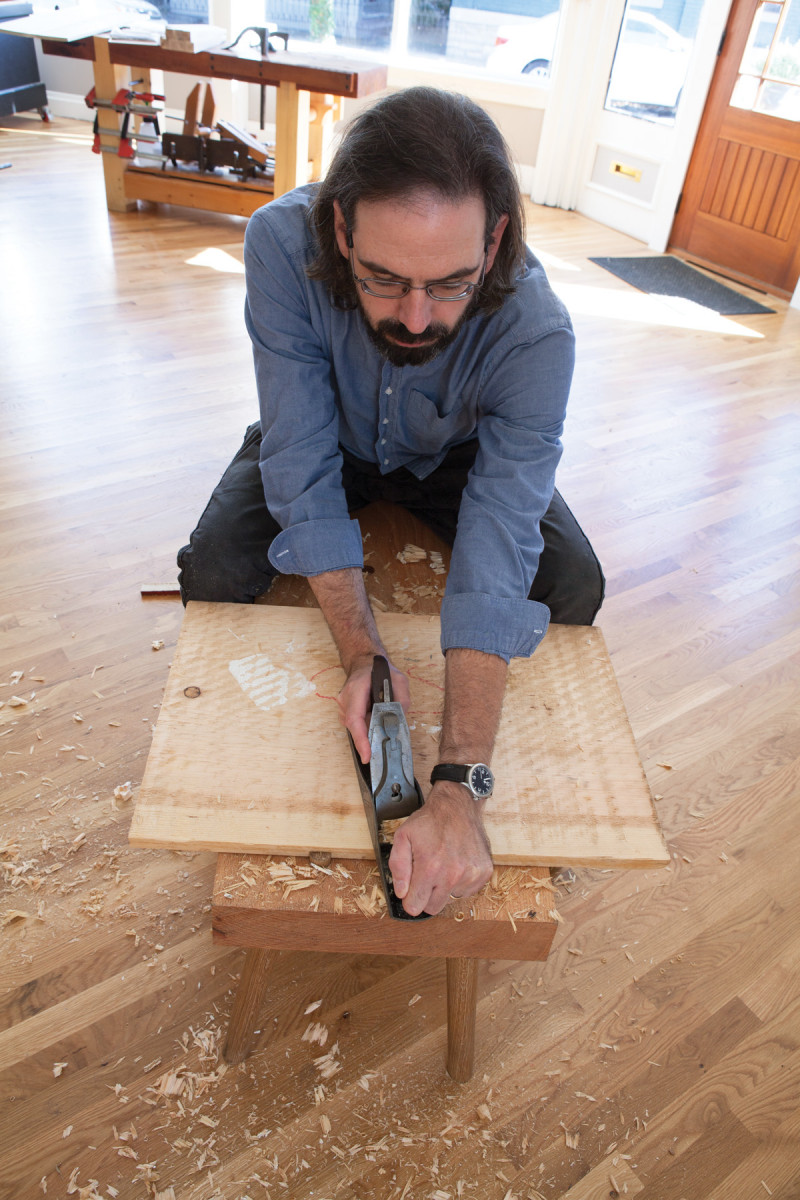
Bench stops. Traversing short boards is simple; with longer stock I use a stool or sawbench to support the end hanging off the benchtop.
Once you get into boards that are longer than your arms can reach, you sit on the work. With workpieces longer than 40″ I begin by processing the stock close to the planing stops as shown at right. When that section is planed, I scoot backward about 3′ and repeat the process.
Traversing boards with a fore plane is also fairly easy with the low bench. You brace the work against the planing stops, then use your knees to lock everything tight against the stops. Finally, plane the area between your legs. An outboard sawbench helps support long stock or when you are at the beginning or end of a particular board.
You can also use the pegs at the end to secure your work similarly when sawing dados or chiseling waste across the grain.
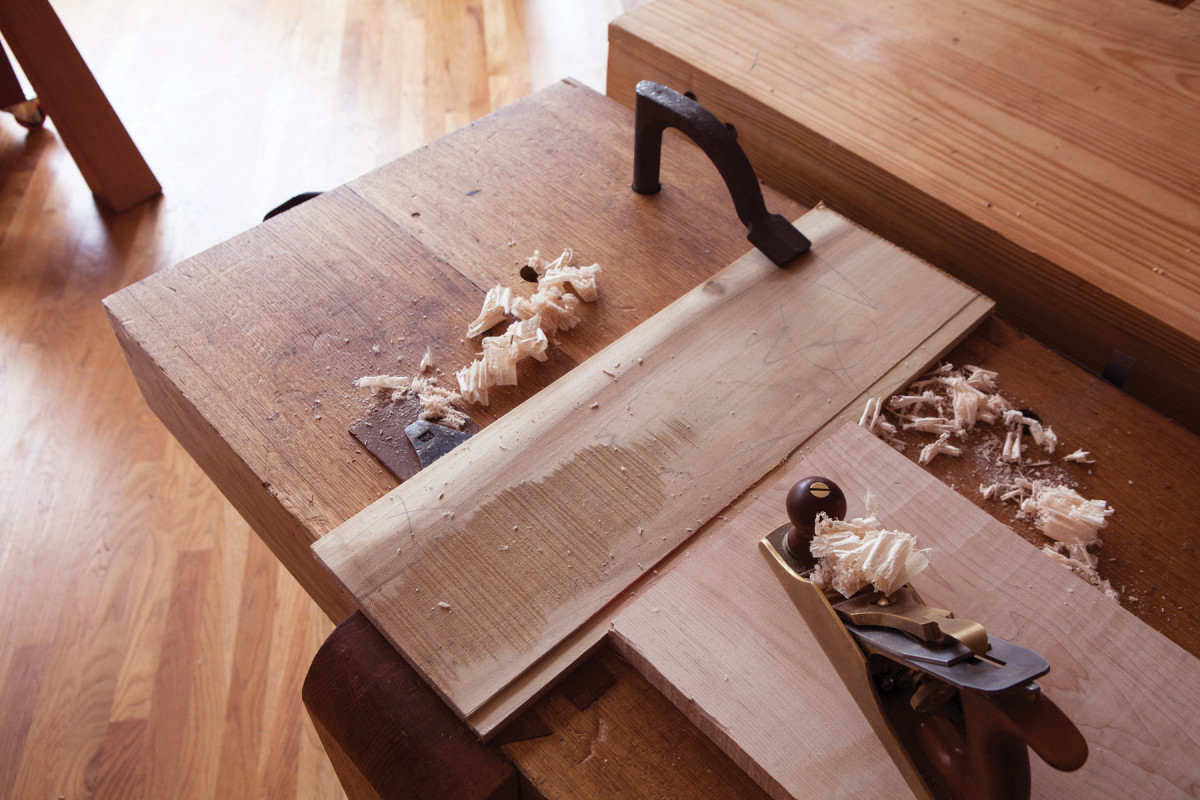
Notches & Wedges
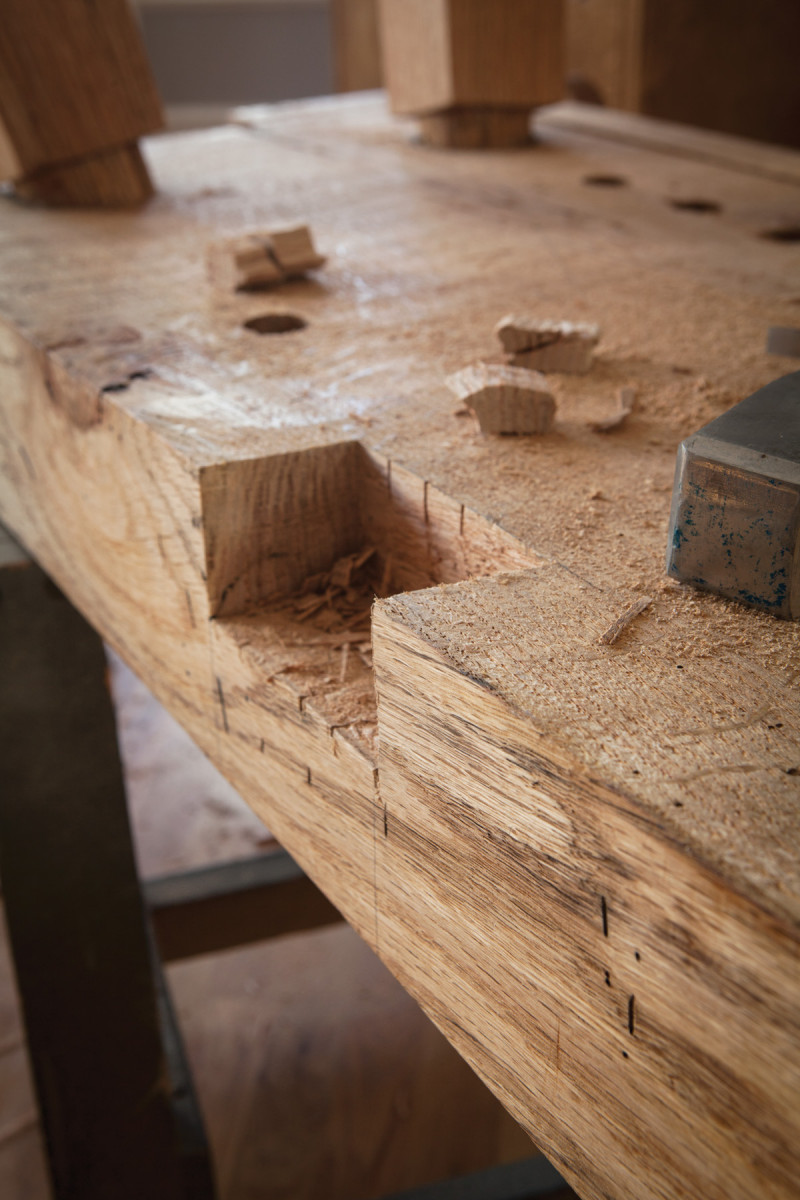
Quick work. With the notch on the edge, you saw the walls and pry the waste out easily with a chisel. Then clean the long grain of the notch with paring cuts.
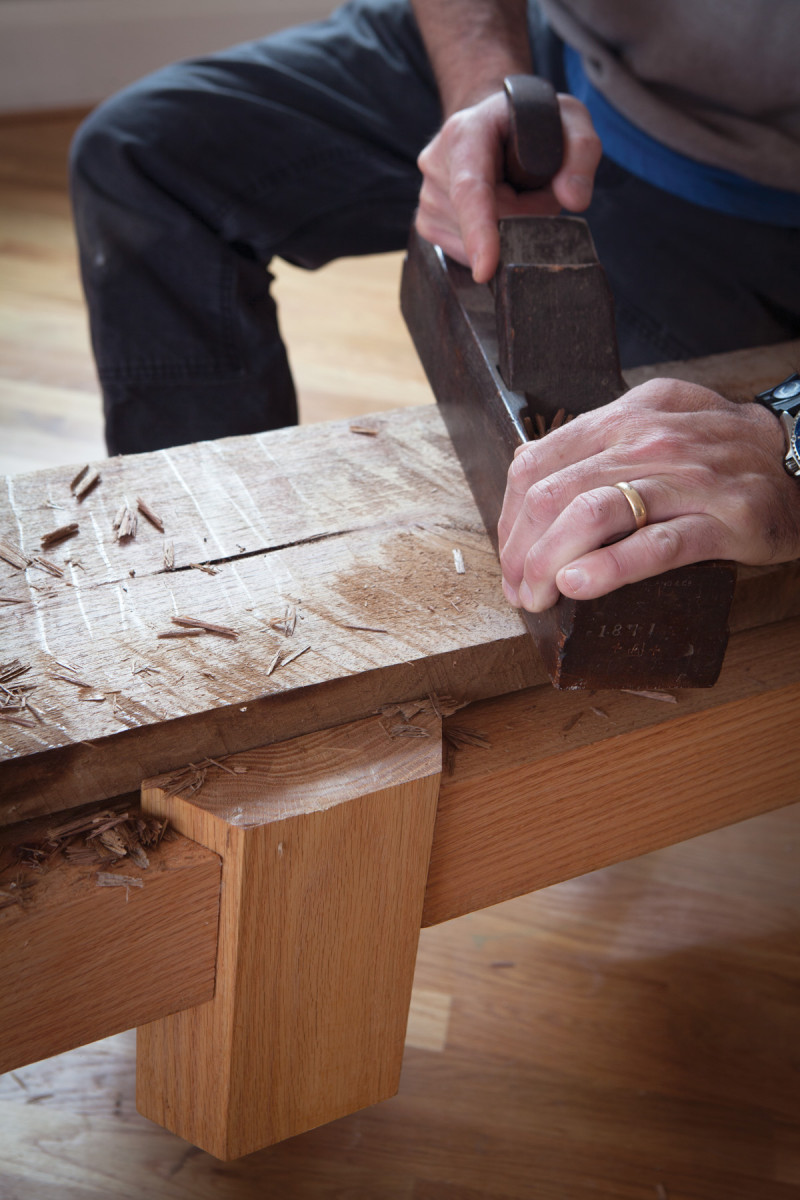
In many old woodworking paintings, you’ll see benches that have no vises but instead have a large rectangular notch cut into the edge or end of the benchtop. In many cases, these notches are used as face vises. You put the work in the notch and then use a wedge to immobilize it. I’ve had great – actually, quite spectacular – success using these notches for cutting tenons and shaping the work with chisels, rasps and files.
It took a little experimentation, however, to get the wedges right. In the end, I went to my scrap pile and grabbed a white pine 2×4. I sawed it to 12″ long and tapered one edge with a jack plane (I later measured the angle at 2º). Then I drove it into a notch.
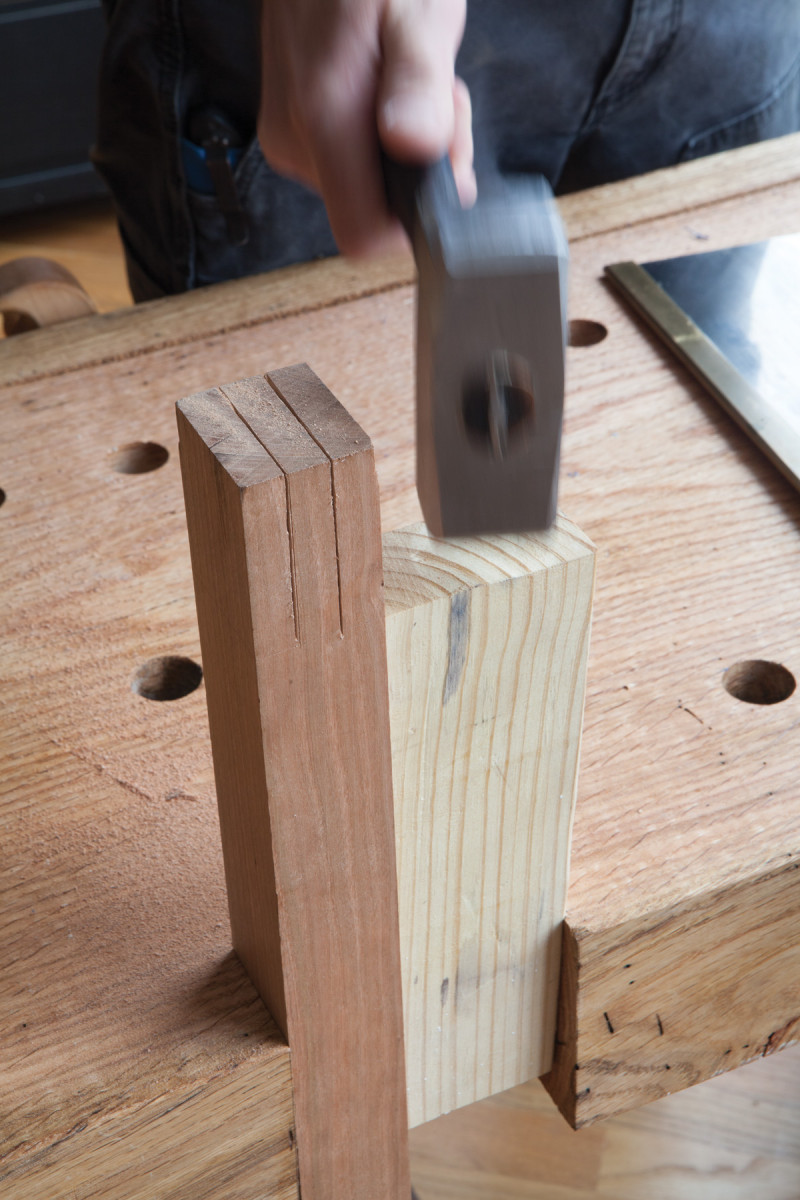
Tap that. Knock the softwood wedge between the work and the benchtop and the work is secure enough for any operation.
It cinched down as hard as any screw-driven vise I’ve used. It worked so well that I laughed out loud.
 If you are interested in making these notches, here are some details. On some benches, the notches are in the end of the benchtop. In others, they are cut into the edges. I tried both. They both held just fine.
Making the two kinds of notches, however, is quite different. The end grain notches take twice as long to make because the wood is fighting you the entire time. You have to rip saw the walls of the notch and then chisel out the waste like cutting a huge dovetail. There is a lot of chopping and splitting. It’s not a horrible task, but it’s more difficult than creating a notch in the edge of the benchtop.
There you crosscut the walls (crosscutting is easier than ripping). Then you split the waste with chisel chops. Splitting wood along the grain is always easier than chopping across it.
Here are the measurements for my notches. Don’t feel compelled to copy me, however. The end-grain notch is 41⁄2” wide and 21⁄2” long. The edge notch is 41⁄4” long and 2″ wide. I have a variety of softwood wedges scattered about that can handle work from 1″ wide to 3″ wide.
Belts & Ropes

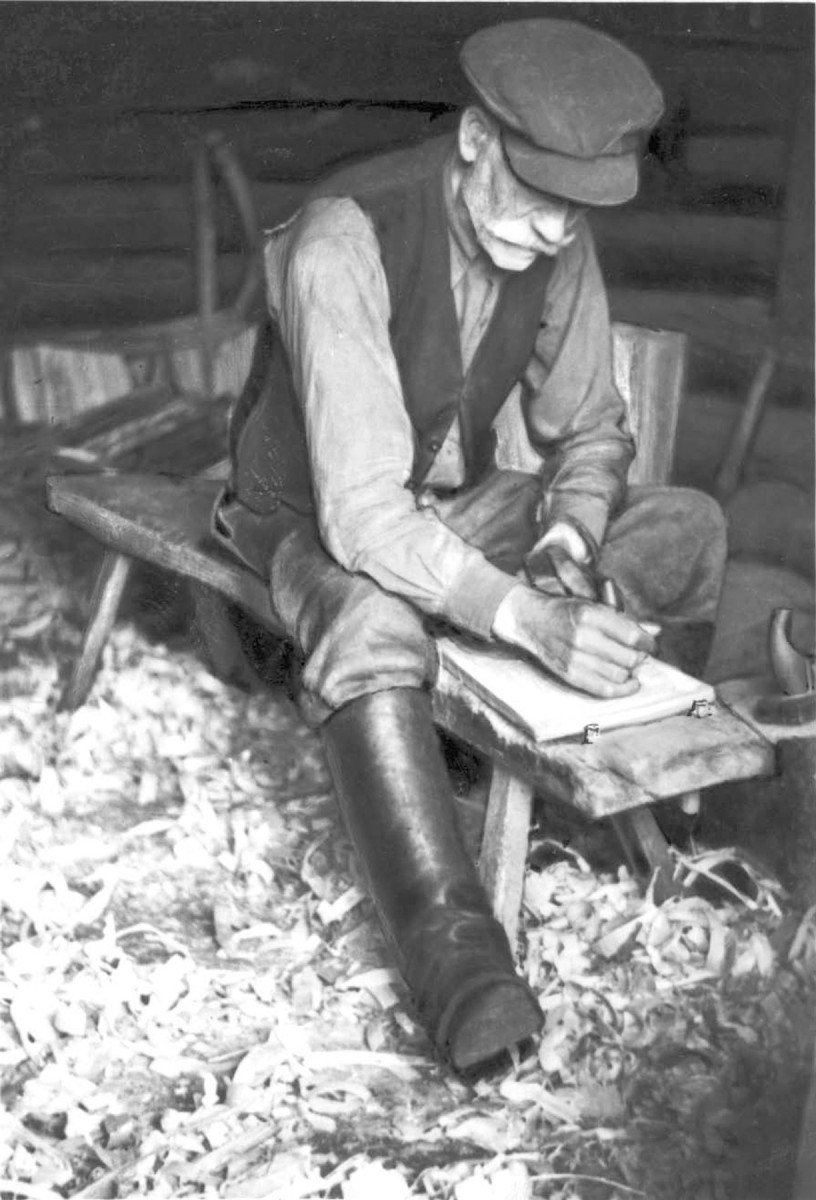
Gag order. A rope makes a surprisingly good hold-down, as seen in this old photograph, where a cooper has made a simple slab-style bench into an effective shavehorse (from “Woodworking in Estonia”).
One bonus operation: You can hold assemblies to the benchtop to work on their faces using a rope (or a belt) and your feet to create a primitive vise. I first saw this in an Egyptian painting. I’ve also been experimenting with using a leather belt to hold the work down. I have found that the belt and rope work best when holding objects that are fairly tall (as shown above in the historic image from “Woodworking in Estonia”). With thin stock, the edges of the benchtop interfere with the grip of the rope or belt.
Workbenches don’t have to be fancy to do their job gracefully. Our ancestors could build masterpieces with simpler tools and workbenches, and so can we. It just takes a little imagination and an open mind. PWM
Christopher Schwarz is the editor at Lost Art Press and author of the forthcoming book “Ingenious Mechanicks: Early Workbenches & Workholding.”
Here are some supplies and tools we find essential in our everyday work around the shop. We may receive a commission from sales referred by our links; however, we have carefully selected these products for their usefulness and quality.


