We may receive a commission when you use our affiliate links. However, this does not impact our recommendations.
Every door needs a hinge – Nancy Hiller shows you which hinges to use, the advantages of each type, and how to install them.
Wherever there’s a door, there must be hinges – and just as there’s a galaxy of door types, there is a variety of hinges and modes of installation. Even when we narrow the field to those used in furniture and built-ins (as distinct from entry doors or gates designed for cattle), the options are many. In this article we’ll describe the uses and installation of several common varieties. In the June 2018 issue (#239) we’ll add five that are less common.
Butterfly/Applied Hinges
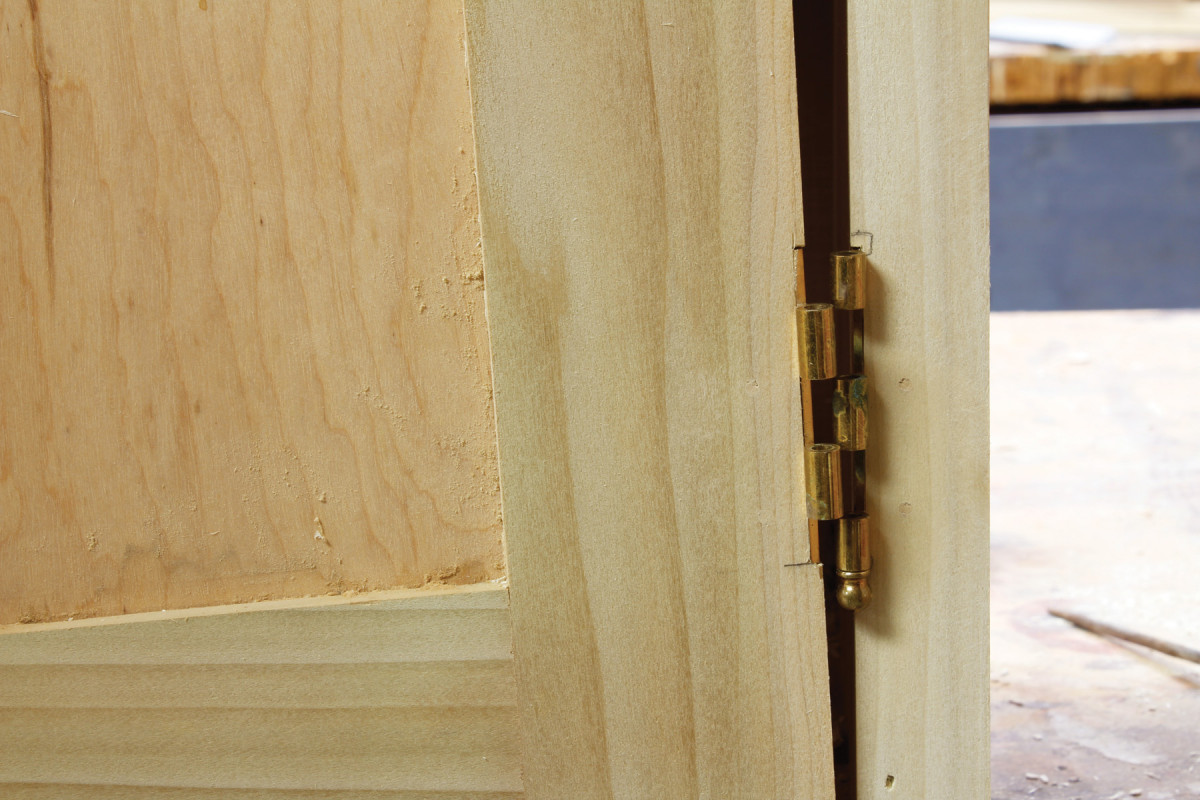
Vertical play. This hinge had a lot of vertical play. The larger gap below the center section of the barrel is from my holding the door up. Compensate for this play when inserting the screws, or the door will sag.
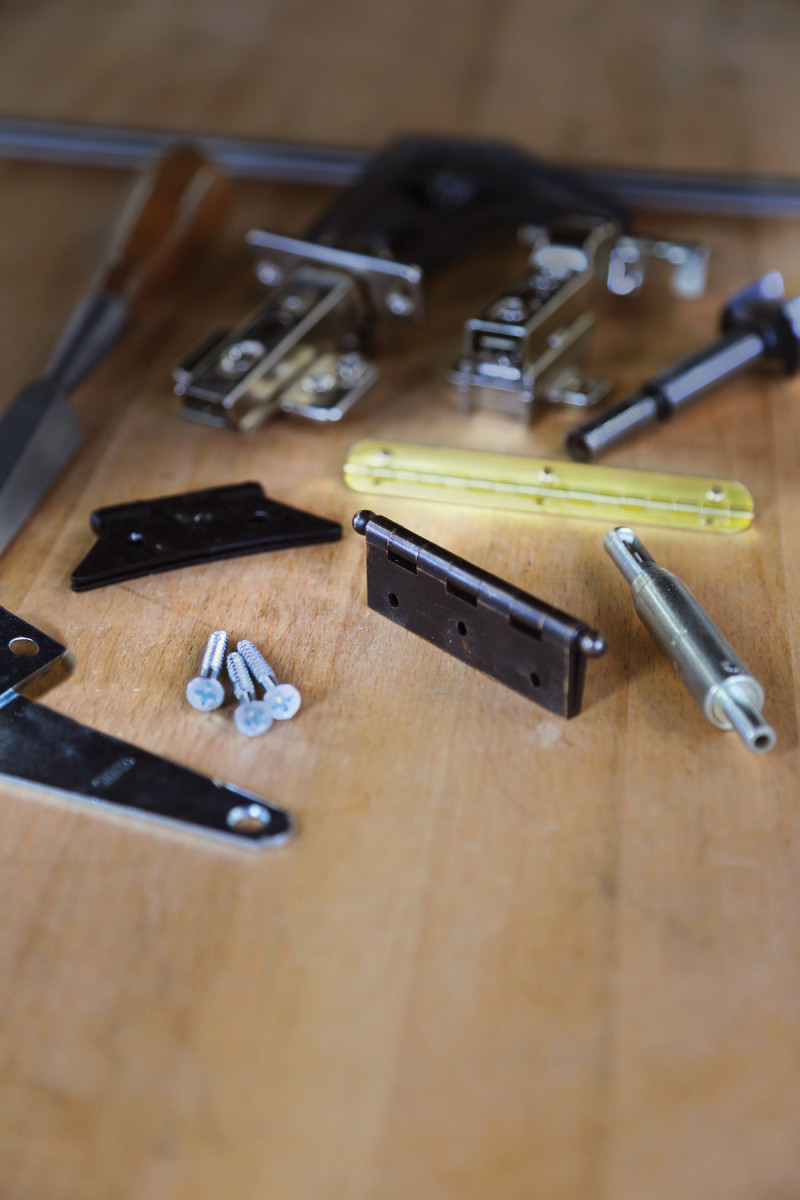
Surface-mounted hinges are decorative, often having strong period associations – especially with built-ins from the early 20th century – and are simple to install. They come in two main varieties, for either inset or half-overlay doors.
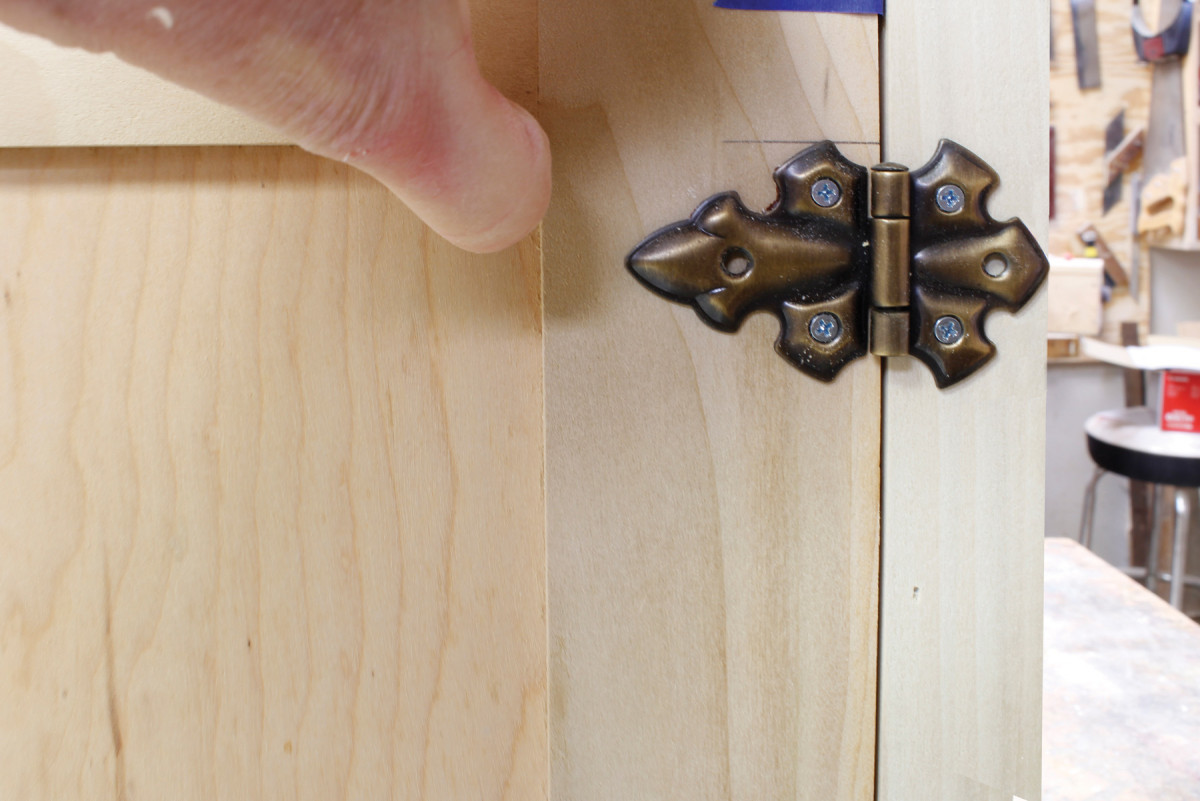
First, determine the position of the hinges on the door. Many butterfly hinges have sloppy-fitting pins that allow for more movement than is desirable. (Stay tuned – I’ll address this later.)
Set one flap of the hinge on the door, positioned so the barrel is just under halfway onto the door’s hinge stile. Leaving the barrel a little less than halfway over the edge of the door will create a small gap between the door and the cabinet side or face frame.
Drill for two screws in each hinge using a Vix bit (a specialty bit that drills holes centered on a hinge’s mounting holes), then insert two steel screws of the same size as those you will use in your final fitting. Leave the third hole alone in case you need to adjust the position of the hinge.
Set the door in its opening on shims. For this demonstration I used pennies. I also taped pennies to the hinge stile to create a gap of the same width. Hold the door steady with one hand and drill two holes in each hinge with the other. Then insert screws and check the fit.
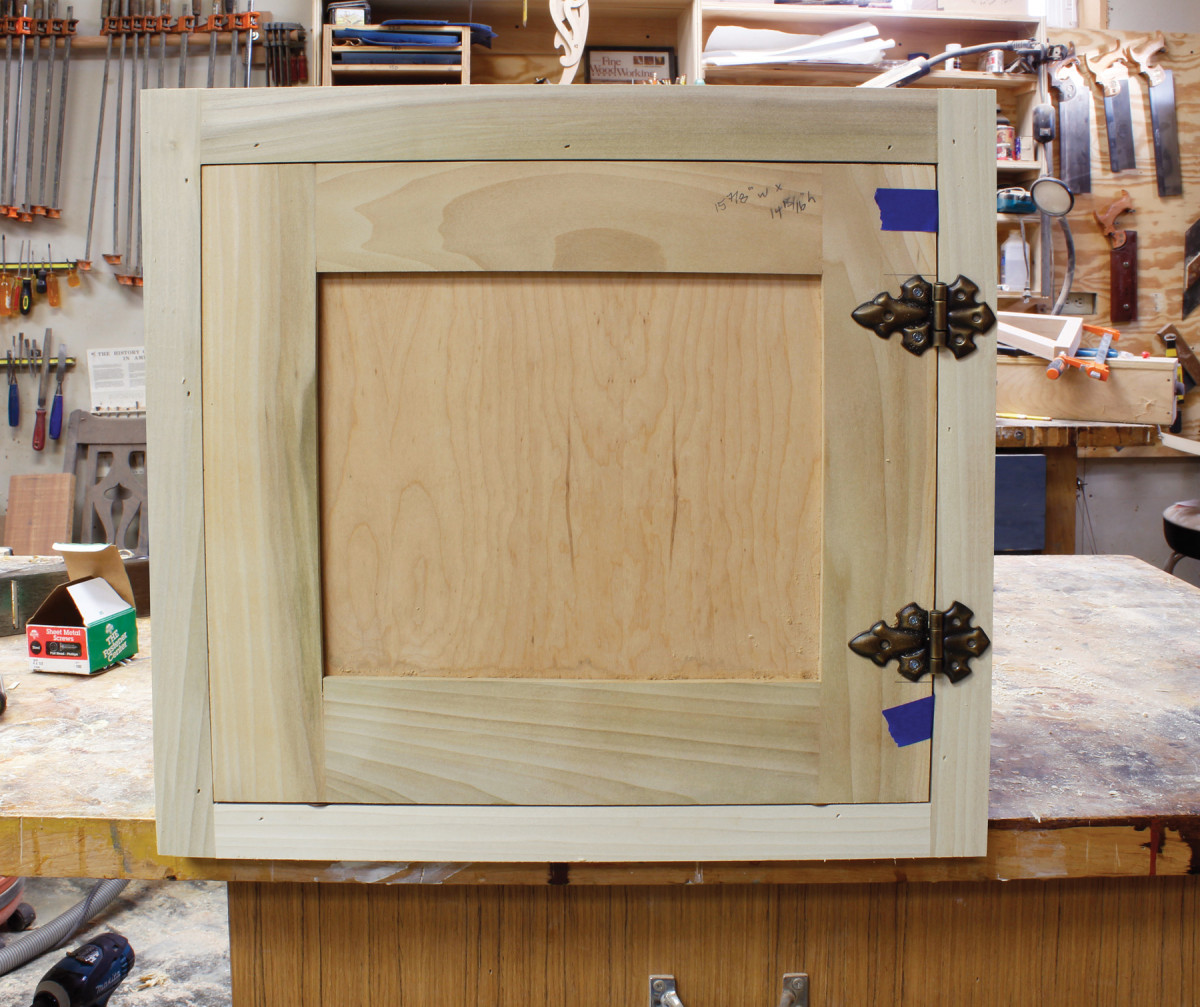
Inexpensive shims. The door is resting on a pair of pennies that act as shims; another pair of shims is taped to the hinge stile to create the desired gap between the door and the frame.
If there’s too much play in the barrel, adjust the fit by moving a screw to the third hole, pulling or pushing the door up or down until it hangs as you want it.
Once the door is fitted, mark the holes for final hanging, remove the hinges, sand and finish. Then insert the finish screws.
You can use the same method for half-overlay doors; just insert the coins under the ledge of the rabbet.
Inset, Half-Overlay & Overlay Doors
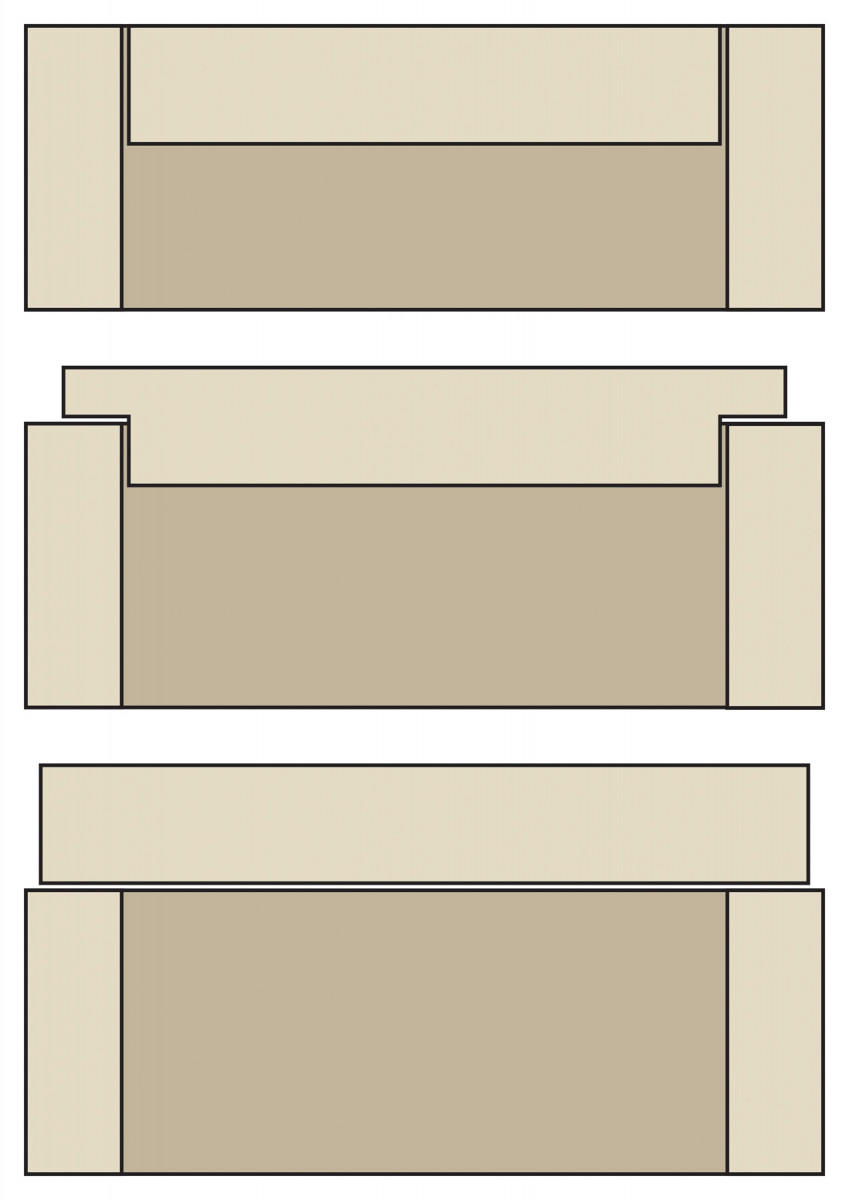
Example of Inset, Half-Overlay and Overlay Doors
This article references a number of cabinetmaker’s terms concerning three different configurations of doors relative to their carcase – inset, half-overlay and overlay. Before we dive into each hinge, it’s worth indicating what these terms mean. (Note: Other hinge types can be used for these applications – this sidebar deals only with those in this article.)
Inset doors lie within the cabinet. This style can be used with both frameless and face-frame cabinets. Traditionally, furniture with inset doors would use butt or butterfly hinges (though other varieties such as strap or rat-tail hinges are common in older furniture). European hinges may be used for inset doors in modern cabinets.
Half-overlay (also called half-inset) doors have rabbets that allow half the door’s thickness to be enclosed inside the carcase. These doors can be hung on butterfly or European hinges. Because there is no visible gap around the door, these hinges make for easy fitting.
Overlay doors hang proud of the face frame (or frameless opening). European hinges are commonly used for this application.
Butt Hinges
Butt hinges are common on furniture and built-ins. Although they come in a variety of sizes and types, most are installed according to a basic sequence of steps.
The simplest form of butt hinge is the surface-mounted variety that does not require a mortise. They’re so easy to install that we won’t cover them here.
Traditional butt hinges come in two types: swaged and non-swaged. Whether or not a hinge is swaged can be figured by how it sits when fully opened – a swaged hinge has a gap when closed.
The most common type of hinge we used in England was the fixed-pin non-swaged butt, which we mortised into the door stile only (I’ll describe an application where this is called for later in this article). In the United States we mortise these half into the door and half into the cabinet, so this is the technique I’ll describe in detail.
Fixed-pin, Non-swaged Butt Hinges
Swaged. A swaged hinge has leaves that are bent inward toward the center of the barrel.
Determine the position of the hinges. Next, square the line for the end of the hinge around to the face of the hinge stile. Lay each hinge in place and scribe the location of the opposite end of the leaf with a marking knife.
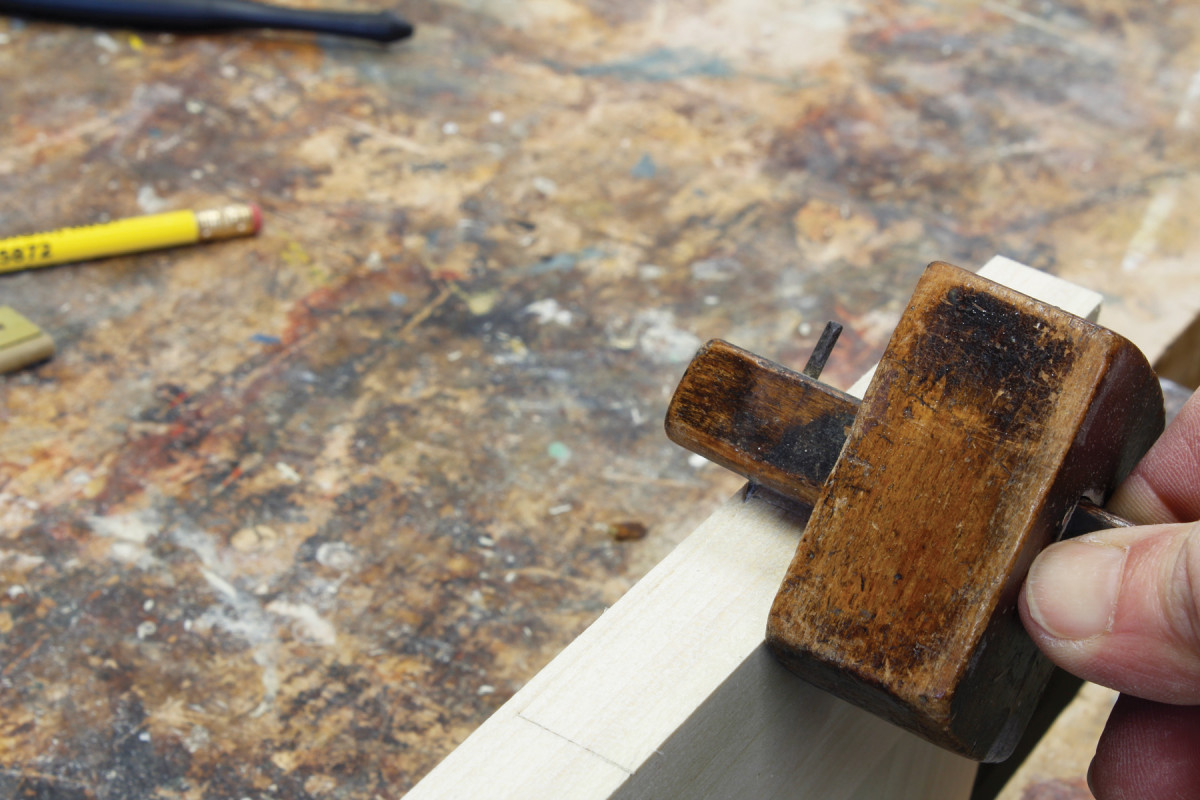
Set a marking gauge for the width of the mortise and scribe the edge of the hinge stile.
Non-swaged. Hinges that are not swaged have their leaves in line with the barrel.
If you have two marking gauges, set a second to the mortise depth: Hold the hinge leaf against the gauge’s reference face and adjust until the pin (or cutting wheel) is just shy of the pin at the center of the hinge barrel.
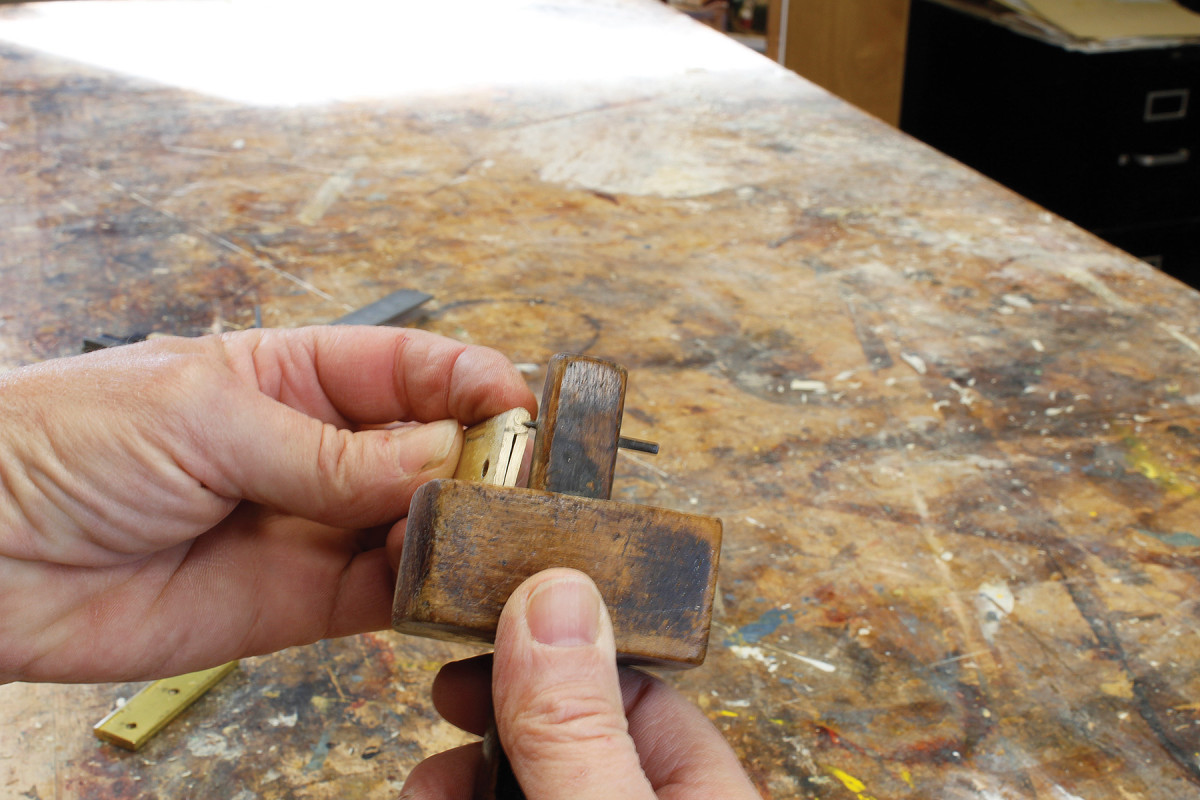
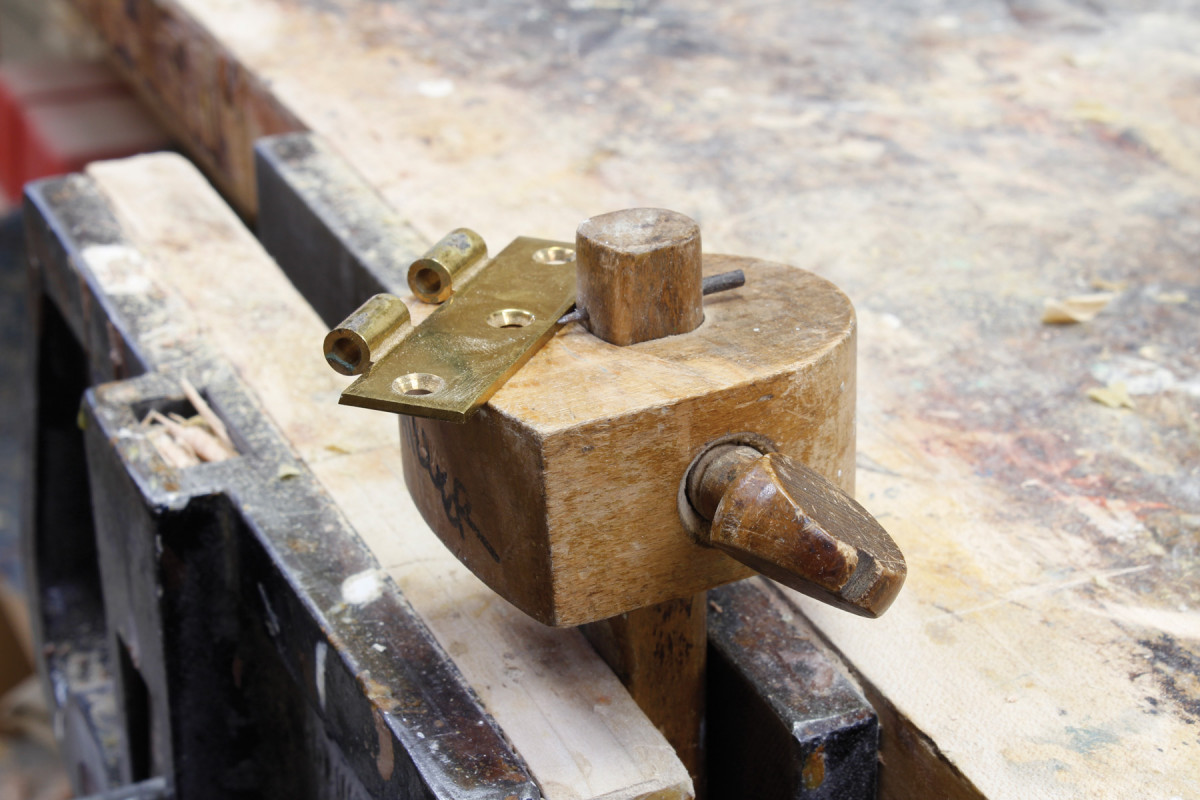
Scribe the width. To lay out the mortise width, set a marking gauge from the edge of the hinge leaves to the center of the pin in the middle of the barrel.
Now that you can see the mortise depth, scribe a line across the door face from each end of the hinge.
Mark this width between the outer lines.
Use a wide chisel to chop out the waste. Begin with a series of cuts across the grain. Stay a bit away from each end to prevent marring those shoulders. You’ll pare them later.
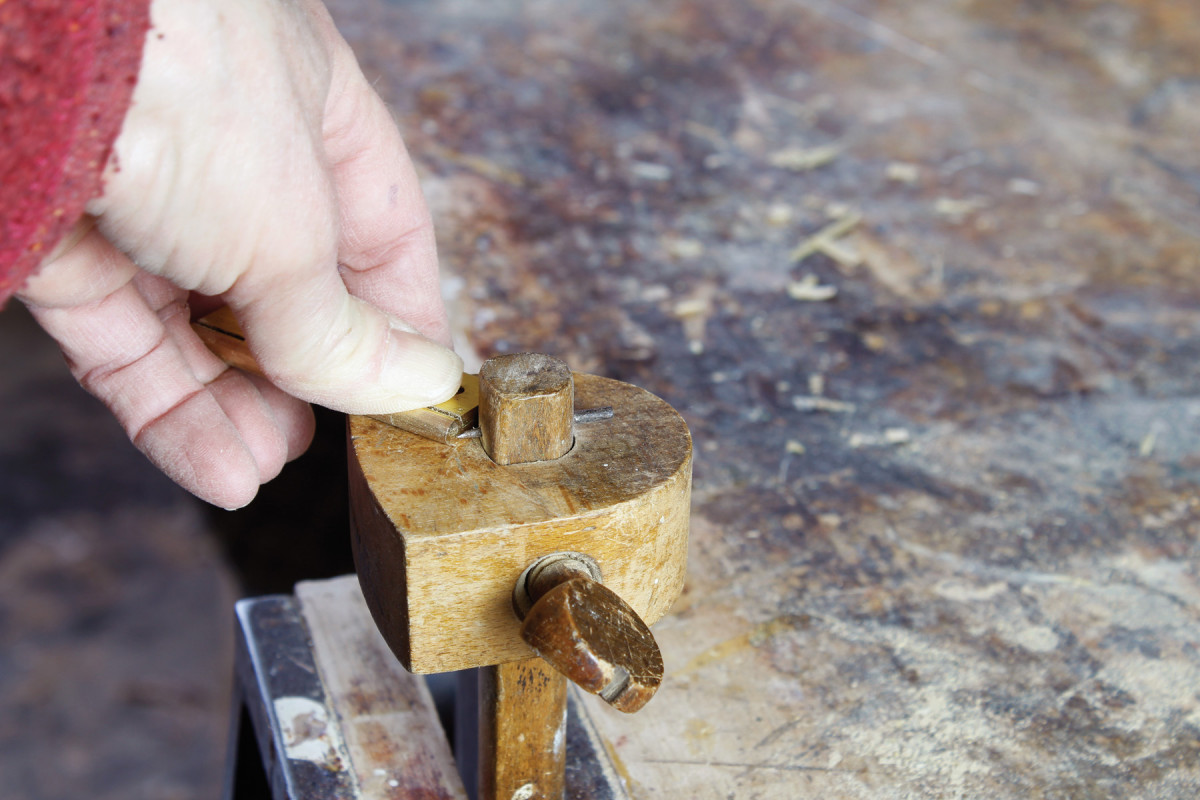
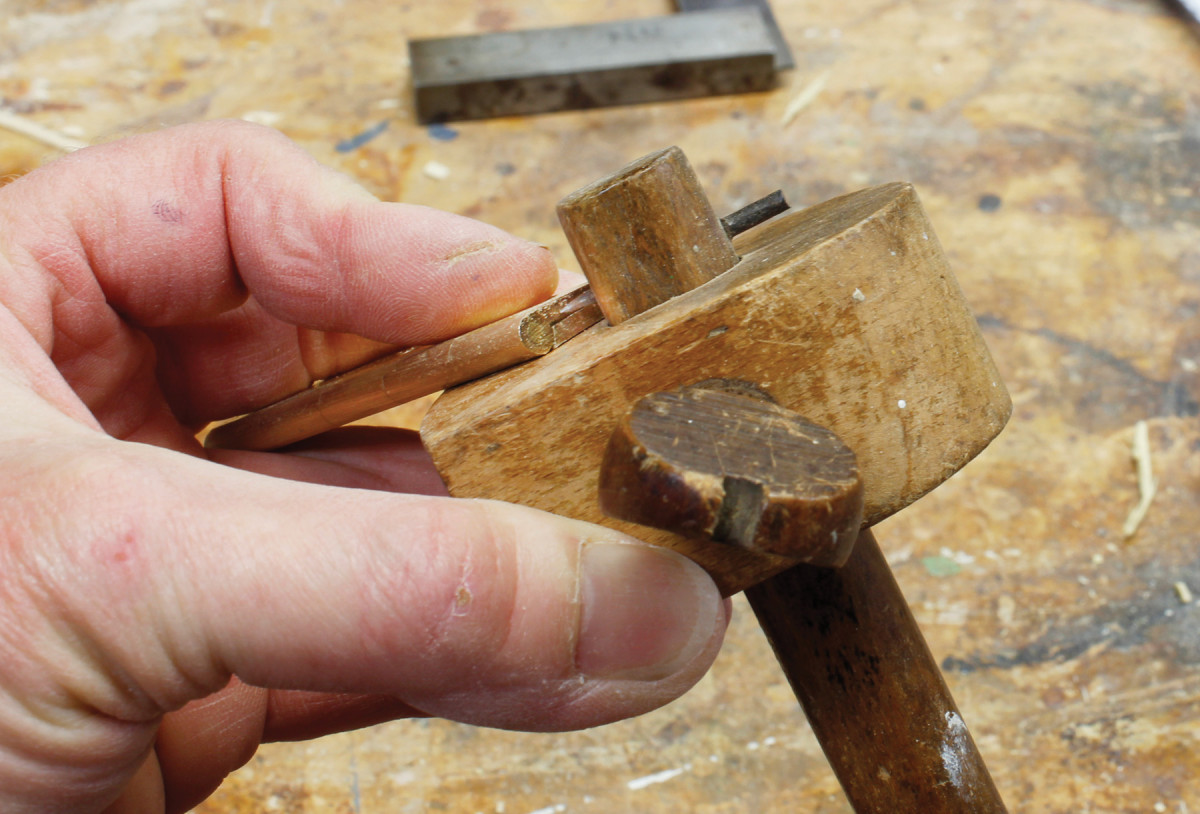
Scribe the thickness. Set the gauge to just under half the thickness of the barrel. However much your pin (or cutting wheel) is short of the hinge pin’s center will be half the gap you’ll have around the door.
Next, use your chisel bevel up to pare the waste. After you’ve removed the bulk of the chips, pare to the baseline, staying away from the bit of waste left at each end.
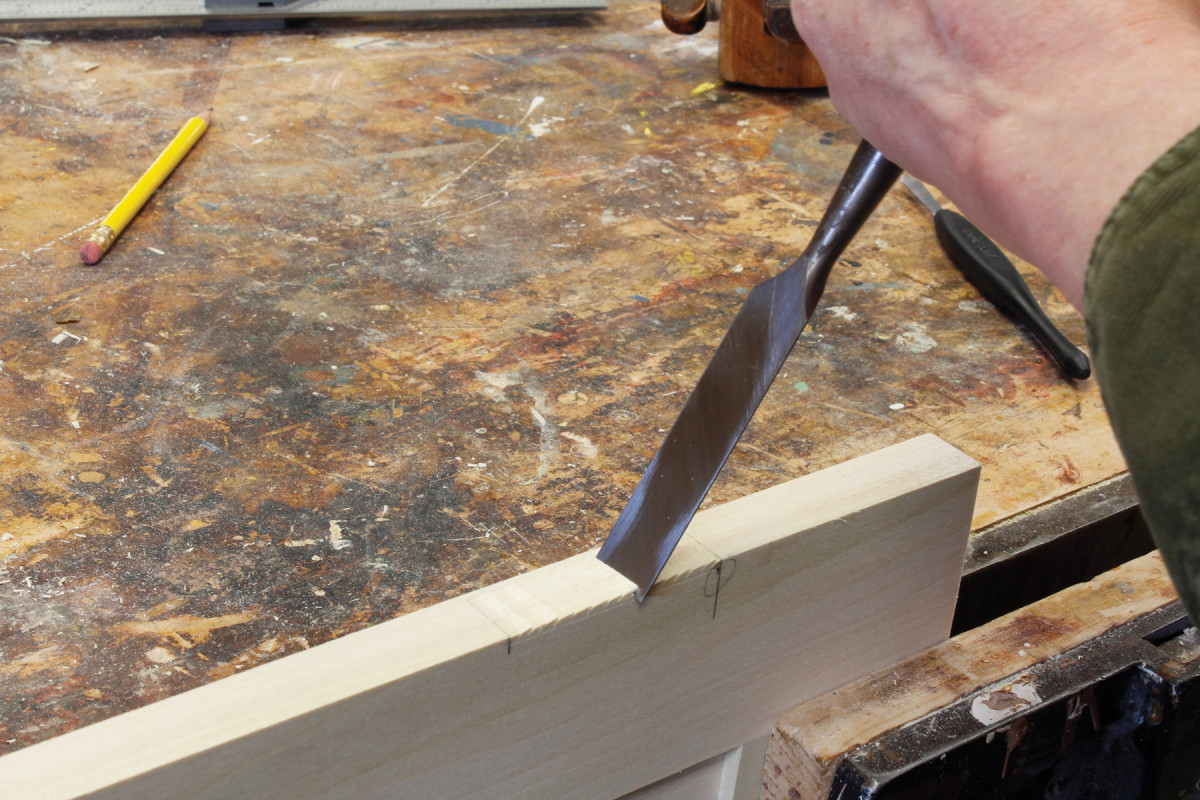
Easy does it. When cutting across the grain to break up the waste, stop just short of the baseline to avoid going too deep.
Hold your chisel vertical with the bevel facing the inside of the mortise and pare away the bit of waste at each end, going down to the baseline. Finish up by paring that waste down to the line. Check the fit, and pare more material away if necessary.

Waste away. Pare away the waste, taking extra care as you place your chisel tip in the gauged line to remove the final shavings.
Use temporary screws while fitting doors. Just be sure you use screws that are the same size or slightly smaller than those you’ll use for the final installation. Here I used #6 x 5⁄8” Twinfast screws, which are easy to insert and remove. Use a Vix bit to drill holes for the two outside screws in each hinge. Leave the third hole alone. If you need to adjust the position of the hinge, you can drill a fresh hole later.
Set the door in its opening, shimming as necessary to get the gap you desire at the bottom. (I used a pair of pennies.) Mark the top and bottom corner of each hinge with a knife.

Put in place. With the door shimmed in place, mark the hinge positions on the cabinet frame using a knife. I also circle my knife marks with pencil to make them easier to see.
Turn the cabinet on its side to finish the mortise layout.
Repeat the steps above to lay out the hinge mortises on the cabinet. When you’ve finished cutting the mortises, test the fit.
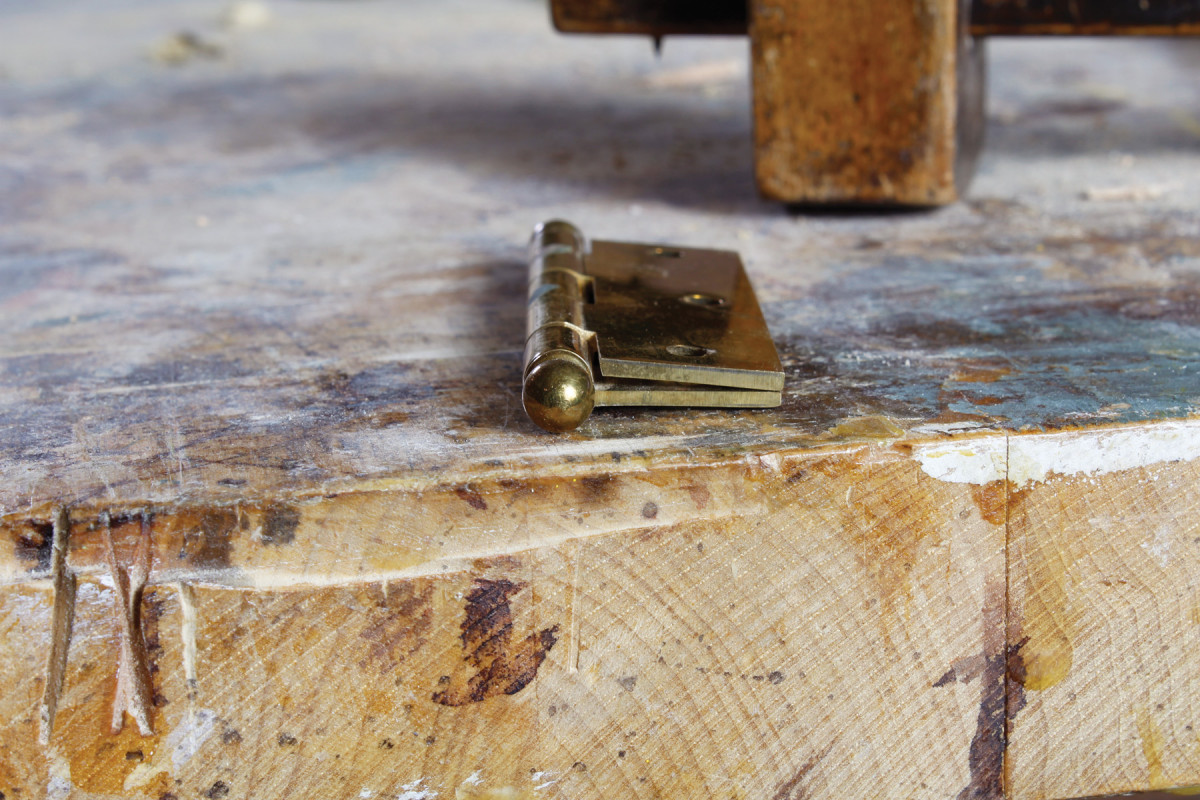
Loose-pin, Swaged Ball-tip Hinges
(Mortised into Door & Carcase)
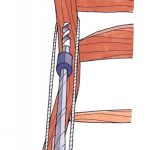
Sliding home. Place the door so that the hinge leaves fit together, then drop in the pins.
The process of installing loose-pin hinges is similar to that described above, but with a few differences. Loose-pin hinges tend to be swaged. They also diverge from non-swaged fixed-pin hinges in terms of their barrel’s position on a door – whereas the hinges in the first example above are mortised so that the outer edge of the door stile hits the barrel of the hinge approximately at its center, loose-pin swaged hinges are installed with the entire barrel clear of the door’s edge; this way you can tap the pin’s finial gently from below with a screwdriver and mallet to remove it.
Because the pins are removable, it’s important to install the hinges so that the pin drops down into the barrel. For example, ball-tip hinges have one fixed finial that goes on the bottom; the pin with the other finial fixed to its end should drop in from above.
Start by setting a marking gauge to the mortise width. In this case, though, the mortise will be only as wide as a single leaf, because the barrel will protrude from the cabinet.
Full depth. The swaged loose-pin hinge is mortised flush with the wood, so set your gauge to the thickness of one leaf.
Mark the mortise width. Next, set the other gauge to the thickness of the mortise – in this case, the thickness of a single hinge leaf.
Scribe the thickness on the door and repeat the processes as described above to complete the layouts.
When you have screwed the first leaf into each mortise, lay the door in its opening on shims and transfer the hinge positions onto the cabinet as in the first example and cut the mortises. Now you’re ready to try the fit.
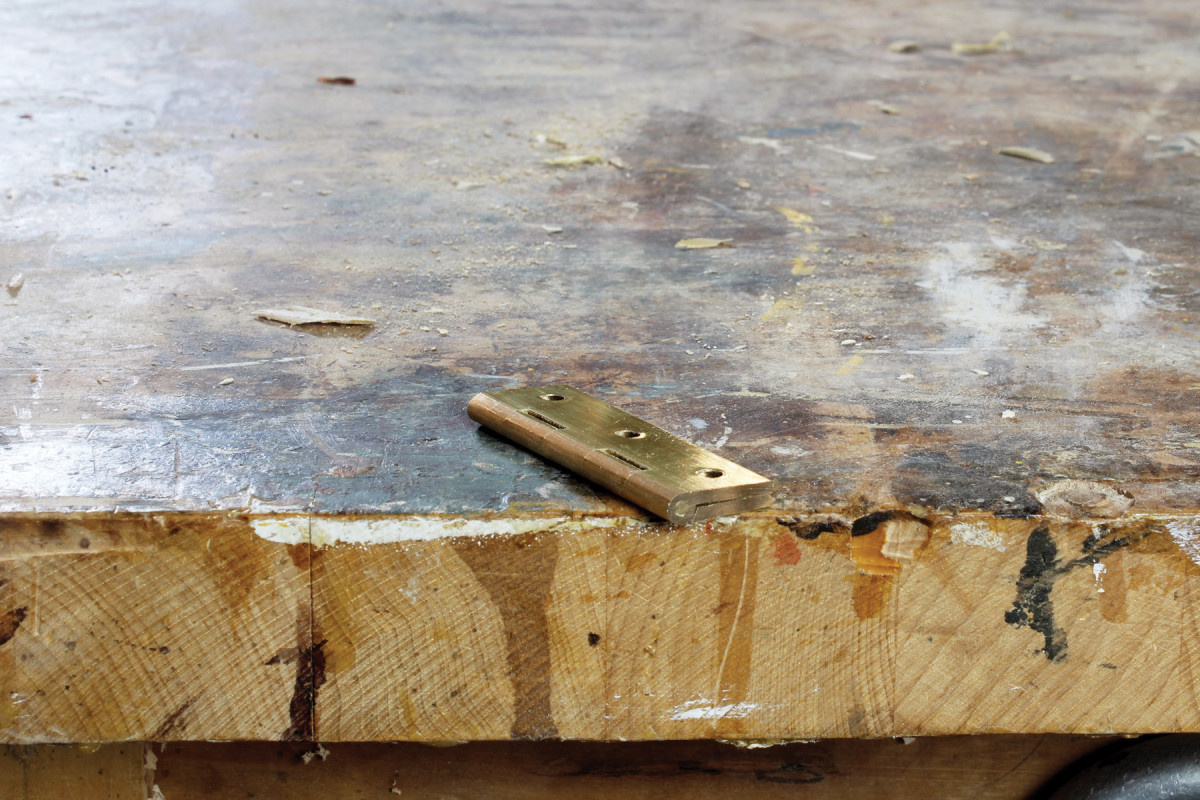
Fixed-pin, Non-swaged Butt Hinges
(Mortised Only into the Door)

Leaf, no barrel. To lay out the width of a swaged loose-pin hinge mortise, set your gauge to just the width of each leaf.
Some jobs call for non-swaged butt hinges to be mortised fully into the door. Although it’s uncommon in the United States, this is a method used often in England. It saves labor but is arguably less durable, especially for heavy doors, because the entire weight of the door is borne by the screws. My Arts & Crafts sideboard in the November 2017 issue is an example of a situation that calls for this method. Because the doors are set back about 1″ from the front face of the cabinet, they would not work if they were mortised halfway into the cabinet as well as the door.
This method is basically the same as the first butt joint method, except that the marking gauge for the mortise thickness should be set to just under the thickness of the entire barrel: If you want a gap around the door of, for example, 1⁄32“, you should set the gauge for the thickness of the barrel minus 1⁄32“.
Mark out and cut the mortise as in the first example above.
To transfer the hinge positions to the cabinet, set the door in its opening on shims, but mark with a sharp pencil instead of a knife. Remove the door and mark the leaf width onto the cabinet side using a marking gauge; this will guide you in aligning the door from front to back.
Revealing. Fixed-pin, non-swaged butts will be let into the door with the cabinet-side leaf protruding by the amount of your desired gap around the door, so I am setting the gauge shy of the barrel’s thickness by about 1⁄32″.
Because the hinges have fixed pins, hanging the doors in this method is a little awkward: You have to hold the door with one hand while drilling the hinge holes with the other. It can take more than one try. I find it best to drill the first hole in the upper hinge, then insert a screw in the top hole. I hold the door steady and close it so I can check whether the face of the door is flush with the face of the cabinet. If it’s proud, I use a bradawl to mark the center of the next hole down a little farther back, remove the door, drill a hole in that new spot and try again. When the face of the door is where it should be, I drill the bottom-most hole in the lower hinge, insert a screw and repeat. Once you have a screw in the top and bottom hinge, you should be home free.
Piano Hinges
On center. The center of the door’s length is marked in pencil and the hinge is positioned so that its center hole falls over that line.
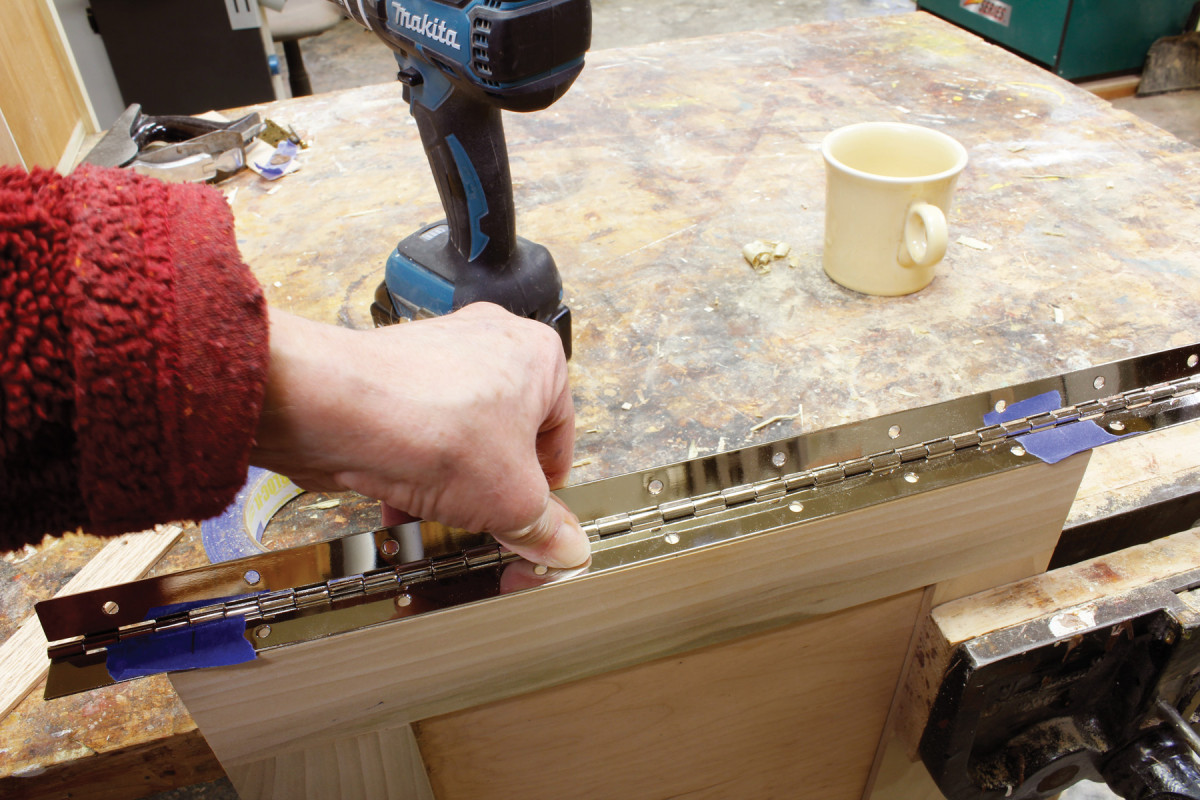
Piano hinges provide continuous support for doors and large box lids. They can be cut to length with a hacksaw, then mounted directly to the edge of a door or lid without mortising.
Piano hinges are made with a series of holes along their length. Sometimes a few holes are elongated to allow you to adjust the position of the door. This works when you use the entire length of the hinge, but many jobs call for cutting the hinge to a custom length. In these cases the result will be neater if you center the holes on the door or lid you’re fitting.

Careful work. A Vix bit will work on piano hinges, though their leaves are on the thin side, offering less meat for the countersink on the bit to land – so make sure the bit registers properly on the hinge’s hole.
After you have inserted enough screws in the door side to hold the hinge in position, hold the hinged door against the cabinet in its final position. The barrel should protrude by exactly the same amount on the cabinet as it does on the door (or not protrude at all, if that’s how you fitted the hinge on the door). Drill a hole at one end and insert a screw, then repeat at the other. If you need to adjust the door a little to either side to even up the hinge relative to the cabinet, remove a screw, move the hinge, drill and insert a screw into the hole nearest the first one. When you’re happy with the fit, drill and insert the rest of the screws.
European Hinges
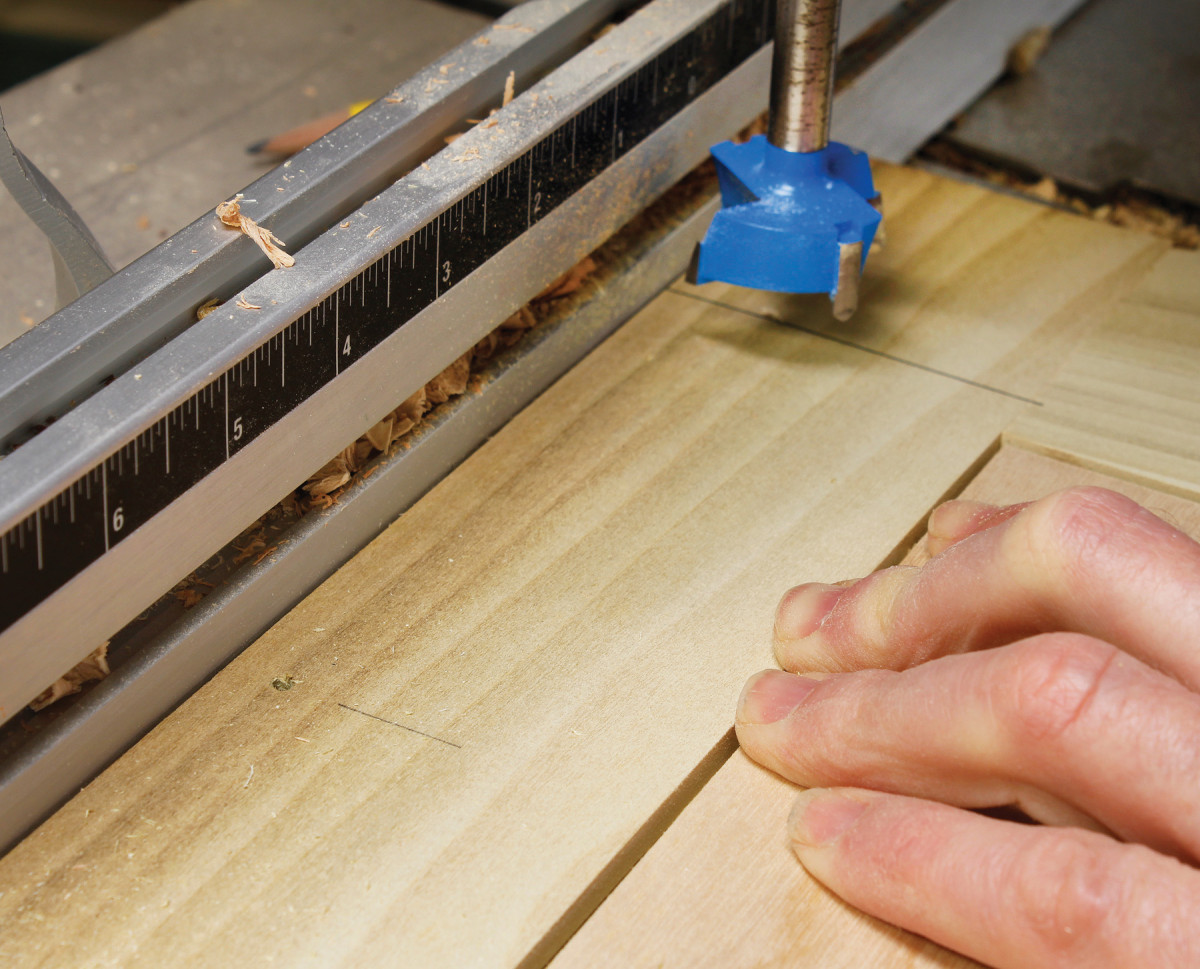
Big holes. First drill the holes for the hinge cups using a 35 mm Forstner bit. A drill press with a fence enhances accuracy. The edge of the hole should be 1⁄8″ from the edge of the hinge stile.
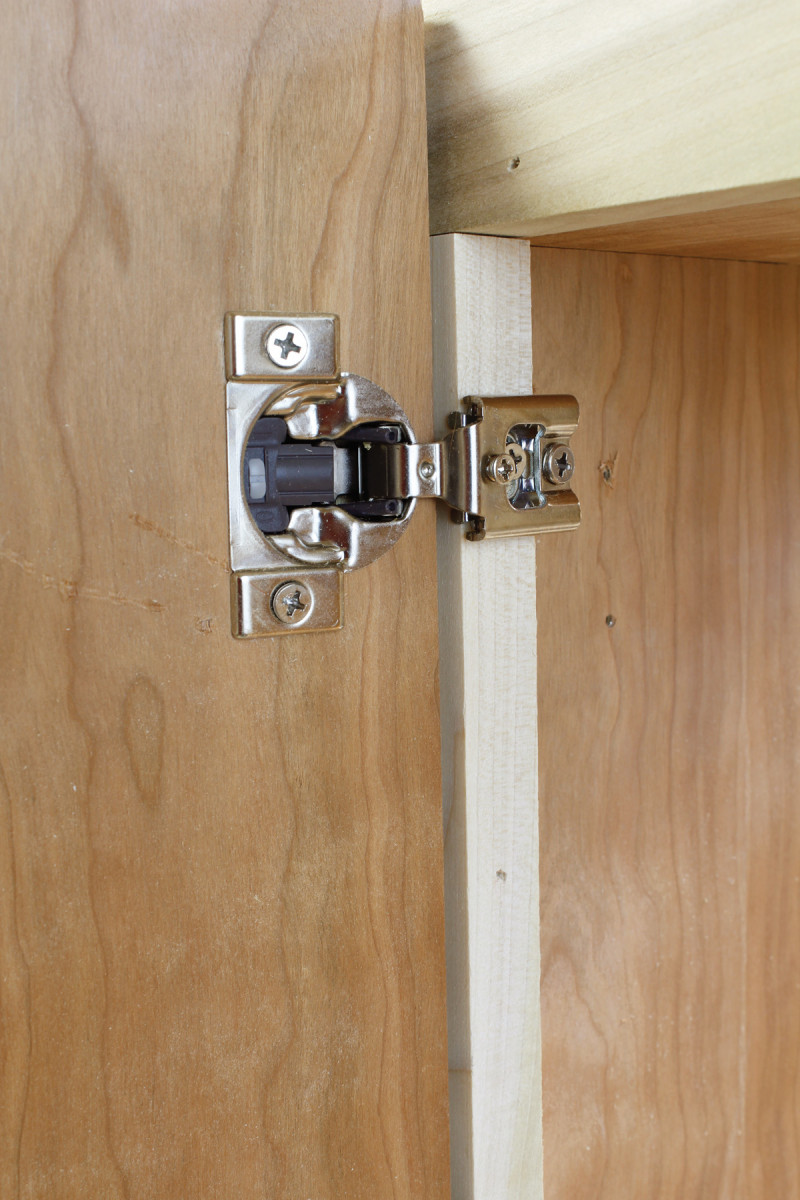
European hinges come in a dizzying variety, each designed to work in different situations. Most consist of two parts – a hinge and a mounting plate – though those designed for cabinets with face frames have an integral mounting plate. Depending on which combination of hinge and mounting plate you use, these hinges can work with doors that are inset, half-overlay (sometimes, confusingly, called “half-inset”) or full-overlay, in which the full thickness of the door is proud of the cabinet face.
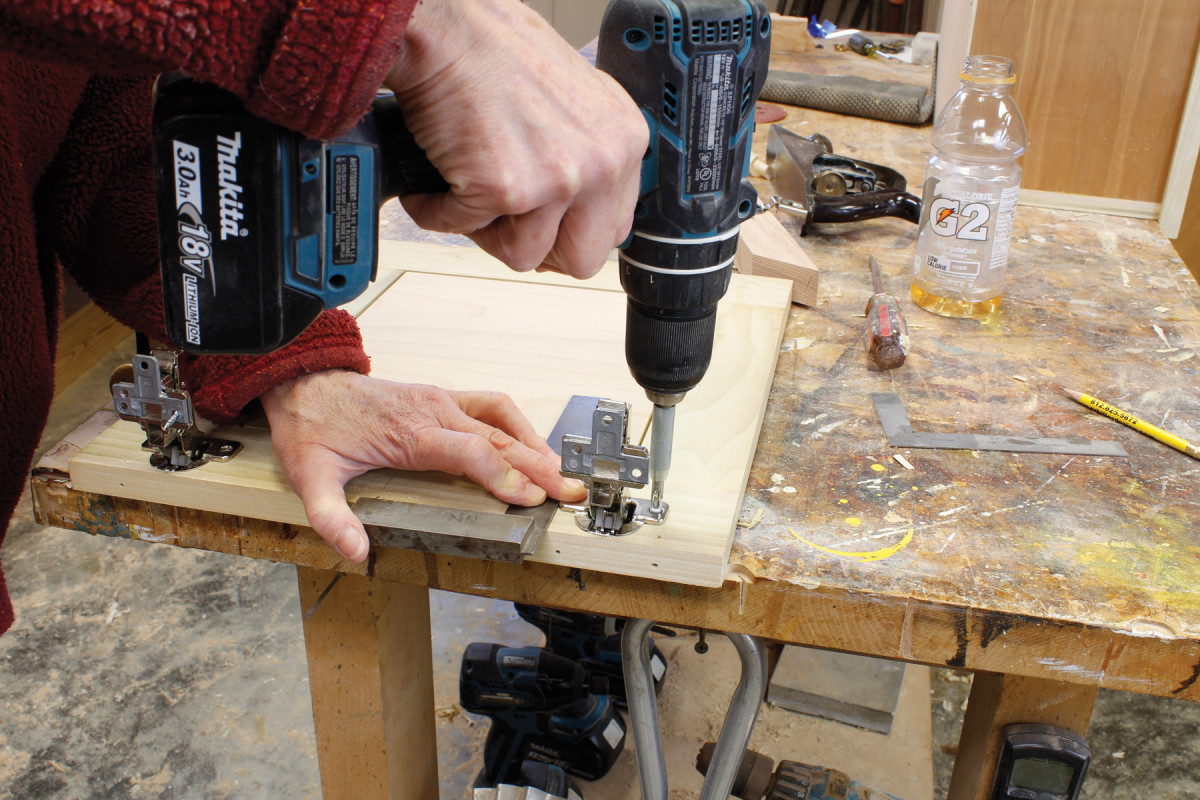
Little holes. As with the other hinges, I use a Vix bit to drill the mounting screw holes, once the larger holes for the hinge cups have been drilled. Alignment is easy, as the hinge sits in the larger holes for the hinge cups.
And there are more – lots more – variations: A full-overlay door may overlay the cabinet face by 1⁄4” or 11⁄4“, depending on the mounting plate you use. Doors can open 95º or as much as 165º. They can be free-closing (these do not hold themselves closed but require a catch) or self-closing. Some of these hinges are even available with a soft-close feature that shuts the door for you once you give it a gentle push.
Despite the huge variety, all of these hinges have the same pattern for drilling the hinge cup mortise in the door: a hole drilled to the depth of the cup (about 1⁄2“) with a 35 mm Forstner bit. The edge of the hole should be 1⁄8” away from the door stile edge.
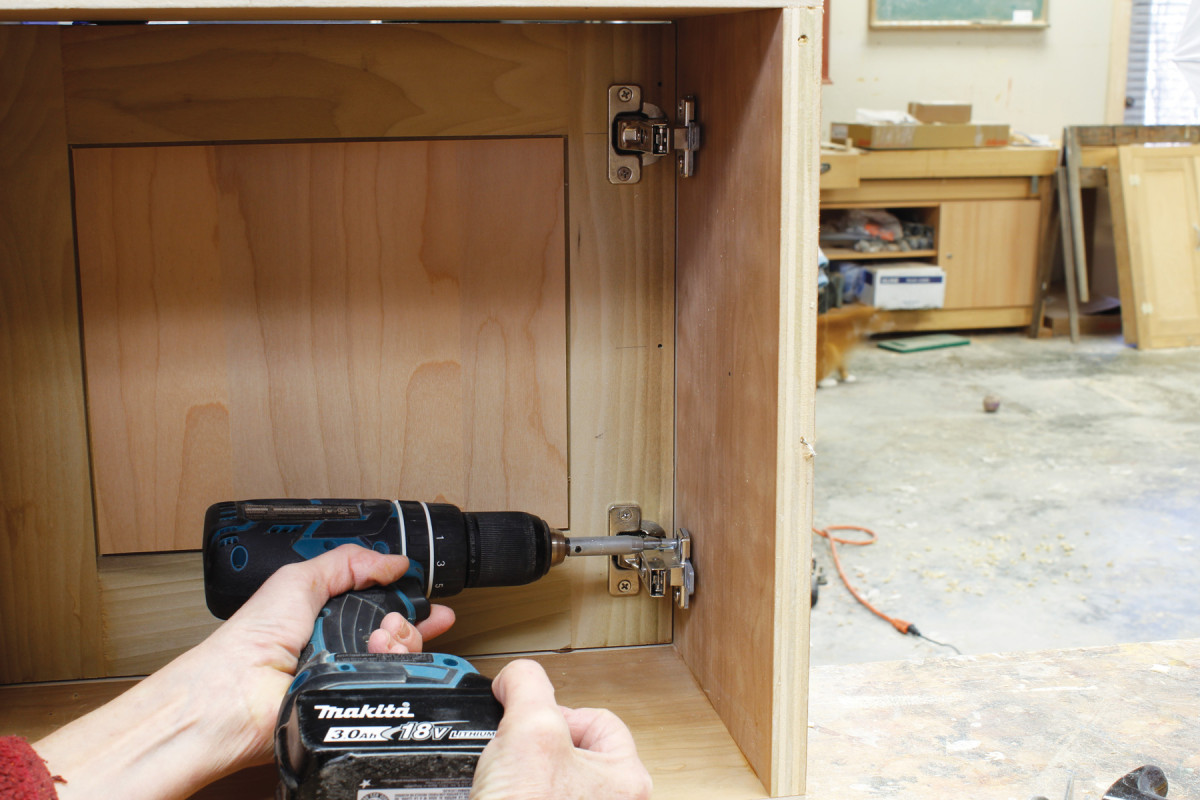
Open back. It’s easiest to install these hinges before you affix the cabinet back. Simply set the door in its opening, shim with a wedge to hold it in place and drill the holes from the cabinet interior.
First decide where you want the hinges. Keep in mind any fixed shelves or other interior features that may be in the way. These hinges and mounting plates occupy more interior cabinet space than many other types.
Looks familiar. As with the European hinge for inset applications, the overlay version for frameless cabinets involves a hinge and a mounting plate.
If you are using a drill press, set the depth to stop at the thickness of the hinge cup. Then drill for the screws using a #5 Vix bit. Insert the screws.
After this initial work is where the method of installation diverges, depending on your style of European hinge and installation plan.
Inset Doors on Frameless Cabinets
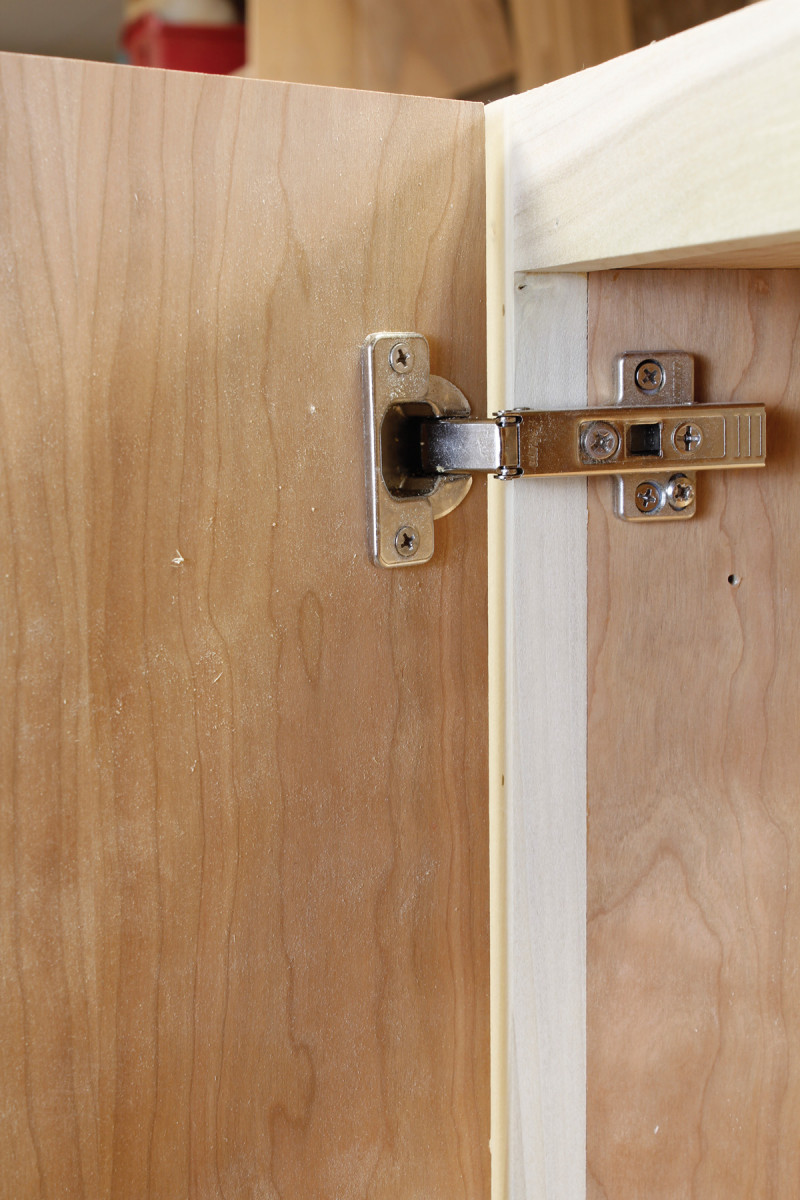
Slip fit. Face frame hinges differ from other European hinges in that the mounting plate on the cabinet side fits over the edge of the face frame.
Although this method works for frameless cabinets, it works just as well for those with face frames, provided that the face frames do not protrude into the door opening. And, even if the face frame does protrude into the opening, you can still use this method if you shim out the mounting plate so that it lies in line with the face frame’s inside edge.
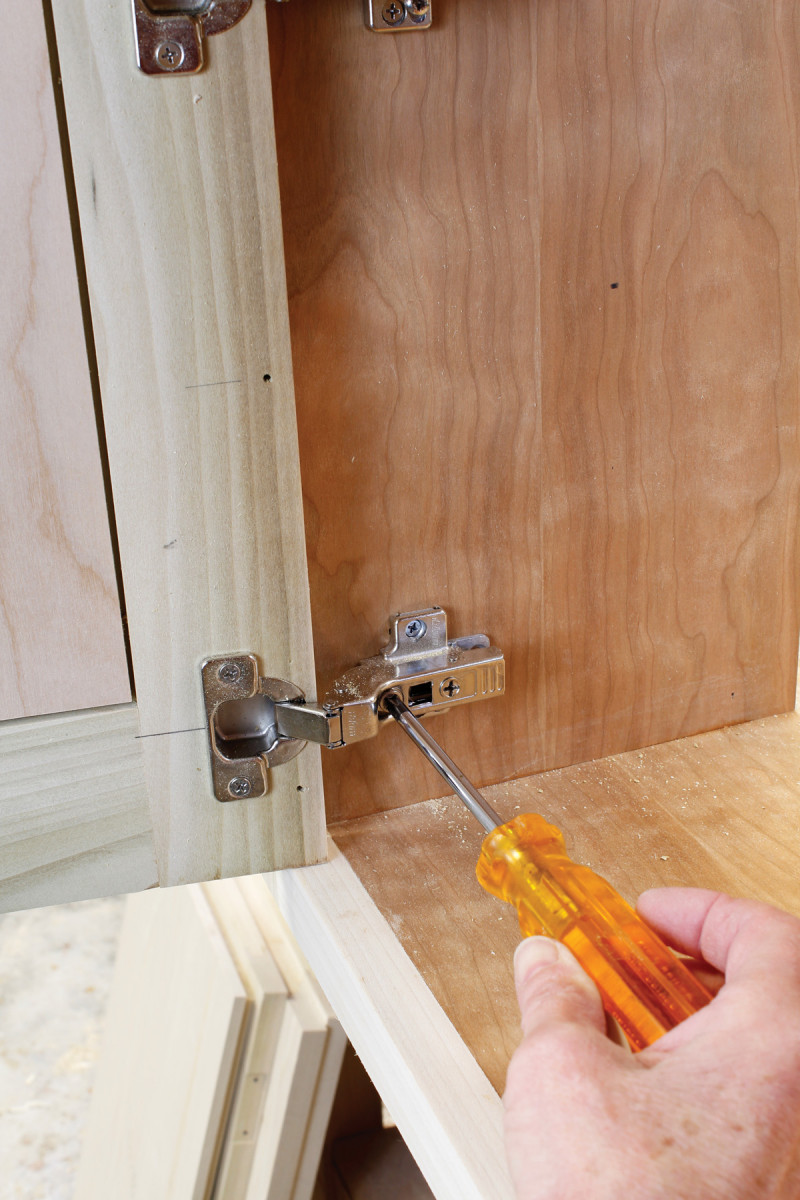
Most doors will need some adjustment after installation. All European hinges offer easy vertical adjustment, and most now allow you to adjust the fit laterally as well as in and out.
Full-overlay On Frameless Cabinets
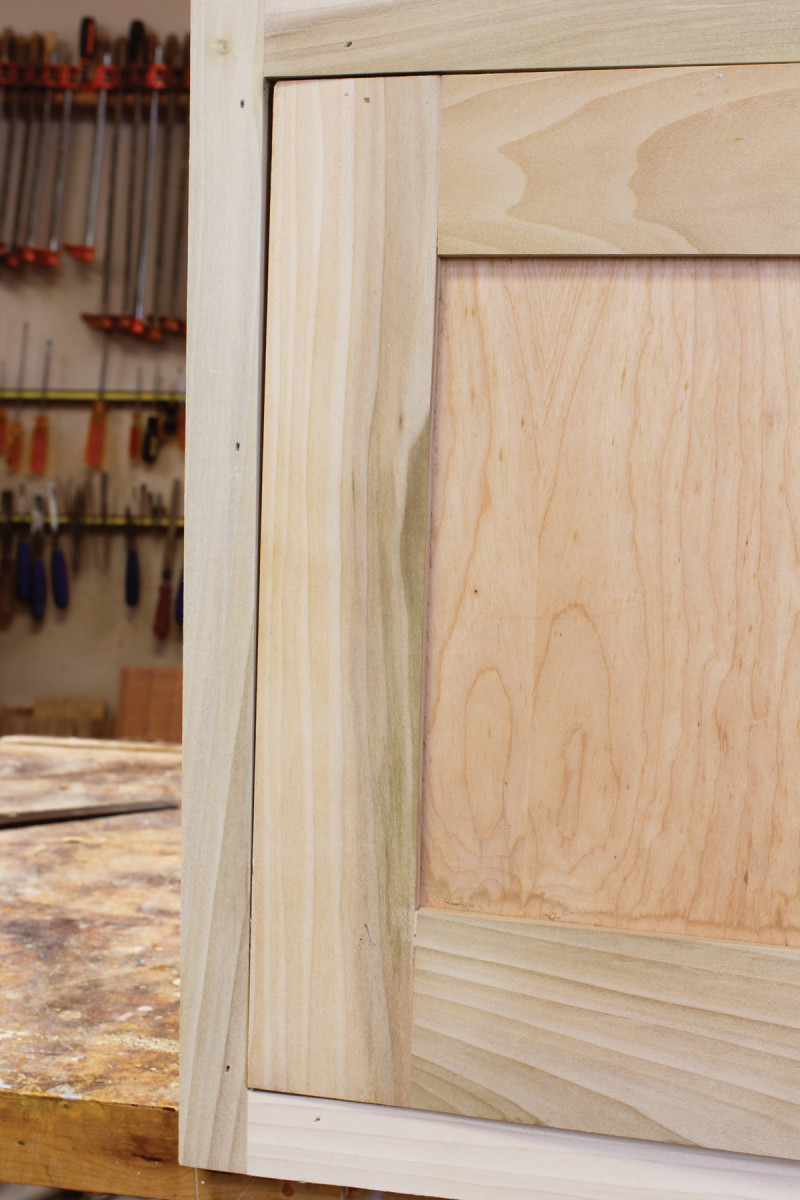
Fix it in post. Clearly this door below needs some work. No worries – European hinges are made for just this type of situation.
Screws on the hinge will move the door in and out, laterally or vertically.
The method for overlay doors is similar to the method for inset doors, though you need to buy a mounting plate for the amount of overlay you desire (that is, the amount of the cabinet that is covered by the door). Here I used a zero-height plate with a straight-arm hinge for a 3⁄4” overlay. Once again, this can be used on cabinets with face frames.
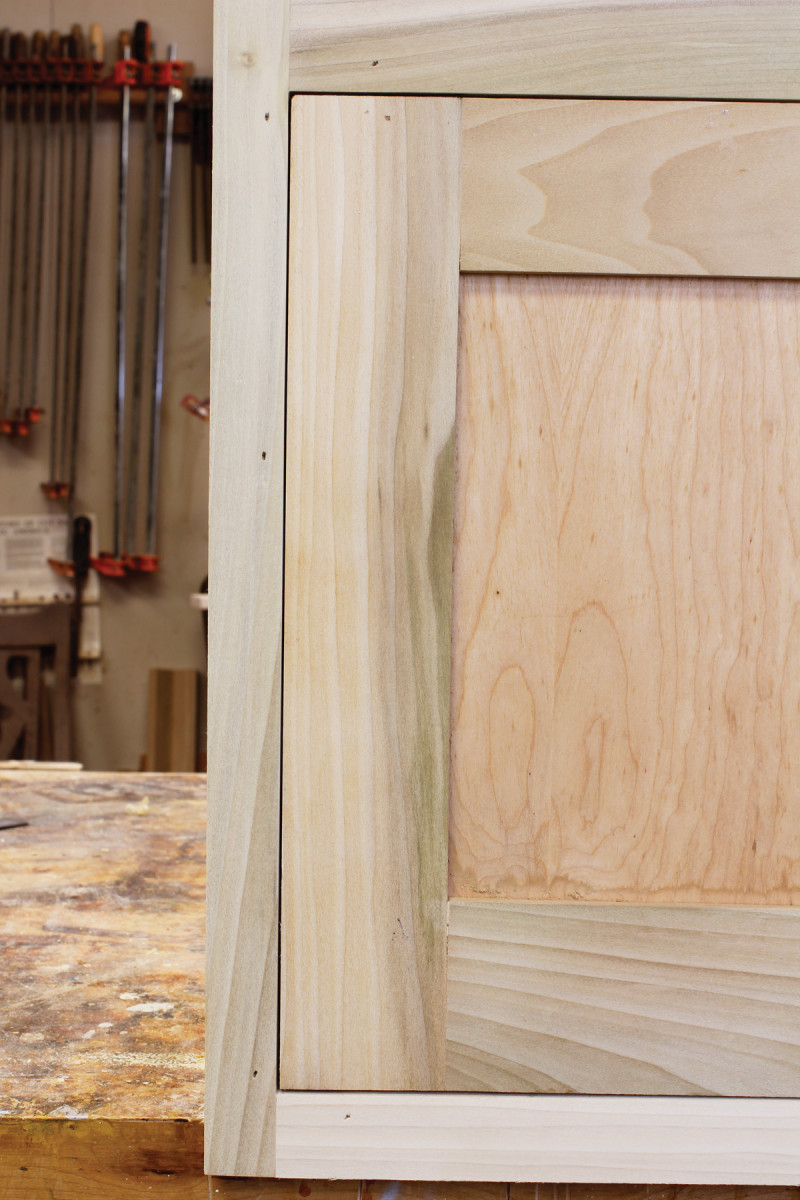
After this adjustment, the reveal around the door is even.
Set and shim the door in place as it will hang. Then, follow the steps used to install and adjust the inset doors.
Face Frame Hinges
Face frame hinges are made for applications where a face frame protrudes into the door opening. These hinges have mounting plates that simply fit over the edge of a 3⁄4“-thick face frame. (If your face frame is thicker, you can notch the frame.) Drill for the hinge cup and screws, then attach the hinge to the door.
 Takeaway Lessons
There are many ways to hang a door – and these are just a few of the common hinges. In reality, here’s how to narrow the choices:
■ Will your doors be inset or overlay?
■ Should the hinge be hidden from view? If so, consider European hinges.
■ Are you matching an existing door? Existing door hardware will guide you.
■ What is your budget? A 4′ section of piano hinge might be $10, while hanging a 4′ door with three quality reproduction ball-tip butts can cost $50.
■ How much adjustability would you like? Mortised butt hinges give you virtually none; European hinges offer adjustability in three planes.
■ If your shop set-up is minimal, consider a piano hinge, which requires a drill and screwdriver. If you have a traditional hand tool setup, go for fully mortised butts.
■ The ultimate decider: What is available?
Finally, of course, don’t forget those pennies. PWM
Nancy operates NR Hiller Design Inc. near Bloomington, Indiana.
Here are some supplies and tools we find essential in our everyday work around the shop. We may receive a commission from sales referred by our links; however, we have carefully selected these products for their usefulness and quality.