We may receive a commission when you use our affiliate links. However, this does not impact our recommendations.
Simple improvements make a mortising attachment work great.
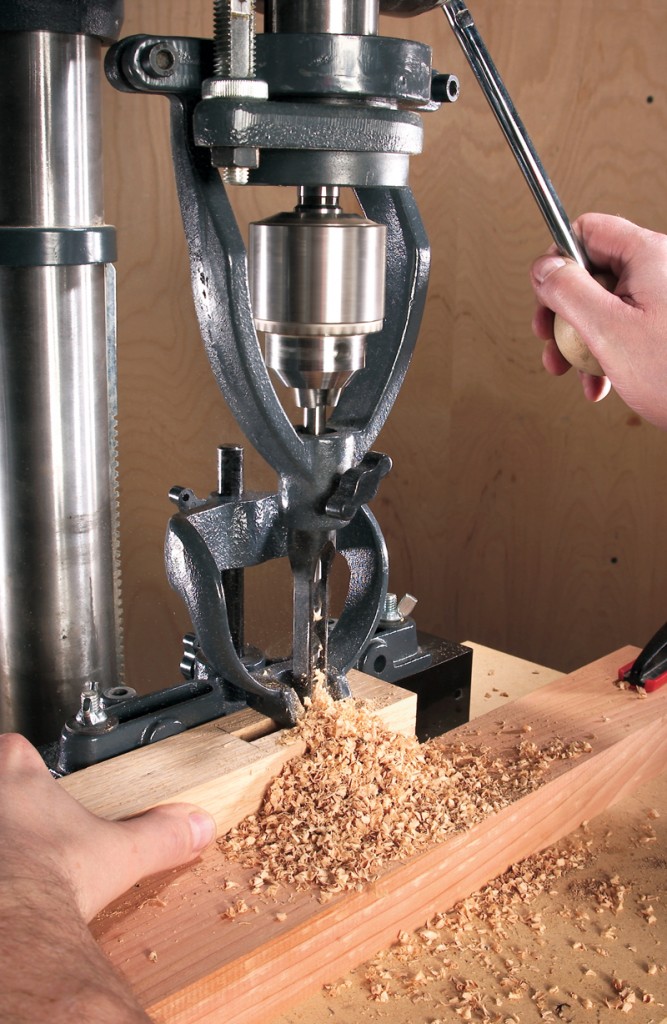
Even though they’re sexy, benchtop mortising machines aren’t the only power-tool option when it comes to cutting square-shouldered mortises. A drill-press mortising attachment can be just as effective and it costs a lot less. I’ll show you how to tune any out-of–the-box mortising attachment so it’s easy to install and a joy to use. Mortising attachments are available for almost every drill press.
Although they vary in appearance, they all have three basic components: a fence, a chisel holder and a hold-down. Upgrading these parts to stabilize the workpiece and operating the drill press at the optimal speed are the keys to success.I get first-class results with my tuned-up mortising attachment. That means I don’t have to store a large, heavy mortiser that I would only use occasionally. On the drill press, I can slow the speed way down, too, so the bits don’t screetch and smoke. Drill press mortising is slower, but it’s much more pleasant, a lot quieter and much less nerve-racking than using a mortiser.
Square mortises require special bits, which can be bought individually or in sets. Inexpensive bits usually won’t stay sharp as long (see “Start Sharp, Stay Sharp,” below), but dropping one on the concrete floor won’t give you a heart attack, either.
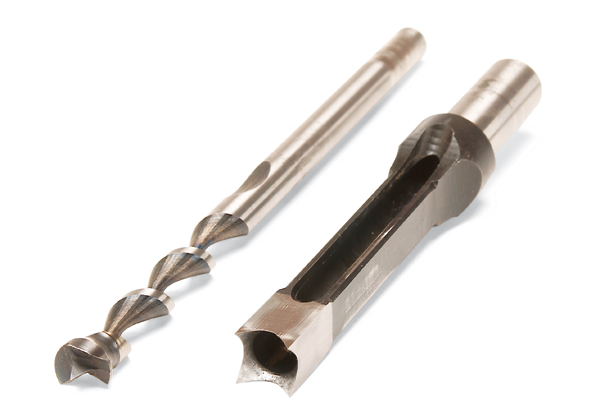
Mortising bits cut square holes.
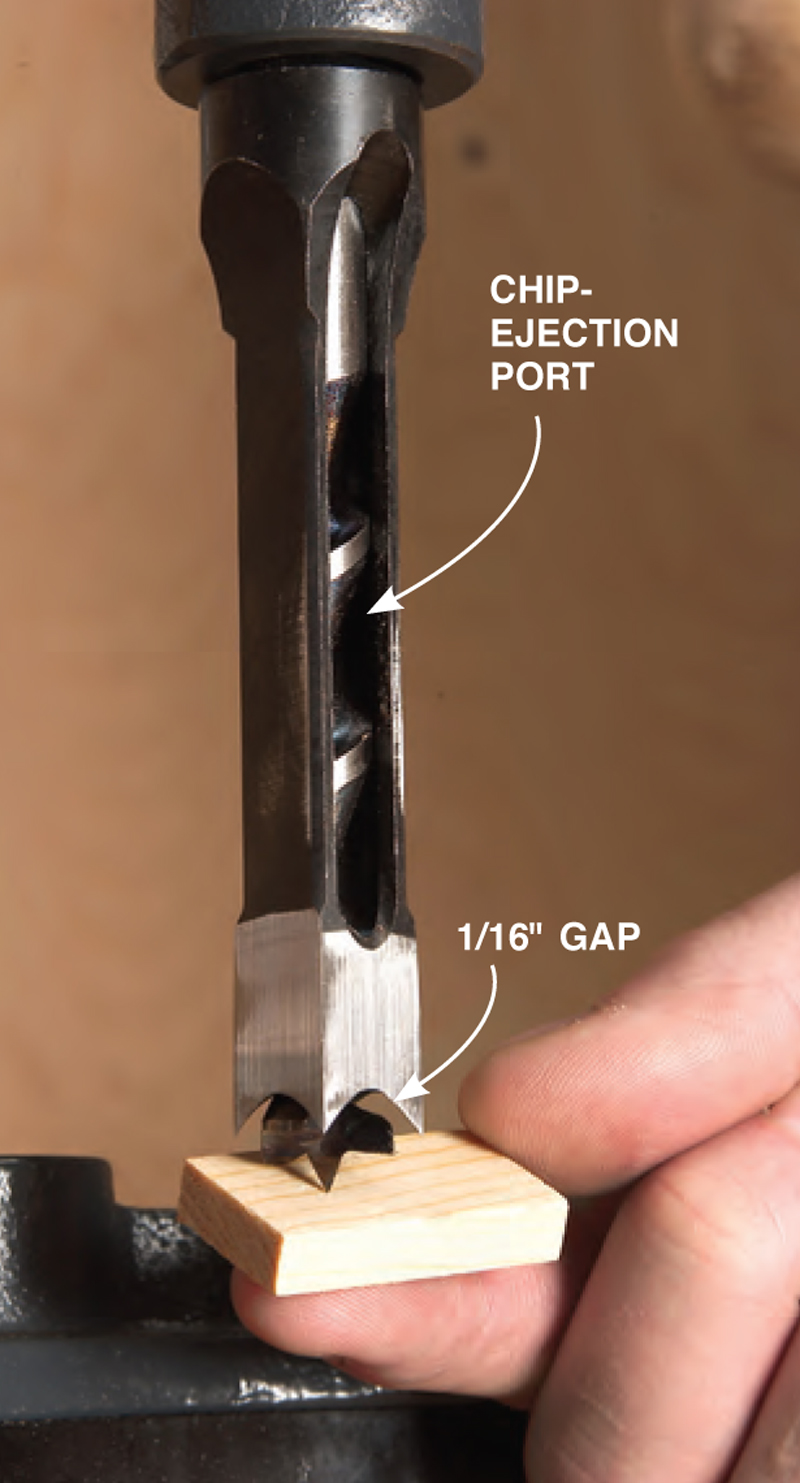
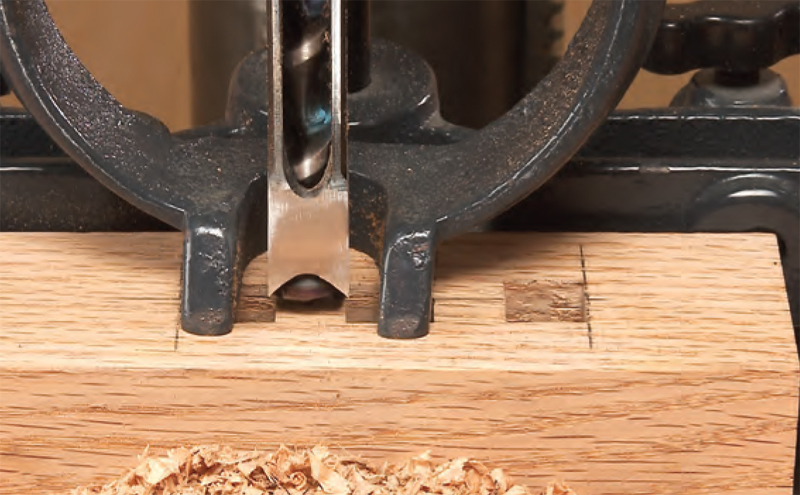
The auger bit fits inside the chisel and protrudes slightly. During operation, the auger drills a round hole and the four-sided chisel squares the corners. Cut side by side, square holes create mortises.

1. Slow down. Mortising chisels work best at slow speeds, between 1,000 rpm and 1,500 rpm, depending on the mortise size and the wood density. Within this range, use trial and error to find the speed that works best.

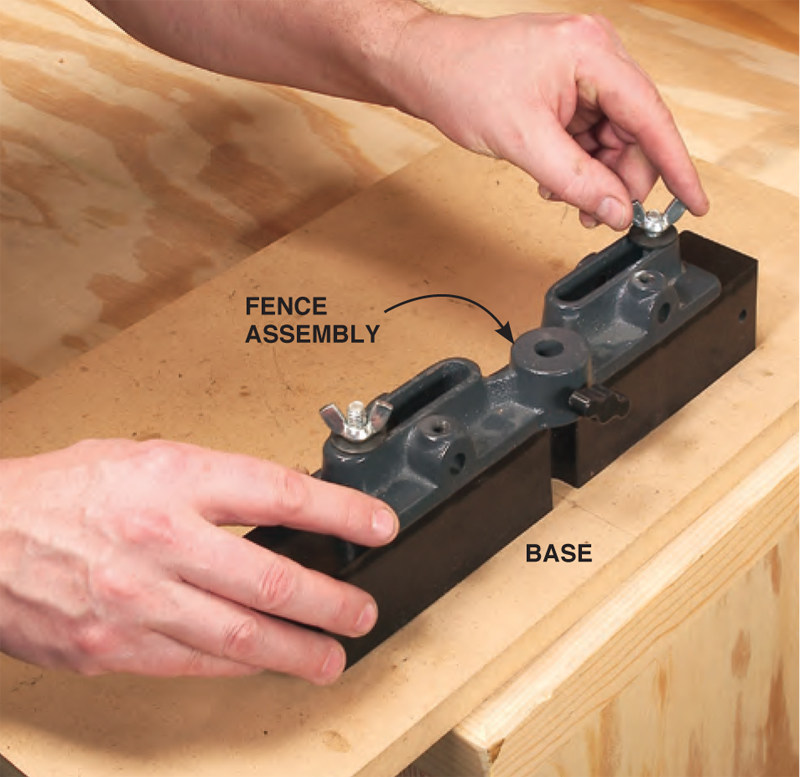
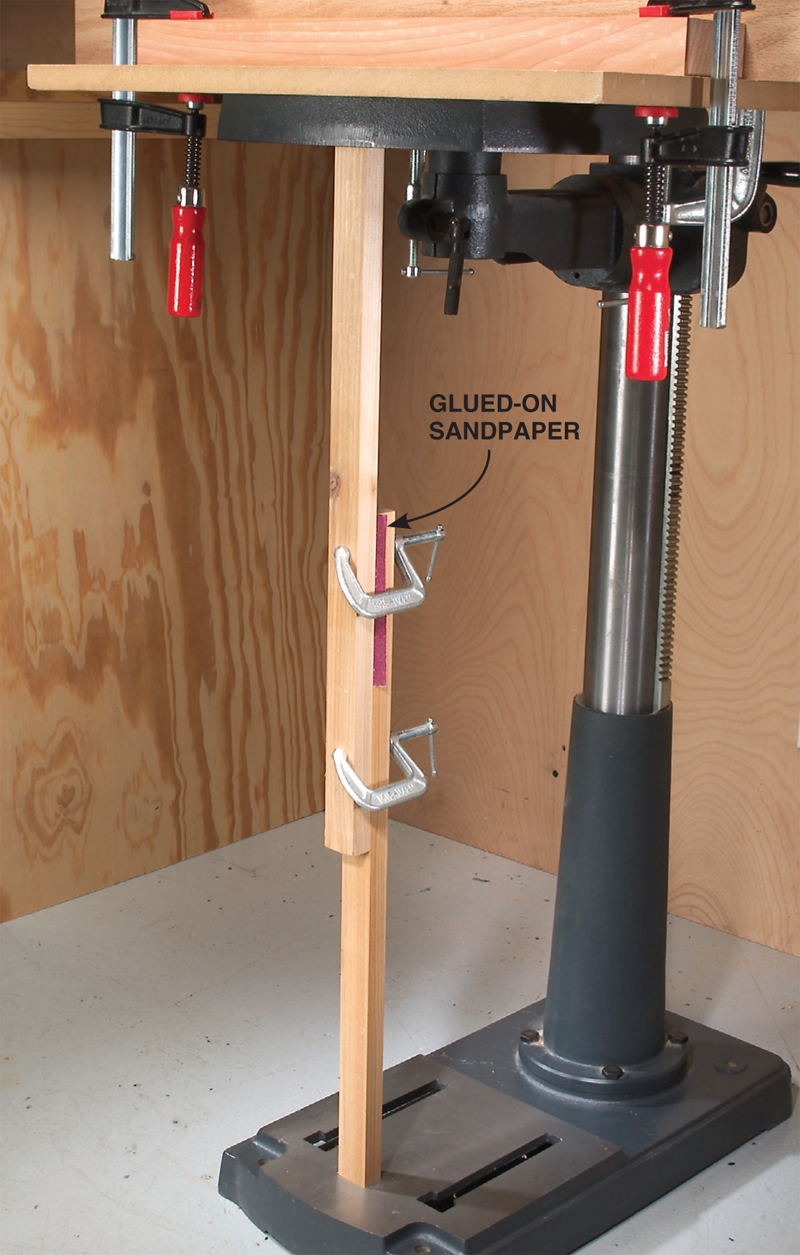
2. Mount the mortising fence on a separate base, rather than fastening it directly to the drill press table. Then clamp the base to the drill press table. This setup makes the fence easy to adjust; so positioning the workpiece is a breeze.
3. Install the chisel and bit. The chisel holder, which clamps on to the drill press quill, centers the chisel directly beneath the chuck. Lock the chisel with its collar tightly against the holder. Then slide the bit into the chuck.
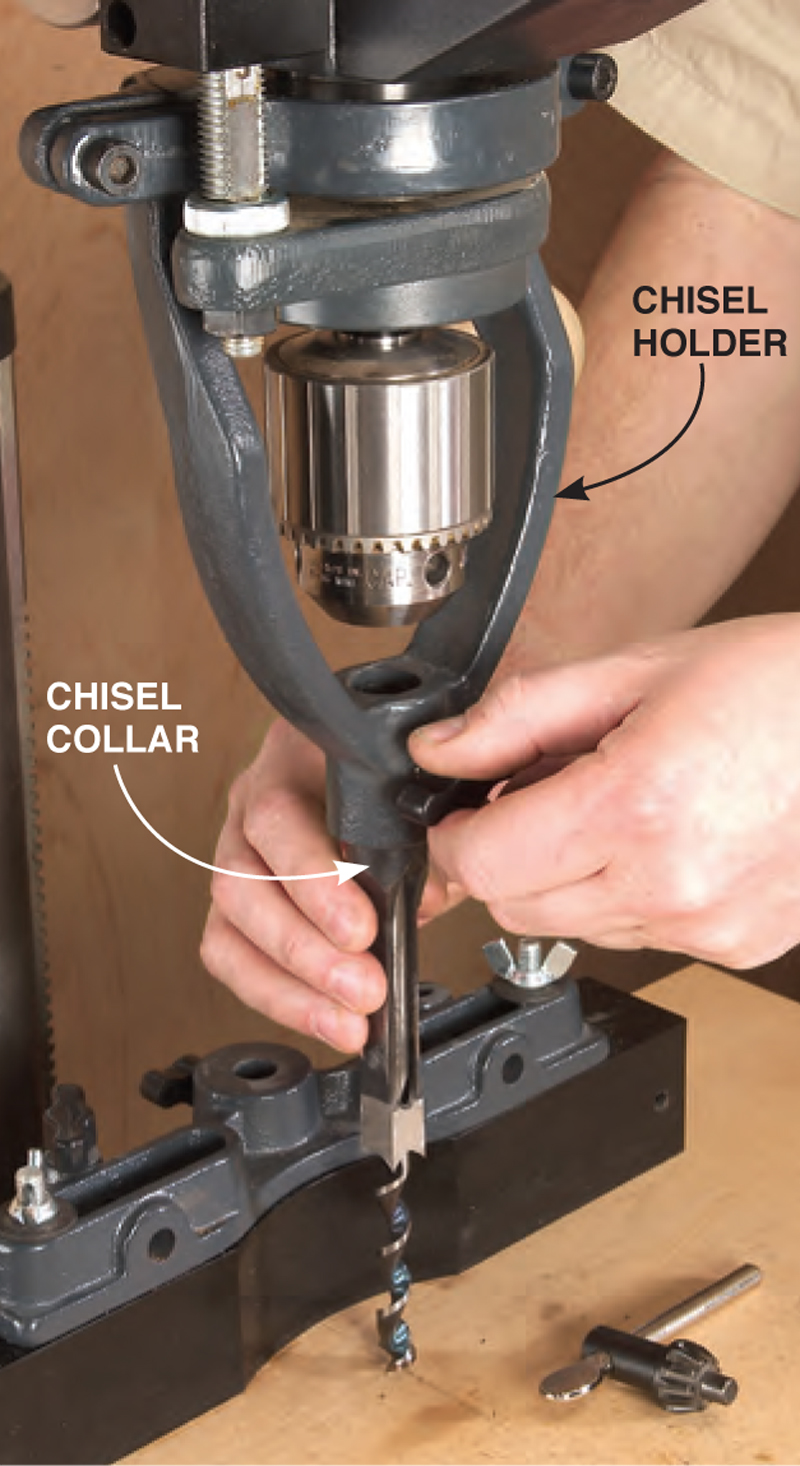
4. Leave a gap. Position the auger bit with its cutting head about 1/16″ away from the domed inside surface of the hollow chisel. Don’t jam these two parts together. The gap is essential, because it allows shavings cut by the auger to be lifted into the hollow chisel and ejected. If the gap is too small or too large, the trapped shavings will bind the bit. Then reposition the chisel.
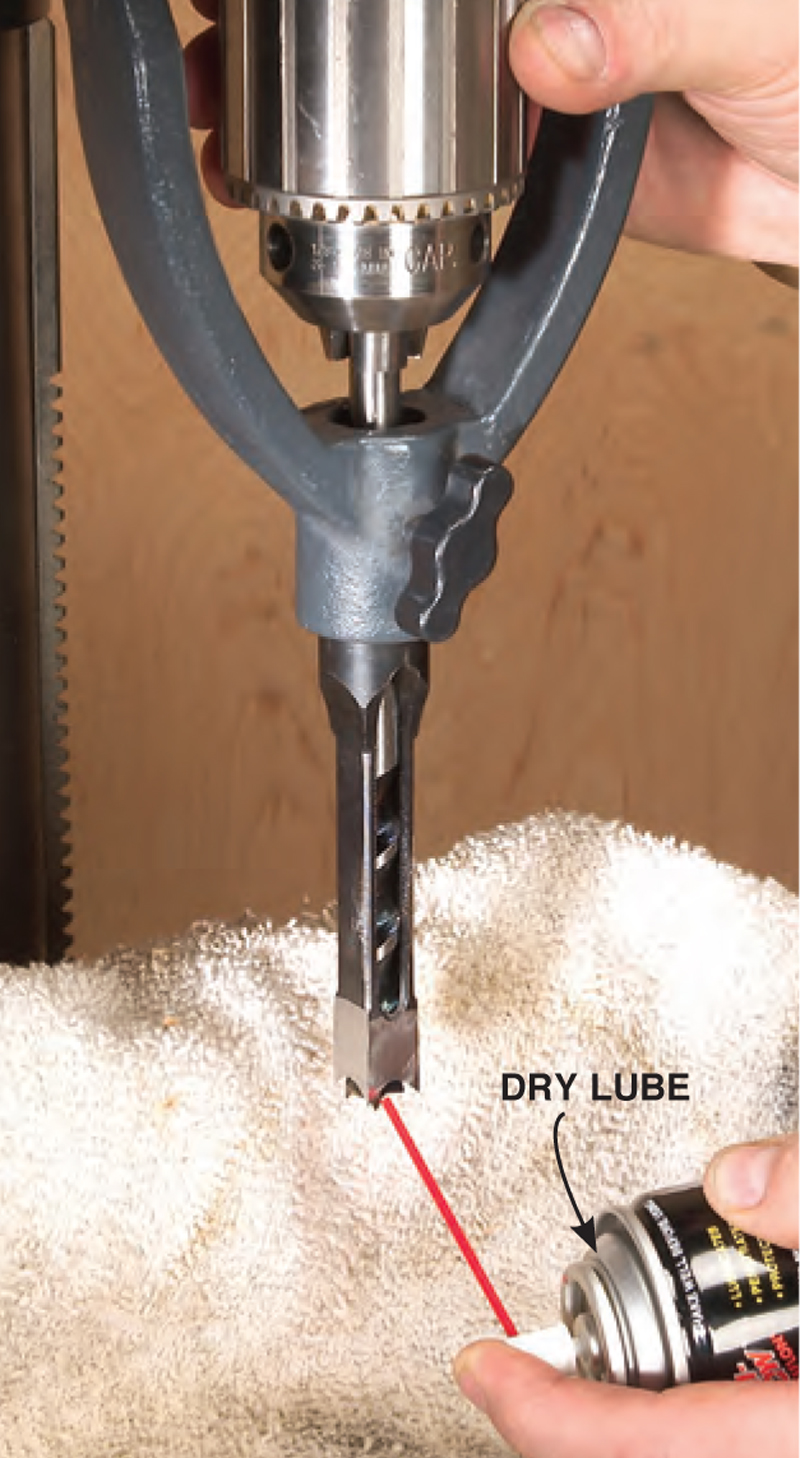
5. Lubricate the auger bit after making sure it spins freely inside the chisel. If the bit squeals when you power up, it isn’t centered precisely. Shut off the power, rotate the chisel 90 (or 180 or 270) degrees and retest. If the squeal persists, loosen the chisel holder and rotate it slightly.
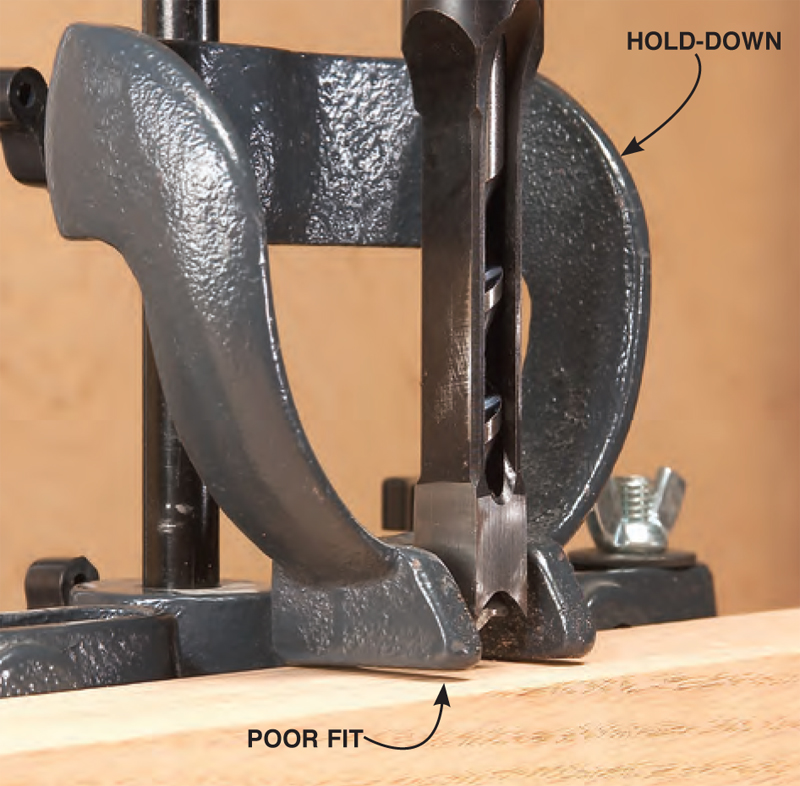
6. Check your hold-down. If it doesn’t sit flat on the workpiece, grind or file it until it does. A poorly fitting hold-down won’t hold the workpiece firmly enough against the base. While you’re mortising, any workpiece movement can bind the bit in the mortise and wreck your setup —or the bit.
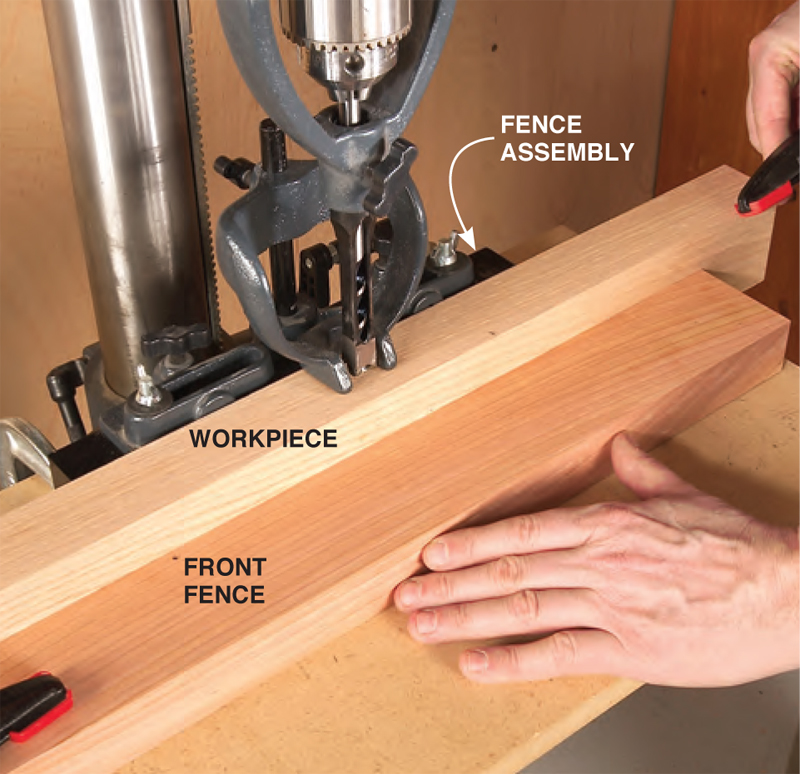
7. Clamp a fence in front of the workpiece to hold it firmly against the fence assembly. Together with the hold-down, this fence captures the workpiece effectively during operation, eliminating any movement. When you reposition the workpiece between cuts, this fence keeps it correctly aligned.
8. Stiffen the table with a brace. On many drill presses, mortising exerts enough downward pressure to flex the table. Like workpiece movement, any table movement will cause trouble. If the table flexes, the chisel will bind in the mortise. A two-part adjustable brace is much easier to install.
9. Square the chisel. For the mortise shoulders to be parallel, the chisel must be perpendicular to the fence. Loosen the chisel, rotate it flush against the squarely cut end of your workpiece and retighten.
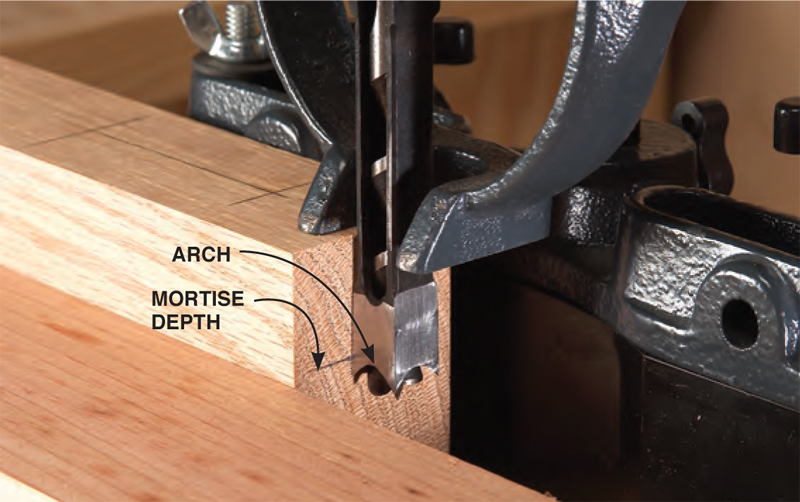
10. Set the depth of the cut. The top of the chisel’s arch indicates the bottom of the square mortise.
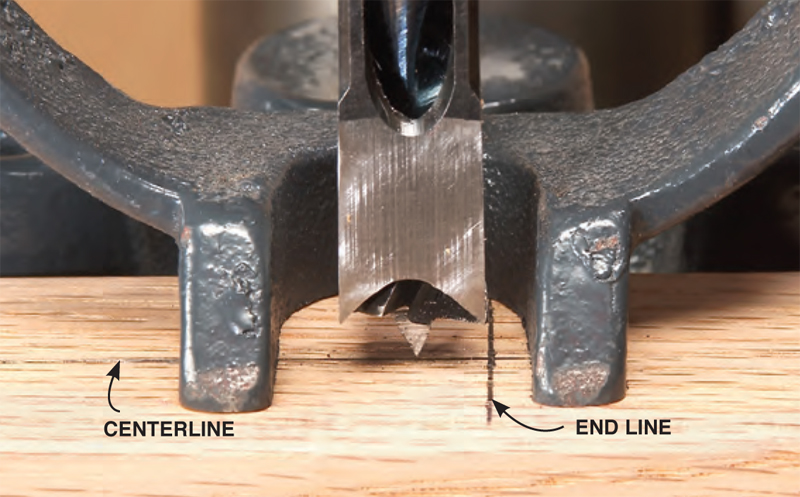
11. Position the workpiece for mortising. First, clamp the base and fence assembly so the center point of the auger bit is on the centerline of the mortise. Then slide the workpiece between the fences until the outer edge of the hollow chisel aligns with the mortise end line.
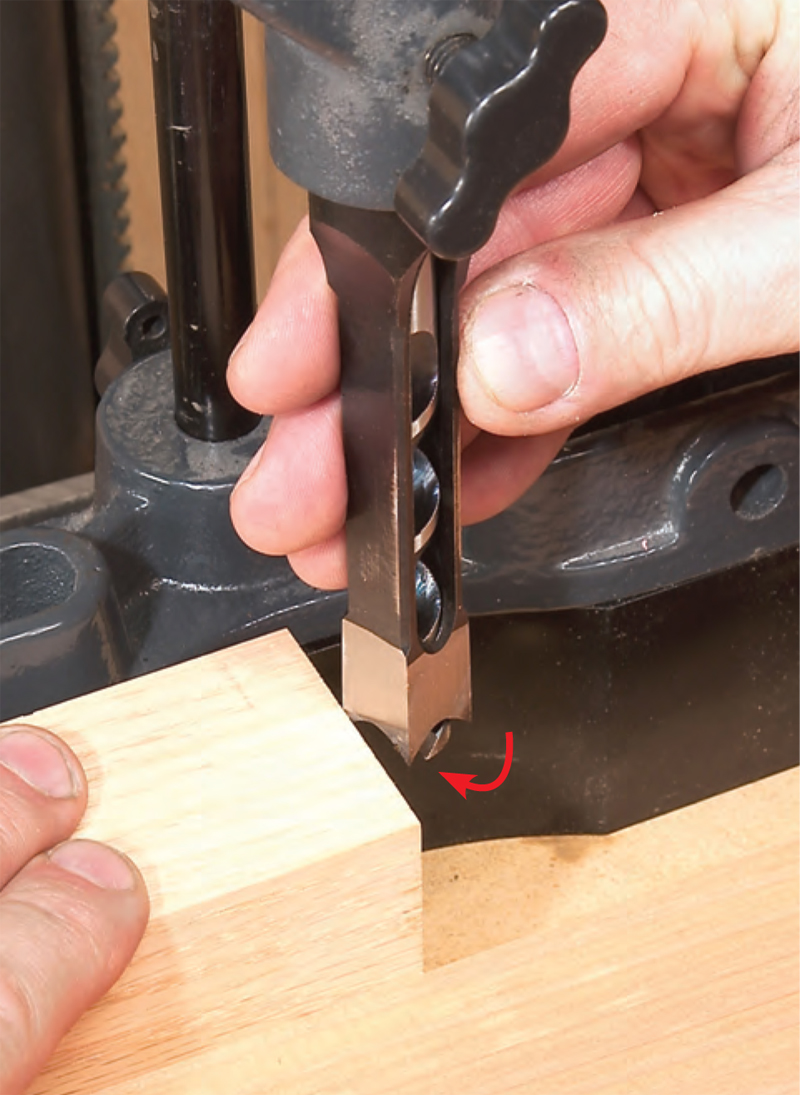
12. Establish the ends of the mortise first. Then clear out the middle. Always engage all four sides of the chisel or two opposite sides. Apply steady pressure and advance the cut slowly. Don’t push too hard. Match your feed rate to the cutting action of the auger by watching the flow of chips exiting the chisel. Easy—but firmly—does it.
Start sharp, stay sharp
Using hollow chisel mortising bits out of the box is like using chisels straight from the factory. They’re sharp enough to work, but not sharp enough to work well. Take a few minutes to tune up your bits and chisels before each use.
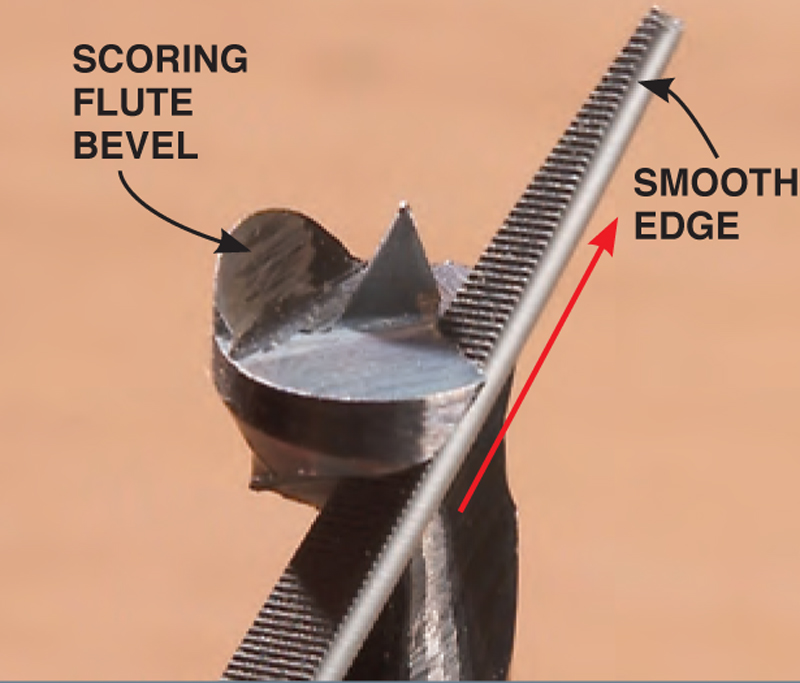
Sharpen the bevels of the auger’s cutting and scoring flutes using a small auger file. (This one is from Nicholson’s miniature file set #42030) Its smooth edges won’t mar adjacent surfaces during this close work. Hold the file flat on the bevel and move it forward toward the cutting edge. Don’t file back and forth.
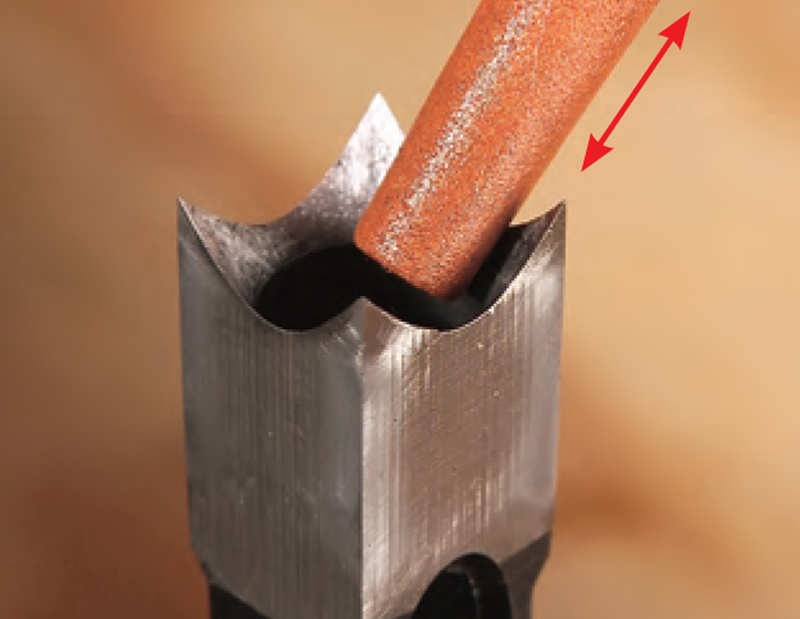
Sharpen the hollow chisel’s inside bevels using a round slipstone or rotary tool. Grind from corner to corner while holding the stone flush against the bevel.
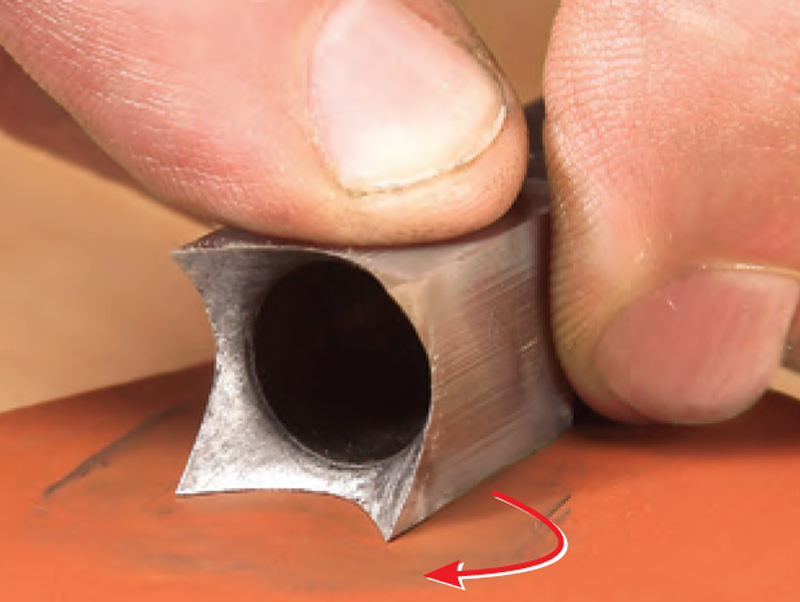
Hone the outside faces lightly on a flat stone, using even pressure and a circular motion.
This story originally appeared in American Woodworker May 2005, issue #114.
Popularwoodworking.com is a participant in the Amazon Services LLC Associates Program, an affiliate advertising program designed to provide a means for sites to earn advertising fees by advertising and linking to Amazon.com and affiliated websites.
Here are some supplies and tools we find essential in our everyday work around the shop. We may receive a commission from sales referred by our links; however, we have carefully selected these products for their usefulness and quality.