


We may receive a commission when you use our affiliate links. However, this does not impact our recommendations.
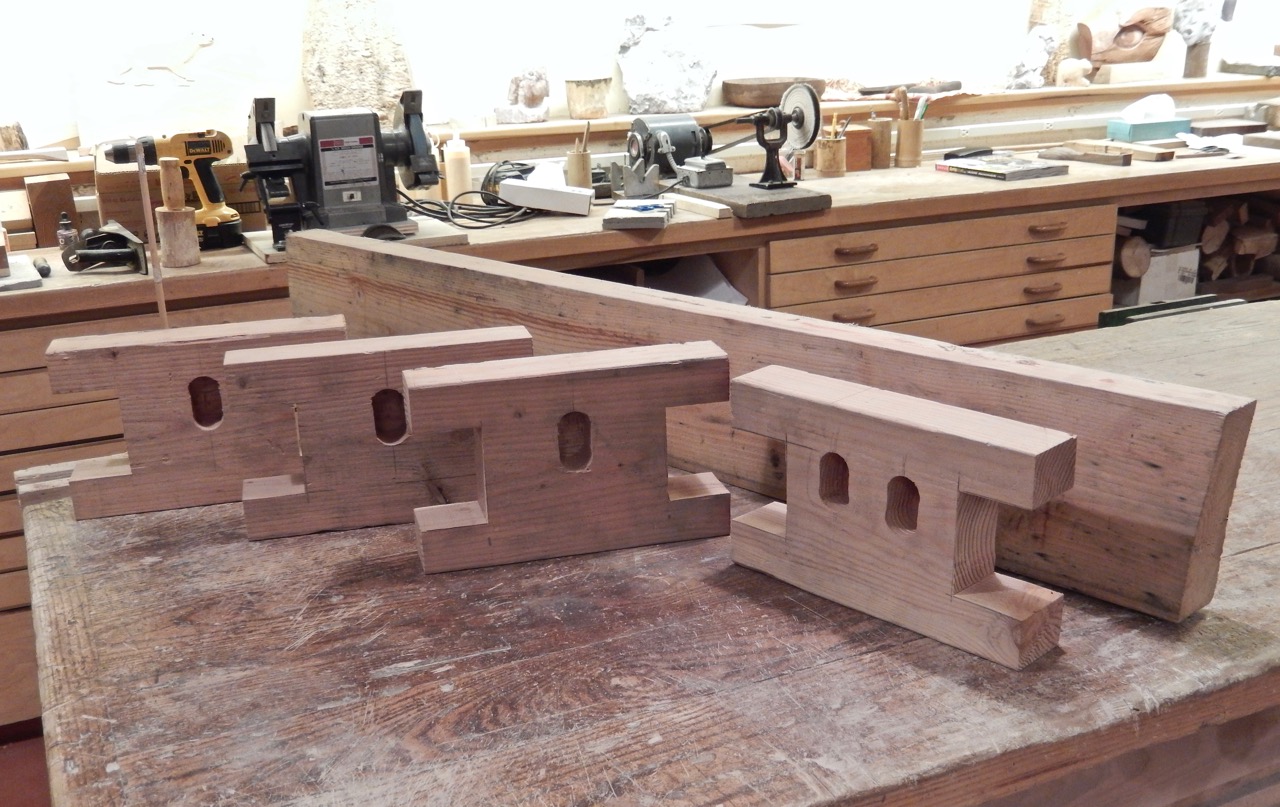
I crosscut our first batch of Bench Bulls from a 7-1/4″ x 2-1/2″ rough pine beam that we found on the street in front of our school. The beams were discarded by our school’s neighboring townhouse at the end of their home renovation. This is the kind of basic sawn pine beam that is used in construction, and I think might not be that easy to come by at Home Depot, Lowe’s etc. Our first Bench Bulls have only one clamping “eye” or socket. On the last one, which I built toward the end of our trimester, I bored two sockets to make clamping operations more versatile. I also built this bull a bit longer than its siblings…


If you decide to work with that kind of lumber, I recommend boring a few sockets every 3″-4″. You might also want to make your bull longer than the one I built. It will enable you to clamp to it wider workpieces. Think about clamping hope chest parts for dovetail cutting. And don’t be stingy with the number of sockets along its length; they will prove themselves useful down the road.
In the first Bench Bull that I built for myself I included, in addition to the sockets, a few 3/4” through-holes close to the base of the bull and through its top. These holes accommodate some of my Veritas clamping jigs that I use on my portable workbench, such as Veritas Bench Pups, Fast-Action Hold-Down and Bench Blade. (You’ll find all of those at Lee Valley.)

The Bench Bull that I built for my own use is 14″ inches long. Its size and proportions allows it to work great with either a pair of 4″ F-style clamps, 2-1/2″ Pony #56 (3/4″) pipe clamps, or the Veritas Fast-Action Hold-Down.
The Fast-Action Hold-Down can substitute for the horizontal F-style clamps, while the Bench Pups can be great when chiseling or planing. The 3/4″ holes through the Bench Bull top can also be used by the Fast-Action Hold-Down to arrest workpieces from above.
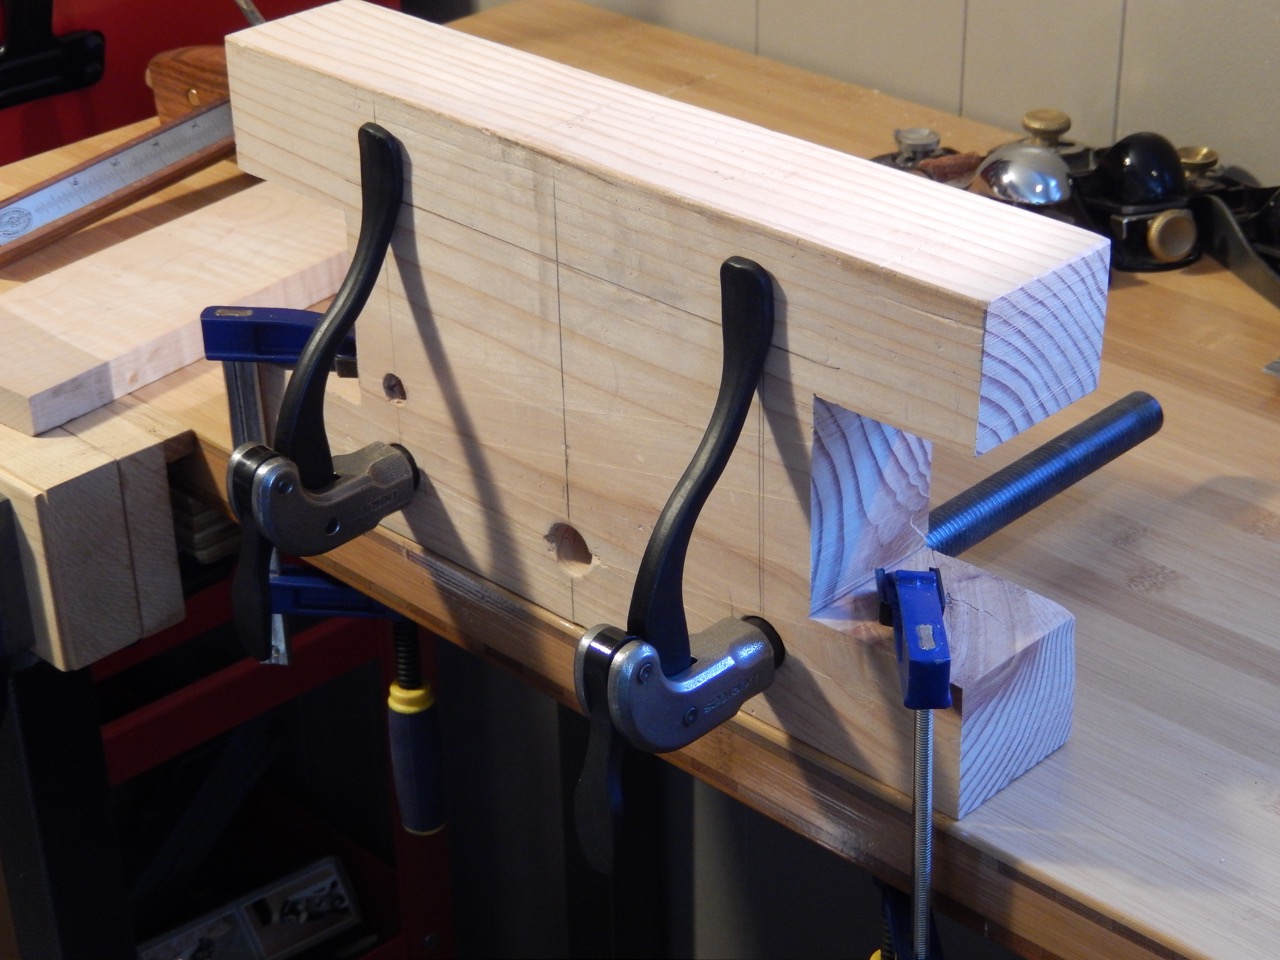
A pair of Veritas Fast-Action Hold-Downs installed through the Bench Bull act as a vise.

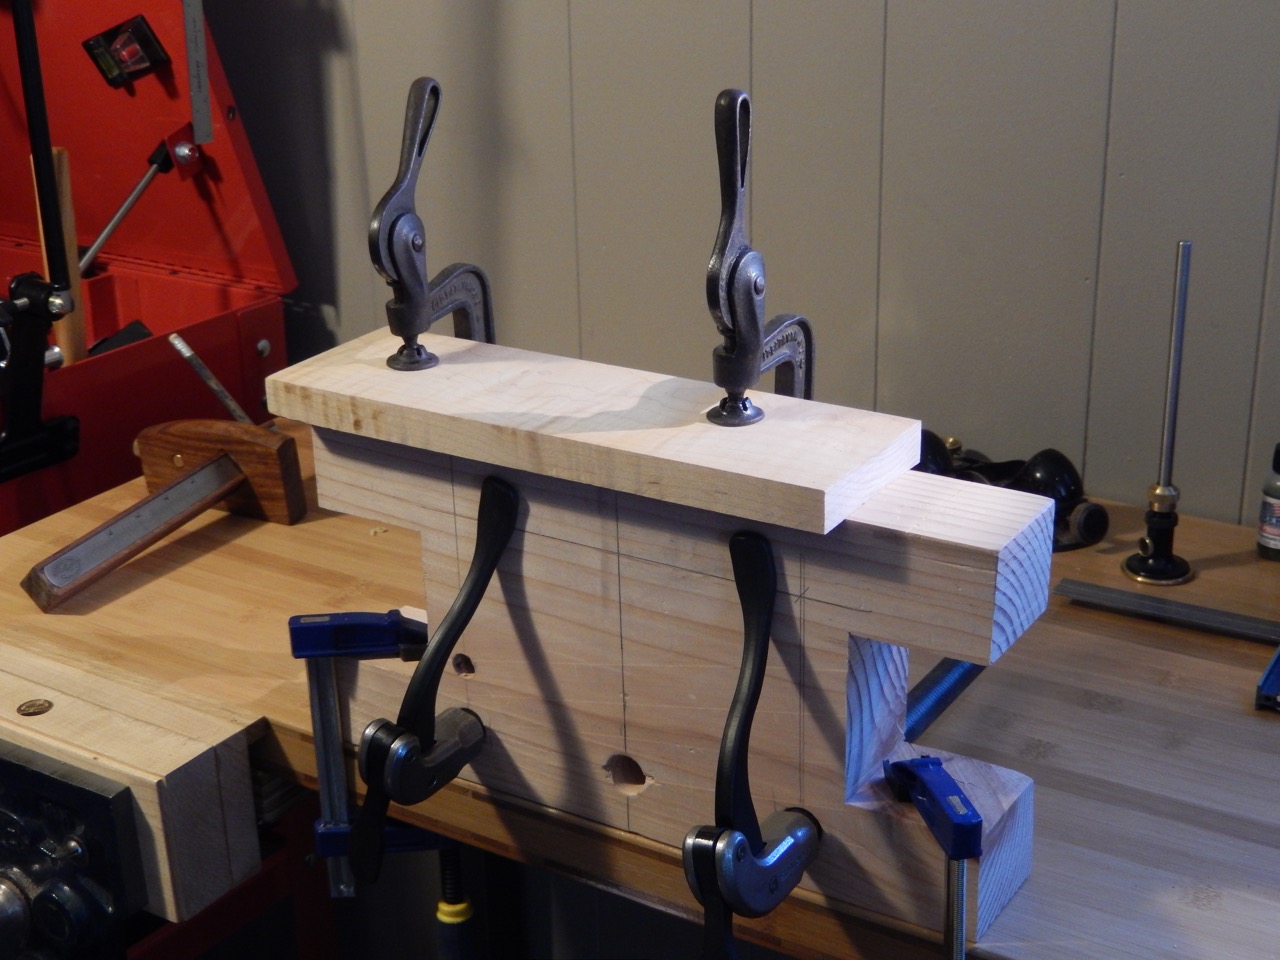


Bench Pups will clamp workpieces on the Bench Bull’s surface for chiseling, carving, sawing and more.


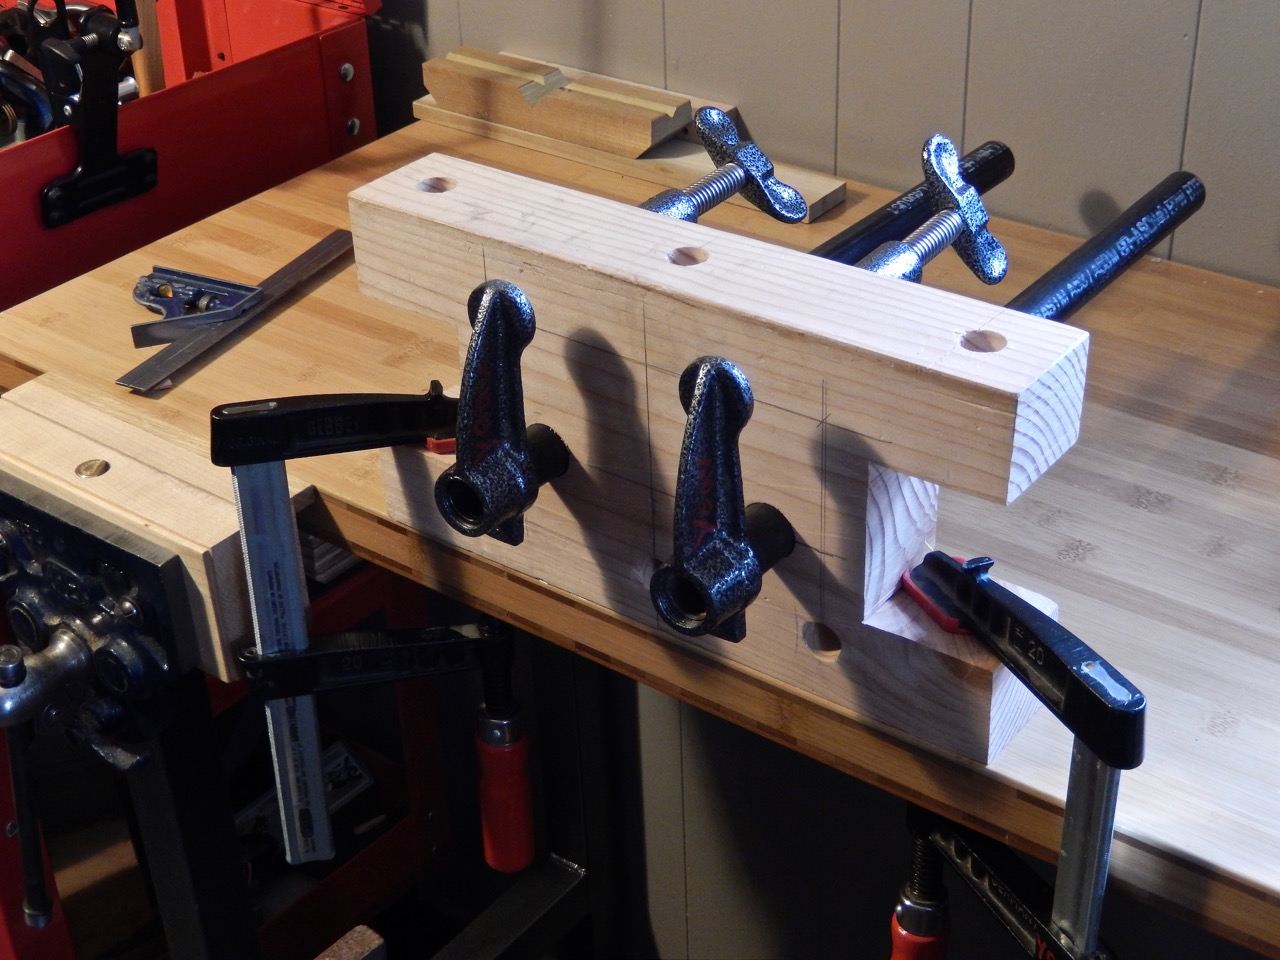
A Bench Blade, used with a small shop-made T-square, will prevent small parts from moving. Here I mounted one of my sandpaper sharpening blocks onto my Bench Bull.

If you don’t own the Veritas® Fast-Action Hold-Down (at $84 this little gizmo is not cheap) you have yet another option for an integral horizontal clamping system that will substitute for the F-style clamps. Consider using a 3/4” pipe clamp fixture. A pair of these installed through 1-1/16” holes just below the socket holes will practically act as a bench vise. Drill a few holes in a row to allow yourself to migrate or add more pipe clamps as needed for the shape and size of the stock.
If you decide to build your Bench Bull from dimensional lumber, you may choose to incorporate spaces or gaps in between the lumber segments to be used as clamping sockets. Choose this way if you don’t have a drill press and feel uncomfortable drilling long and wide holes by hand. To accommodate your pipe clamps cut a few 1-1/16” x 1-1/16” dados across the second pine board (see drawings).
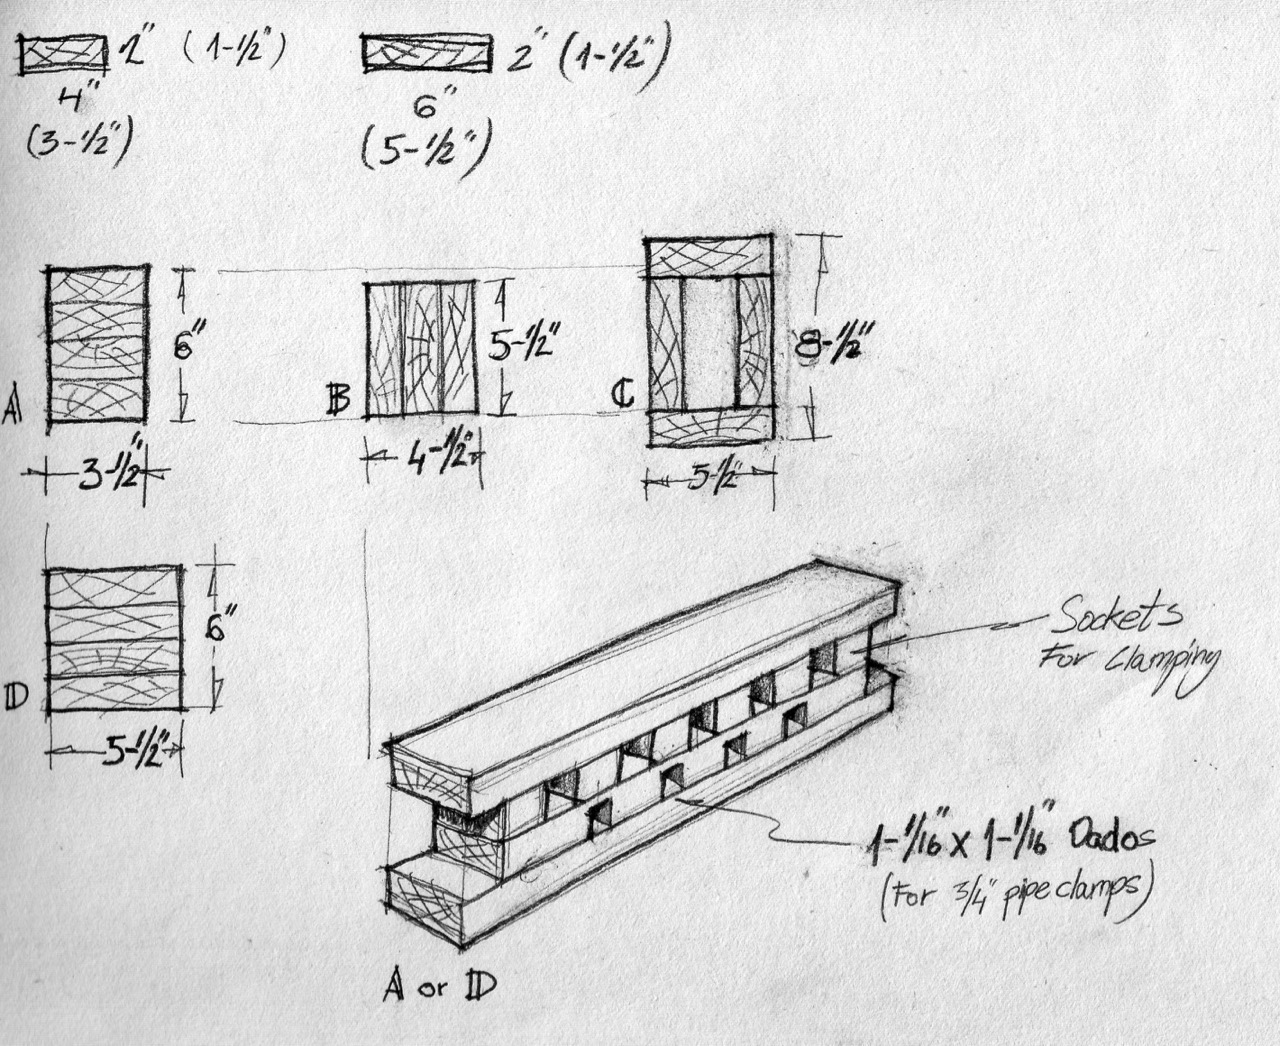
Here are a few Bench Bull build-up configurations using 2×4, or 6×4 dimensional lumber available in any home improvement center.
One of the main challenges of making a wide Bench Bull with through-holes is drilling through 6” and wider laminated wood block. You can circumvent this if you drill each ply of pine (or wood of your choice) before sandwiching them together. To ensure perfect alignment of the holes, insert your pipe/stem of choice through all the holes then glue and clamp the block together. Once the glue cures, joint and plane your Bull.
What diameter drill bit will you need? You’ll need a 3/4” bit for the 3/4” Veritas jigs stems, a 7/8” bit for 1/2” black pipe clamp and a 1-1/16” bit for 3/4” black pipe clamp.
Below are a two more sketches to help you build a Bench Bull from dimensional softwood. But of course, if you want to invest in a nicer, longer-lasting Bench Bull, build it from hardwood. Next time, I will show my latest Bench Bull; it incorporates 1/2” pipe clamps with a movable vise jaw.

This Bench Bull is laminated from three pre-drilled vertical beams. After the core has been jointed and planed it is capped and bottomed with two additional beams.

This Bench Bull has a hollow core.
Here are some supplies and tools we find essential in our everyday work around the shop. We may receive a commission from sales referred by our links; however, we have carefully selected these products for their usefulness and quality.


These “Bench Bulls” are certainly interesting for sure, although not sure that they offer much practicality in use since they, at least in all the demonstrated uses in this article, put your stock at too high a level to work comfortably, unless your workbench is adjustable in height . They may be more suited to use on a pair of saw horses or portable work station than on a regular height work bench. Thanks for sharing !
The sketches have a lot of character and as soon as I commented about the rays I realized that you were taking an artistic license with them. If you’re truly curious about a definitive id of the beam, saw off a slice and put it into the mail to Jeff Dubis.
Thanks for posting the info / drawings / photos on these, Yoav. I think it’s a brilliant design, and I’ll definitely be making myself some of them at some point, before too long. (But I’ll probably take a crack at your cool “Portable Workbench” first! Might combine the pipe clamp idea into it, though … we’ll see!) Thanks again!!!
Lots of questions about one thing: What is the source of the two cam operated clamps showing at the top of picture DSCN2858, above the Veritas quick cam clamps? Antique I’d guess or a supplier I haven’t heard of yet? Why hasn’t Rob Lee (or yourself) started making them? Can we have a photo of them fully revealed?
Do you really measure to 1/6 inch? Or did no one proof your work when you meant 1/16 inch? Or maybe it’s a typo and you meant 1/8 inch?
Or is the difference so slight it really doesn’t matter?