


We may receive a commission when you use our affiliate links. However, this does not impact our recommendations.
Among the first woodworking tools that I bought were two marking knives.
In this entry I will talk about those first knives and the way I use them. In the coming entries, I will show other knives that I own and demonstrate how even a simple utility knife can do a good marking job, in case you don’t own a dedicated tool.
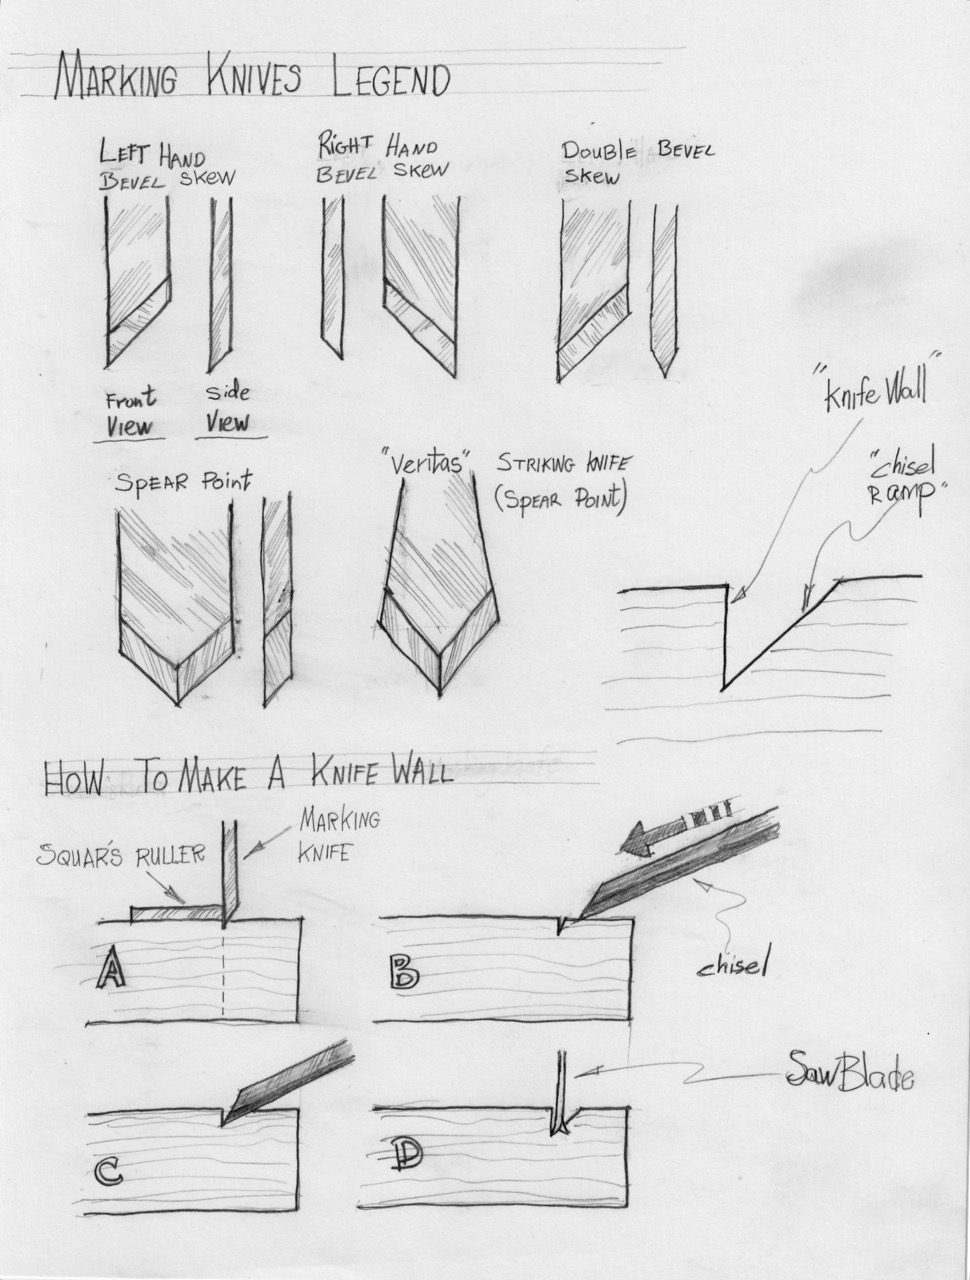
Marking Knives legend
I first learned about marking knives 19 years ago. The articles and books I read stipulated the use of two skewed marking knives: one with a right-beveled edge, the other with a left-beveled edge. What I read was that a marking knife is an indispensable tool for preparing workpieces for successful sawing or chiseling. At the time I was looking to buy my knives, the One-Knife-Does-it-All, double bevel spear, was not around, or at least I wasn’t aware of it, so I ended up buying the recommended two.
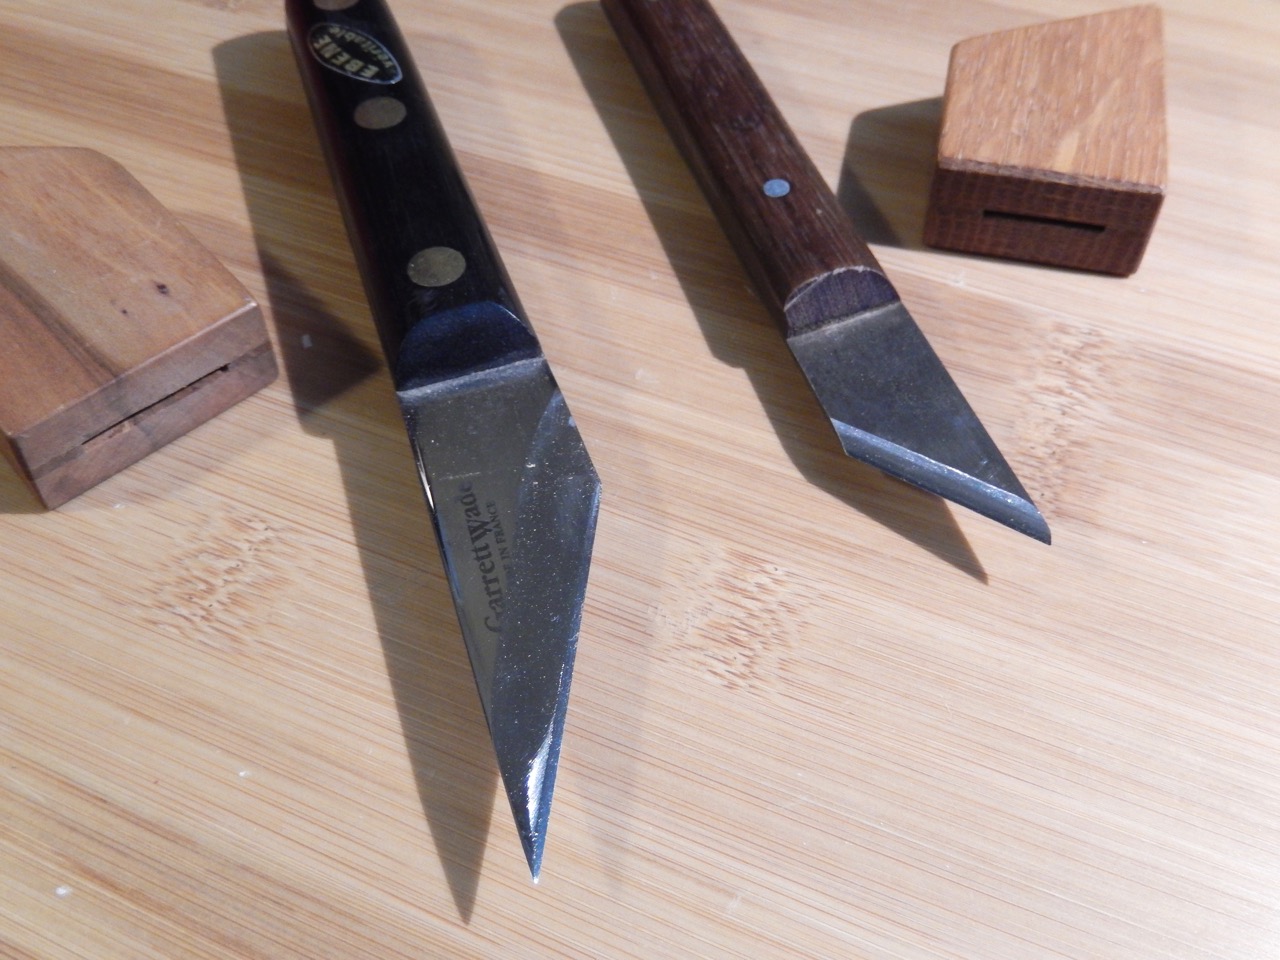
My marking knives
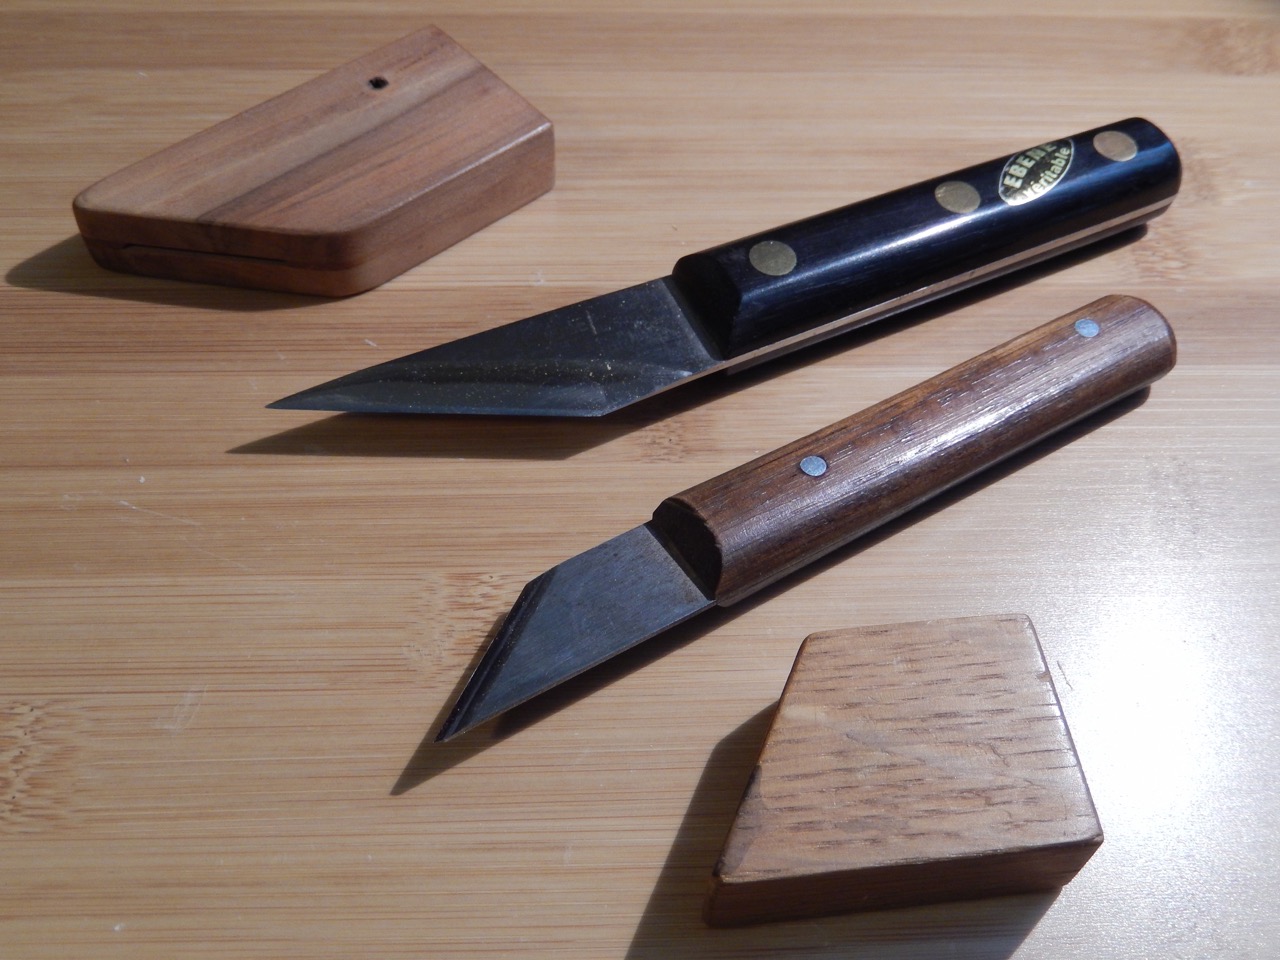
My marking knives
I use my marking knives mainly for a few things: serrating across the grain as a first step in preparing a “knife wall”; laying out the location of pins and tails in a dovetail joint; outlining the borders of a hinge basin and other hardware recesses that need to be excavated, and outlining mortise-and-tenons joints.
The “knife wall” technique, a term I first heard from Paul Sellers, helps me to saw accurately across the grain. Once you gain experience with this technique, you will need to use the shooting board and shoulder planes less frequently as your cross-cut surfaces will be smoother and truer.
A knife wall is actually a shallow “V” dado that nests the saw blade during the first few (and perhaps most crucial) saw strokes. These strokes determine the success of the entire sawing process. The “V” dado is made of two sides; one is perpendicular to the surface and is made by the knife, and the other is a slope that intersects the knife wall and is cut by a chisel.
To make a knife wall I place a square in the intended location of the cross cut, and with a marking knife (I am right handed so I mainly use my right bevel knife) I serrate the line of cut. I begin the serration by holding the back of the knife’s blade tucked plush against the square’s ruler, while the bevel of the knife is facing the waste side. Initially I use only light pressure on the knife as I pull it toward me to score the line. I repeat scoring the line a few more times, each time with increased pressure on the blade. Your scoring depth should reach 1/32” to 1/16”.

Serrating the knife wall with a spear-point striking knife
Next, I reach for a chisel to create the sloped wall, or “Chisel ramp”, of the “V.” I place the chisel’s edge, bevel up, about 1/16” off to the waste side away from the line, and with the chisel held at a 45° angle to the surface, I push it downward, shearing away the fibers toward the knife’s serration line. Then I lift up the chisel and repeat the stabbing in a new location adjacent to the initial cut until the remaining “chisel ramp” is excavated.

Creating the chisel ramp
Now I can nest my saw blade in the “V” and begin a successful cross cut.
One of the many advantages of the knife wall technique is that the saw gravitates toward the perpendicular wall of the “V” (the one created by the knife), which ensures perfect alignment with your intended part’s dimension (length in this case). If the “V” did not have a right-angle wall, the saw would have cut a kerf down the middle and off to the intended partition line.
Another advantage is that you will be able to achieve nice cross-cut results even without using a backsaw. My students regularly use a simple all-purpose Japanese saw and their cross-cut quality is pretty decent. When they use the all-purpose saw, I advise they begin sawing by putting light pressure with their hand on the saw’s spine to eliminate any chance of the saw jumping out of the “V”. Once the saw kerf is 1/8” or so deep, they can alleviate the pressure and saw naturally.

Putting light pressure on the saw’s spine will eliminate any chance of the saw jumping out of the “V”
The knife wall technique requires some preparation and it is a bit time consuming, but it is one of the most rewarding woodworking practices that I know of. It is a great confidence booster as it demonstrates that, with a few initial preparations, one can preform a professional looking cut that will match any cut made by a miter-box, a table saw or even a C.N.C. router.
Here are some supplies and tools we find essential in our everyday work around the shop. We may receive a commission from sales referred by our links; however, we have carefully selected these products for their usefulness and quality.


I agree – excellent images!
These drawing are great. They show skill and more importantly humanity.
PWW should ban Sketch-up drawings from ever appearing in its blog or print pages.
Excellent drawings and great tips. For me when I started using knives in my layout my skills got a huge boost just for the repeatability of measurements etc. so I always enjoy seeing anyone promote HOW they can help. I also use the knife wall technique, though often I’ve found that grabbing a shoulder plane to track in the initial knife line speeds up the chisel process.