We may receive a commission when you use our affiliate links. However, this does not impact our recommendations.

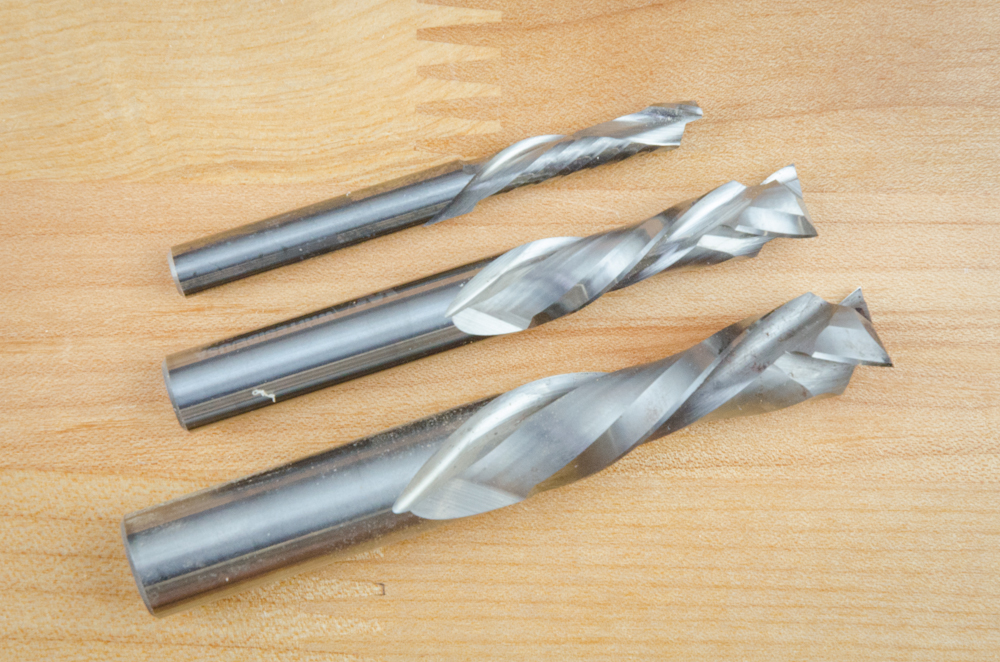
Compression router bits and mills upcut on the bottom of the bit and downcut over the rest of the length.
Part Three: More End Mill & Router Bit Details
In my last post, the focus was on the cutting edges, or flutes, along the sides of an end mill. If you’ve missed the previous segments on CNC mills, here’s the intro and part one. As suggested earlier, two-flute end mills designed for woodcutting and router bits almost always work best. We’ve reached the end of this tooling primer but before we go, I want to pass on a few more details you should know about CNC mills. I’ll be focusing on hobbyist-sized CNC machines next month but I’m certainly not done with this topic. Down the road, there’ll be much more about CNC mills including selecting mills for specific purposes such as part cutting, carving, specialty and high-performance mills, a suggested basic mill set for digital woodworkers and more.
Upcut or Downcut?
Many straight end mills or router bits come in two versions: upcut, where the waste from the cut is pulled upward and ejected out the top; and, downcut where the waste is actually being pushed down and back. If you’ve used a hand-held router, chances are you’ve mostly used upcut bits. If you’re making a mortise that will later house a tenon, for example, you certainly want to get the chips out of the way as you’re cutting. The same thinking holds true when using a CNC. You want to eject the chips as fast as you can.
However, there are some trade offs to be considered when using upcut mills on a CNC. For one thing, upcut bits are more likely to tear the top surface with the cutting edges because they’re pulling the wood fibers up while cutting. On laminated materials, such as plywood with a thin top veneer, that can matter a lot. It may not matter if you’re ultimately going to round over that top edge and/or apply solid wood edge, but in other situations, it might be a problem.
Another issue that’s different on a CNC than with a router is that the upward cutting action pulls the piece of wood you’re cutting off the table. If you’re not careful, that can cause the piece to move if it’s not firmly held down. So, in some situations that makes a downcut bit or mill the better choice. With a downcut mill, the advantage is that it’s pushing down on the piece you’re working, plus it cleanly cuts the top surface. The tradeoff is the waste is pushed back into the cut area instead of being ejected.
So how do you decide on an upcut vs. a downcut bit on a CNC?
If you’re cutting MDF or HDF you absolutely have to use an upcut bit. Otherwise, between the bit getting overheated and the fine paper dust-like waste being pushed back into the cut, there’s a high potential of starting a fire. I know because I’ve made the mistake of using the wrong bit at a slow speed, and the result was a near-fire situation with smoke pouring off the MDF board I was cutting – unnerving to say the least! (And yes, I ran to my dust collector barrel to make sure that I wasn’t starting a fire there, too.) You can bet that I’m careful about this detail now. My mantra: MDF = Upcuts.
As you can guess, when cutting solid wood, most of the time an upcut is the best solution. But not always. On a CNC, I use downcut bits almost exclusively when I’m cutting out solid-wood parts, because the top surface comes out perfect and the wood is held tighter the bed because the bit is pushing down as it’s cutting. But I have to run the CNC faster so that the chips and the bit don’t overheat. To do this, I usually take shallower cuts and multiple passes at higher speeds than I would use with an upcut bit, where I might take the opposite approach with slightly deeper cuts and fewer passes.
Compression Bits
Thanks to modern end mill and router bit design, you can now have your cake and eat it, too. Compression bits do both upcuts and downcuts at the same time. They have flutes that upcut on the bottom .250″ or so, and flutes for rest of the cutting length that are for downcutting. These are the cutting tool of choice for laminated materials such plywood. But you have to use them correctly. Your first pass needs to be slightly deeper than the upcut section of the bit, say .260″, then the remaining cutting area on the bit will push down the board and cleanly cut that top surface without tearing the thin top veneer layer. Also, if you cut all the way through the board, you get a bonus: The top cutters don’t tear out the bottom veneer layers because they are pulling the fibers inward. A win/win situation.
For solid woods, compression mills or bits can work just as well. But to get their major benefit you need to keep in mind the depth of that first pass. For very hard woods, .250″ might be too deep a cut. With other, softer, woods this may not be an issue. For MDF, which is notoriously hard on cutting tools, it just seems like such a waste using an expensive bit on such as abrasive material, so I stick with upcut bits.
Climb vs. Conventional Cuts
With conventional cuts the bit is biting into the material at it travels. A climb cut, on the other hand, pushes the bit away from the material. This is why it’s so difficult to control a hand-held router during a climb cut, and why you really need to pay attention to the direction that you’re routing. Cutting direction is a different issue on a CNC machine where the stock is tightly held onto its bed. There, you can take advantage of climb cutting to get the benefits, which are usually less tear-out and a smoother cut. In fact, on a CNC, climb or mixed cutting are the preferred techniques. Mixed cutting is faster, too. However, there will be times when cut direction on a CNC is important. I’ve had a few issues with very soft woods with strong grain where I’ve restricted cutting to conventional cutting, but for the most part, I cut bi-directional to speed up the milling process.

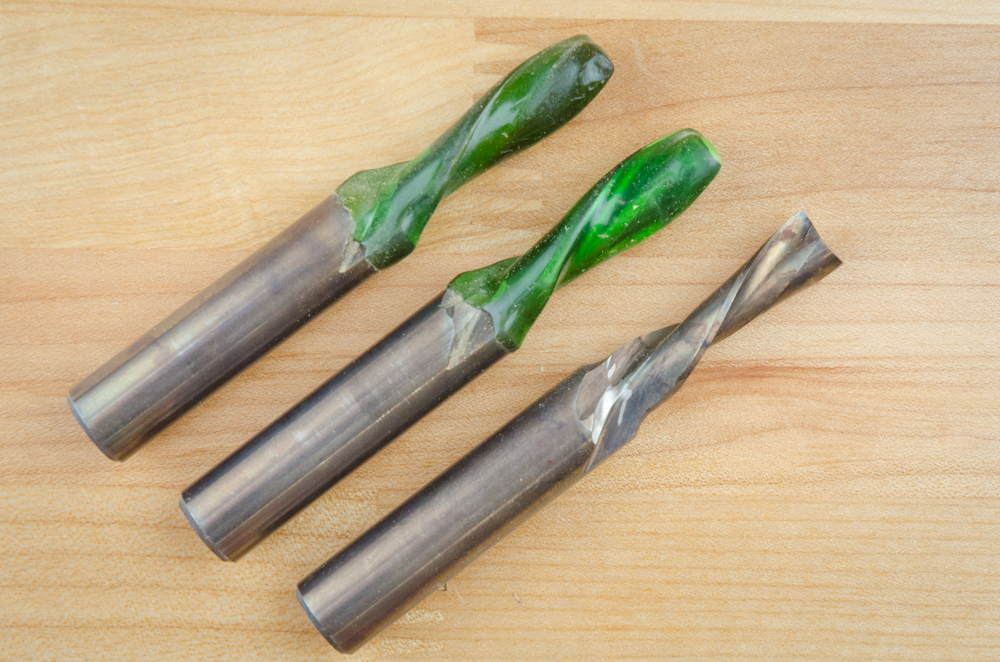
Though I prefer carbide end mills and router bits for their longevity, sometimes bargain high-speed still mills have their place. These heat-treated Onsrud 3/8″ mills are very useful for part cutting.
Cutting-Tool Materials
Router bits and end mills are made out of a variety of materials. The most common are high-speed steel (HSS) or carbide. Carbide is harder, lasts longer, resists heat better and can take faster feed rates. In my work, most of the time I use carbide mills. If you’re already using a router you likely are using them as well. Carbide lasts a long time and the better ones are worth resharpening. You need to be very careful when using carbide cutters; they break with the slightest deflection. Though carbide is superior in most ways, HSS mills have their place in some situations and when cost is a consideration. I have occasionally found great deals on quantities of HSS mills in sizes I like to use for CNC part cutting. If the work isn’t too hard and you’re careful to not overheat the bits, use them. I’ll use HSS cutters on a few projects; once they’re dull, I toss them.
To further enhance wear resistance, various coatings, including titanium aluminum nitride (TiAN) and diamond, are sometimes applied to carbide tools. Though these may add to add to a cutter’s longevity for specific metals, for woodworking use, an uncoated mill running at an optimal speed works just fine. Some manufacturers, including Onsrud, use special coatings on some of their end mills to protect them from higher temperatures.
To see the entire series on CNC Tooling Basics, click here.
P.S. Next month, I’ll introduce a class of CNCs that are well-suited for hobbyist woodworkers and I’ll follow that up with a review of one of them.
Here are some supplies and tools we find essential in our everyday work around the shop. We may receive a commission from sales referred by our links; however, we have carefully selected these products for their usefulness and quality.


