We may receive a commission when you use our affiliate links. However, this does not impact our recommendations.
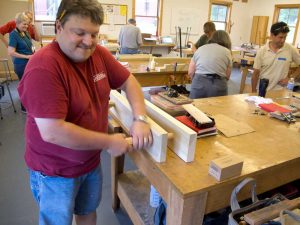
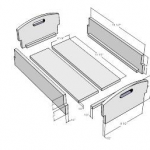
Threading and tapping wood by hand can be frustrating, even when you know what you are doing. Today, 11 students and I at the Center for Furniture Craftsmanship built Moxon-style vises to prepare for a week of dovetailing and more dovetailing.
Of course, almost all of the students had some sort of problem with the tap or the thread box. I’ve done a few thousand rounds with these cursed beasts, so here are some things I do to make my life easier.
1. Buy the Benchcrafted hardware instead. OK, I’m kind of kidding. But I’m kind of not. I’ll let you decide.
2. Turn the posts that you hope to thread a wee bit undersized. If you are going to make 1-1/2”-diameter posts, turn them down to 1-7/16”. Life will be so much easier because the major diameter of the post won’t hit the bottom of the threaded hole. I know that people will line up to take a shot at me about this, but I’m not listening to you. I’m building a motorcycle in my head instead.
3. When you thread the post, thread it once. Then back the threadbox up to the top of the post. Do not take the threadbox off unless you want a firm spanking (and a cross-threaded post). Now spin the threadbox down the post again and this time push down hard-ish on the handle that holds the V-cutter. Don’t know what I’m talking about? Buy one of these torture devices and you’ll find out.
4. When you tap the hole, run the tap down as you normally would – don’t forget to back up occasionally to break the chip and clear the mouth. Remove the tap. Then start again. This time lean the tap into the end grain of the hole. This will help clear both end-grain walls of some excess wood.
5. Buy the Benchcrafted hardware after the little V-tool gets buggered up.
— Christopher Schwarz
P.S. I’m in Maine all week at the Center for Furniture Craftsmanship. Stop by the school If you can; it’s a swank operation. It’s open to the public with a nice gallery that shows the work of the instructors. I am also available to receive offerings of malted beverages.
P.P.S. For more on this topic, check out my video on adjusting and using a woodthreading set.
Here are some supplies and tools we find essential in our everyday work around the shop. We may receive a commission from sales referred by our links; however, we have carefully selected these products for their usefulness and quality.


the dimensions of the vise stock in the video are very pleasing. Any chance you can post these?
Many thanks
#2, about having the “screw” blank a size smaller is critical. All cutting tools need clearance and fitting assemblies need clearance in order to fit together.
Number three seems to be critically important. I made one of these with the Woodcraft kit. The tap works fine, but if you take the die all the way off the dowel and find the fit is too tight, you will never, ever — ever — get it started in the right spot again. My screws look like they have an odd double-threaded spiral. They aren’t cross-threaded, they just look strange. They work, but aren’t as purty as they should be. In the end, what matters most is they work.
If I did it again, I would cut the threads extra deep from the get go. Even if they are really loose, they will function just fine. Too tight, and not so much.
Or buy a couple of veneer press screws at one fifth the cost of Benchcrafted. Woohoo!
I bought the Benchcrafted hardware. The vise works like a dream. 🙂
Buy the Benchcrafted….
Just a quick warning to those who might be tempted to buy a thread box and a tap: don’t do it (at least not the one I got).
I recently bought a thread box from Dictum in Germany (and I believe it’s the same sold by Woodcraft), and it is wrong on so many levels. I’ve wasted at least 10 hours trying to set it up properly and make it work, only to realize that it was doomed from the start. The steel used for the cutter is much too soft to hold an edge, and trying to harden it again won’t change a thing. If somehow you manage to cut some threads, you’ll realize that the geometry of the cutter is all wrong, and you end up with a thread angle of 90°, instead of the proper 60°. Also, the cutter has a nasty tendency to slip away from the dowel, and if you tighten it down a bit more you’ll either crush the wood of the thread box and throw everything out of alignment (at best) of snap the brass bolt that holds it in place (at worse).
The tap wasn’t much better: very rough, not sharp, and unsharpenable…
The best solution I’ve found (unless there’s a good-quality ready-made thread box out there that I don’t know about) is to make your own. I’ve bought threading kits from Beall, but since I’m not very much of a router guy, I’m using the high-quality tap to make my own thread box. I’m not done yet, but I’ll make the cutter our of O1 tool steel (or you could also use a V-gouge, I guess…) and there will be a few set screws in the body of the thread box, so that I can position the cutter very accurately, and that it stays put.
Francis
i’ve got the same shirt as that guy, but i’ve never made that face.
Hi Chris,
I was a little surprised you didn’t mention anything about lubrication (seems hard to pass up an opportunity to use lubrication in the same sentence with wood and screw). Some people recommend a light oil but I’ve had a lot of success with good old paste wax with the screw box and paraffin or beeswax for the tap. I’ve not done near as many as you have but the ones I have done have gone a lot better the slipperier things were. Can I say that here?