We may receive a commission when you use our affiliate links. However, this does not impact our recommendations.
Most repairs to furniture during the construction process are a drag because I am kicking myself for making an error in the first place. Not so when adding wooden keys to a slab tabletop.
Big wood tends to split. And left unchecked, the split can continue to open during the seasonal expansion and contraction cycle. The traditional fix is a wooden key that looks like two dovetails kissing. Or a butterfly. Or a unicorn sparring with its sacred mate.
While I am sure someone has written rules and regulations regarding wooden keys, I have yet to read and obey them. I make mine so they have the same slope as my dovetails, and they are thick enough to reinforce the slab.
How thick? I’m patching a split in some 12/4 oak in this example. My key is about 1/2” thick. Depending on how I feel, I might put a key on the underside as well.
(Note there are non-traditional ways to keep a split in check. Try countertop connectors – sometimes called “dog bones” in the trade – or pocket-hole screws that span the split. These metallic fixes have the advantage of being adjustable. I know, I know, fetch your torch and pitchforks.)
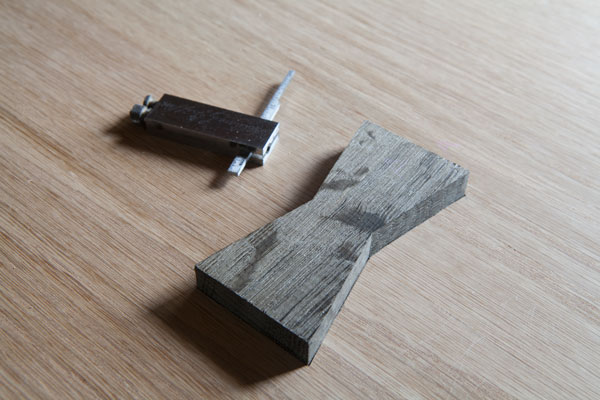
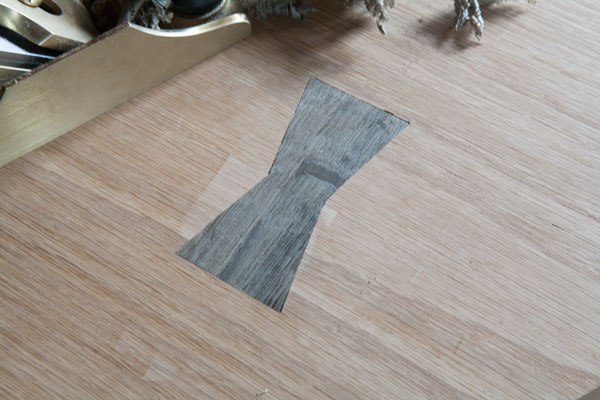
Saw out the key using a stout wood. I used a scrap of bog oak for this repair. Clean up the sawblade marks with a chisel and ensure all the key’s edges are 90° to the faces.
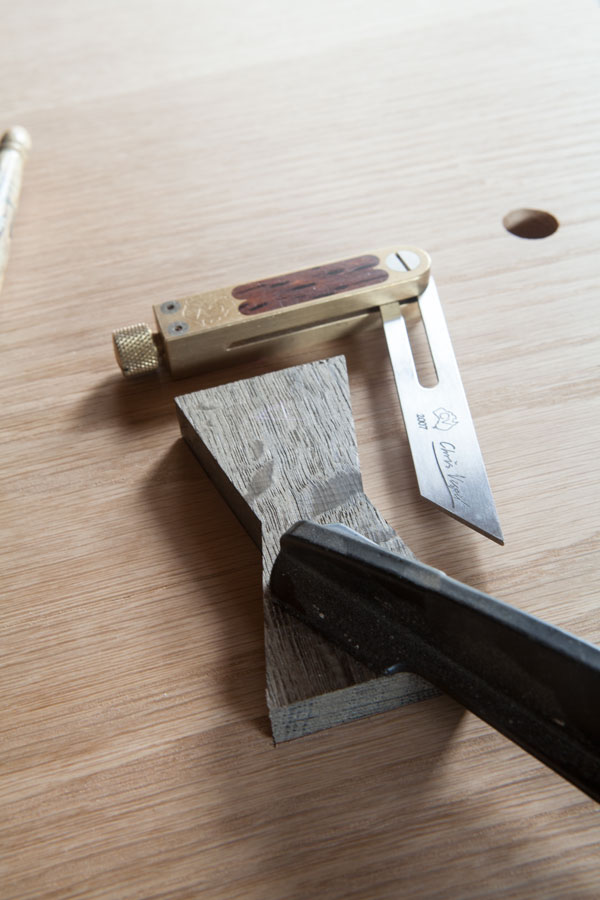
Clamp the key across the work with the narrow neck right over the split. Then trace the shape of the key using a marking knife and a sharp pencil. Remove the key.
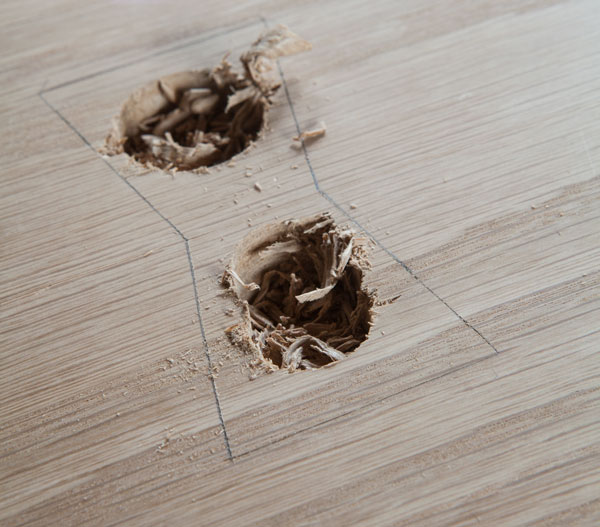
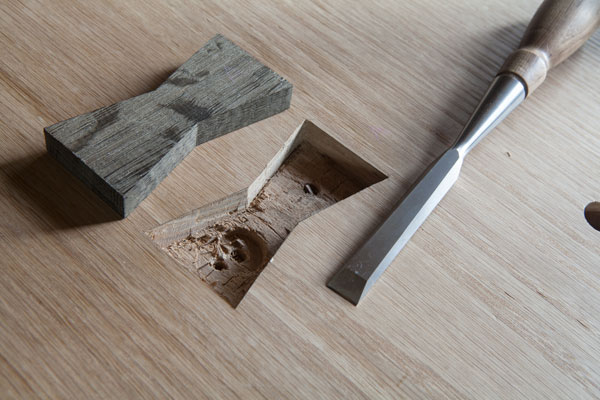
Root out the waste. I like to bore a few holes with an auger to get the process started. Then I chop out the rest of the waste with a chisel. Stay away from the knife lines until the end. Resharpen your chisel and pare to the knife lines. This mortise took about 15 minutes to bore and chop.
Check the walls of the mortise with a small square. They should be 90° or slightly, slightly undercut.
Then put some glue in the mortise and tap the key in. Plane it flush. It shouldn’t require clamping (but clamp it if it does).
I try to keep the process simple. There are lots of variants on this procedure – you can bevel the edges of the key to create a cork effect, but you better practice that first before jumping in.
As you can see, the fit above isn’t perfect. One of my knife lines got a little rounded over. And a tiny speck of grain popped out. The slab can shift around when you insert the key. However, after some planing, some finish and a little black wax it will look seamless.
— Christopher Schwarz
Here are some supplies and tools we find essential in our everyday work around the shop. We may receive a commission from sales referred by our links; however, we have carefully selected these products for their usefulness and quality.




Dude you the man! I love the fact you stick to hand tools for the most part.
I use bubinga for my butterfly keys, esp. on light-colored woods. If the wood I was repairing was dark-colored, I might go for a lighter wood like cherry for contrast. I usually leave the key proud around 3mm (1/8″ for you anglo-saxons), and round the corners with sandpaper before applying. Depending on the use, however, I may go for a flush key (e.g. in a tabletop).
I remove most of the material for the mortise with my dremel micro-tool on its router base, with a 3mm bit, go as close to the edges as I deem safe, then remove the rest with chisels.
I usually use CA glue (if you do this, make sure to wear eye protection – you don’t want it to splash into your eyes when you tap it with the mallet). Depending on the tightness of the fit I may or may not use a clamp to tighten the key for a few minutes, until the glue sets. Usually the fit is tight enough that no clamp is needed.
I find that butterfly keys are decorative enough and easy/fun enough to make, that I sometimes use them even when they aren’t strictly necessary – e.g. to hold in place / decorate scarf joints. In their main use (controlling splits) they are a great solution to difficult problem.
I realize this joint has mechanical strength, but would it be worth the effort to flatten the bottom with a small router plane so as to get a strong glue joint with the bottom face of the key?
I attempted my first three butterflies last summer. 1.5″ thick Wenge keys into a 4″ thick laminated quarter-sawn oak mini-Ruobo for my son. (All of the wood was left from prior projects, but definitely not “scrap.” The wenge was a particularly ignorant choice on my part.) The effort helped my chisel work immensely, but without a band saw I had a really rough time cutting the keys consistently. I think part of my mistake was trying to make the keys so thick. But I also suck at sawing. I am taking a class with Chris next month, and one of my big goals is to learn how to be a half-passable sawyer.
Tilted – looking forward to reading your post and finding out if you have any advise for sawing/shaping the keys. I have seen router jigs that produce both the key and its slot with great consistency, but I’m trying to learn the non-electron-killing way.
Count me as one who puts a very slight taper on the sides(not the ends!) Since this area of the key is a face grain to end grain joint there isn’t much glue strength on the sides (only on the bottom) and as the recess is laid out from the slightly smaller bottom of the key it gives a nice tight fit when driven home.
If I have a rather large split, is it advisable to attempt to pull it together and then apply the key? Might more than one key be used in a severe situation?
Is this just an example or am I blind? I don’t see a split. If there were a spit would you clamp it together before making the key or just use the key to keep if from splitting further.
Nice suggestion. Thanks!
I just did eight of them in a walnut table using bog oak, as well.
My definition of “scrap” changes when it comes to some of my select wood – bog oak, West Indies Satin Wood, Kauri. If it is big enough I can make an escutcheon with it, it isn’t scrap. 🙂
I was working on a blog post outlining my technique. I wanted to get that done before I leave for Handworks; might be a late Wednesday night post. I have a few extra steps in mine, but the end result is the same, isn’t it? Or close enough, anyway.
One thing I do once I have my border knifed is to deepen it a little and then use a chisel to take a small wedge out from inside the line. I got the technique from your suggestion to do that with saw lines to create a little ditch for the saw to sit in. I think it helps preserve the edge; at least it does for me.