We may receive a commission when you use our affiliate links. However, this does not impact our recommendations.
Though I’ve been a non-editor at both Popular Woodworking and The Fine Tool Journal for almost three years now, I still have debts to pay. And I take those debts seriously.
One of my first reviews for The Fine Tool Journal, which was reprinted in the book “Handplane Essentials,” is a review of Clifton bench planes. I had some of the first-ever Clifton planes, which were both spectacular and troubling. The Clifton No. 3 I purchased back then was as fine a tool as I’ve ever used, and I sold it to a student only after excessive begging on his part. (Personal note: I tried to buy the tool back from him and he’d sold it to a relative. Not happy.)
The Clifton No. 7, on the other hand, had some troubles. The mouth chipped out after only a little work. And the lateral adjuster became unwelded after only a little more work. That plane went back to the factory and was replaced with a nice one.
The No. 5 I tested had a warped sole, but it was remedied quickly.
All in all, the planes were excellent, but they exhibited some little quirks that are characteristic of any manufacturer when it launches a new product line.
I caught a lot of flack for that review, which was first published 10 years ago. I still stand by my impressions at the time, but I always meant to update the review as Clifton introduced new models. The problem was the international exchange rate. When I wrote my first review, Cliftons were a bargain. After a year or so, Cliftons were considerably more expensive than a Lie-Nielsen plane, so they became less popular. So there was little urgency to update my review.
In 2012 at the request of Clifton, I took down my original review of the planes that was posted on WKFineTools.com. I resolved again to update the review. But – and I’ll be honest here – I really am trying to get away from reviewing equipment. So I was slow to dive into another review.
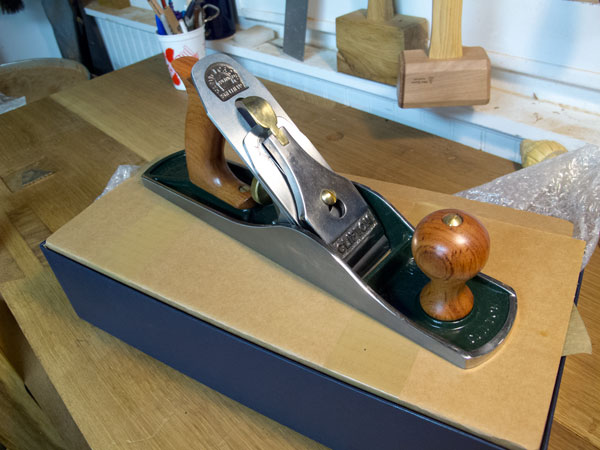
As I am headed to England this summer to teach, I decided I should update my review, which was almost as old as my 13-year-old daughter. So I purchased a Clifton No. 5 from Tools for Working Wood for $335. Joel Moskowitz, the owner of Tools for Working Wood, assured me the tool I ordered was right off the rack and had not been tampered with. Joel has never lied to me or deceived me in all the years I have known him.
Today I started the long process of evaluating the No. 5. And instead of writing a simple evaluation (it’s great! or it’s not great!), I decided to show you how I go about evaluating a handplane when I review it.
1. Initial Unpacking
This is where I look for major faults. Does everything work as it should before I sharpen it up? You would be surprised how many tools fail at this point. With the Clifton, the only thing I could note is that the rear tote was loose. This is common with tools from England. A screwdriver tightened it up.
I then remove all the surface oil, which all tools have to protect them during shipment. And I evaluated the plane’s sole.
2. Sole Flatness
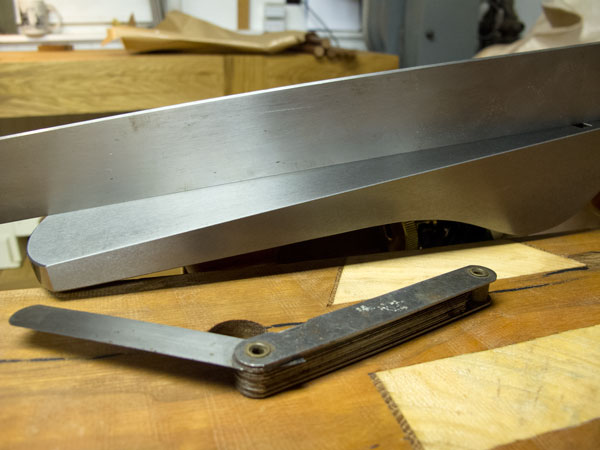
I am not a card-carrying member of the “Flat Sole Society.” For me, the tool has to do its job. No more. But before I put a plane to wood, I like to measure the sole’s flatness with a reasonable measuring instrument so that I have a record of it before I start working.
I use a machinist’s straightedge and feeler gauges. (Looking for light leaking through a straightedge is a fool’s errand, in my opinion.) I use a .003” feeler gauge and look for gaps everywhere on the sole. The .003” is about half the thickness of a piece of typing paper and is probably too fine a gauge of the flatness.
The Clifton No. 5 passed with no gaps anywhere on its sole.
3. The Iron
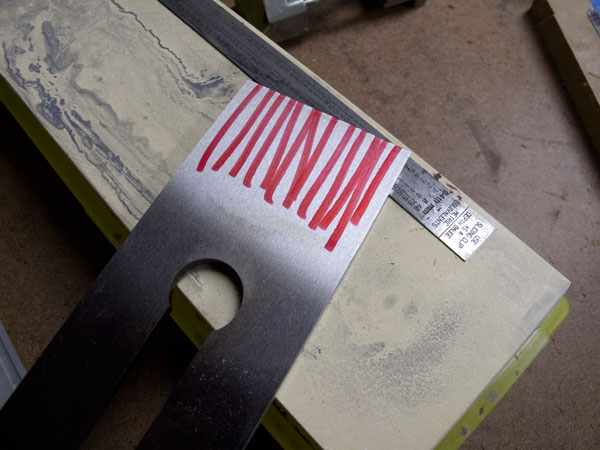
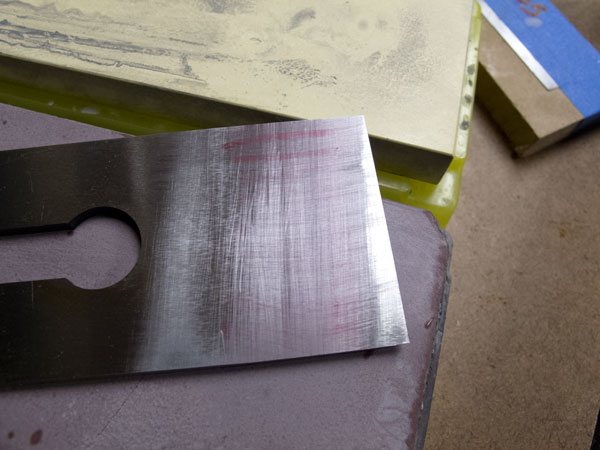
Evaluating an iron takes many sharpening cycles. But I always record my initial impressions of the iron. I color the back of the iron with a permanent marker and then go to work on a coarse sharpening stone. I gauge my progress after every 10 strokes.
With the Clifton, I was definitely impressed. After 10 strokes on a coarse stone, the leading edge was flat. Then it was just a matter of finishing the job on the polishing stones. It was every bit as good as a Lie-Nielsen or the super-dang-flat Veritas irons.
4. In Use
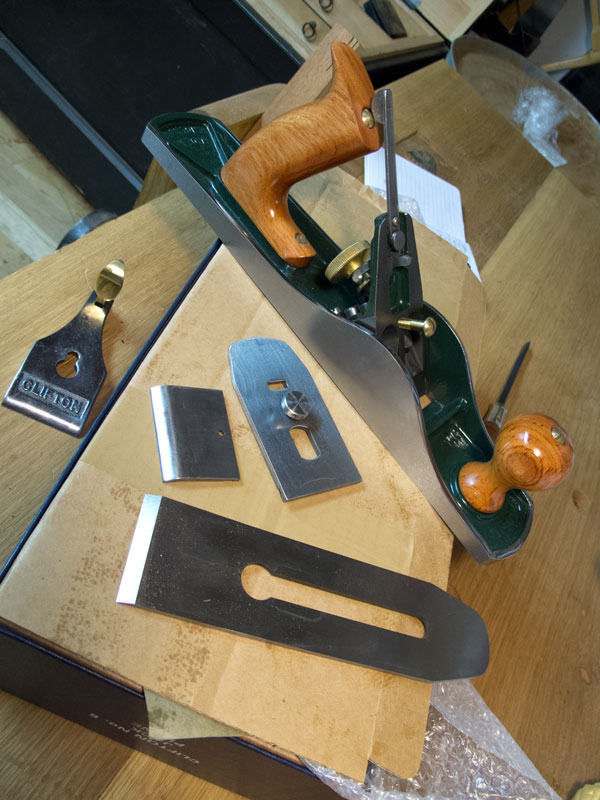
Then I assemble the plane and try to find its limits. How tight can the mouth be before it clogs? How close can the chipbreaker get to the leading edge? How does the iron adjustment function (both lateral adjustment and the old in-and-out)?
The Clifton has an unusual cap iron/chipbreaker, which is in two pieces. This makes it easier to sharpen the iron, but it is a little fussy to adjust the breaker super-close to the cutting edge. I tried to get it .005” from the cutting edge, but the cap iron moved too much to make this feasible. So I dropped back to .007” and things started working fine.
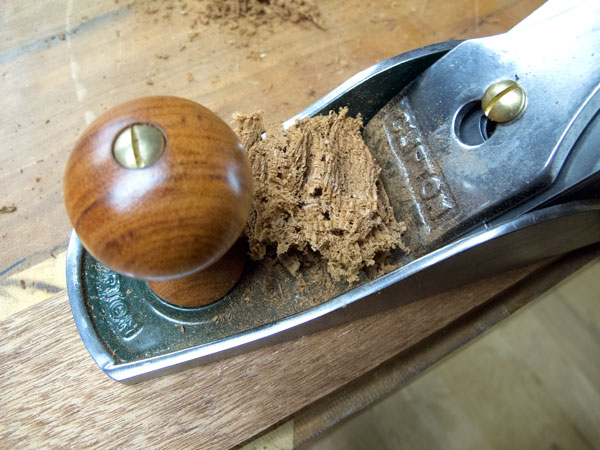
I planed up some ribbon sapele with this setting with little trouble. So far, the two-piece chipbreaker is my only quibble. I wish it were just one piece, like the breaker that Veritas and Lie-Nielsen make. The Clifton breaker is dead flat and mates perfectly against the back of the iron. But it shifts forward and back a tad, which makes a super-tight setting a little fussy (but totally possible).
Tomorrow I leave for Maryland to teach a class in building a tool chest and am bringing the Clifton along for the journey. After a month or so of hard use, I’ll have more impressions. But at this point, the Clifton is definitely a winner.
— Christopher Schwarz
Here are some supplies and tools we find essential in our everyday work around the shop. We may receive a commission from sales referred by our links; however, we have carefully selected these products for their usefulness and quality.




Chris,
I had a very similar experience with the first Cliftons to be released in UK.
They are much better now.
I have a simple fix for the twisting front plate of the chipbreaker. Use a centre punch firmly, adjacent to the back edge of the slot, at either sideof the main plate. This will cause a bulge which effectively narrows the slot and removes slop. I managed to set mine around 4-5 thou from the edge yesterday.
Thanks for the update Chris. Where do you publish your teaching/workshop schedule? Coming to OH or western PA anytime soon?
Hey Chris, thanks for the review. I bought the #6 from Highland in 2007 and was/am very pleased with it. ‘Bout a month after I got it the lateral adjustment ‘yoke’ broke….I called and soon received a whole new frog. I’ve used it to flatten my bench 3 times (doggone twin screw vise kept causing the end to sag) and I absolutely love this plane. I, too, had to get used to the 2 piece chip breaker and was concerned that the groove would wear and cause it to loosen but it has really convinced me that it is a credible design. I really like the weight when flattening stock….makes an significant difference.
Good luck in your travels….looking forward to seeing you in San Diego this fall.
It will be interesting to see what you think of the iron/blade over the next month. They seem to be made in more of the old ways (hand forged), and at $80 for a 2″ iron, I hope it performs to the level that is should.
I have thought of putting the money down for one of the blades because I have a love for 01 steel, and their’s seems like it “should” be the best.
I always appreciate your honest reviews, Chris, from pointing out the good and the bad to the fact that you pay for the tools you review. I always feel like I should take a review with a pillar of salt when the reviewer got it for free from the company.