


We may receive a commission when you use our affiliate links. However, this does not impact our recommendations.
As a woodworker and former editor of a woodworking magazine, I am amazed at how some woodworkers decline (or refuse) to share their sources for hardware or finishing supplies.
Even with the Internet, search engines and friendly online assistants, there are still some dark arts in our craft.
I refuse to have secrets. Secrets have almost snuffed our craft several times in the last few hundred years. So here is one of my favorite sources for hardware: McMaster-Carr. If you want something that is metal or plastic, McMaster-Carr probably carries it. The prices are solid. And their delivery speed is nothing less than spectacular. In fact, I wonder if they sometimes have trucks trolling my neighborhood that are filled with bolts, nuts, screws and washers.
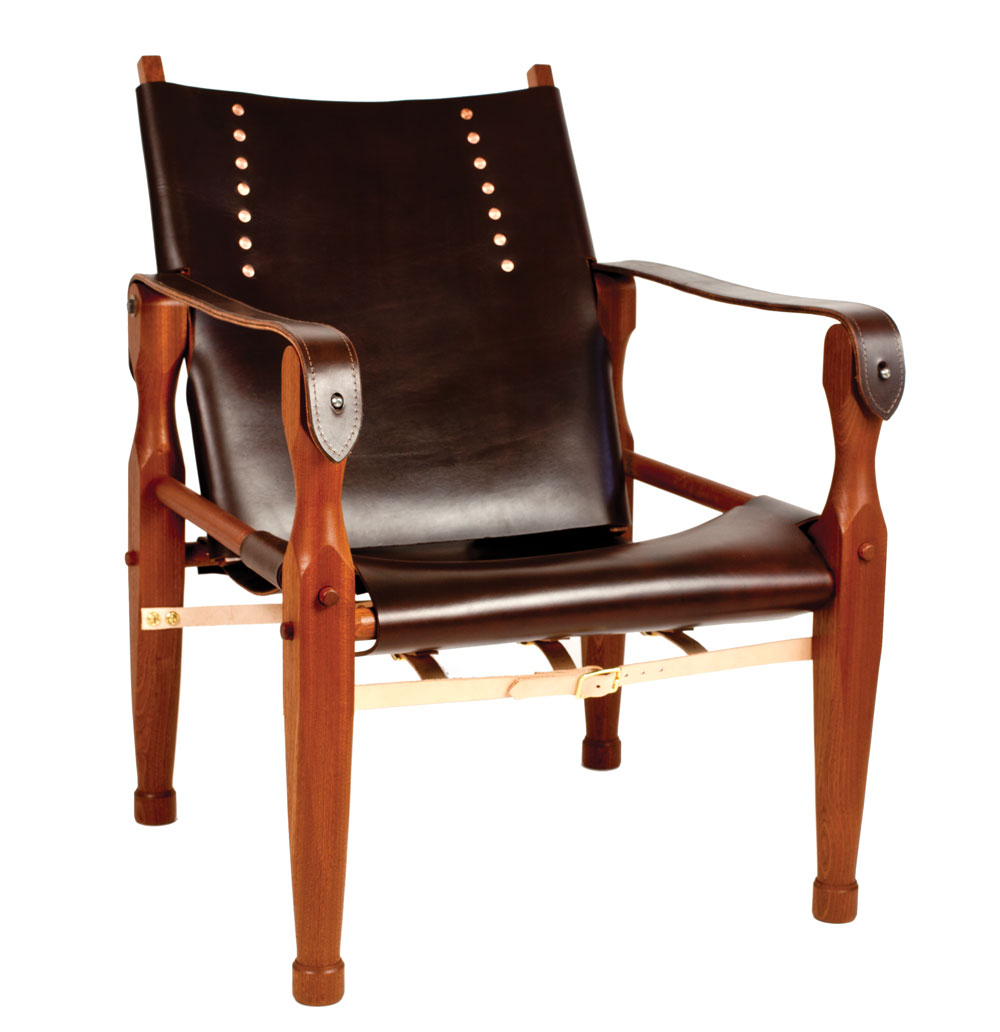
Today I ordered a batch of hardware for more Roorkee chairs and thought I should share the McMaster-Carr links if you were thinking of making one of these campaign pieces. I am making my 23rd and 24th chairs this week….
Here’s my list of items to build the chairs.
1. You need eight buckles for the leather straps for one chair. You can get those from Tandy Leather or from BuckleGuy.com. I use the 3/4” brass center-bar buckles, item 1210. Nice stuff.
2. Attaching the leather arms to the frame. At the front of the chair, I use two 13mm ball studs with a 5/16″-18 male thread. They come zinc-plated, and I strip the zinc with citric acid. The McMaster-Carr item number is: 9512K18. At the back of the chair, I attach the arms two different ways: With brass slotted screws and finishing washers, or with two brass knurled flared-head thumbscrews, 1/4-20 Thread, 1/2″ Long. Item No.: 92421A537. The thumbscrews go into brass tapping inserts (sometimes called “threaded inserts”). I use two with 1/4-20 internal threads, 1/2″ length. Item No.: 90016A029.
3. To attach the back pieces to the frame, I use two silicone bronze round-head, square-neck bolts, 5/16″-18, 3″ long. Item No.: 94050A335. The bolts are secured with two brass nylon-insert hex locknuts, 5/16″-18 thread, 1/2″ width, 11/32″ height. Item No.: 92092A030. And four brass flat washers, 5/16″ screw size, 7/8″ OD, .05″-.08″ thick. Item No. 92916A191.
4. To attach the belting to the frame I use brass screws and finishing washers. These are for a No. 10 screw size, .59″ OD. Item No. 92921A011. If you don’t have brass slotted screws, McMaster-Carr can hook you up. Oval-head screw for wood, slotted, brass, No. 10, 1″ Long, packs of 50. Item No. 92408A247.
5. No. 9 x 1/2” copper rivets make all the leather-to-leather joints. Here’s the link to them at Tandy.
Oh, and if you need plans for a Roorkee, it’s in the October 2012 issue of Popular Woodworking Magazine, which you can buy at ShopWoodworking.
— Christopher Schwarz
Here are some supplies and tools we find essential in our everyday work around the shop. We may receive a commission from sales referred by our links; however, we have carefully selected these products for their usefulness and quality.


I don’t see any supplier for leather. Did I miss it?
Contemplating making the chair and went through the sources and filled my shopping carts without finalizing. As with most nice things there is a significant financial commitment but the finished chair is very appealing – to me has a medieval look – a chair to pull up next to King Chris.
Got the video download, which I always find helpful.
Still thinking.
Holy cow! I ordered the hardware for two chairs from McMaster-Carr last evening and got it this afternoon! And with every line item in its own plastic bag numbered to match the packing list! How do they do that?
Chris – I have the October issue where you build this chair, but i cannot recall if you have any instructions on how you finish the leather to get it to look that beautiful chocolate color in the photo.
Also, not related to this artical, but have you every provided an artical or instructions on making the little leather doodads such as chisel rolls, the block plane holster from your tool chest, and especially the little pen/pencil/tool caddy behind your saw till on the lid of your dutch tool chest? Not sure about others, but I would love to see more info on those. I don’t ever with to be a full on leather worker but would love to be able to work in it for rough tool protection and storage projects.
Sorry Chris, it is SILICON bronze screws, not SILICONE bronze. Pet peeve of mine. The latter is what makes certain implants skwooshy, the former would make for very un-skwooshy implants indeed.
More on topic, thanks for sharing your sources. I can’t understand why anyone would hesitate to do the same. Really, for some is their ego really tied to the secret place they buy ‘those screws’? Pathetic if true.
I love it that you share hardware sources. It saves a ton of time when I want to build “what Chris built” and additional hardware sources gives me more tools in the design toolbox.
1000000% better than a useless cut list.
Thanks, their is value in your research time and I appreciate the sharing.
As a toolmaker I’ve long used McMaster-Carr as a source for all sorts of needs. They are indeed my go to one-stop supply shop. A few other resources that can come in handy are Grainger, MSC, and Fastenal. I do share your aversion for secrets but not so much your love for roorkee chairs. It would be a boring world if we were all exactly alike.
Yeah, and the people that refuse to share sources are the first to lament when the store closes ( due to lack of sales).