We may receive a commission when you use our affiliate links. However, this does not impact our recommendations.
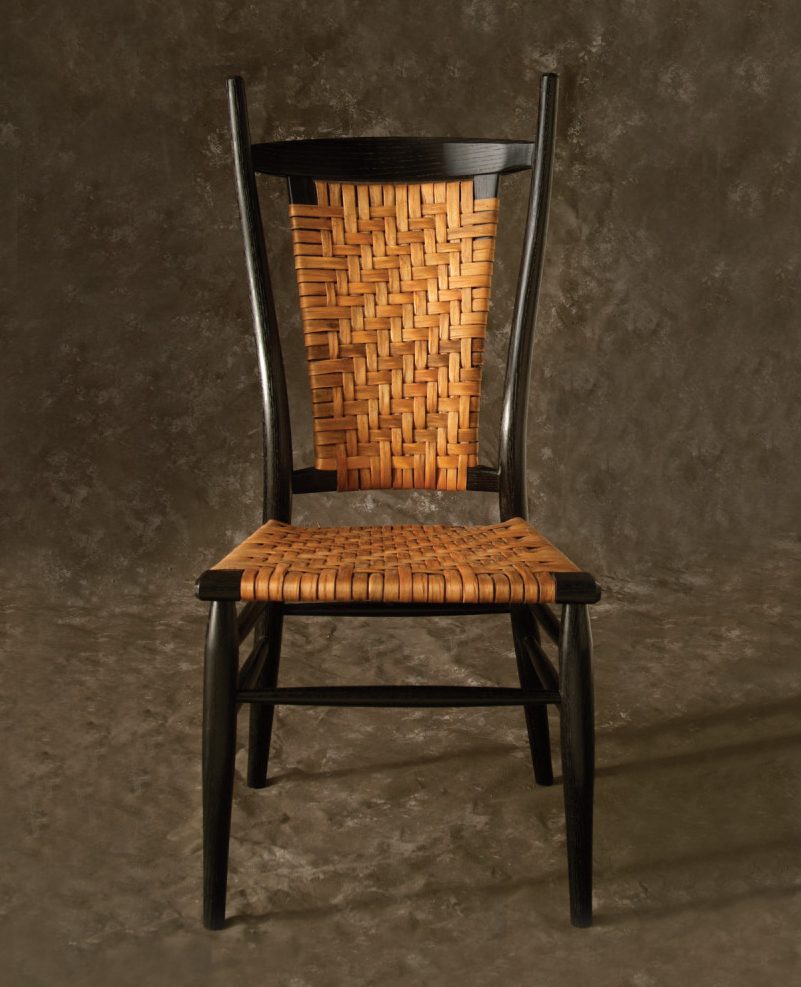
Achieve a deep, rich black using household ingredients plus some powder from a South American evergreen.
It’s hard to improve on the natural beauty of wood with all its various hues and grain patterns. For that reason I generally prefer a natural oil finish to just about anything. But there are occasions when there is already too much of a good thing in one space. I occasionally like to see black chairs around a particularly striking tabletop or a black frame showcasing woven hickory bark in the back and seat of a chair. For whatever reason I decide to ebonize, I prefer to do so naturally. I have tried ngr (non-grain-raising) stains, aniline dyes, and oil stains and they all have their advantages for specific situations. But for depth and durability, I prefer ebonizing with iron.
I have been experimenting with using iron to stain wood for more than 20 years. I have read a little bit about it, but most of what I have learned came through experimentation. Iron staining, or ebonizing, generally uses a reaction between iron oxide and the natural tannins in wood to create a natural-looking black that is actually created in the fibers of the wood rather than a stain sitting on top. This is why it is so durable. It is integral, not superficial. I have also found it to be very light-fast.
The problem with this staining method is that it traditionally relies on the wood having enough tannic acid to react with the iron. This limits the wood choices and makes the results unpredictable. Oak is commonly used because of its high tannic acid content, and walnut is a very reliable wood for ebonizing. But even within these species there are a lot of variations.
The trick I have found to getting consistent results is to control the reaction independently without relying on the wood’s varying chemistry. I saw an encouraging example of this in a chair by Randy Cochran in Knoxville, Tenn. He had ebonized a chair seat using chemical tannic acid first to saturate the fibers of the wood. Then he applied a rich iron solution made by soaking rusty nails in water for a few weeks.
The effect was an impressively deep black, but with a bluish tint like indelible marker ink. It worked well for his contemporary chair design, but I was in search of something more natural looking.
I experimented with adding chemical tannic acid and got nearly identical results to Randy’s. I tried adding other stains afterward to tone down the blue tint, but I didn’t like the results. When I later was explaining this problem to my father, he mentioned that he used a tree bark called “quebracho” for tanning hides. This was traditionally used because of its high tannic acid content. So I borrowed a batch of this bark powder from his stash to try.
The Trick: Bark Powder Tea
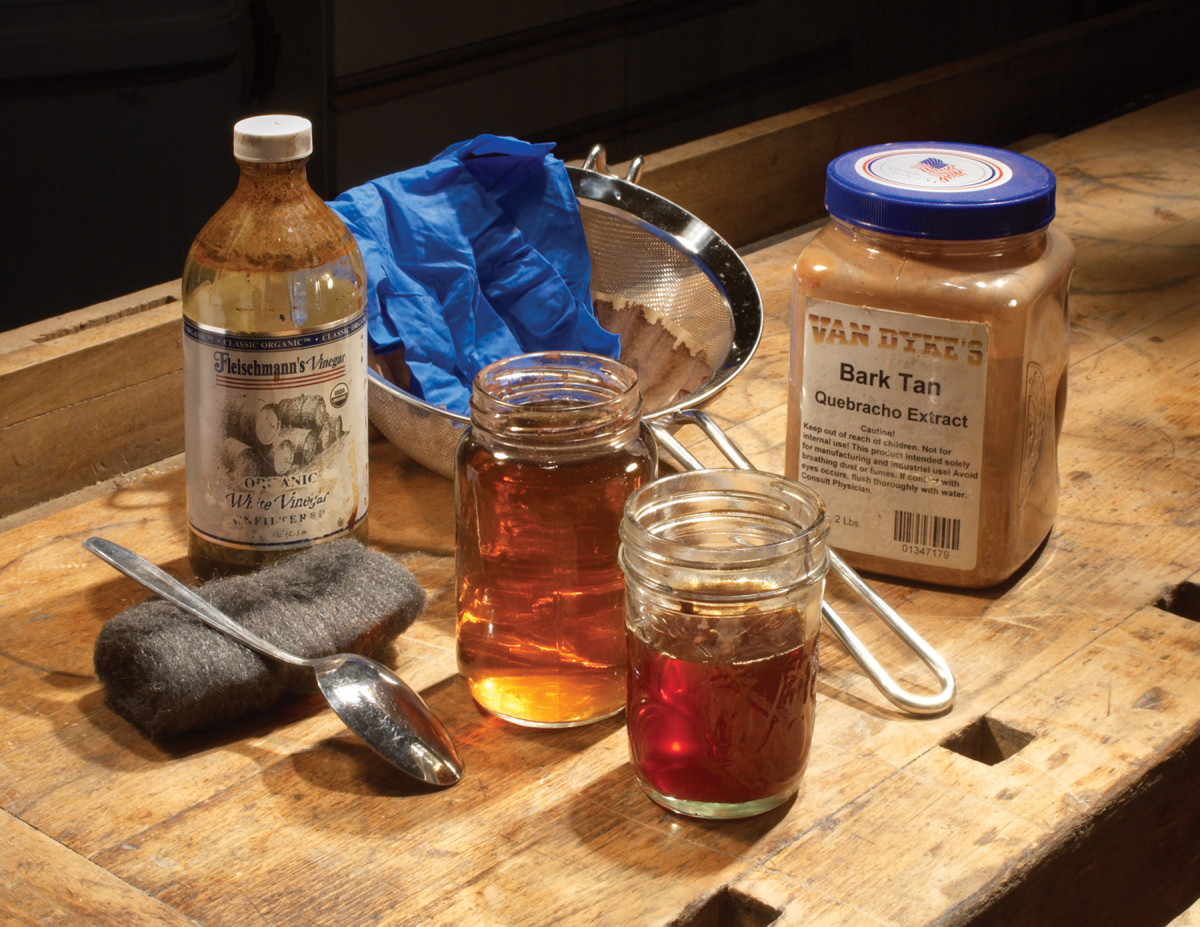
The basic kit. The materials needed for the process are basic and cheap, but the bark powder needs to be mail-ordered.
Making a tea of the bark powder to saturate the wood did a lot to increase the tannic acid content. Using the bark tea first, then adding a solution of vinegar and iron once the wood had dried, I finally started getting close to the effect I was looking for. It was a bit chalky though, and not the intensity I wanted. Topping it off with another coat of the bark tea made all the difference. The tea completely eliminated the chalky look and the piece became a deep, coal black.
The process of ebonizing this way is pretty straightforward. Soak the wood surface with bark tea, wait until the surface moisture absorbs into the wood, then add the iron solution. Follow up with a bark tea “rinse.”
What You’ll Need
■ One quart of Heinz white vinegar (in a plastic bottle)
■ One clean, large-mouth quart jar
■ One stainless steel spoon for stirring
■ One basket-type coffee filter
■ One sieve
■ One pint jar (for mixing)
■ Two small containers (quart jar lids are big enough) or squirt bottles
■ Paper towels or two brushes
■ Latex gloves
Making the Solutions
For the iron I have used rusty steel wool and clean steel wood. I get about the same staining results from either, but rust solids build up in the pores from the rusted version. Any iron source will likely work, but the fine filaments of steel wool dissolve faster than anything else I have tried. I just wash a fresh pad of #0000 steel wool in soap and hot water to remove the oil and shove it into a plastic quart bottle of Heinz white vinegar. I don’t know why, but I have had better luck with the Heinz brand.
It can take a week or more for the steel wool to dissolve. If you need faster results you can bring the steel wool and vinegar to a boil, then remove it from the heat. I can sometimes get a working solution in a day by boiling the vinegar and steel wool. You’ll want a lot of ventilation for this, as the gasses produced are obnoxious. Either way you go, when the steel wool has all been eaten by the vinegar it is ready to strain. I put a coffee filter in the sieve and slowly pour the solution through it into the quart jar. Then I pour it back into the plastic jug. The solution should be either light gray or light reddish brown. I don’t know why it varies, but it doesn’t seem to matter. In either case the liquid should be quite clear rather than cloudy.
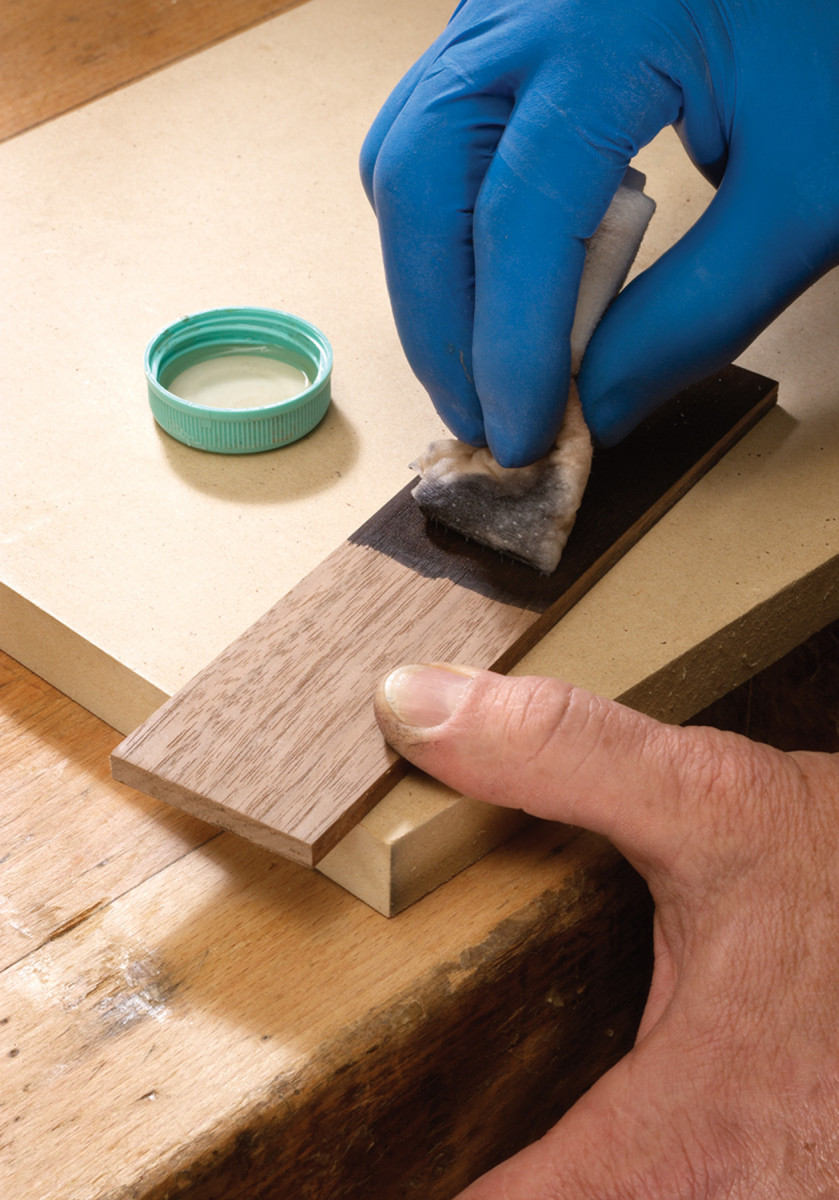
Iron-on color. Above, I’m wiping the first iron layer onto tea-saturated walnut.
Before using the vinegar and iron solution, I always test it with a stick of oak or cherry dipped in the solution. It should turn fairly dark in a few minutes. If not, you can try just waiting another day or make another batch. I haven’t found a cure for this particular failure. Nor do I know why it sometimes doesn’t work well. It might be that I’m not always being thorough in getting the oil out of the steel wool. I highly recommend making this iron solution at least a week or more in advance of actually needing to stain a project. You’ll want to get the feel of the whole process before putting it on a real piece of furniture.
The iron solution keeps for months in the jug. As the steel wool dissolves, gas is produced. And if the container is sealed it can burst. Just because the iron is visibly dissolved doesn’t mean the reaction has stopped. So be sure there is an escape hole in the lid. A 1⁄32” hole is adequate.
The bark tea is easy to prepare and can be made up right before using it. I just put a heaping tablespoon of bark powder in a pint of hot tap water and stir it up well. (It helps to mix up a slurry of the powder with a couple tablespoons of water first to get all the powder mixed, then add the rest of the water slowly while stirring. This makes it easier to avoid clumping.)
The Process
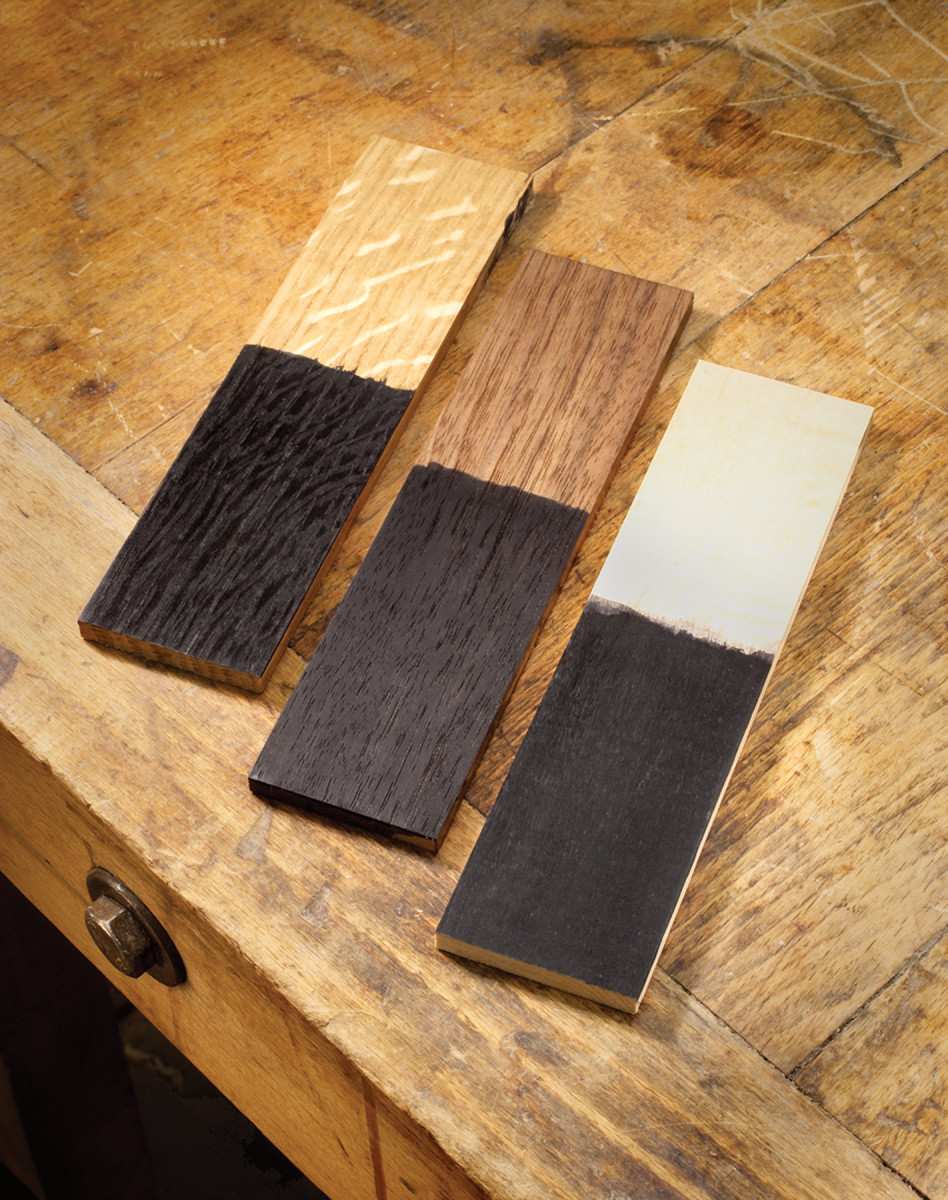
Different woods, same result. Three samples of ebonized wood (oak, walnut and maple) showing color consistency with the stain with the grain variations being prominent.
Be sure you sand the furniture well and raise the grain at least twice before the last sanding. I would stop after #320 grit to avoid burnishing the wood. It is possible to burnish with #320, so use a light touch and fresh paper. If you have to sand the wood to remove raised grain after staining, you’ll need to start the staining process over. I have experimented with using the bark tea to raise the grain between the last two sandings. It doesn’t take a lot of bark tea dust up your nose to realize this is probably not a healthy method, even with a dust mask.
Apply a good soaking amount of bark tea to the assembled furniture and allow it to soak in. Be careful not to rub the wood; just lightly stroke the surface with the solution. If there are places where the tea can pool, blot off any excess that collects there. Once the tea has soaked in you can apply the iron solution. I like to do this when the wood is still damp, but not visibly wet. If there is tea still sitting on the wood surface the iron will react to that tea rather than the tea that has soaked into the wood. You want the reaction to happen in the wood, not on top of the wood.
Once this tea has soaked in, apply a liberal amount of the iron solution with light strokes. The wood should start turning black immediately. Keep applying until every part is turning black. Look at the piece from several angles to make sure you didn’t leave any part unstained.
By this time you have put a lot of water on the piece. I recommend letting it dry for a few hours before finishing it off with the tea rinse. Once dry you can use the iron deposits left on the surface as a fine abrasive to polish the wood. Just use a clean rag and buff the piece as well as you can. Be gentle so you don’t burnish the wood too much, just in case you need to re-stain. This not only polishes the wood, but it also removes a lot of the loose iron deposits. Once it is looking pretty even in sheen, it’s time for the rinse. Just apply another coat of the bark tea and “wash” the surface with it just like you were washing anything. Let that dry and buff one more time. This should polish the piece very nicely.
The last step is to wash the piece off with clear water. This is to remove any residue and to help see if the stain is what you are looking for. The water makes it easier to see where you’ve missed a spot. If you do find a light spot, you’ll need to sand that part lightly with #320 grit before starting the staining process at step one. You don’t need to re-stain the whole piece, but I have only been able to fix a missed spot by sanding the whole part and starting over with that part. You don’t need to remove all the stain, just sand enough to scratch the surface everywhere so the solutions can penetrate more easily.
Problems and Solutions
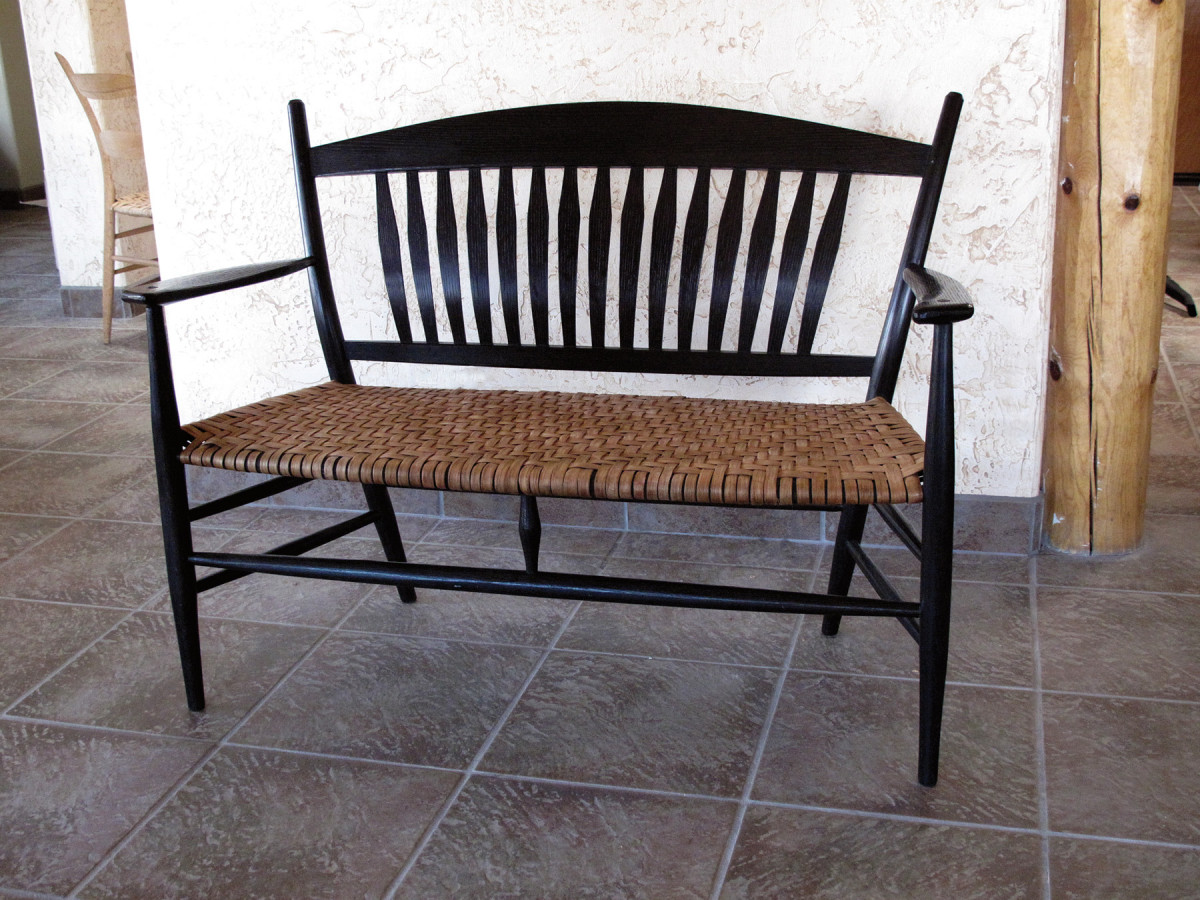
Settee. Like the chair in the opener, this settee features ebonized wood and a woven hickory bark seat.
As simple as it sounds I have run into some perplexing problems and inconsistencies with ebonizing. They all have solutions, but with proper attention they can be avoided.
If you apply the two solutions with a rag and wipe with too much pressure, you can compress the fibers. It doesn’t take much pressure to do this. Compressed wood will not absorb well so the staining will only happen on the surface, not in the fibers. As soon as you wipe off the surface after cleaning, most of the black comes off too. If this happens you’ll need to sand again with #180 then #220 grit. Then start the process over.
To prevent this problem you can brush on the liquid each time or apply it with a paper towel using light brushing strokes, keeping finger pressure off the wood.
The second problem is that a build-up of solids can occur on the surface. This is often from the bark tea being too strong, or poorly mixed. You’ll notice a texture change on the surface of the wood when this happens. The only way I have been able to fix this is to sand and start over.
Sometimes it seems impossible to get the solutions into the pores of oak, especially white oak. A little soap in the liquids can help. I have had my best luck fixing this by just sanding after the first iron reaction has dried and starting the process all over. This sanding forces ebonized wood dust, iron and bark tea residue into the pores. That sounds like a problem in itself, but it sure seems to work, and I haven’t had any trouble with this dust crumbling out of the pores later. The subsequent iron and tannic mixes either wash out the dust or bond it in place.
I have noticed that the solution needs to be fairly pure when applied to the wood. If you use the same rag to apply both solutions, the chemical reaction will happen in the applicator rather than in the wood. You’ll be essentially applying ink to the surface rather than creating the reaction you are looking for in the wood. I recommend using a squirt bottle to get the solution onto the rag or brush. That way you never dip into the solution and contaminate it. I have also used jar lids to dispense a small amount of each solution and I only dip my brush into the jar lid, never into the main container.
Every time the vinegar rag goes over the tea-soaked wood it gets contaminated. The same happens when you use the tea rag in the rinse step. A little bit of this is not critical, but you’ll need to keep contamination to a minimum. Change paper towels often, or rinse the brushes periodically to make sure only pure solution is applied to the wood.
You’ll need to keep the two brushes or paper towels separate. Never dip the same brush or towel into both liquids or you’ll spoil the batch. Eventually any batch will get contaminated in the process of ebonizing, that’s why I work out of jar lids or squirt bottles. When using the jar lids, I use up the solution before it gets too contaminated. A squirt bottle is best.
It is possible to stain the parts before assembly. I used to do this, but the hassle of keeping tenons and mortises clean is more work than staining around lots of joined pieces. It’s doable either way, and the design of the piece will dictate which is more practical. This process will take patience, as does any finishing.
In my experience it tends to add about 20 percent to the cost of any project. Figuring that in to your expectation for completion time will help set reasonable goals. This is not a project to knock out in the evening after a long day at the office. Start in the morning and try to avoid interruptions. You can stop at the end of any step and come back to it later with little if any adverse effect, but I do best when I can stay with it all the way through. I also recommend only staining one piece of furniture at a time. It won’t likely take much longer and I find I do a better job with fewer parts to keep up with. Ebonizing can be a lot of fun and it’s a great option to add to your offerings.
Here are some supplies and tools we find essential in our everyday work around the shop. We may receive a commission from sales referred by our links; however, we have carefully selected these products for their usefulness and quality.



I’ve been told by a very serious organic foods researcher that Heinz white vinegar is the only non-organic white vinegar on the market that is actually food-based (if memory servers, it is rice). Other inexpensive, non-organic white vinegars are petroleum-based products. That may explain why you have more consistent results with Heinz white vinegar.
When you are done ebonizing the wood, do you need to use another finish to protect?