We may receive a commission when you use our affiliate links. However, this does not impact our recommendations.
Tips for Tool Storage
Organize your shop with these weekend projects.
By Tom Caspar
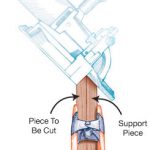
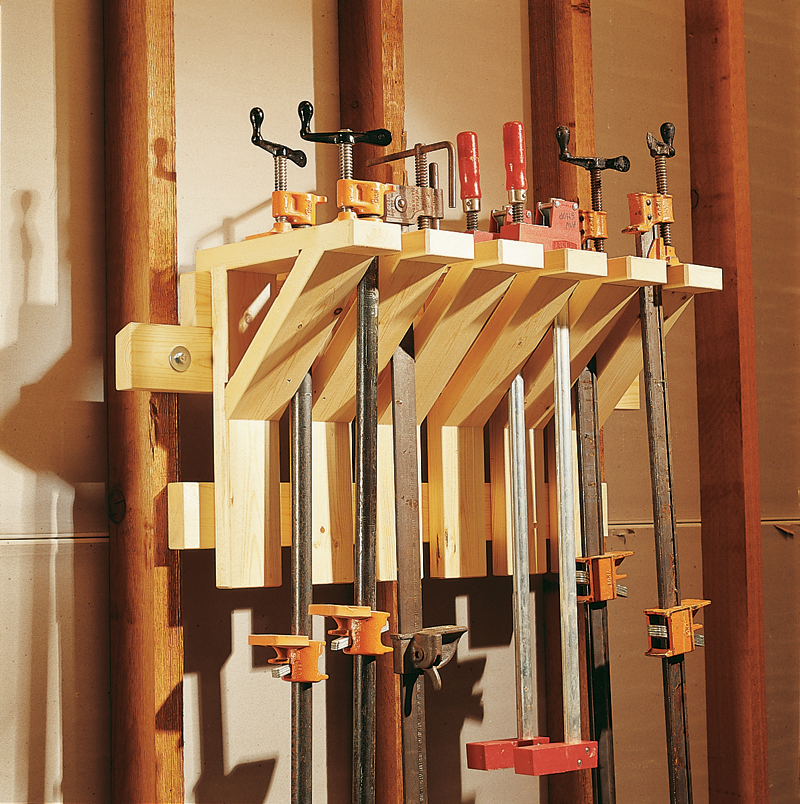
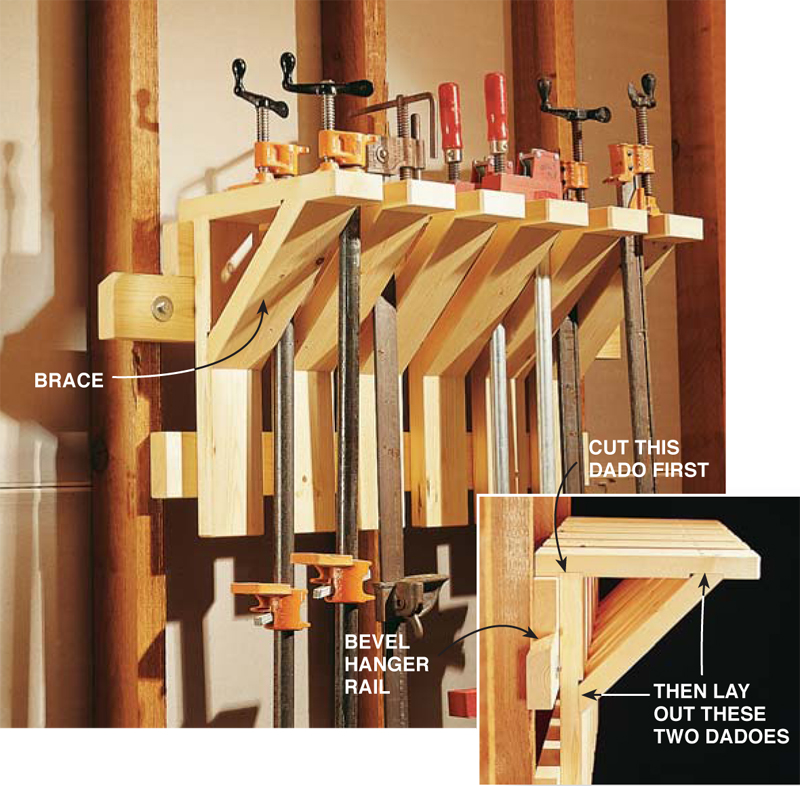
Clamp WarehouseHang your long, heavy clamps on this rack designed for strength. The braces are notched into the bracket arms in a simple version of a timber-frame joint. Mill 2×4 dimensional lumber straight and square to make these brackets. The braces form a 45-degree triangle with the two arms. Miter the ends of the braces first. Then cut shallow dadoes into the horizontal arms. Assemble one pair of arms on a workbench. Make sure they’re square. Lay a brace on top of the arms and mark the positions and depth of the dadoes. Assemble with glue and screws. Cut a 30-degree bevel on the top rail and hanger rail. Space the brackets 15⁄8-in. apart. Drill holes in the hanger rail for large lag screws and space them to hit studs. Mount and level the hanger rail first, then place the clamp rack on it. If you fasten a vertical arm to the wall, the rack will be locked in place so it won’t lift off the hanger rail. |
Click any image to view a larger version.
|
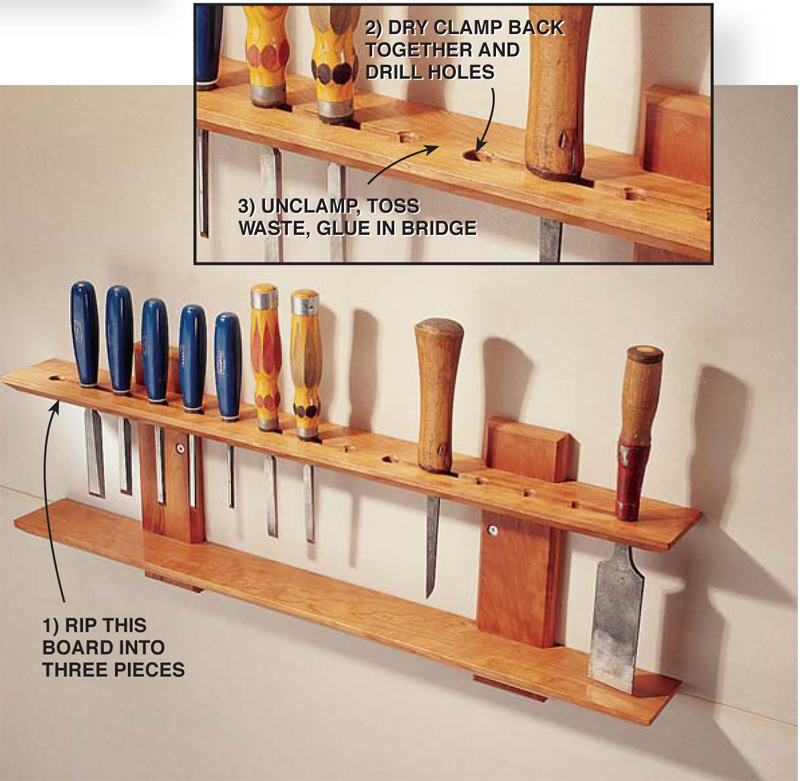
Chisel CorralWhere’s the 1⁄2-in. chisel? When all the handles of your chisels look alike, you’ve got to see the blades, too. Grabbing the right size is easy with this open rack. The long slot allows you to store chisels with blades wider than the holes. The bottom shelf prevents you from brushing up against sharp edges. Make the rack by ripping three lengths of wood from one wide board. Cut the center piece 3⁄8-in. wide, then clamp them back together (without glue). Drill 5⁄8-in. dia. holes spaced 2-in. apart down the middle of the center piece. Unclamp the three pieces. Crosscut the center piece to make three short bridges, one from each end and one from the middle. Glue the wide board back together with the bridges separating the outer boards. Cut 3⁄8-in.-deep dadoes into the 3⁄4-in. uprights and shelf. Reinforce with screws from the back. |
 |
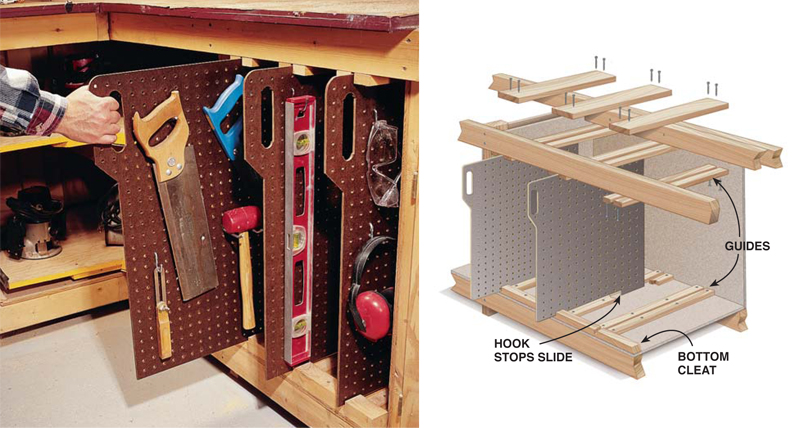
Tool SlidesHang tools on Peg-Board slides without taking up valuable wall space. Dozens of hook styles are available—you’ll probably find one to fit every tool. Top and bottom guides keep the slides on track. Make the dadoes wide enough for the slides to travel easily in the cleats. A hook at the back end of the slide stops against the bottom cleat, so you can’t accidentally pull the slide out all the way. Source: The best hooks to use on the slides are |
 |
Tool CabinetStore your small tools in this simple, easy-to-build plywood cabinet. The shallow drawers are ideal for layout tools or carving gouges. Deep drawers hold marking gauges and block planes. Place your cabinet on a shelf or hang it from a wall by fastening through the back. Use 1⁄2-in.-thick ApplePly or Baltic birch for the case and back, 1⁄4-in.-tempered hardboard for the drawer bottoms, and pine for the drawer sides. The drawer bottoms do double duty. They function as slides and pulls as well. Cut 3⁄16-in.-deep dadoes in the case’s sides for the drawer bottoms to slide in. Stagger the dadoes in the middle divider so it stays strong. The lowest drawers do not have dadoes. Cut rabbets for the cabinet’s back and fasten it with screws or nails. Simple rabbet joints hold the drawer sides together. (The back of the drawer is made the same way as the front.) Nail and glue the sides together, then even up the bottom edges. Glue the sides down to the hardboard bottom. The stiffness of the drawer sides keeps the hardboard from bending under the weight of your tools. Source: To find an ApplePly distributor near |
 |
Magnetic HolderStick awkward tools on a magnetic tool bar. You can find small tools right away when they’re out in the open. When you get a sliver, you’ll know right where the tweezers are!
Source (Note: Product availability and costs are subject to change since original publication date.) Lee Valley |
 |
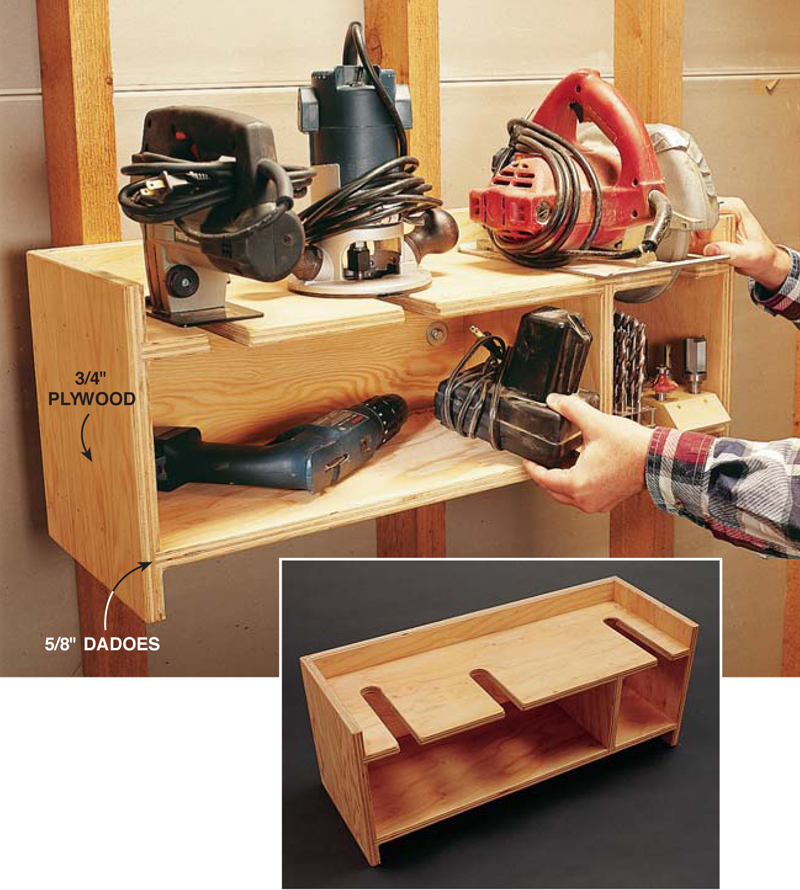
Power Tool RoostPower tools are ready to use if you leave their bits and blades in place. Store them in an upright position on a slotted plywood shelf. Make the box from 3⁄4-in. plywood. The sides are 3⁄4-in. deeper than the shelves. Assemble a stack dado set to make 5⁄8-in.-wide cuts. Move the rip fence 2-in. from the blade. Saw four shallow dadoes across the side pieces. Then rabbet the ends of the shelves to fit in the dadoes. Slide the fence 5⁄8-in. away from the dado blade. Stand the shelves up on end and cut. Put the box together and cut the back to fit. Take the box apart and round over all the edges and slots with a router. Assemble with glue and 4d nails |
 |
Saw Blade BoxSeparate carbide saw blades in slots so their brittle teeth can’t bang against each other. The angled top of this box makes it easier to handle the sharp blades. Make the plywood box by cutting three tall sides and one shorter side. Build your box 7-in. wide and it’ll hold both 71⁄4-in. and 10-in. blades. Pencil a 45-degree line on two side pieces. Lay out the length and spacing of the slots. Rip the slots on the tablesaw, stopping the cut on the pencil line. Then cut the tops of the two sides at 45 degrees. Assemble the box with screws. |
 |
Tool Hang-UpTools won’t bump into each other in this rack. It’s safe, too: you (or your kids) won’t get cut on a tool’s exposed edge. Make dado cuts partway across the width of a 3⁄4-in. board. Each dado should be 1⁄8 in. wider than the tool that fits in it. Screw the board directly to your wall, or fasten it to a piece of plywood first. |
 |
Rust-Free ToolsIf your small hand tools are prone to rusting, apply a light coat of 3-In-One oil or WD-40 and wrap them up in a heavy-duty canvas tool roll.
Source (Note: Product availability and costs are subject to change since original publication date.) Lee Valley Tools, leevalley.com, 800-871-8158, |
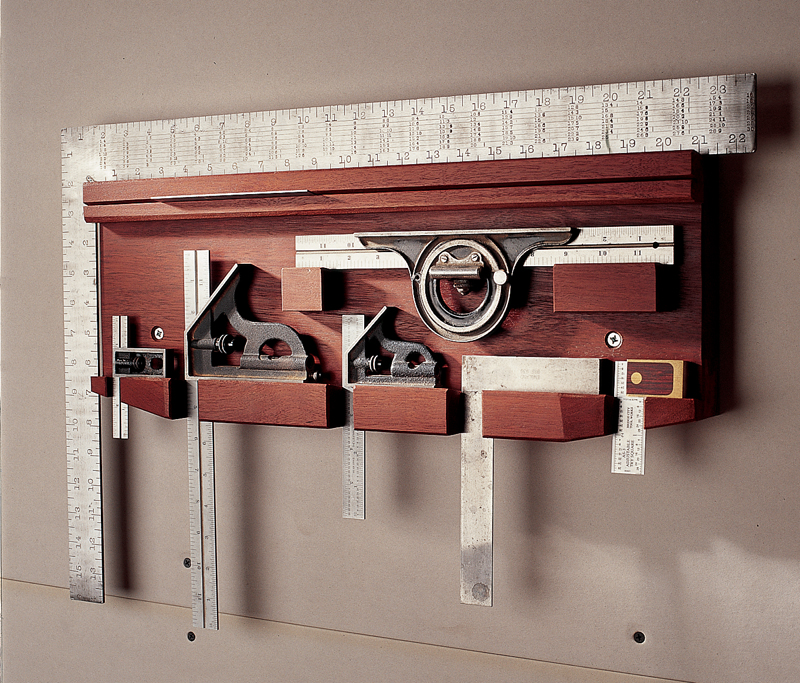 |
Square CornerStore delicate squares in a safe, convenient place. These brackets have sloped tops so the squares stay put if the rack is jiggled. Make the back at least 1-in. thick. Your tools are easier to grab if they sit well away from the wall. This story originally appeared in American Woodworker August 1999, issue #74.
|
 |

Here are some supplies and tools we find essential in our everyday work around the shop. We may receive a commission from sales referred by our links; however, we have carefully selected these products for their usefulness and quality.