We may receive a commission when you use our affiliate links. However, this does not impact our recommendations.
Air-Drying Lumber
It’s the low-cost, low-tech way to dry lumber. Here’s how to do it right.
By Dave Munkittrick
Want a truly cheap and easy way to dry lumber? Consider air drying. It’s the most economical method for removing water from wood, and when done properly, you’ll end up with perfect lumber.
Although air-drying is inexpensive and easy,be aware of these drawbacks:
It’s slow. Depending on the species and your climate, it can take from 2 to 12 months to bring 4/4 lumber from green to air-dry (12- to 20-percent moisture content, depending on your location).
Air-dry isn’t dry enough for indoor use. If you’re planning to use the lumber for outdoor projects, airdrying outdoors is fine. But if you plan to use the lumber for interior projects, you’ll have to re-stack it indoors and let it dry down to 6- to 8- percent moisture content.
Loss of material. When you airdry lumber, it’s not unusual to lose up to 10 percent or more to drying defects. Lumber defects occur when drying is too rapid, which leads to surface checks and end splits or when drying is too slow, which results in sticker stains and discoloration from fungal growth.Because air-drying is at the mercy of the weather, drying rates are difficult to control.
There’s not much you can do about the slowness or the final moisture content, but you can ensure that your lumber has the fewest possible drying defects. It’s all in how you stack the pile.Here’s how to do it right:
Put Your Pile in the Open
Locate the stack in an open area exposed to the prevailing winds. Avoid shady spots or low areas where moisture can collect on the ground.
Keep the area around the stack clean and free of vegetation. Debris from off-cuts or broken stickers and sawdust are breeding grounds for insects that can migrate to your stack. Control vegetation around an outdoor pile by laying down landscape cloth and covering it with gravel.
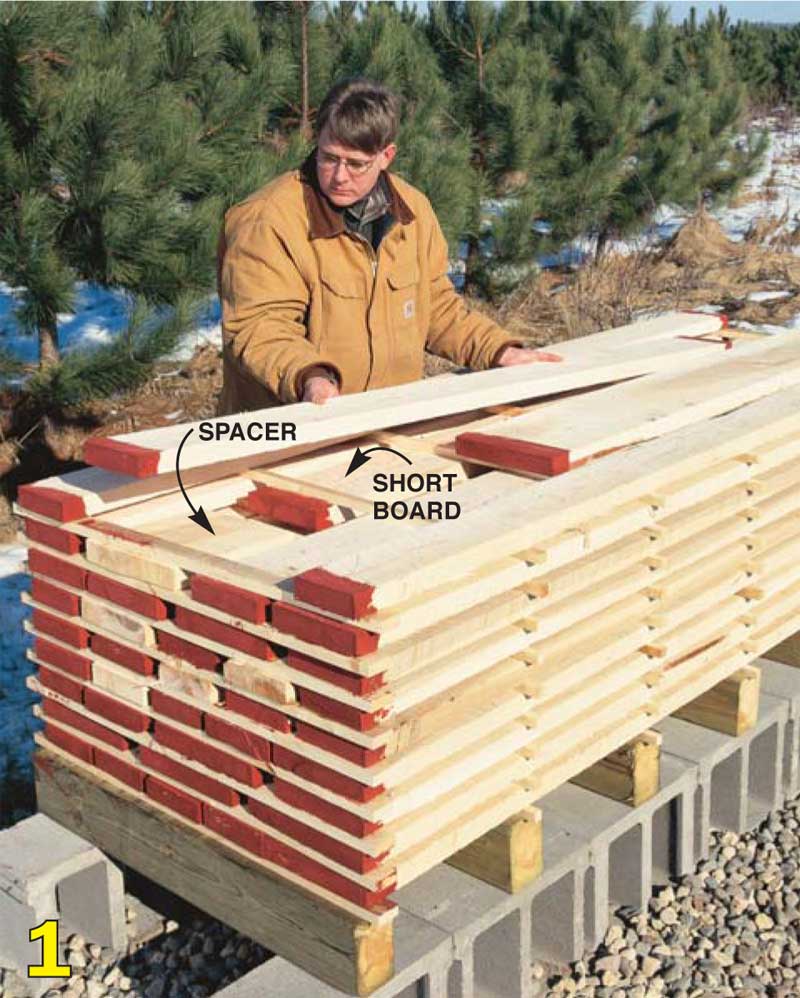
1. Box-piled lumber yields the most high-quality boards. The pile should have:
• Straight sides and ends
• Full-length boards on the outside of the pile
• Short boards staggered through the inside of the pile
• Offcuts used as spacers to bridge the gaps caused by short boards.
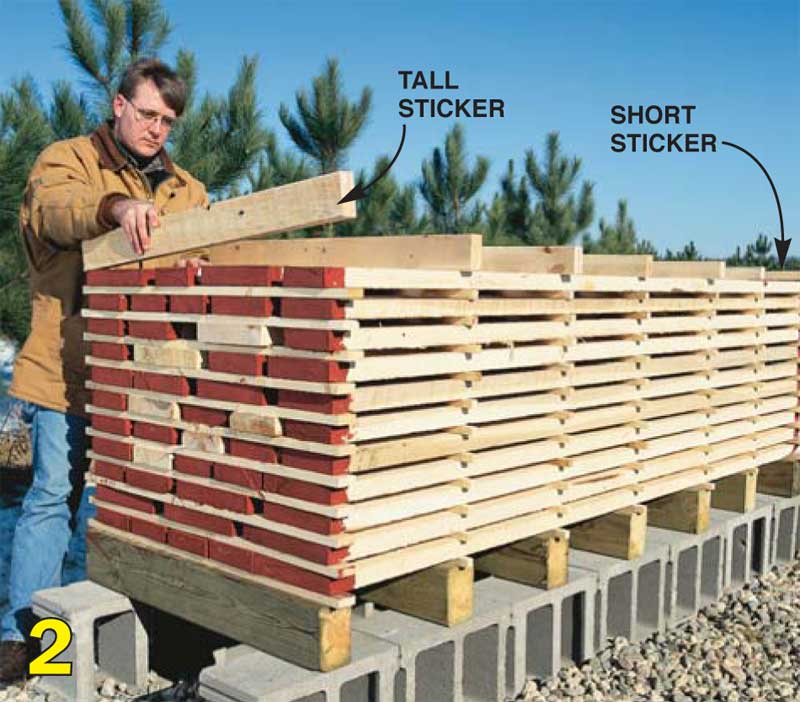
2. A slanted roof helps the pile shed water.You can do this in a number of ways; here we are using stickers on the top that vary in height to slant the roof to one end of the pile.
Prepare a Good Foundation
For outdoor drying, the foundation should be at least 18-in. high. We used 12-in. cement blocks and 4×6 landscape timbers to keep the bottom of the pile up off the moist ground and to encourage airflow through the bottom of the stack. Level the cement blocks to create a flat foundation.A dip in the foundation will telegraph through your whole stack resulting in less-than-flat boards. Place the timbers on 16-in. centers.
Prepare the Boards for Stacking
First, trim the ends of the boards so they are a uniform length. Be especially careful to remove any existing checks, because they’ll only increase during the drying process.
Then, “butter” the ends with a commercial end-sealer (see Sources, page 98). The money you spend on end-sealer will be more than paid back in better quality lumber. Make sure the coating is thick enough to indent with your fingernail.
You may find some variance in the thickness of your green stock. Sort your wood so that all the boards in a layer are within 1/16-in. of the same thickness.
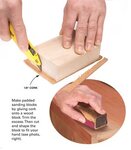
Use Good-Quality Stickers
Stickers create gaps between the layers of wood. These gaps allow air to flow freely through the stack. Make your stickers from dried wood.They should be straight-grained and strong, so they can be used over and over again. Standard stickers should be surfaced to a uniform 3/4 in. x 3/4 in.Use 2- to 3-in.-wide stickers at the ends of the stack. The extra width helps slow the rapid loss of moisture at the ends of the boards and makes the stack more stable. Stickers should be slightly longer than the overall width of the stack. It is essential that each sticker be place directly in line with the one below. This creates a vertical column that transfers all the weight of the stack to the foundation.
Box-Pile the Stack
“Box-piling” is the best way to build your drying stack (Photo 1). In box-piling, full-length boards are used on the outside edges, and shorter boards are placed in the interior of the stack.Fill the voids at the ends of the pile with offcuts from trimming.
Put a Lid on It
If your stack is outside, it needs a roof to keep out damaging direct sunlight and rain. You don’t need anything fancy, although it’s good to have a slight slope in the roof for water run-off (Photo 2.) We used chipboard covered with tarpaper. It’s best if the roof overhangs the pile by 6 in.or more.
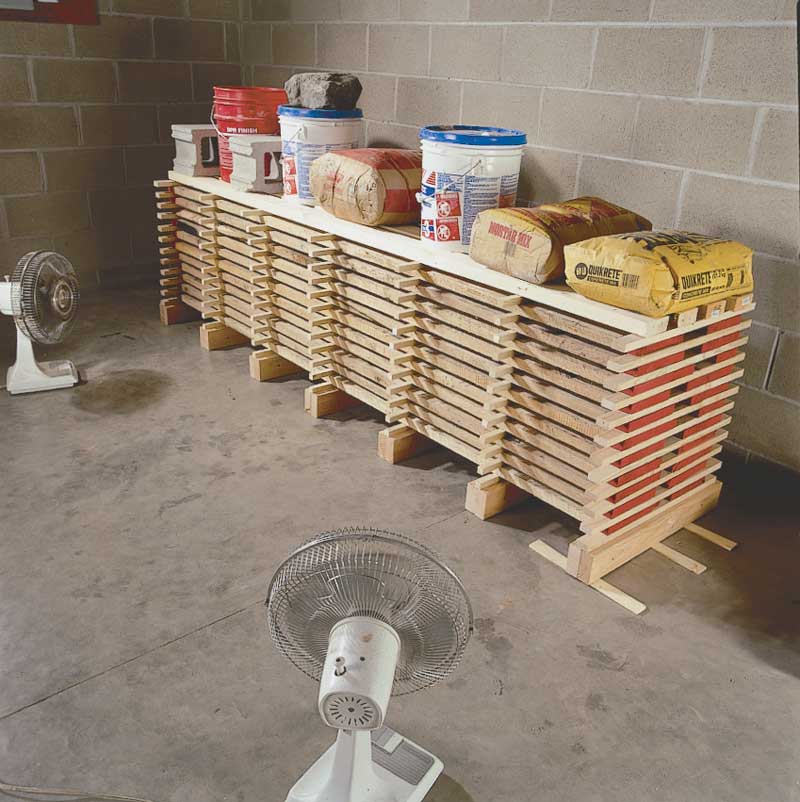
Weight the Stack
Weight (rocks, cement blocks, sandbags) will lock the boards in place, helping to prevent warp and twist as they dry. Plus, it keeps the roof from blowing away.
Control the Wind
To help minimize the effects of the weather, it’s best to have a tarp that can be dropped down the sides of the pile. This offers protection on hot windy days when the drying rate can be too rapid. This is important with hard-to-dry, check-prone woods like oak and hickory, especially when the green wood is above 30 percent moisture content.
After you’ve done all you can to protect the quality of your air-dried lumber, it’s up to nature.
This story originally appeared in American Woodworker June 2002, issue #94

Here are some supplies and tools we find essential in our everyday work around the shop. We may receive a commission from sales referred by our links; however, we have carefully selected these products for their usefulness and quality.