We may receive a commission when you use our affiliate links. However, this does not impact our recommendations.
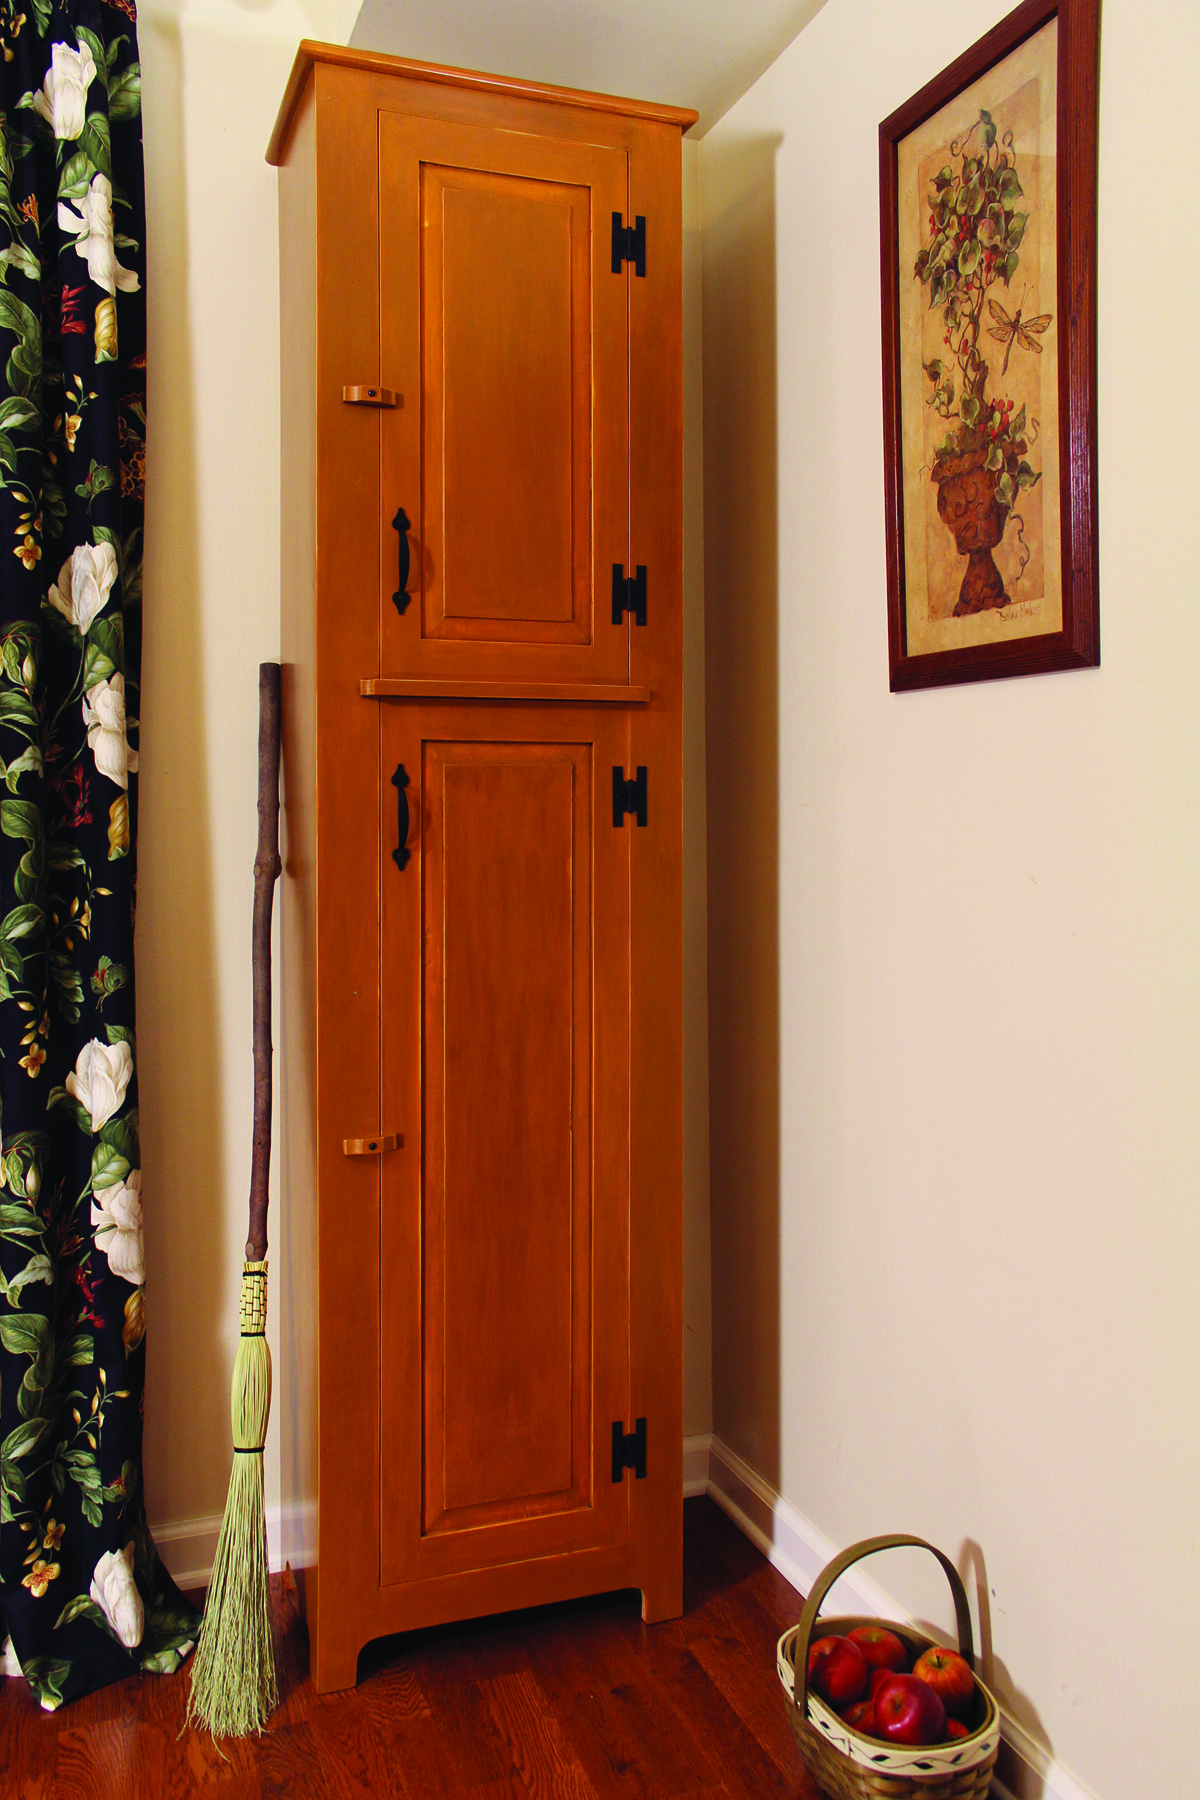
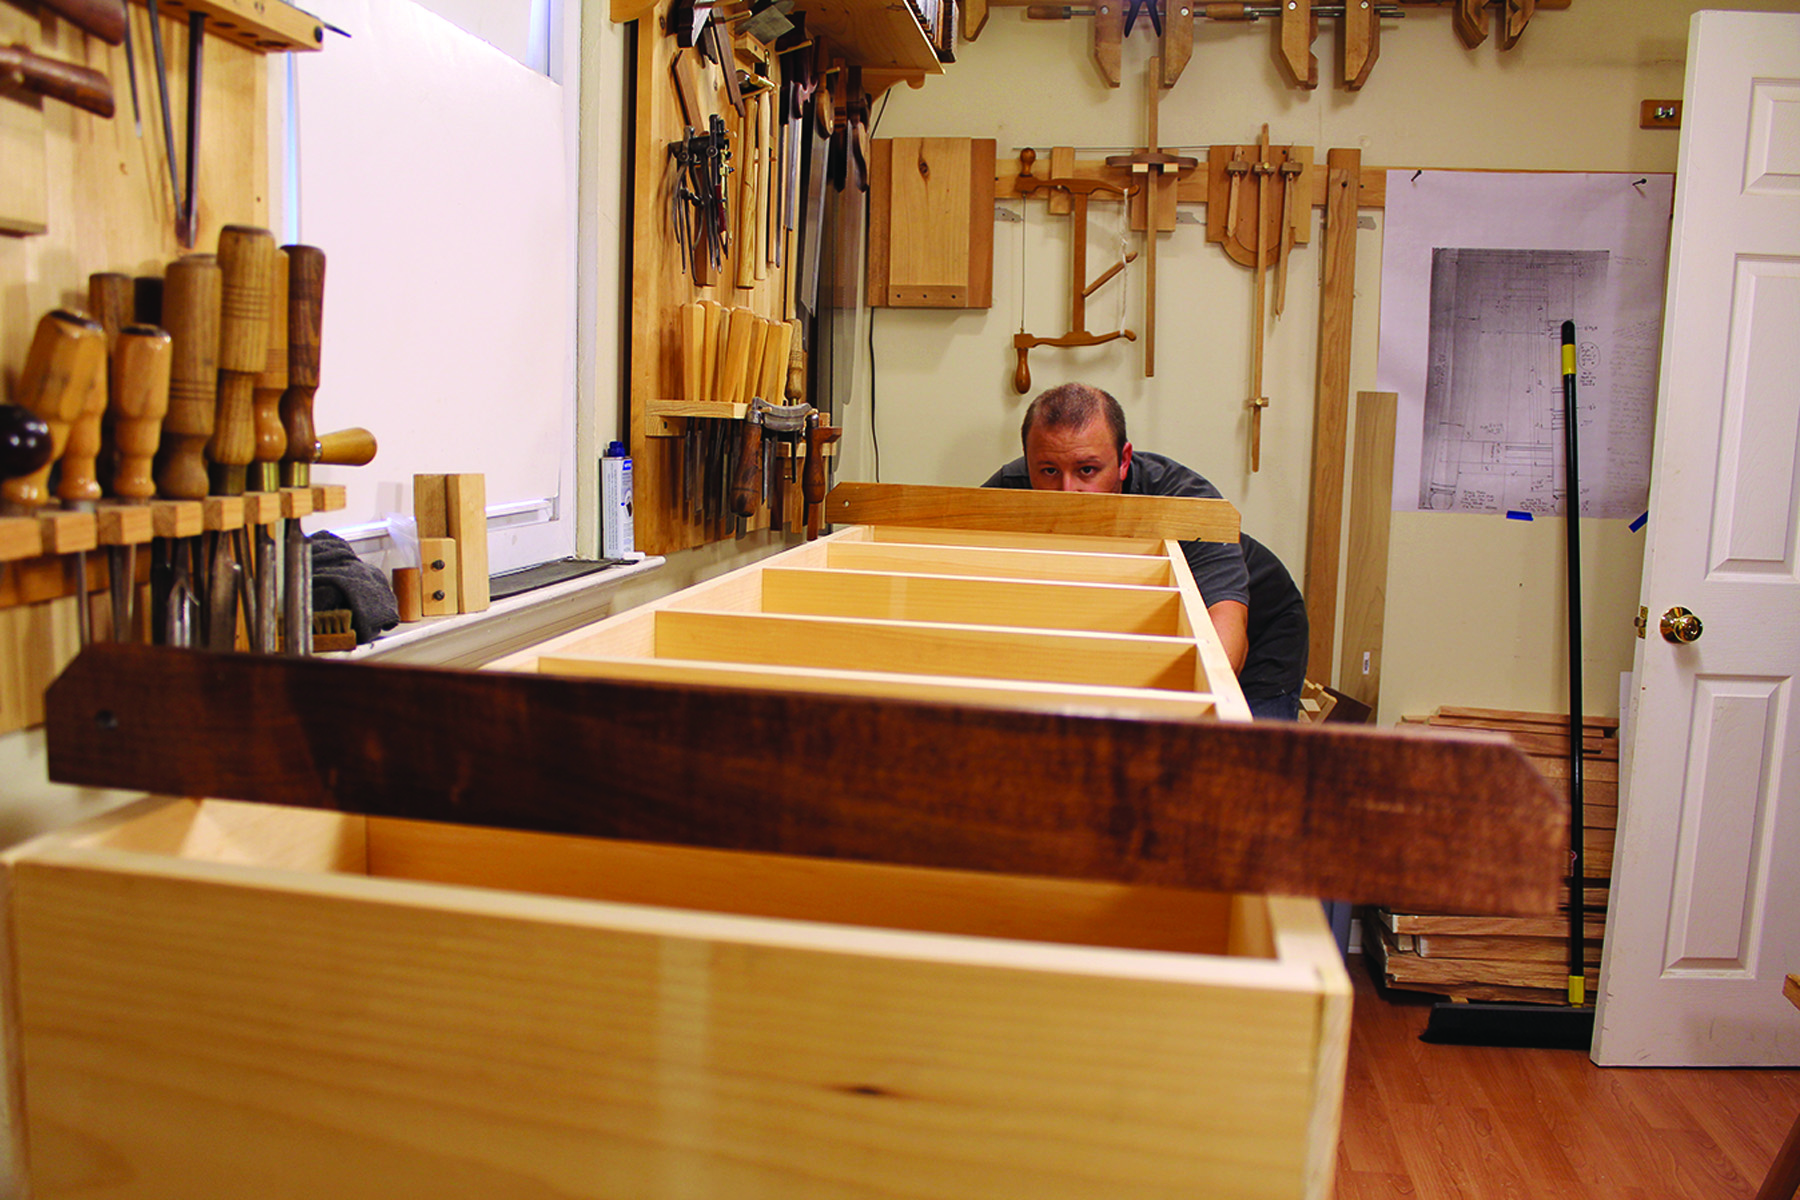
Small footprint, big stature. The small footprint of a traditional chimney cupboard takes up very little of floor space, but it provides tons of storage thanks to its tall stance.
This classic furniture piece offers lots of storage in a small footprint – and it’s a simple hand-tool build
I need some additional storage space in my 7′ x 13′ shop, however, space in my shop is at a premium. At the moment, every inch of floor and wall space is occupied, except for a 14″-deep area behind the door. Options for this spot are limited, but a traditional chimney cupboard should be the perfect fit.
It’s not clear if chimney cupboards are so called because of their tall, narrow, chimney-like appearance, or because they were frequently placed in the narrow space next to a fireplace. In fact, it’s highly likely that the term is a modern description for something that was simply called a cupboard.
Whatever you call them, these attractive cupboards are great for adding storage in narrow areas such as hallways and behind doors where a larger, deeper piece won’t fit. Their simple, sturdy construction also makes chimney cupboards great projects on which to practice traditional joinery methods that go together fast, but last for generations.
Quick & Easy Case
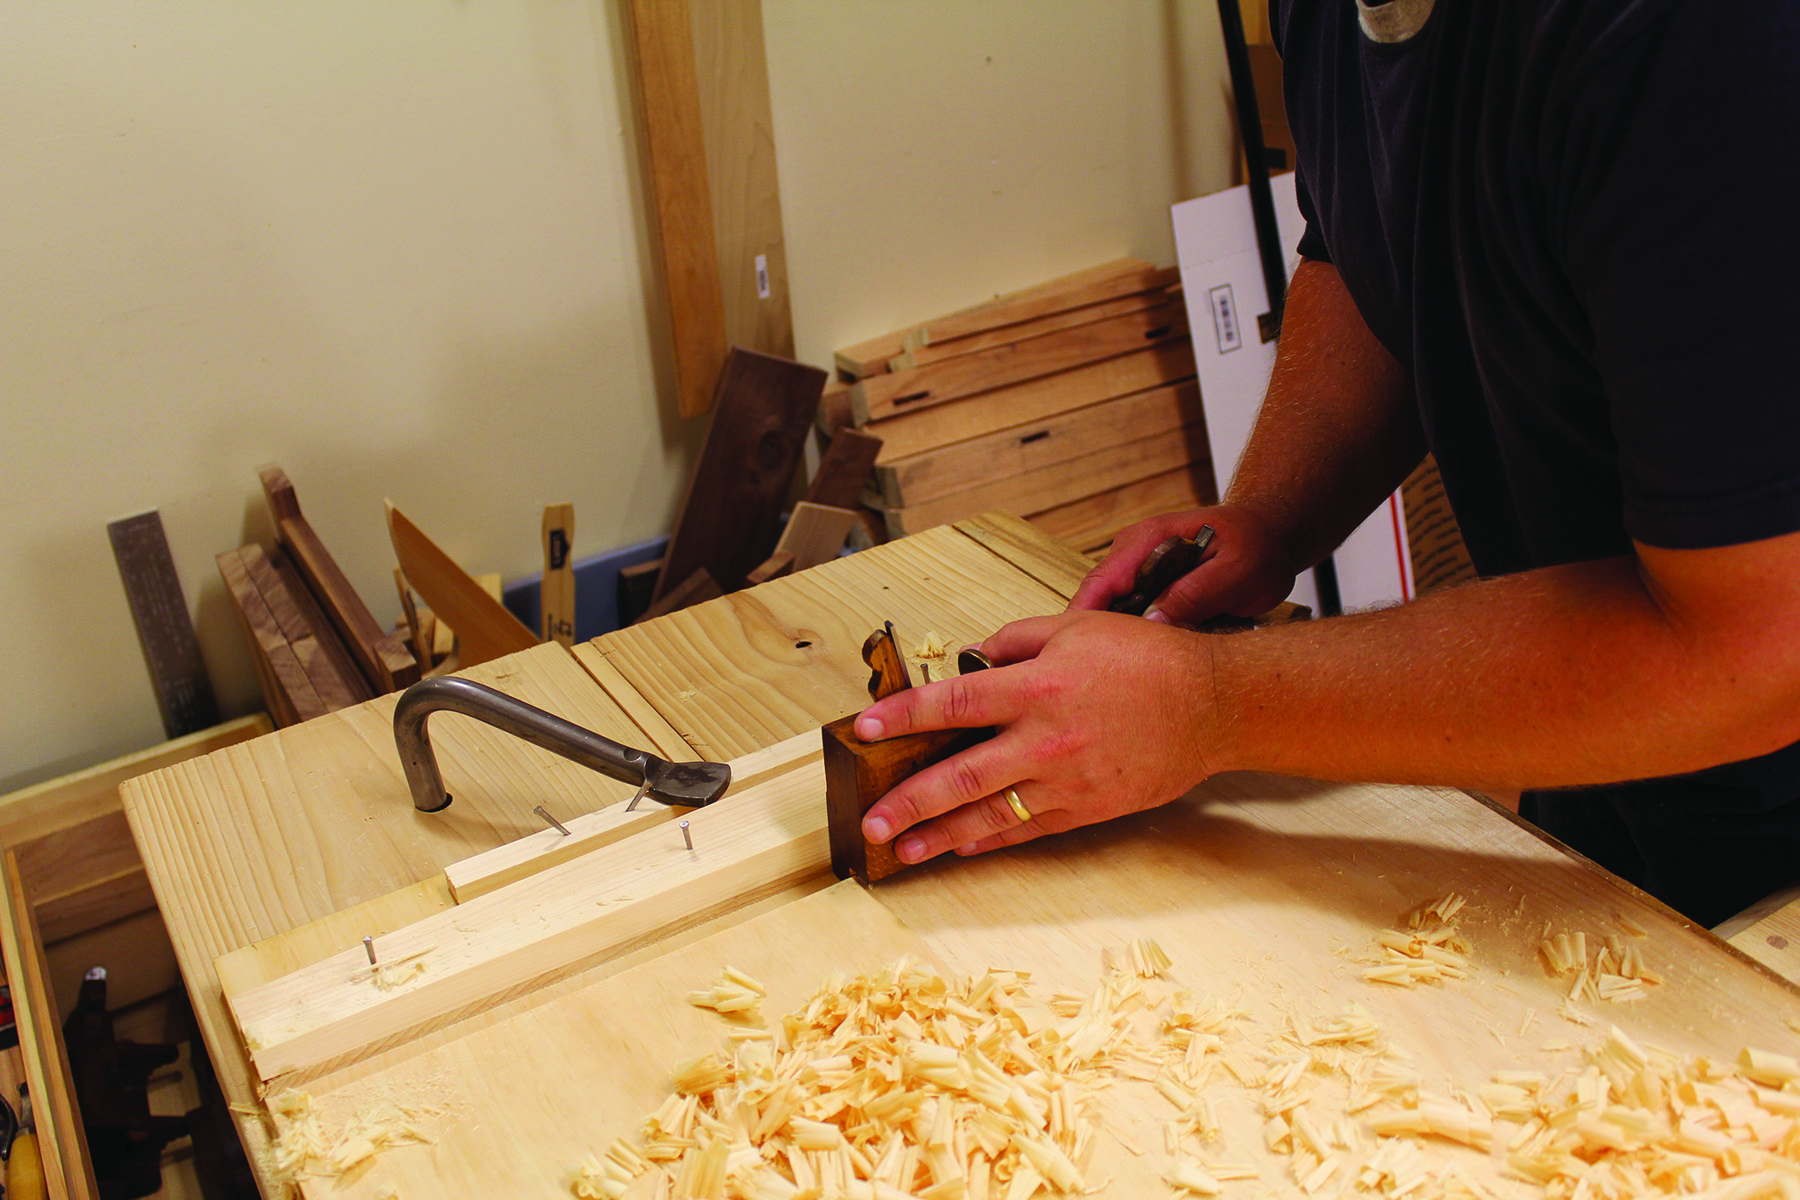
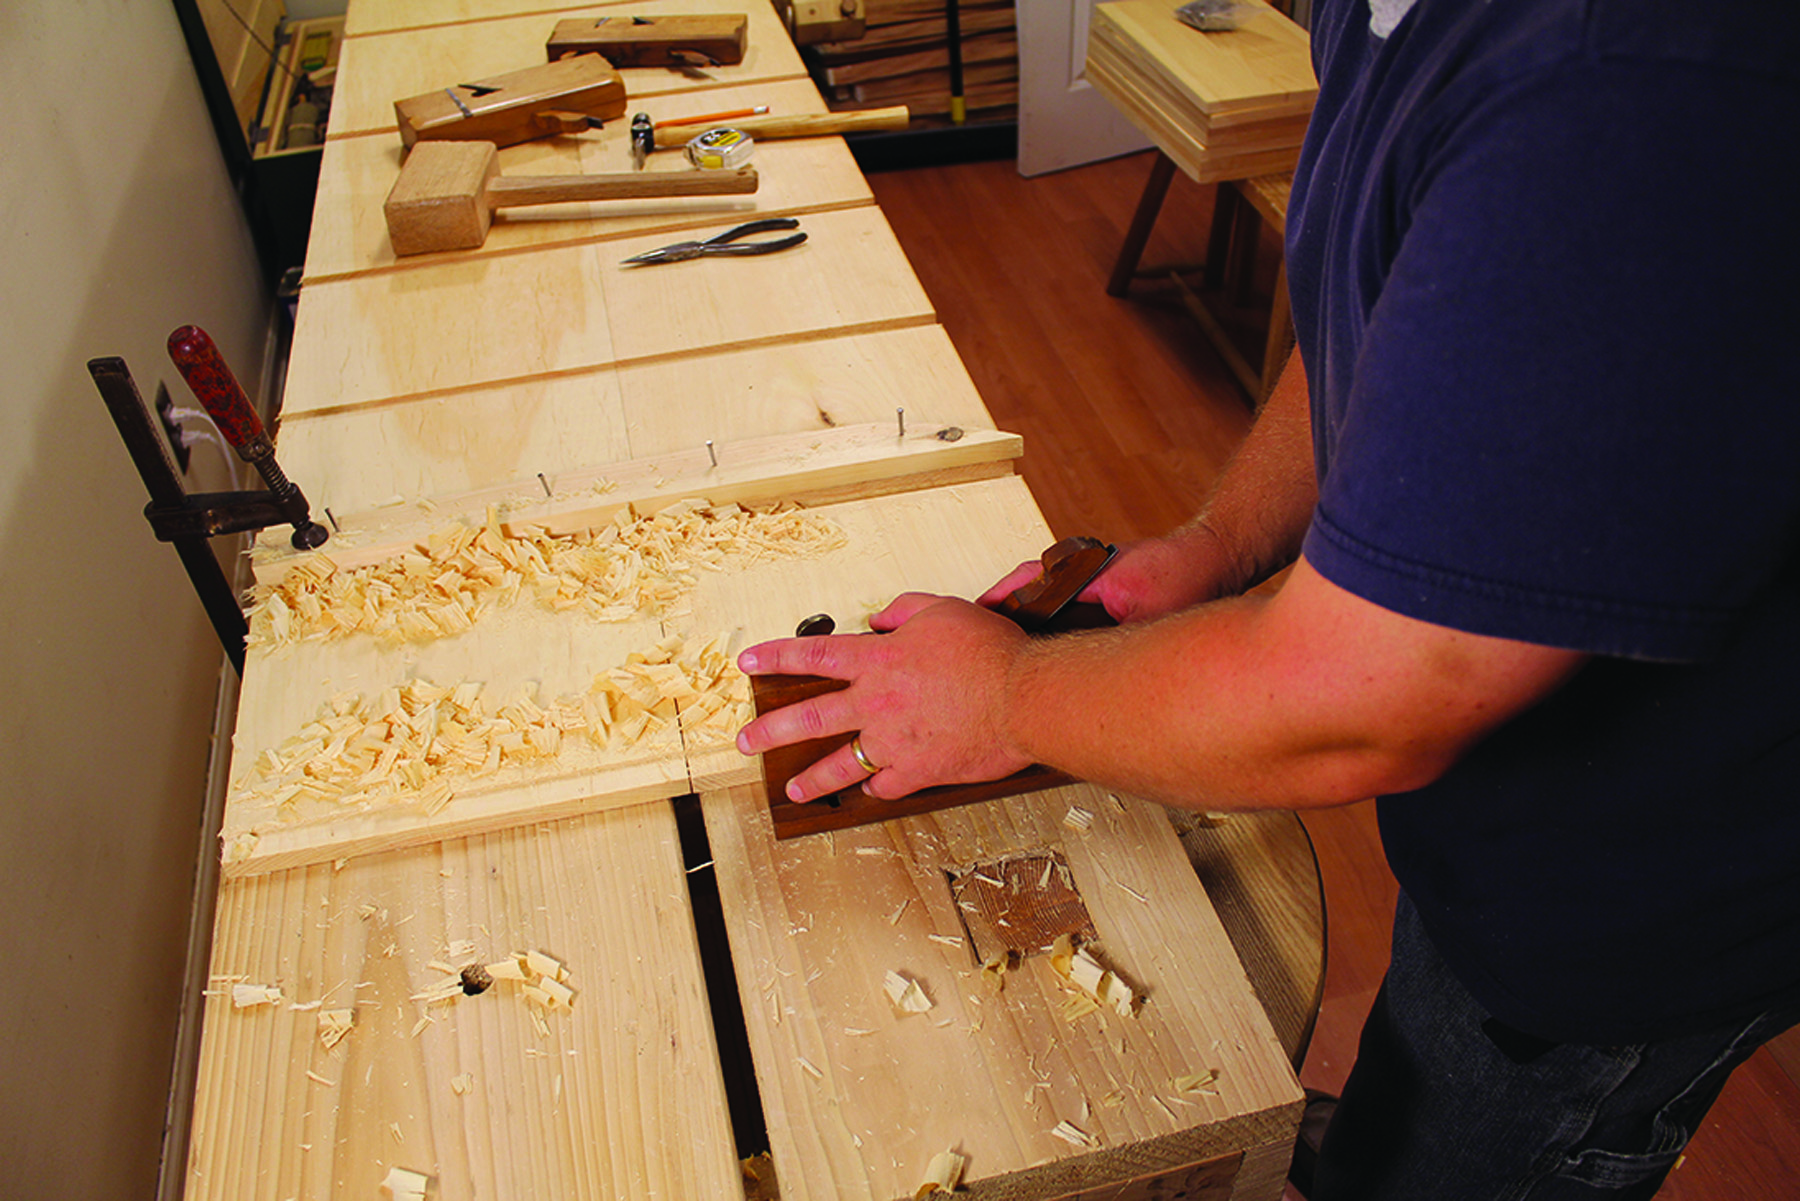
Riding the fence. Plane the dado across both case sides at the same time to guarantee that the dados line up in the assembled case. Leave the nails in the fence and battens proud for easy removal.
While many period cupboards were assembled with complex, time-consuming dovetails, this is not one of them. In simple terms, it’s assembled with dados and nails. This type of construction is sturdy and economical, and was quite common in utilitarian pieces of the 18th and 19th centuries.
Start by planing the front edges of the sides straight and square to their inside faces. The front edges and inside faces will be the reference surfaces for marking and gauging because that is where the joinery will be. With the reference surfaces true, cut the side boards to their final length and ensure the top and bottom ends are square to the front edges.
Place the two side boards on the workbench, front edges together, inside faces up and bottoms to the right. To keep the sides aligned, nail battens across the top and bottom. Place the bottom nails in the area that is cut away for the feet and the top nails where the top rabbet is cut.
Divide & conquer. A pair of dividers makes partitioning the inside of the cupboard much faster, and leaves less room for error versus measuring and using math to divide the space.
Measure 4″ from the bottom of each case and nail on a straight, square fence to guide a dado plane for cutting the bottom dado. Be sure the bottom of the case is to your right so the nail holes are under the dado where they will be less visible. (If you are opposed to the nail holes being visible in the finished piece, you can clamp the fence down instead of nailing it.)
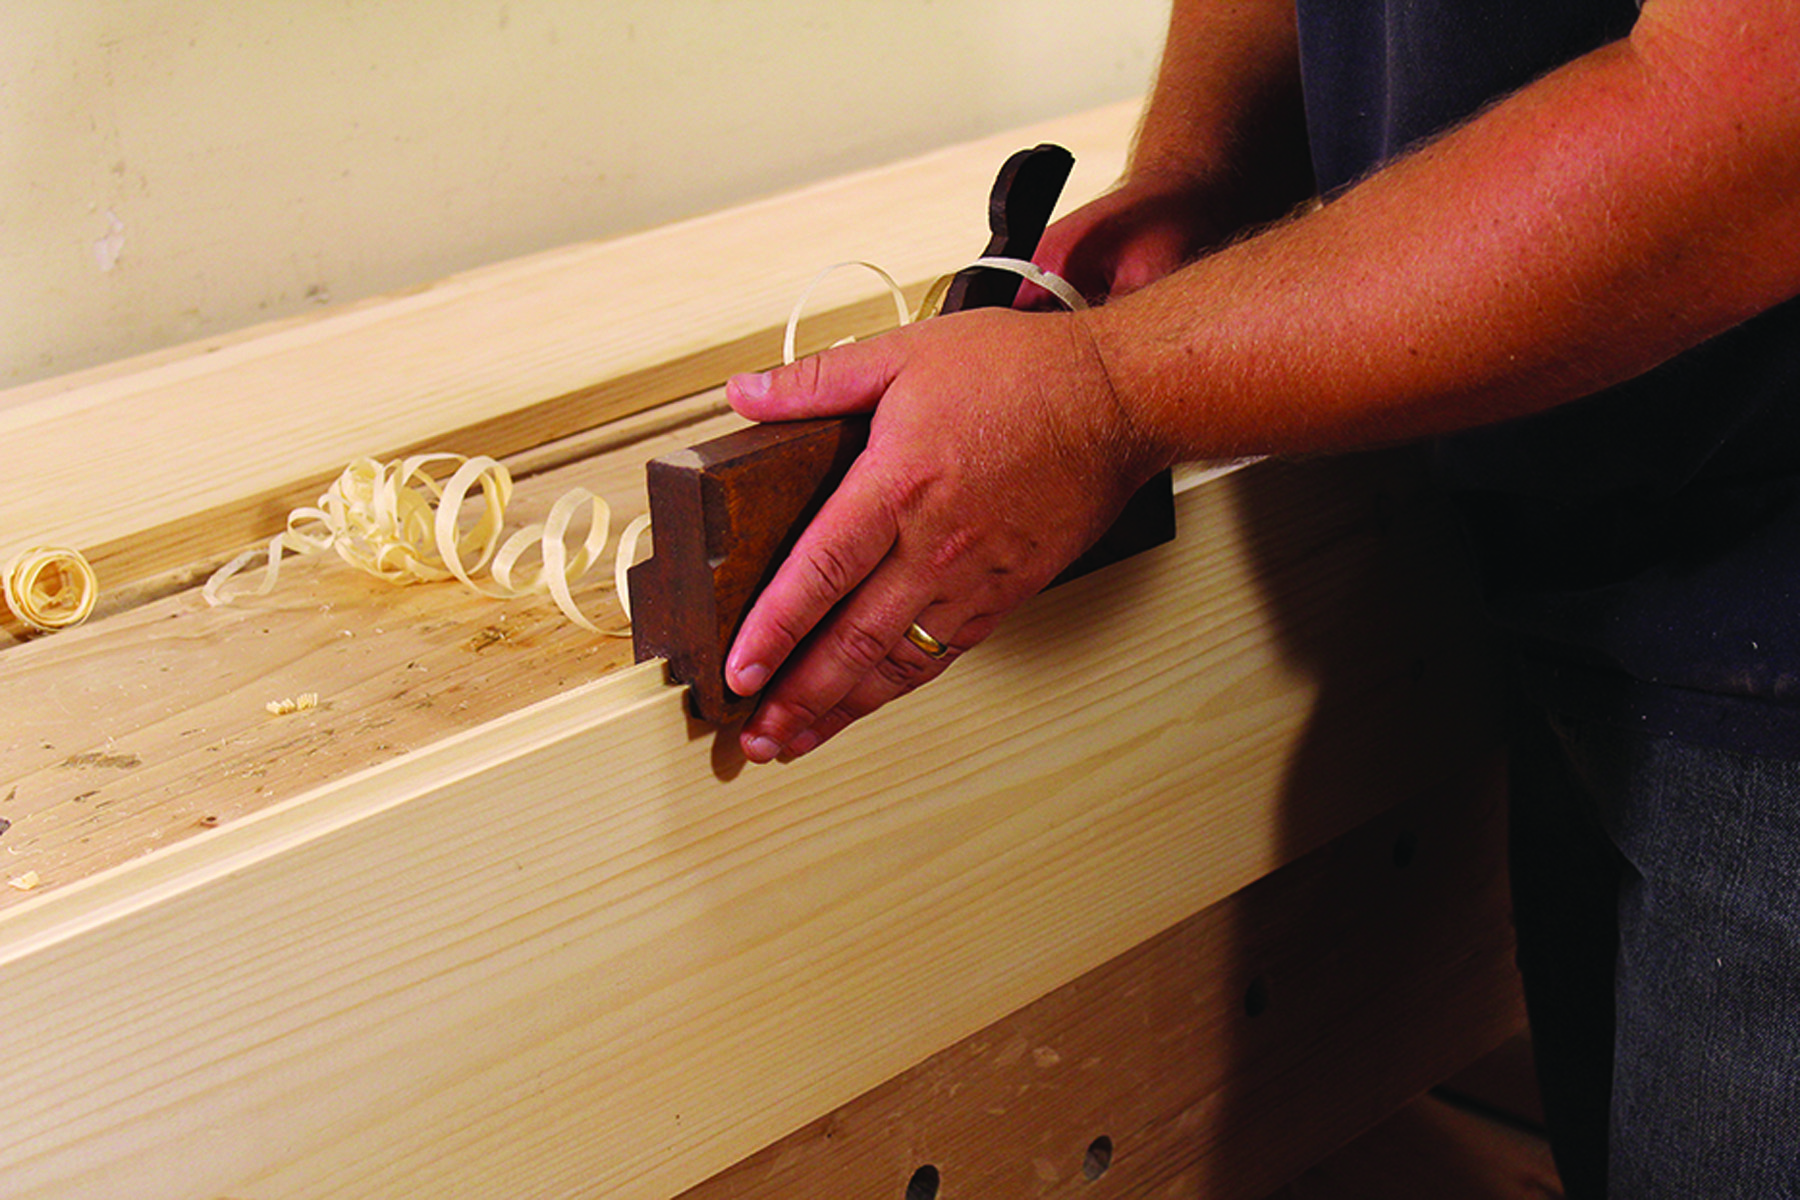
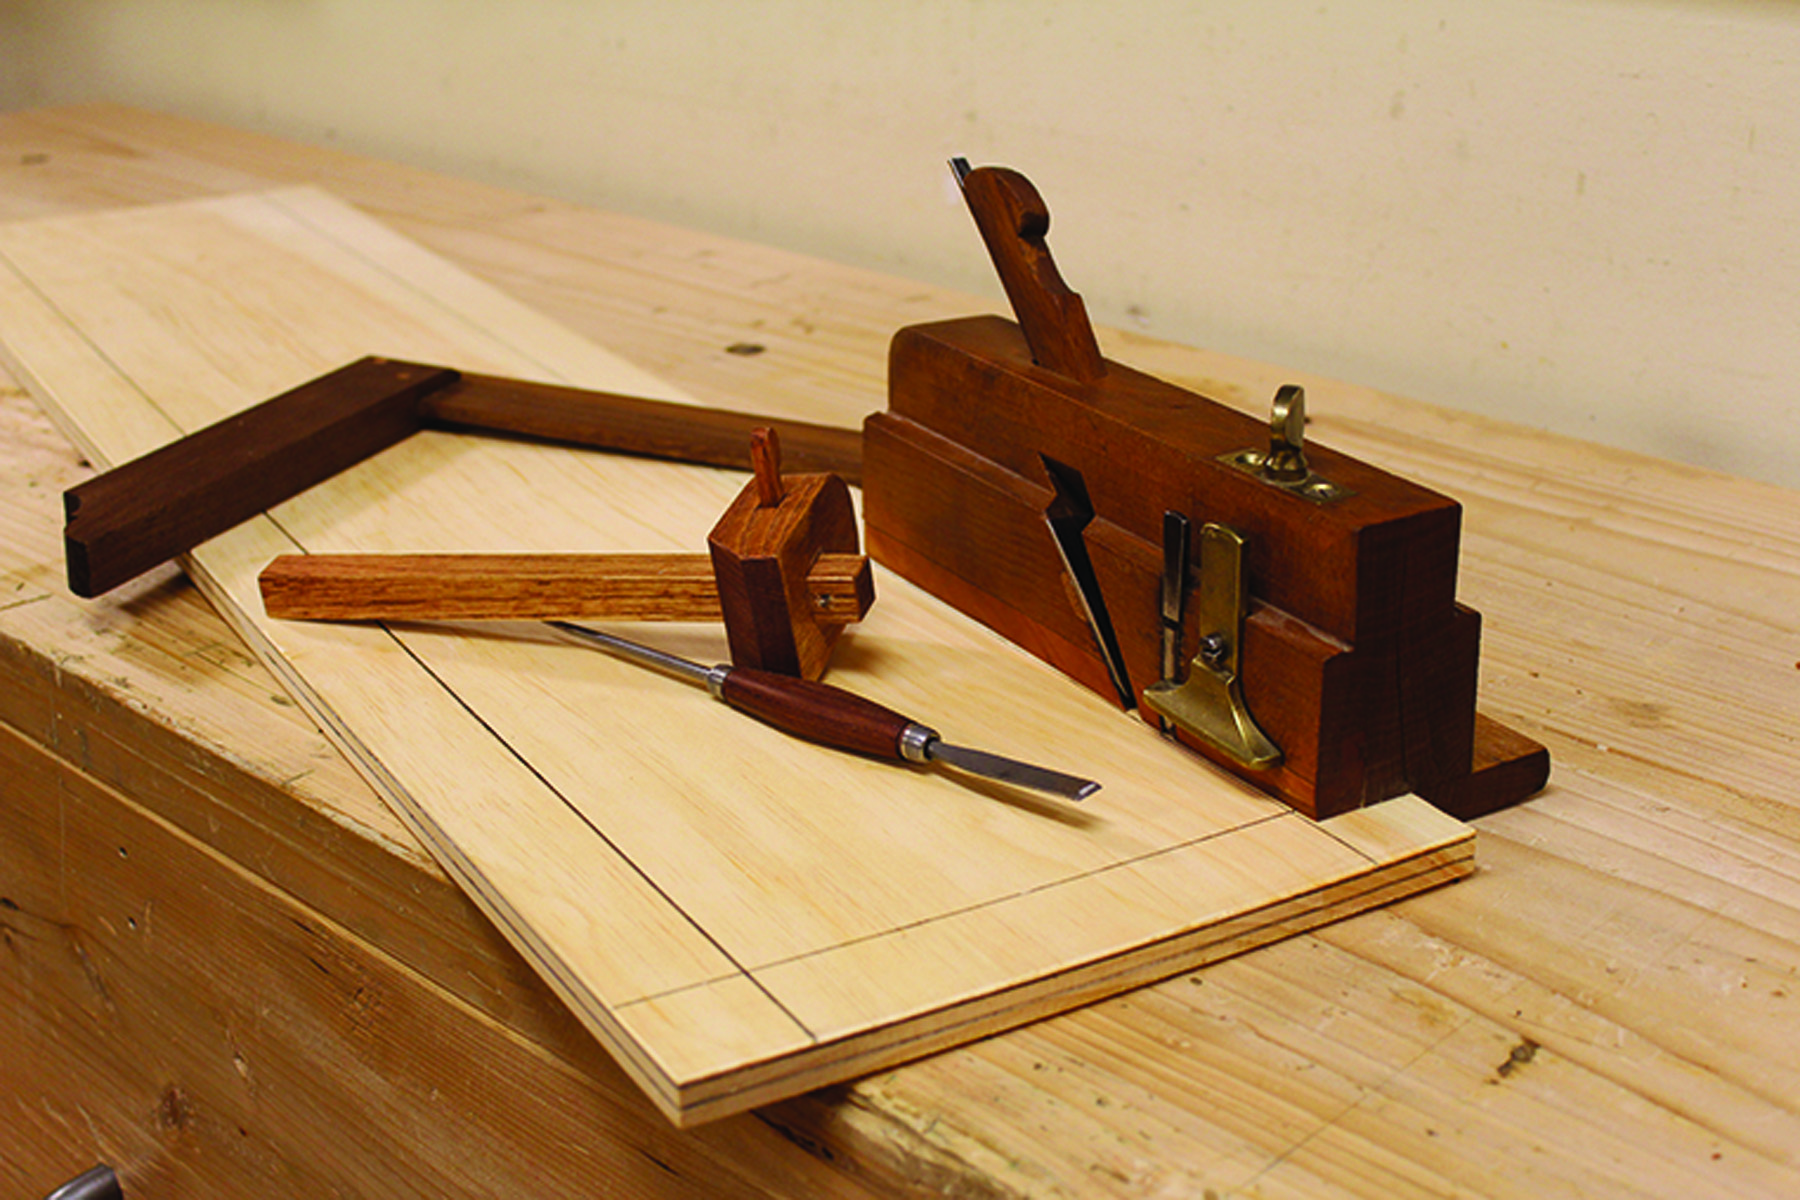
To cut the dados for the shelves, the most efficient hand tool is a well-tuned dado plane. At the front of this plane is a scoring iron that scribes the sides of the dado to the appropriate width (3⁄4” in this case). The rear iron is skewed specifically for cross-grain work and peels up the material between the scribe marks, leaving a smooth, flat bottom. The plane also has a built-in depth stop so it stops cutting once the desired depth is reached (3⁄8” in this case). To use the plane, hold it vertically against the nailed-on fence.
Once the bottom dado is cut, the interior of the case is divided into upper and lower sections. Divide the open space between the case top and bottom shelf into five equal parts using a pair of dividers. The bottom section is equal to three of these parts and the top section is equal to two of these parts. This locates the center of the dado for the shelf that separates the top section from the bottom section. Offset this mark 3⁄8” toward the bottom of the case to locate the bottom of the dado. Nail your fence at this location then plane the dado across both cupboard sides.
Repeat the process by dividing the space in both the top and bottom sections into three parts to locate the centers of the remaining dados. Offset the marks toward the bottom of the case by 3⁄8” to locate the bottoms of the dados then plane away.
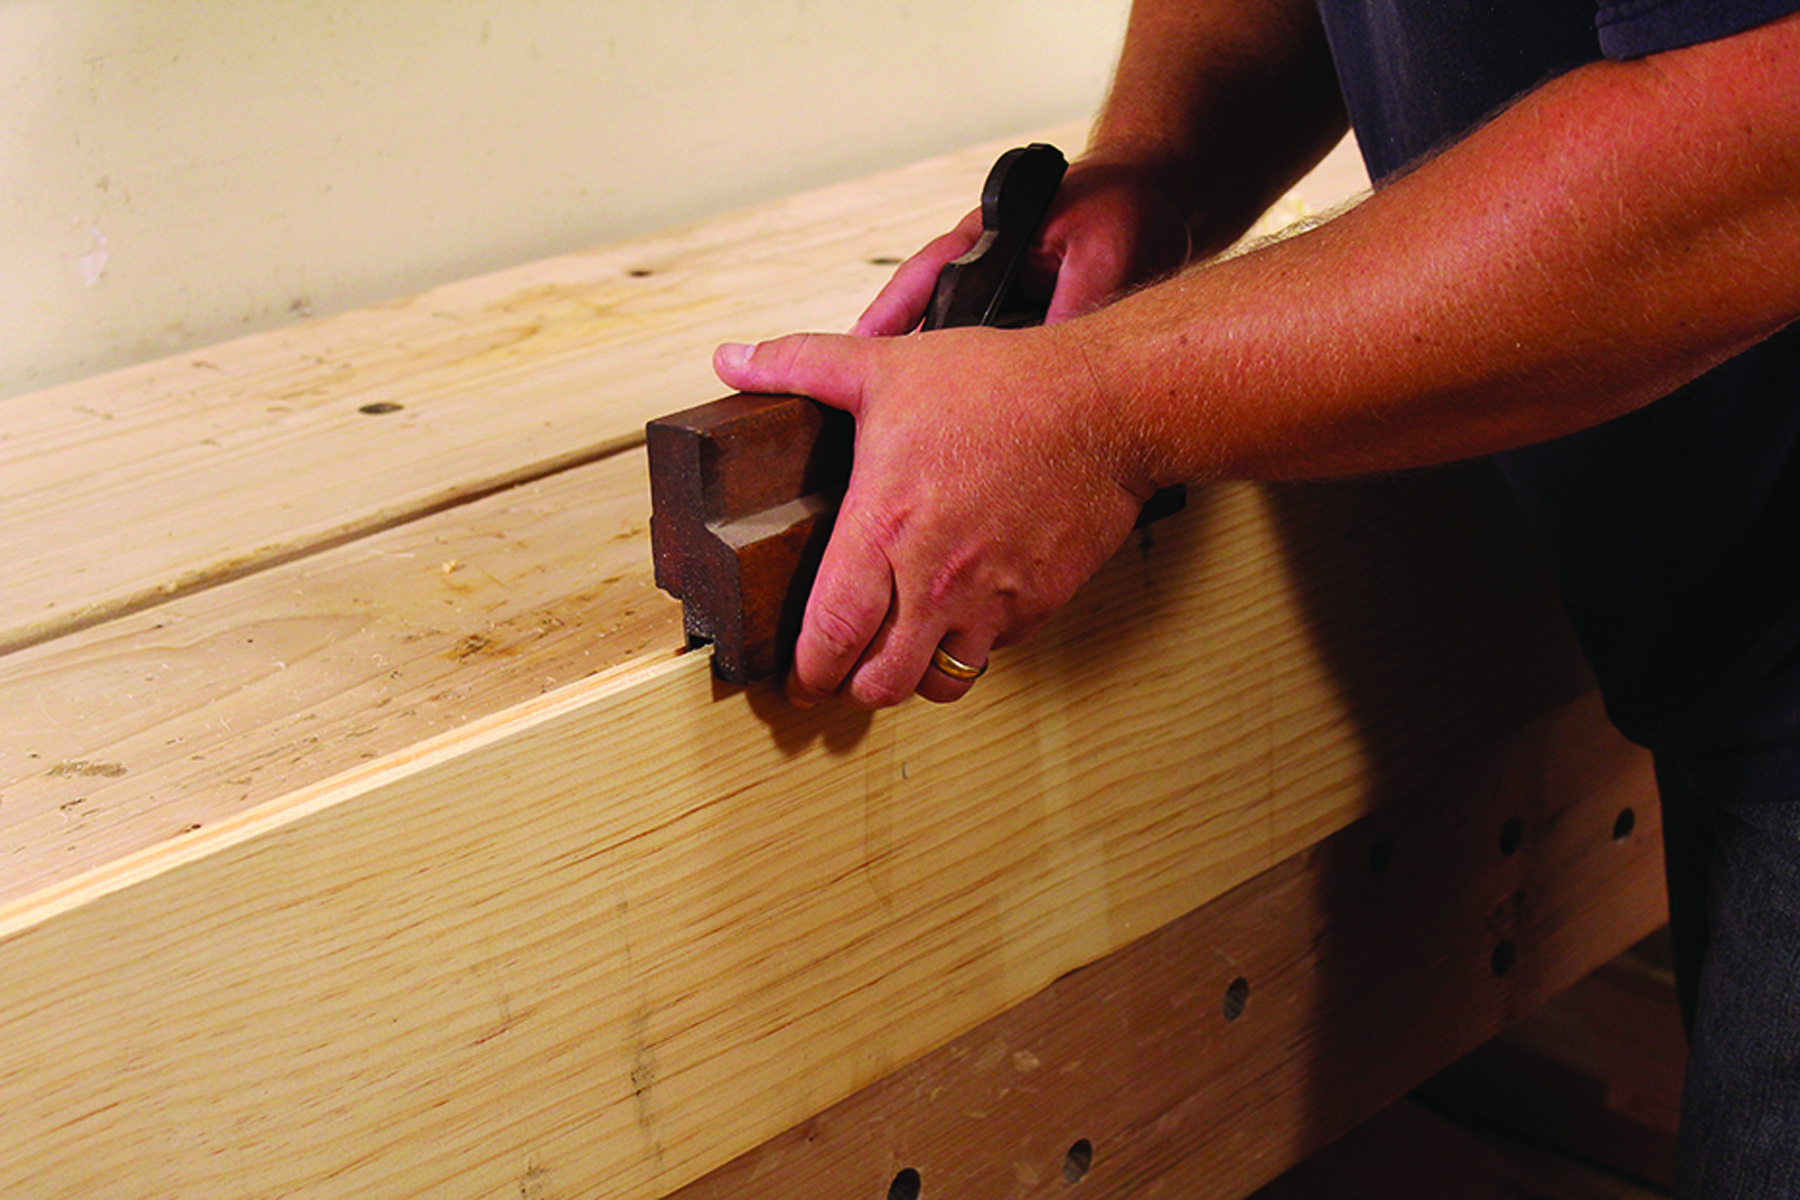
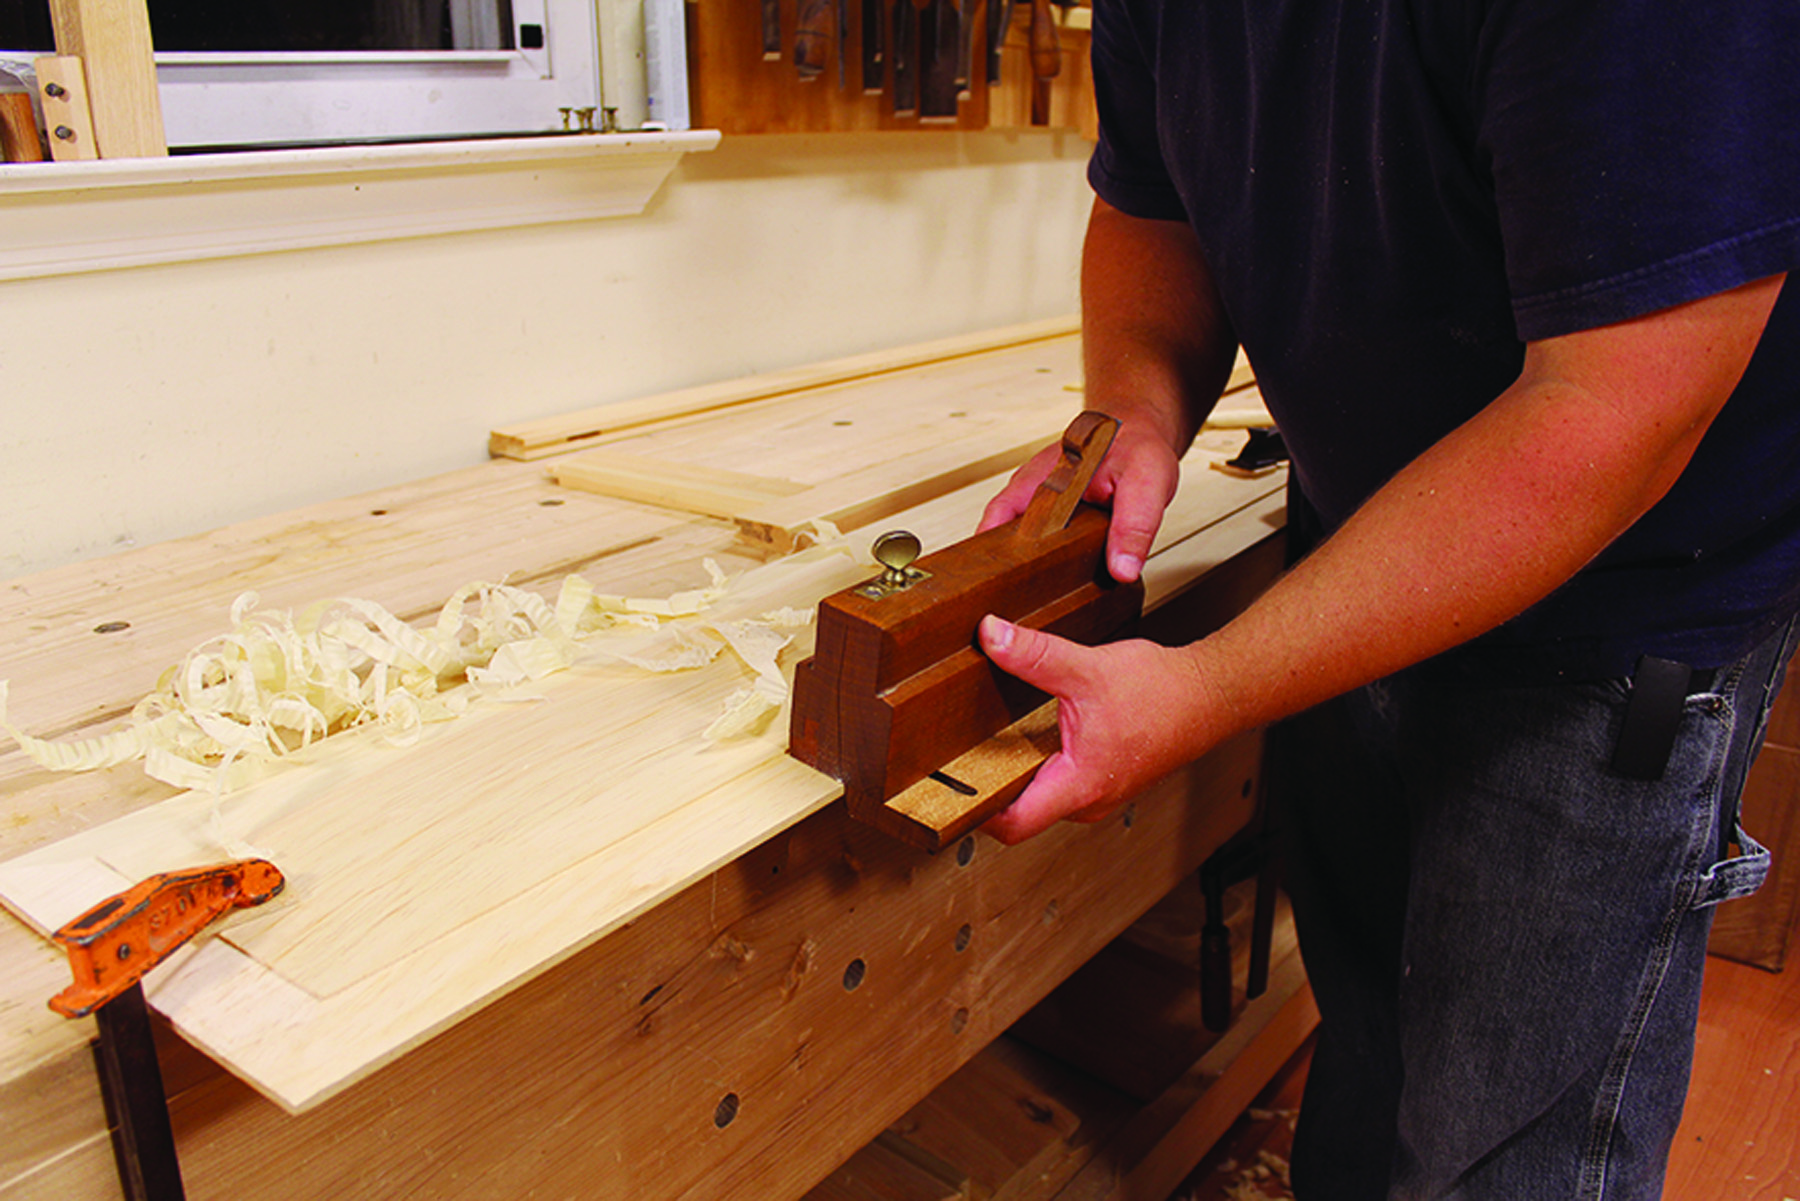
After planing the uppermost dado, leave the fence in place. Remove the upper batten used to keep the sides aligned then plane the top rabbet. I use a moving fillister plane for the top rabbet. This is a fenced rabbet plane with a depth stop, a skewed iron and a scoring iron for clean cross-grain cutting. A regular fenced or unfenced rabbet plane can be used as well. If your rabbet plane doesn’t have a scoring iron, scribe the shoulder of the rabbet with a knife prior to planing and deepen the scribe as necessary to maintain a crisp, clean shoulder.
Two rabbets at once. Like planing the dados, planing the rabbets in both sides together ensures good alignment. It also prevents the rabbet on the near side board from spelching at the far edge.
After the cross-grain dados and rabbets have been planed, the fences and battens can be removed. The final joinery that needs to be cut into the case sides are the long-grain rabbets for the backboards. This is done after the cross-grain work so that any spelching that occurred is removed when planing the rabbets for the backboards. These rabbets are 3⁄4” wide and as deep as the dados (3⁄8“).
With the joinery done, clamp the sides face to face with their front edges aligned. Lay out and draw the feet then cut them out using a turning saw or coping saw. Clean your cuts with a spokeshave, rasps and files, gouges or scrapers.
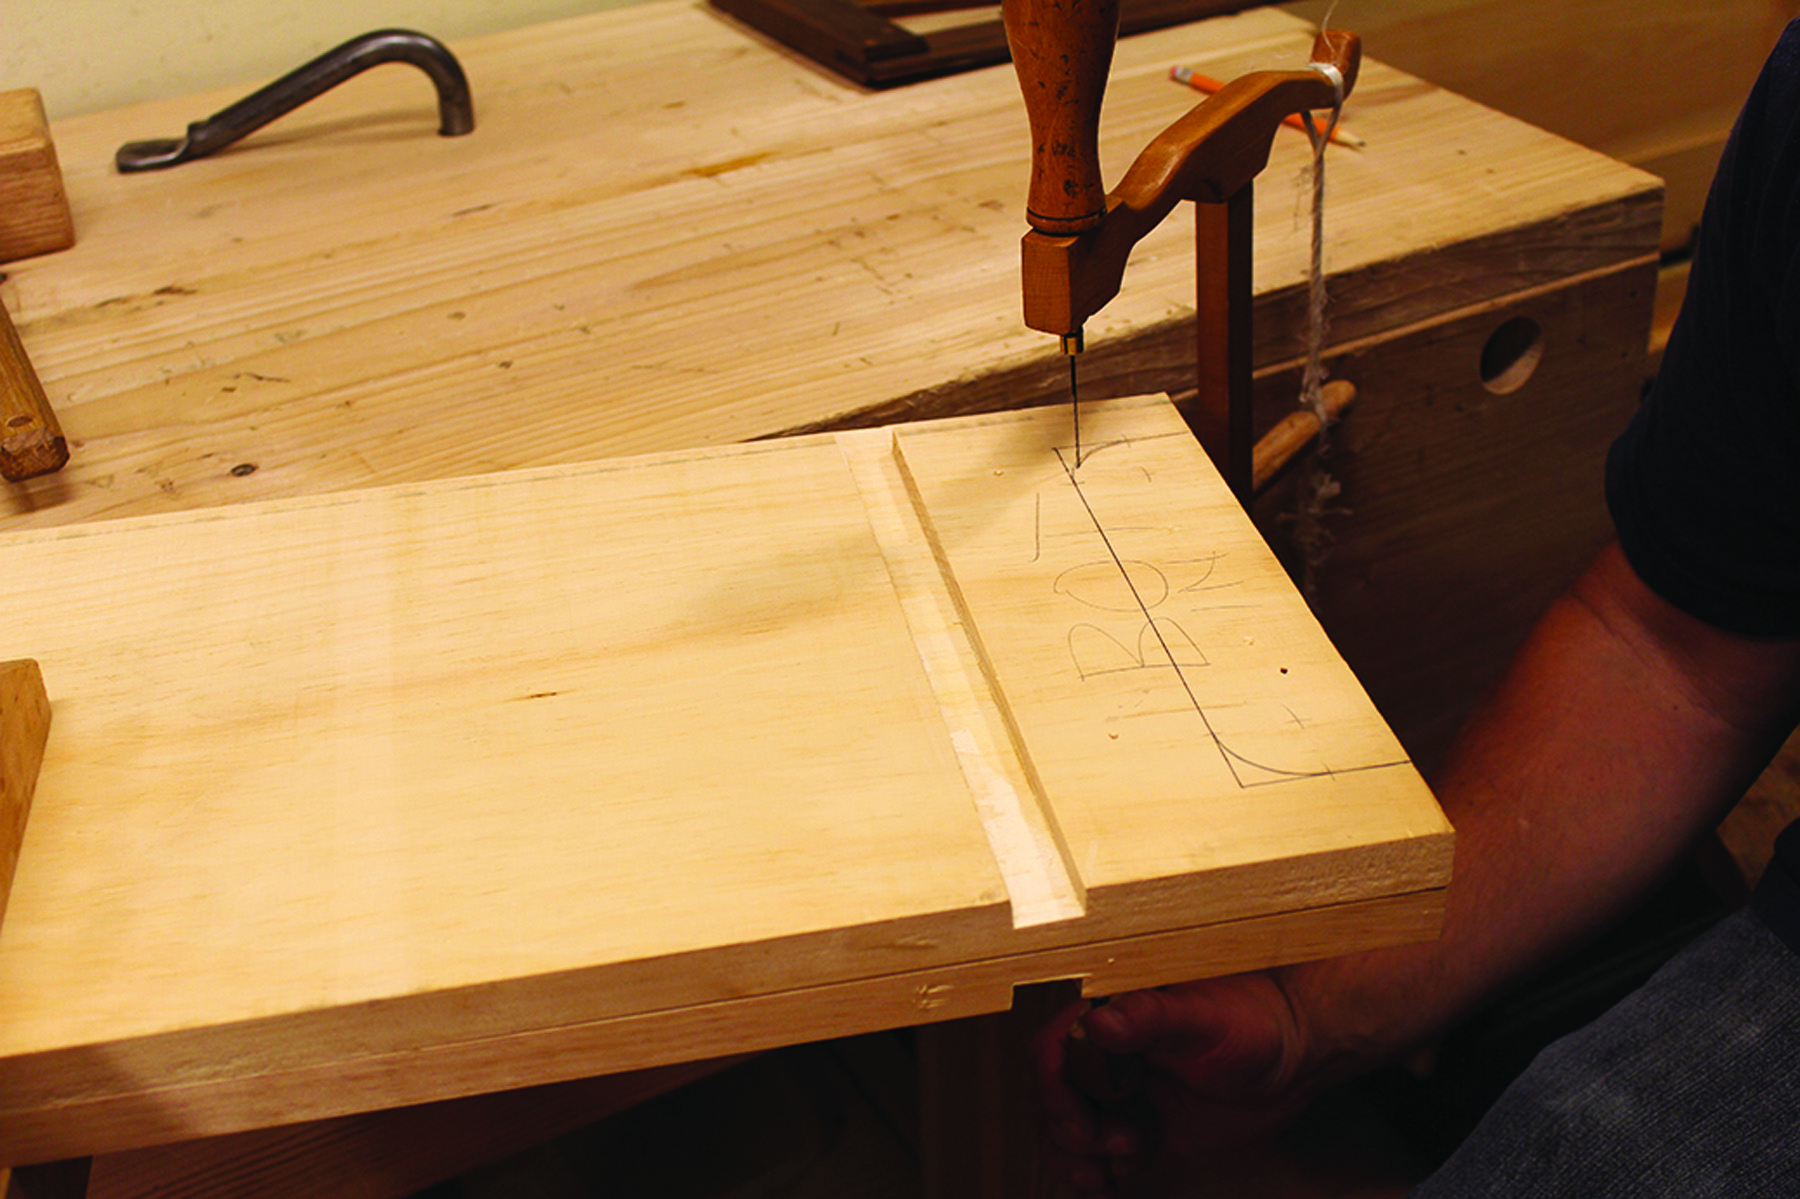
Feet are offset. In order to account for the face frame, the cutout for the feet is not centered on the side boards. Adding the face frame centers the cutout in the sides of the assembled case. Saw and smooth both side boards simultaneously so the feet match.
The hard part is now done; move on to making the shelves. Cut all seven shelves to final length, but don’t rip them yet. Instead, dry-fit the case with the shelves aligned with the back of the dados, and mark each shelf on both ends where it meets the front of the case. Connect these marks with a straightedge and pencil, then rip the shelves about 1⁄8” wider than the pencil line so they sit proud of the case when assembled. The shelves are planed flush after assembly.
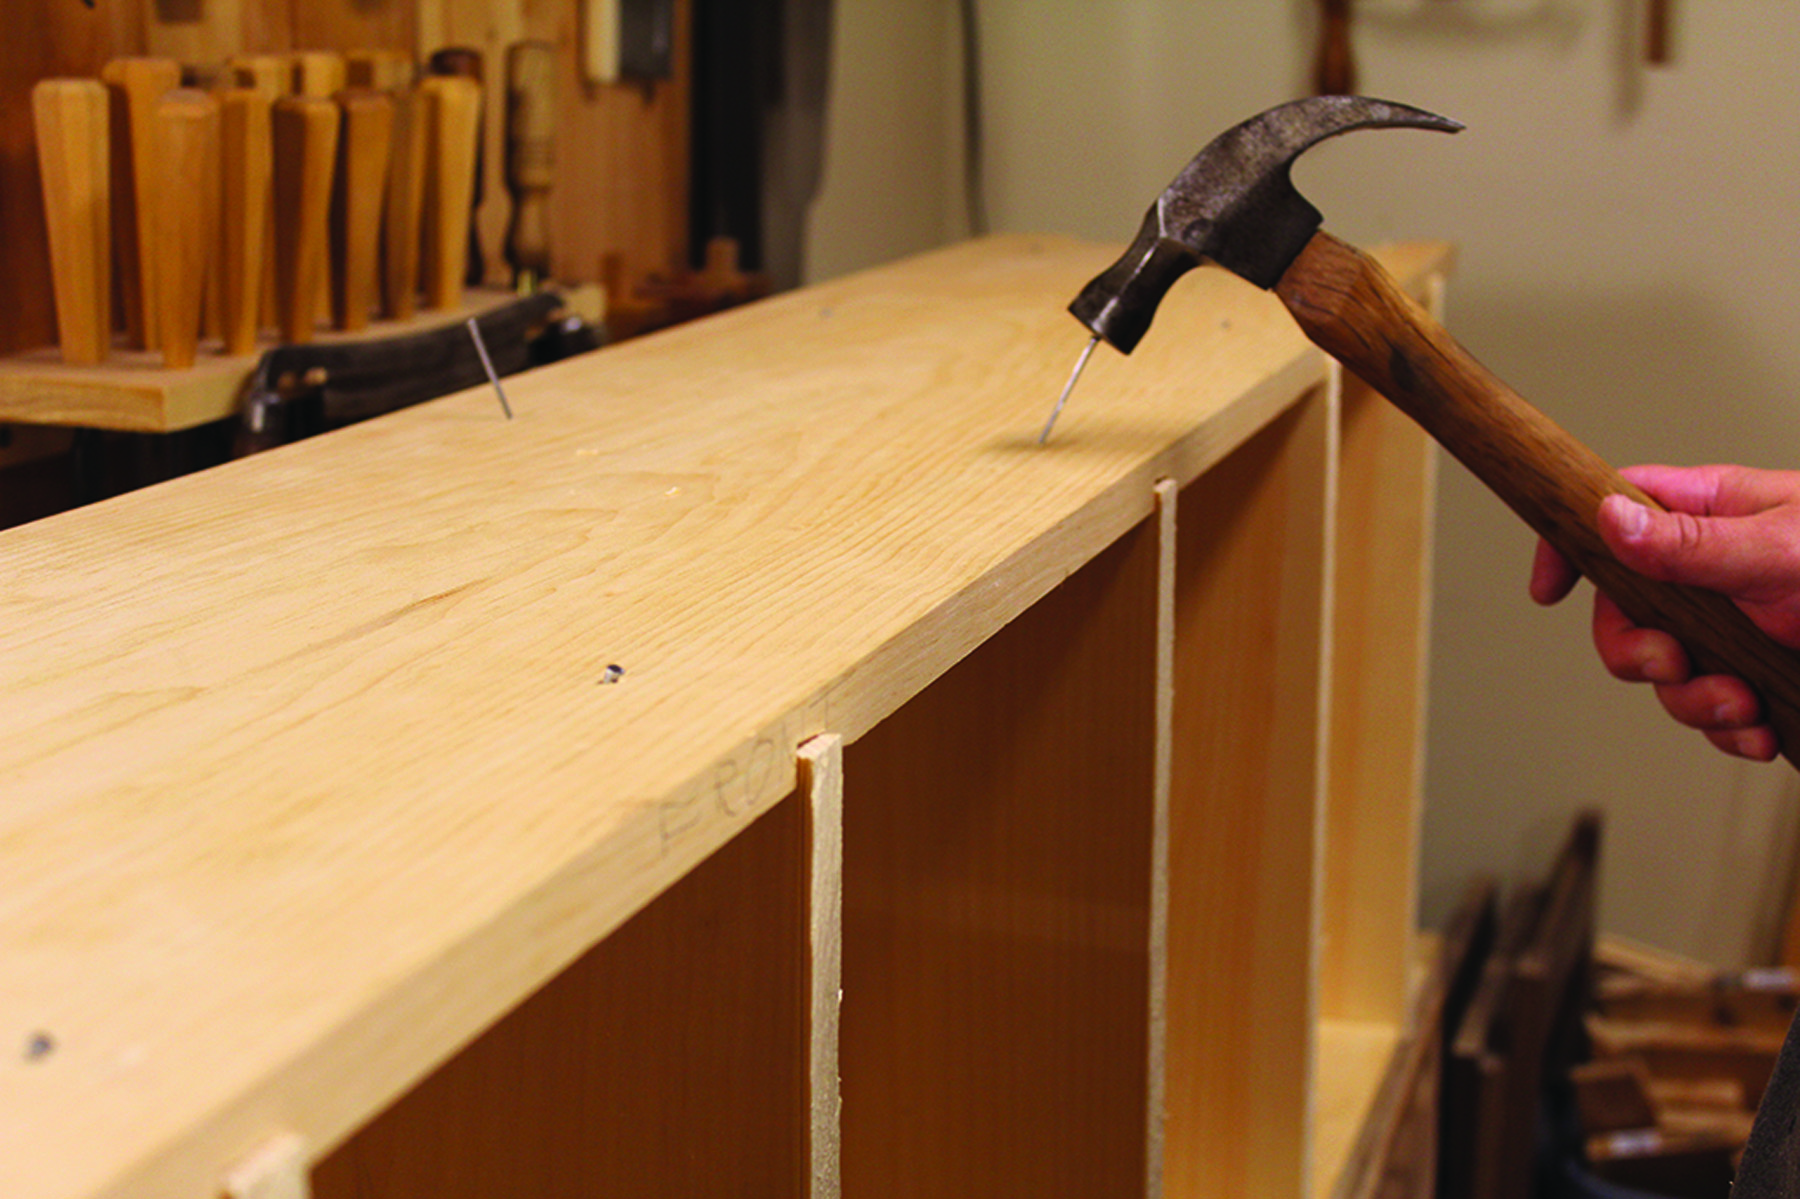
Lock the shelves with nails. Align the wedge shape of the cut nails with the long grain of the case sides to prevent the sides from splitting as the nails are driven. Drive the nails in at opposing angles to lock the shelves in place, just like a dovetail.
To assemble the case, place one side on the benchtop with the dados facing up. Place the shelves in the dados without any glue. (The side is just being used for support and alignment at the moment.) Put glue in the dados of the other side then place it on the shelves, aligning them with the back of the dados. The fronts of the shelves should be proud of the fronts of the case sides. Secure each shelf with two fine finish nails driven through pilot holes in the sides and into the end grain of the shelves. After gluing and nailing the first side, flip the case over then glue and nail the shelves on the other side. Once all of the nails are driven (and set, if you plan to fill the nail holes), flip the case onto its back, check the diagonals to make sure the case is square, then make necessary adjustments if it isn’t.
Chimney Cupboard Cut List
No.ItemDimensions (inches)MaterialComments
t w l
❏ 2 Case sides 3⁄4 11 1⁄4 76 Pine
❏ 7 Shelves 3⁄4 10 1⁄2 17 3⁄4 Pine
❏ 1 Backboard 3⁄4 7 5⁄8 72 Pine
❏ 2 Backboards 3⁄4 5 5⁄8 72 Pine
❏ 2 Face frame stiles 3⁄4 3 78* Pine
❏ 1 Upper face frame rail 3⁄4 1 3⁄4 14 1⁄2 Pine 1″ TBE†
❏ 1 Lower face frame rail 3⁄4 2 3⁄8 14 1⁄2 Pine 1″ TBE
❏ 1 Center face frame divider 3⁄4 1 1⁄2 14 1⁄2 Pine
❏ 1 Top 3⁄4 12 3⁄4 20 Pine
❏ 2 Upper door stiles 3⁄4 2 28 13⁄16* Pine
❏ 2 Upper door rails 3⁄4 2 10 Pine 3⁄4” TBE
❏ 2 Lower door stiles 3⁄4 2 44 5⁄16* Pine
❏ 2 Lower door rails 3⁄4 2 10 Pine 3⁄4” TBE
❏ 1 Upper door panel 1⁄2 9 23 5⁄16** Pine 1⁄4” TAS‡
❏ 1 Lower door panel 1⁄2 9 38 13⁄16** Pine 1⁄4” TAS
❏ 2 Toggles 3⁄4 3⁄4 2 1⁄2 Pine
*Face frame and door stiles are 2″ longer than the final height needed; **Door panel sizes determined by adding 1⁄2” to opening in dry-assembled door frame to account for the grooves; †TBE = Tenon both ends; ‡TAS = Tenon all sides
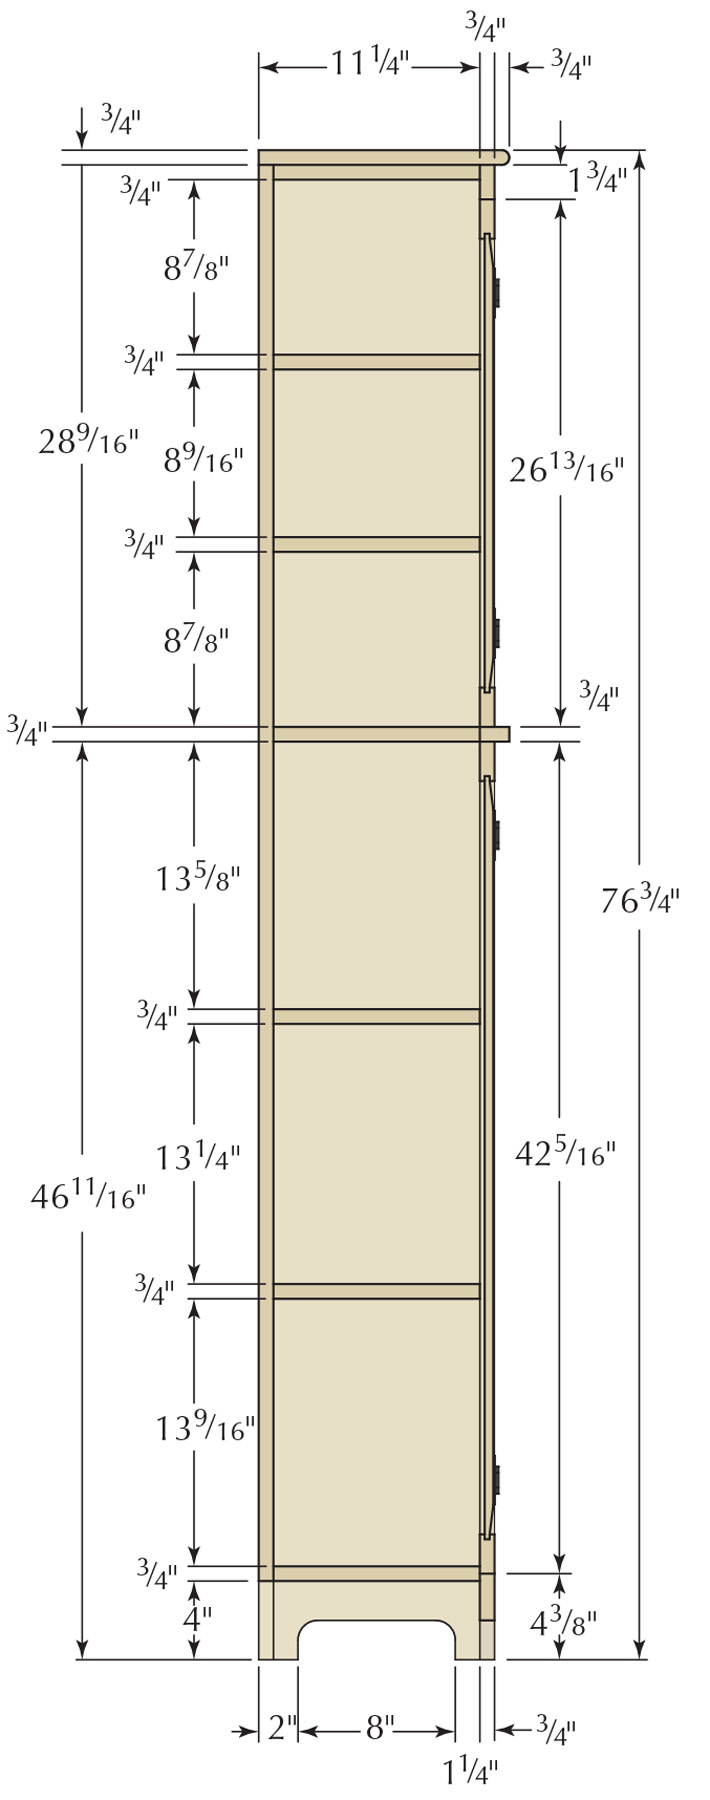
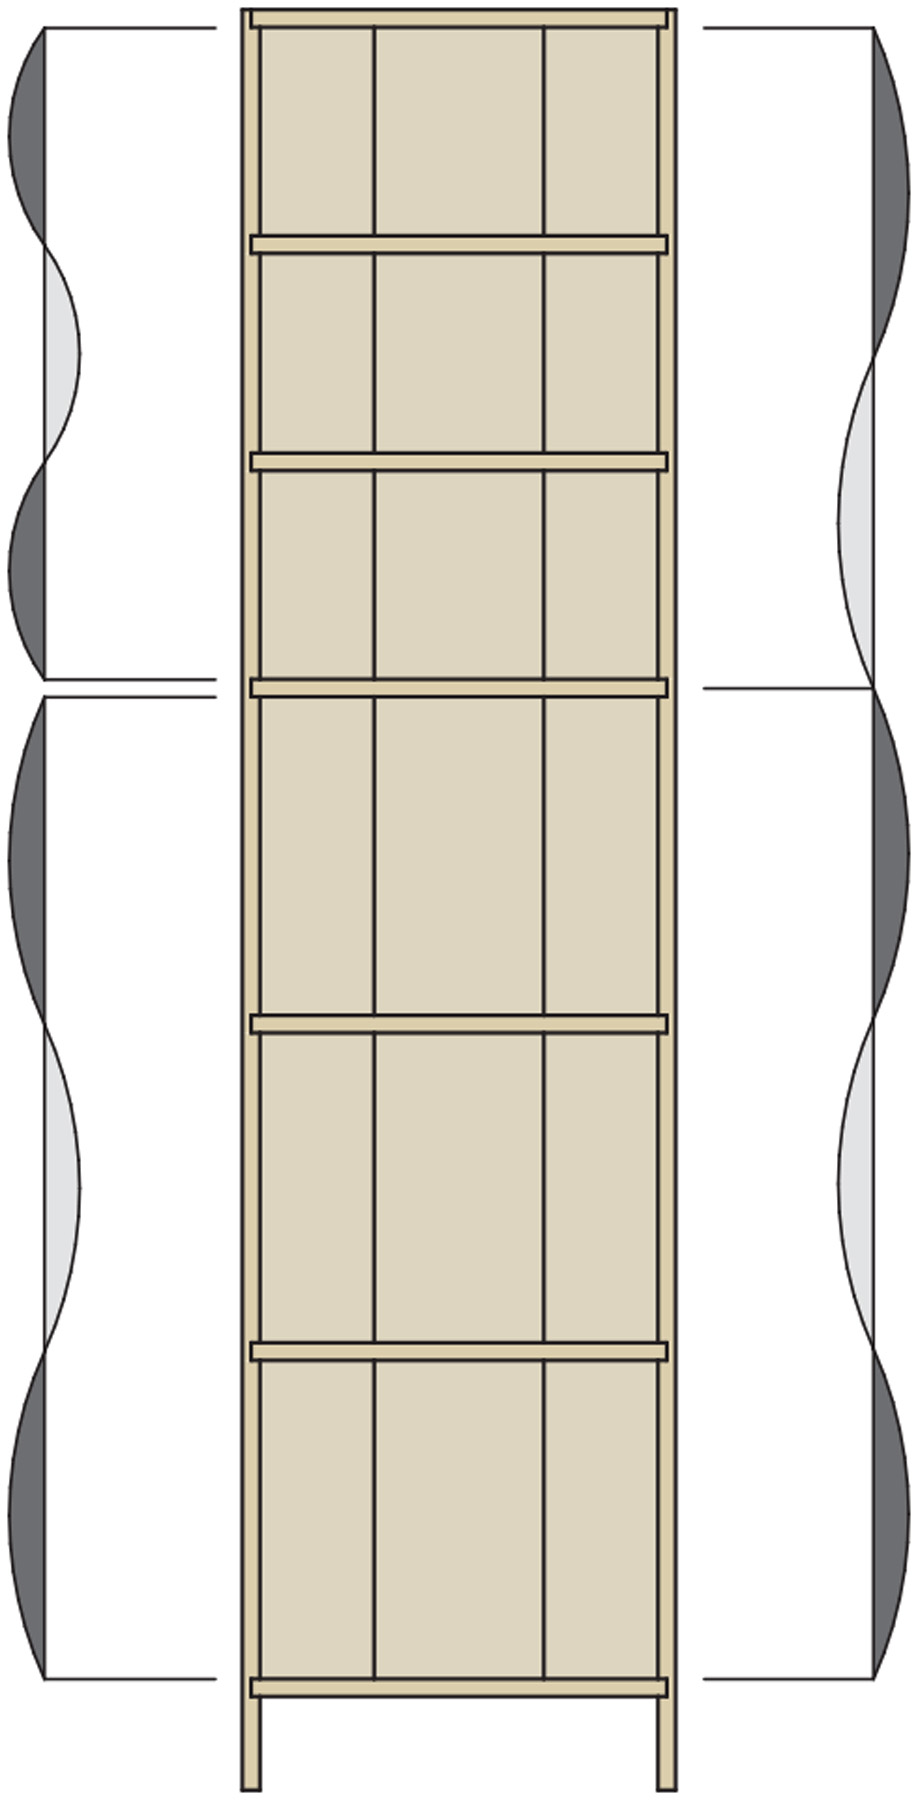
Section
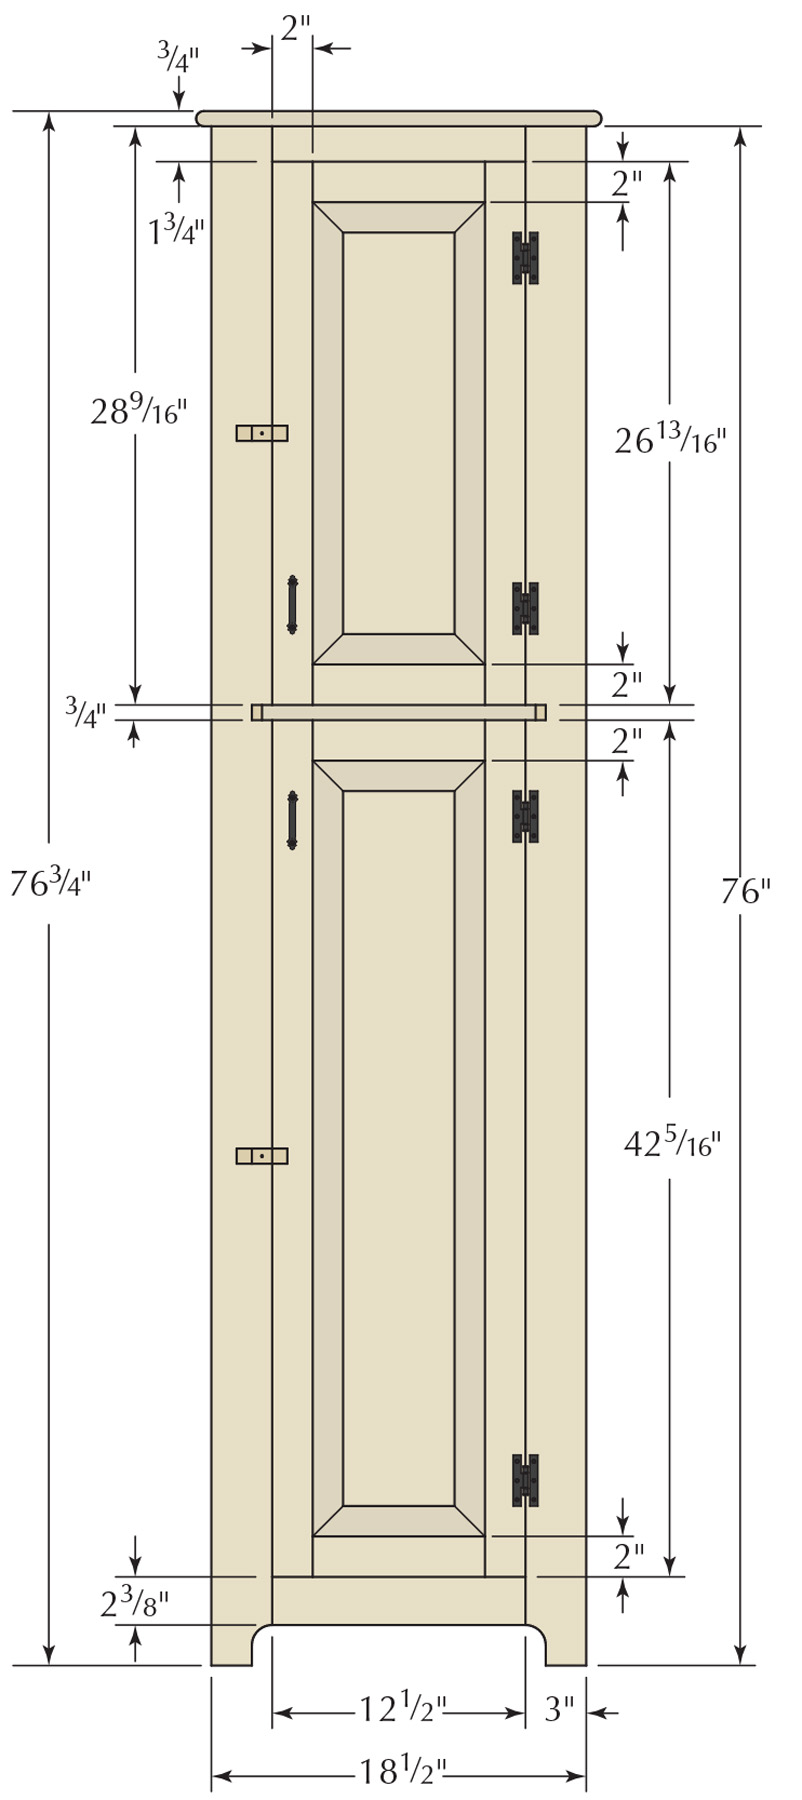
Front
Tongue-&-Groove Backboards
While the glue on the case is drying, turn your attention to the backboards. These boards have tongue-and-groove edges that help to align them while still allowing for movement. The center board has a tongue on one edge and a groove on the other edge. The two outer boards have the matching half of the joint to fit the center board. Traditionally, a bead or bevel is planed on the insides of the backboards to disguise gaps that grow or shrink during seasonal changes. I chose to add a small bevel at the edges of my three boards.
Match the backboards. The tongue-and-groove joinery on the backboards is made with a pair of match planes. One plane cuts the tongue and the other cuts a matching groove. The joint is sometimes called a match joint because of this.
 The backboards are attached to the case with nails only. The outer boards are nailed to the backs of the shelves close to the boards’ outer edges. The center board is nailed right down its middle. I leave about a dime’s thickness between the boards in the summer, or up to two nickels’ thickness during a really dry winter.
Face Frame Adds Strength
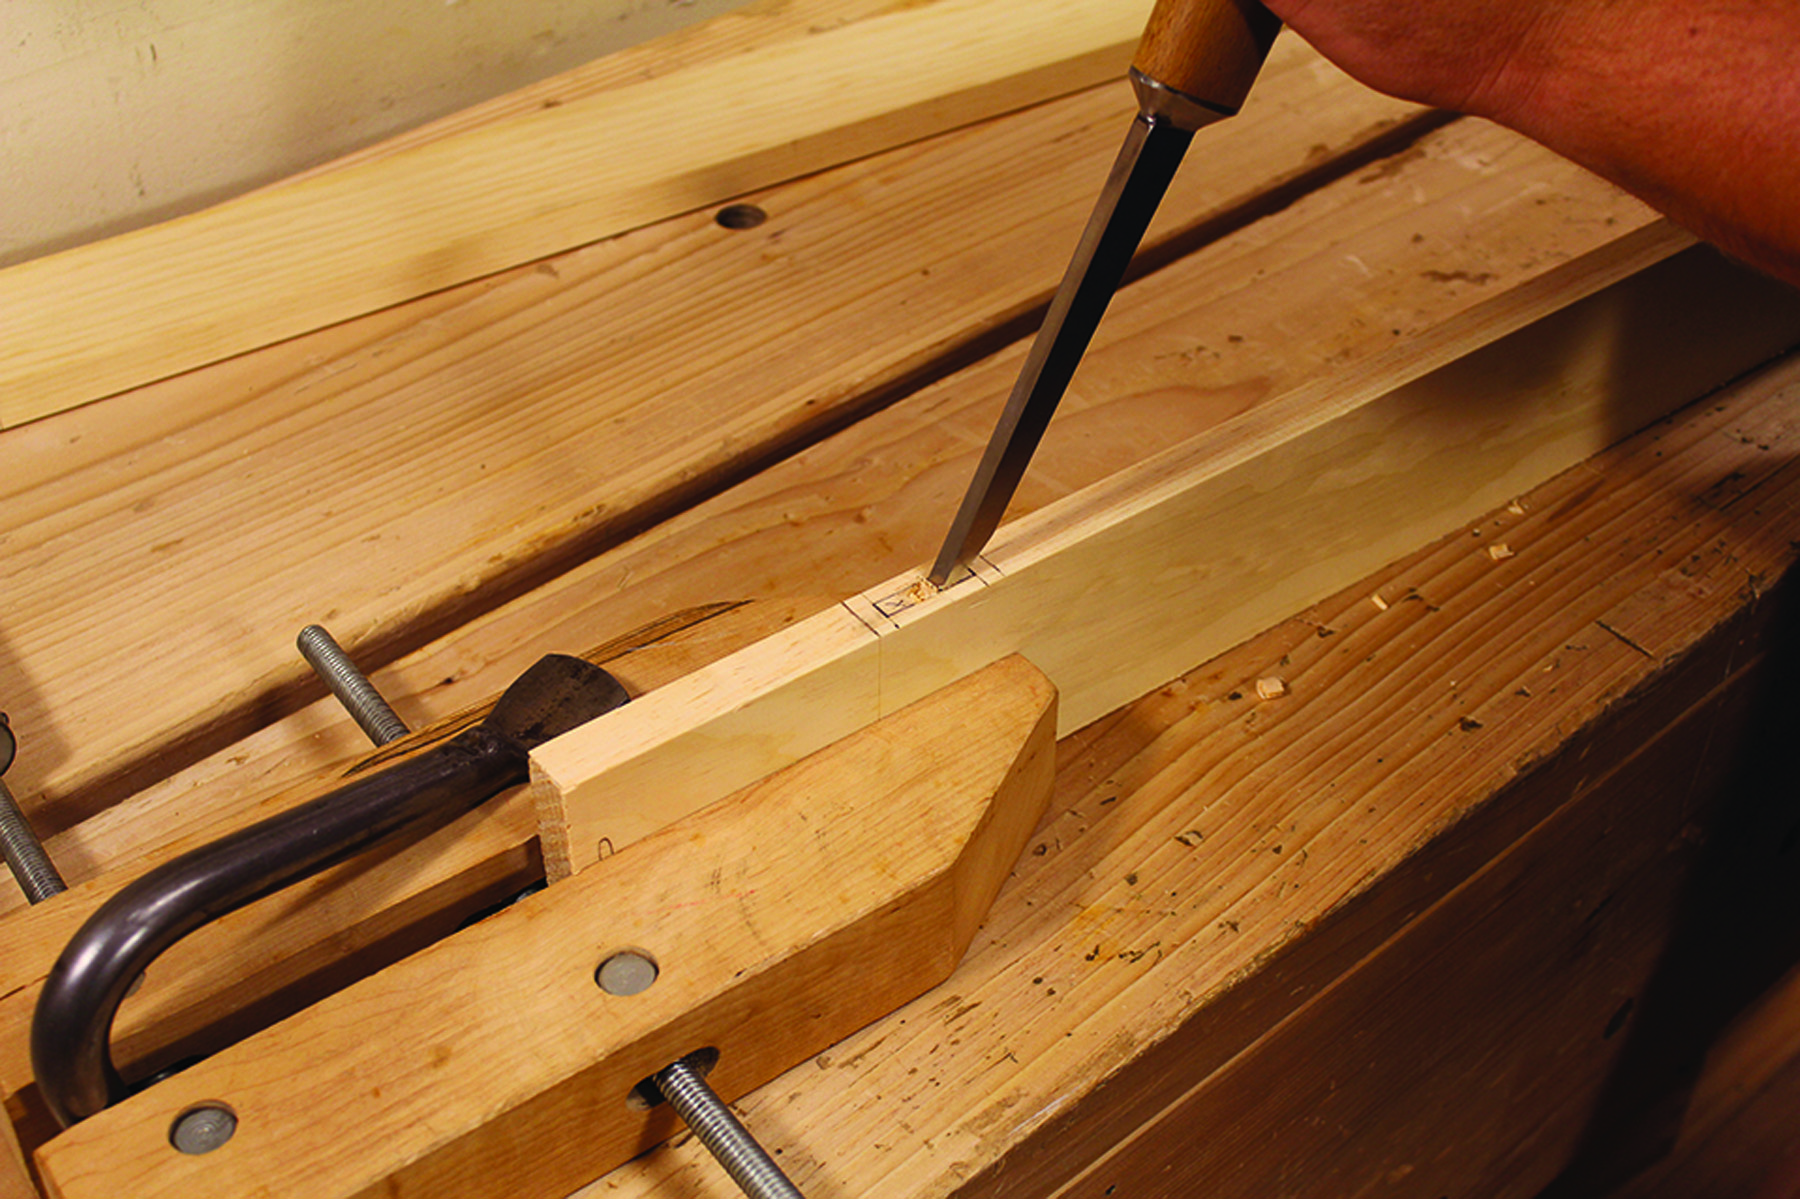
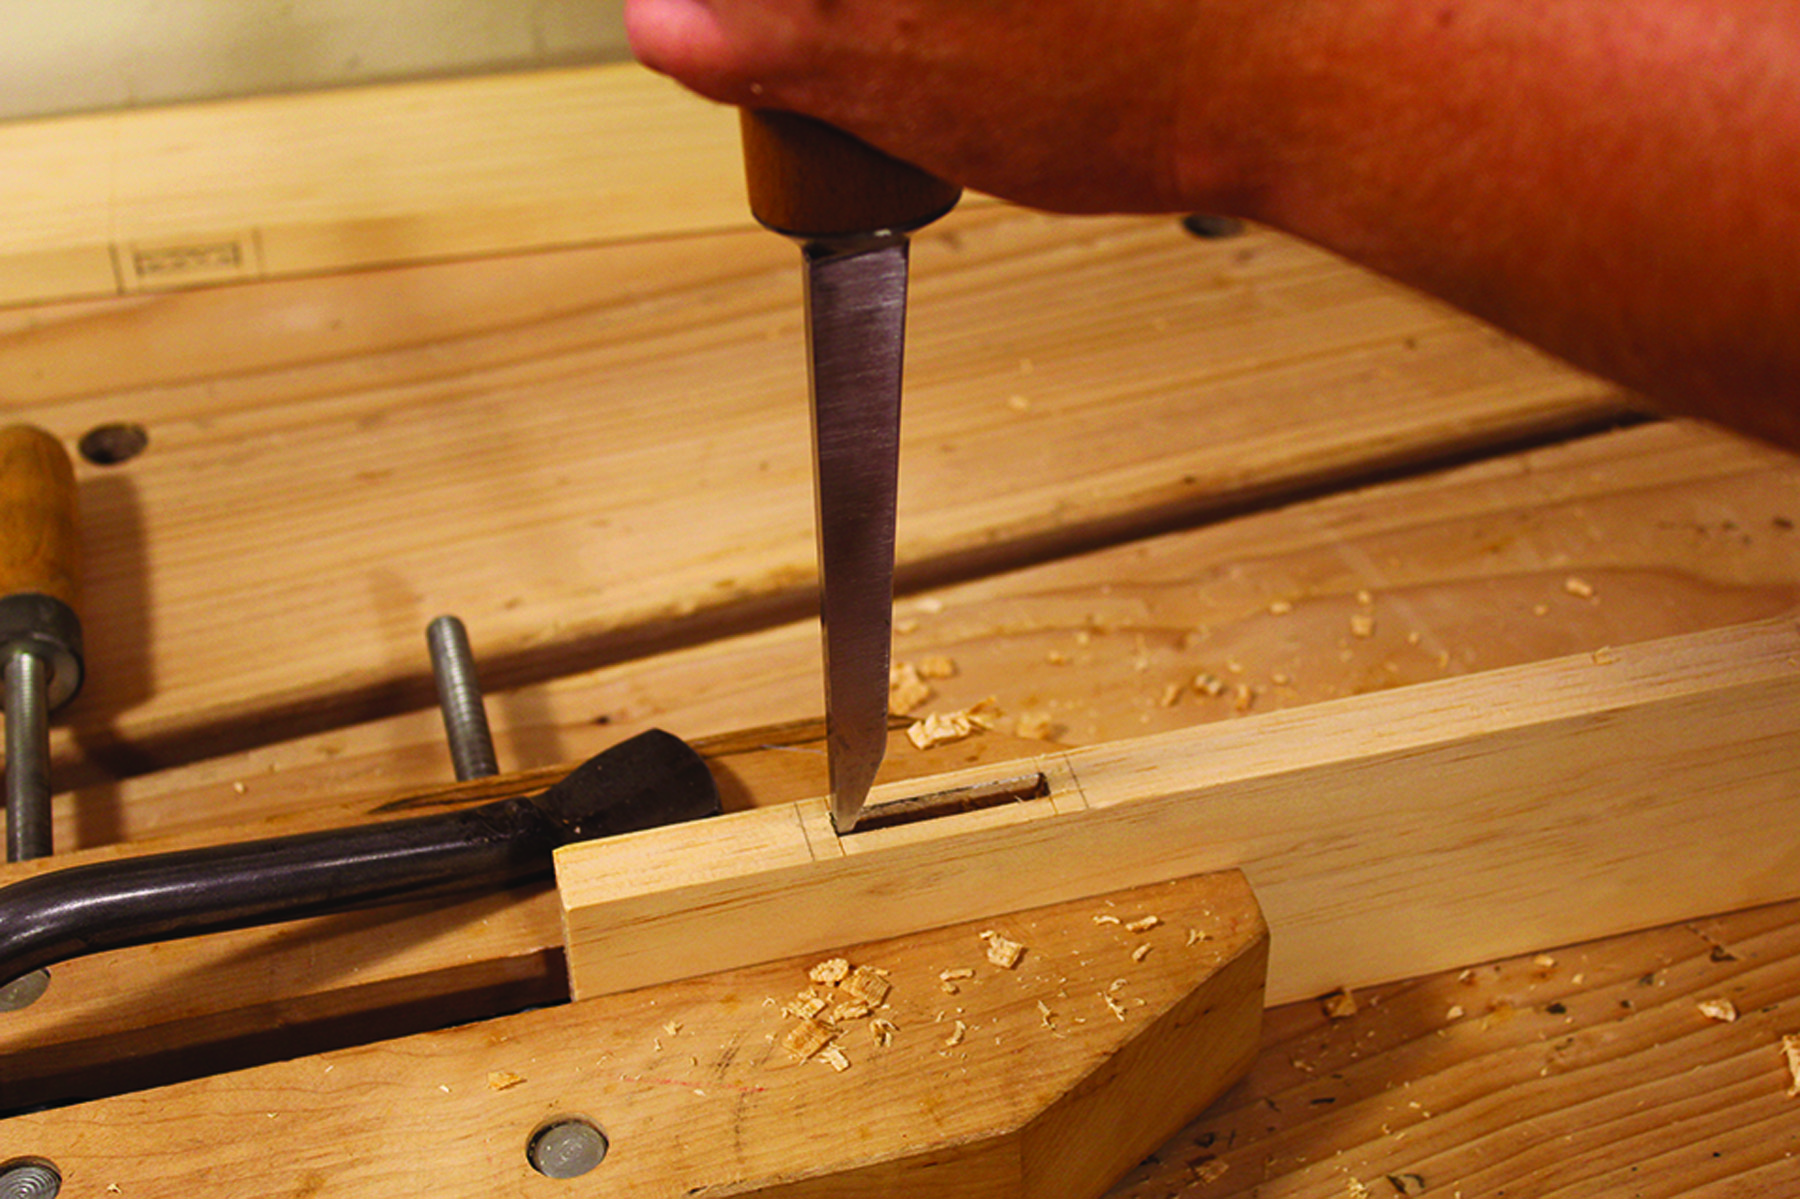
Chopping a mortise. I chop a V-shaped chip from the center of the mortise until the center is at full depth. The last two chops are right at the knife lines to define the ends of the mortise.
 Adding a face frame to the case helps to define the upper and lower sections. It adds rigidity to the case to prevent racking. The face frame is constructed with mortise-and-tenon joinery then glued and nailed to the case. I like mortise-and-tenon construction for face frames because it’s a strong joint. However, if you’re not comfortable with mortises and tenons, half-laps work, too. I think half-laps are harder to get right, though, and they’re not as strong a joint.
Cut stiles 2″ longer than needed to provide support to the end grain as you mortise. The added “horns” are cut off after the frame is assembled. The 1⁄4“-wide mortises are centered on the thickness of the stock. Locate the mortises vertically by transferring the finished length from the case onto the stiles then subtracting a 1⁄4” from each end to account for the shoulder of the tenon. Mark the width of the rails directly on the stiles and leave another 1⁄4” shoulder at the other end of each mortise.
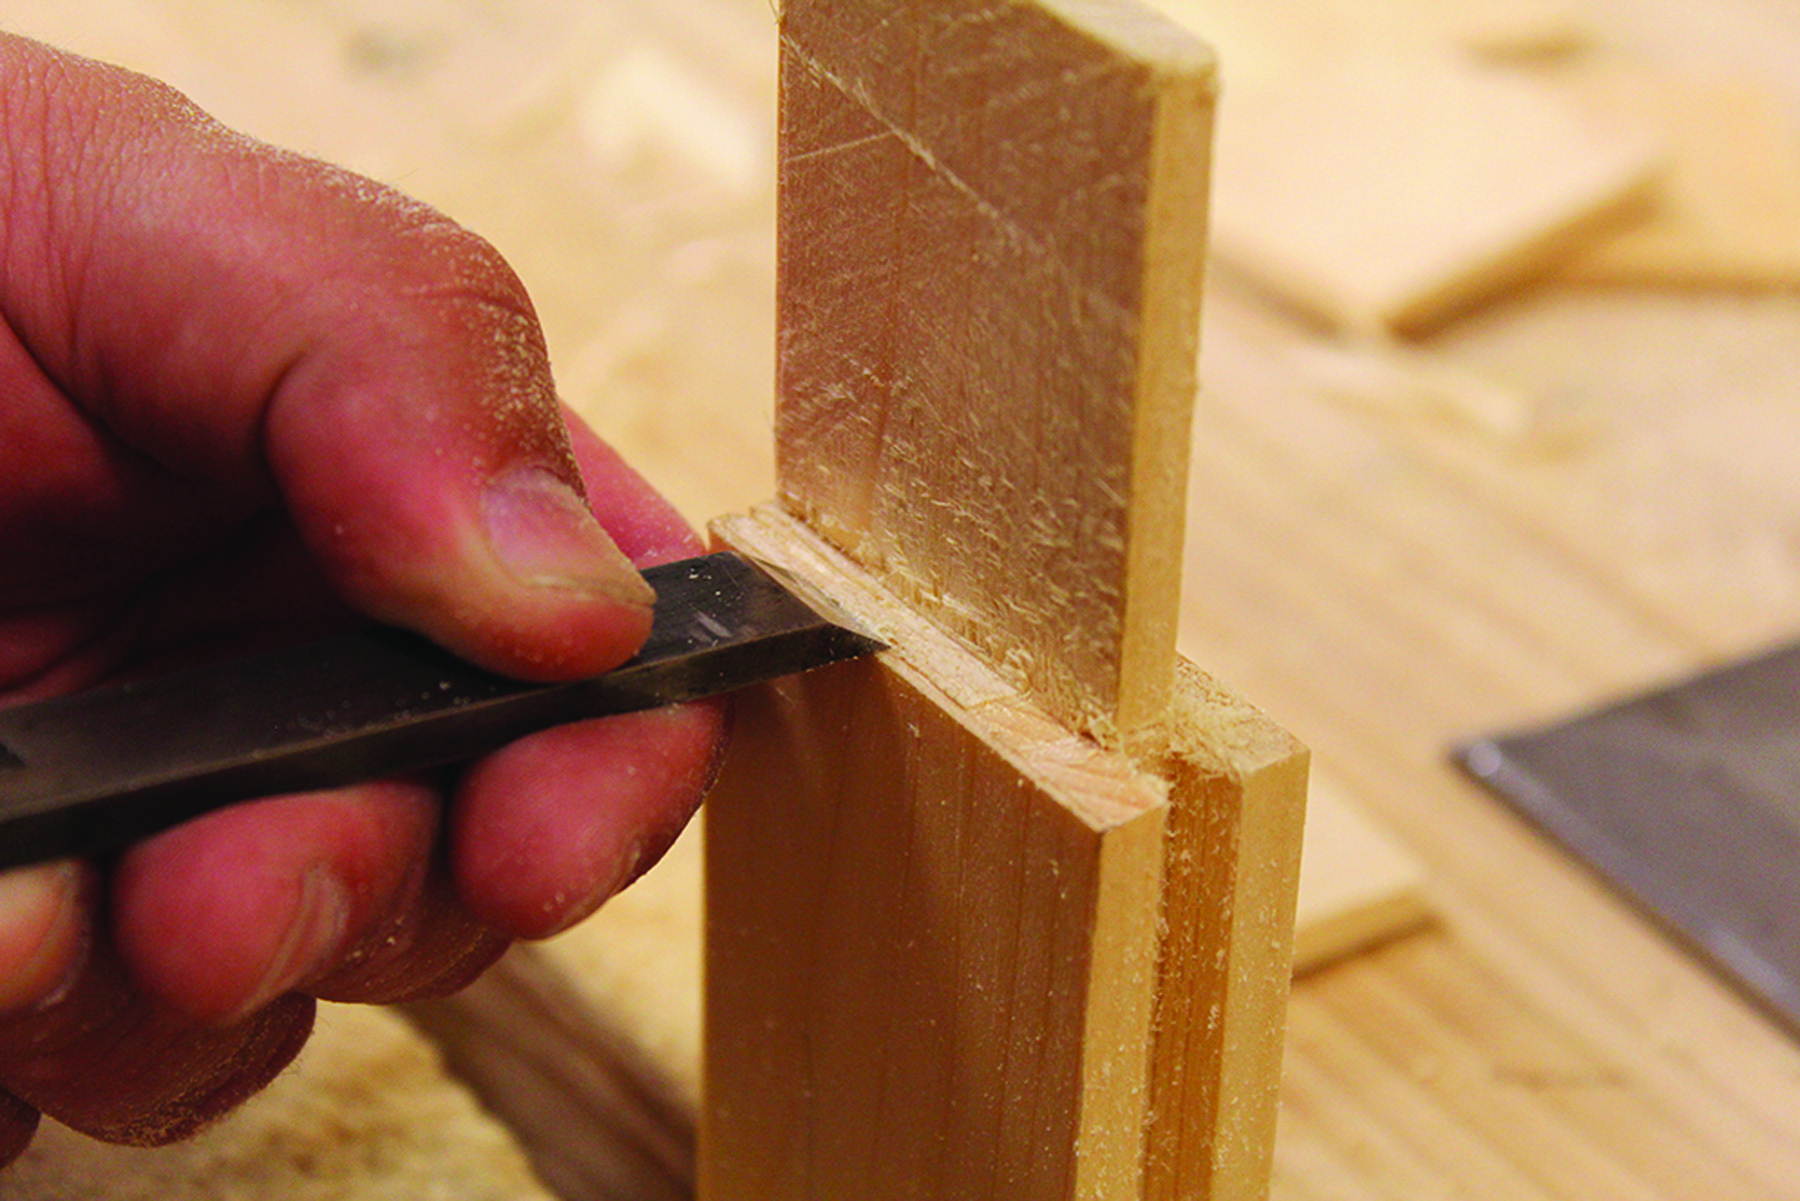
Pare the shoulders. Imperfect shoulder cuts are easily pared by putting a sharp chisel right into the knife line. A slightly undercut shoulder ensures that the joint closes tightly at the outer edge.
To cut the mortise, I start at the center and chop in a V-shape to the mortise’s full depth. I sight from the end of the rail while chopping to ensure that I’m holding the chisel plumb. With the center of the mortise at full depth, I chop toward the ends of the mortise and lever out the chips. The last two chops are made with the chisel held perfectly vertical. I cut right at the scribe lines to denote the ends of the mortise.
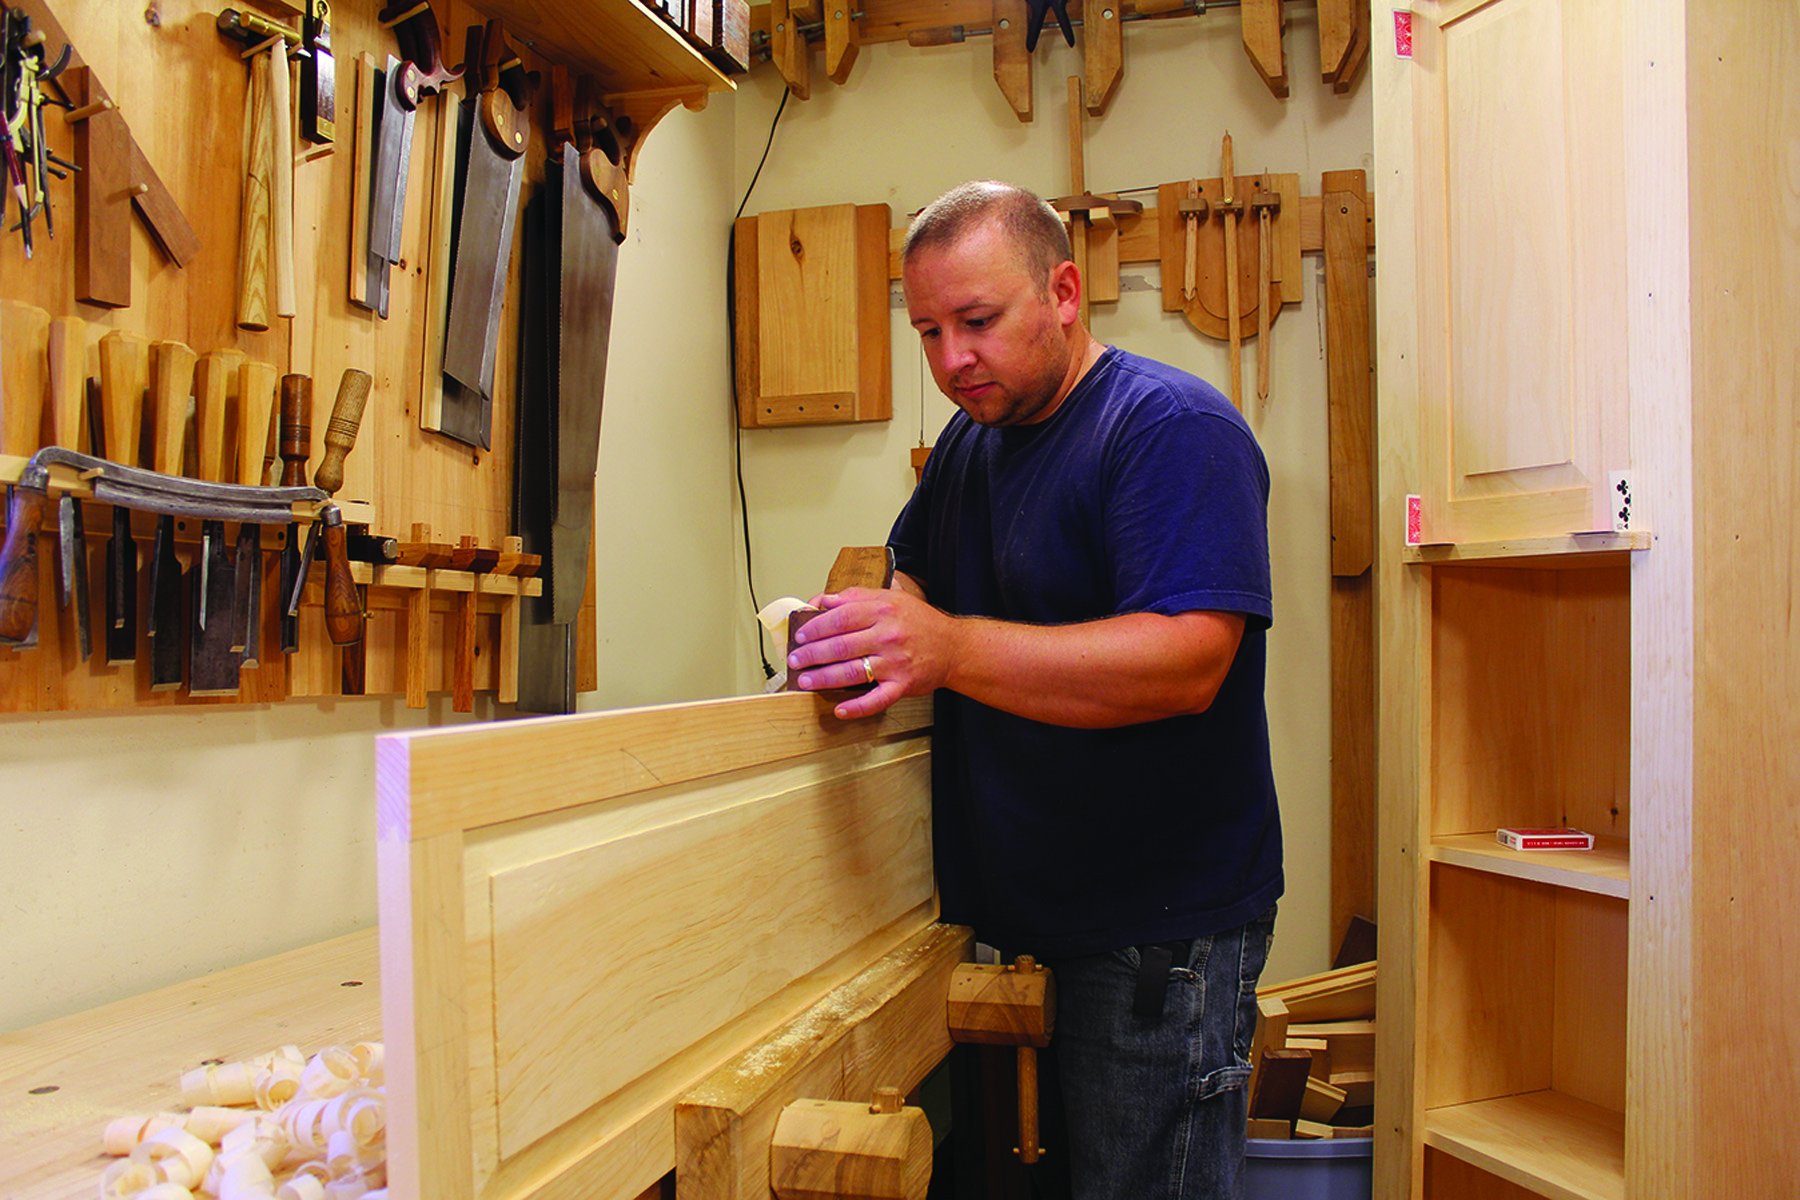
Check for wind. If the case is twisted at all, the time to fix it is before the face frame is glued on. Check with winding sticks and plane down any high corners until everything is nice and flat.
To lay out the tenons, scribe the shoulders deeply on all four edges. Scribe the cheeks with the same mortise gauge setting that was used to scribe the mortises, referencing the gauge off of the same face as when marking the mortises. Then transfer the width of each tenon directly from its mating mortise.
I saw all four shoulders of the tenon on the bench hook by working around the tenon, turning the stock 90° after each cut so every subsequent saw cut has a kerf to start in. After the shoulders are sawn, I cut away the cheeks by sawing down one edge at an angle, turning the stock around and then sawing down the opposite edge at an angle. Finally, I secure the stock vertically in the vise and saw out the triangle of waste that remains between the first two saw cuts.
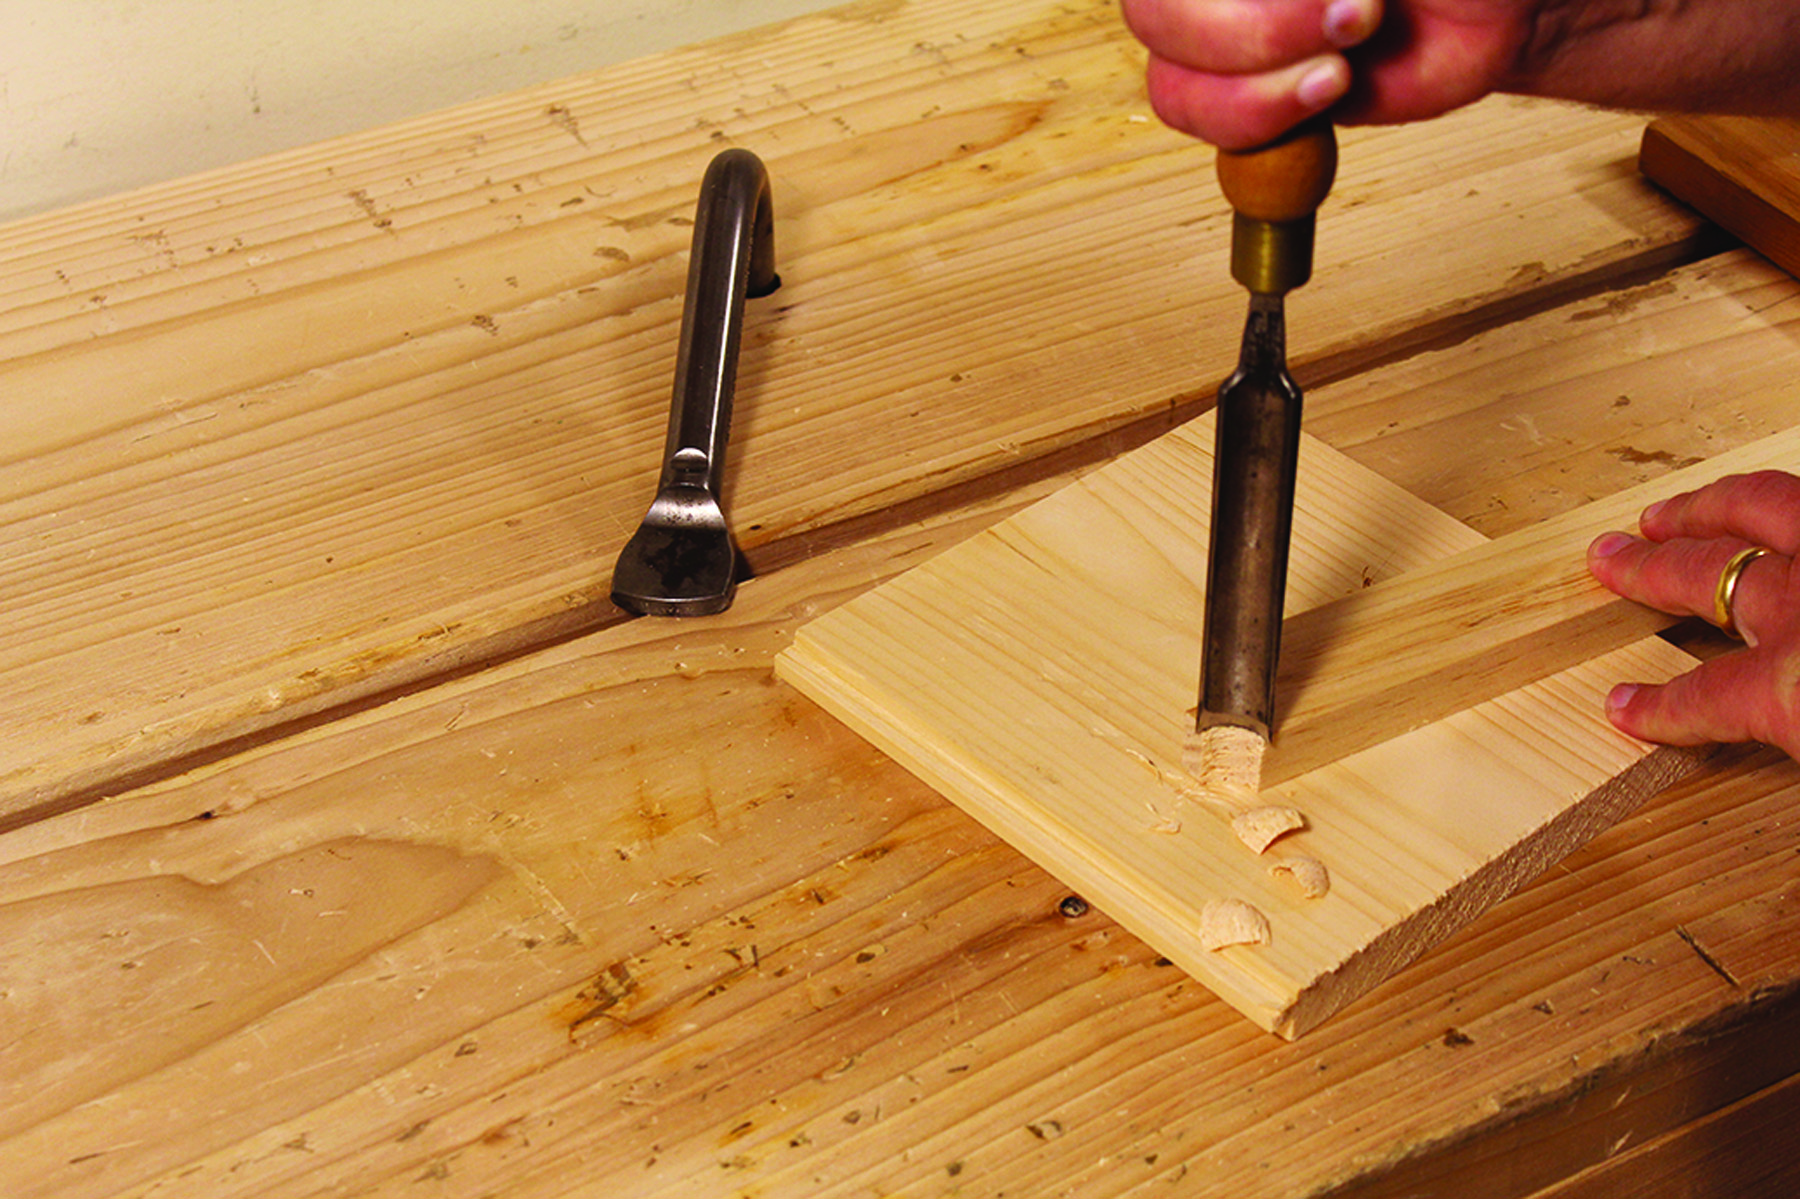
Pare the cove. An in-cannel gouge makes quick, clean work of shaping the decorative coves on the ends of the case divider. This can be done with a coping saw and files as well, but the gouge is faster and cleaner.
Dry-fit the face frame and make any adjustments necessary to get everything to fit snug. Check each corner to make sure the face frame lies flat when assembled. If necessary, make adjustments to any out-of-plumb mortises to ensure that everything goes together flat. (Loose-fitting tenons can be shimmed with plane shavings.) When the dry-fit looks good, go ahead and glue up the face frame.
While the glue in the face frame dries, turn your attention back to the case. Plane the fronts of the shelves flush with the sides of the case. Check the front edge of each shelf with a straightedge to make sure it’s not humped in the middle. Also check the case at several points with winding sticks to make sure the front of the case is coplanar. You don’t want any surprises as you attach the face frame.
After the glue in the face frame has dried, trim the horns then cut the feet. Align the face frame with the case and mark them both for easy realignment. Apply glue to the front of the case sides and to the first 2″ of each shelf. Put the face frame back in place, aligning your marks. Drill pilot holes and nail the face frame to the case using fine finish nails. Once the glue dries, plane the face frame flush with the sides and top of the case.
The final piece of the face frame is the decorative divider that separates the top section from the bottom section. Cut the divider to size, saw the notches to fit around the face frame, and shape the small coves on the ends. Glue and nail (or clamp) the piece to the front of the shelf that divides the upper and lower sections.
Simple Raised-panel Doors
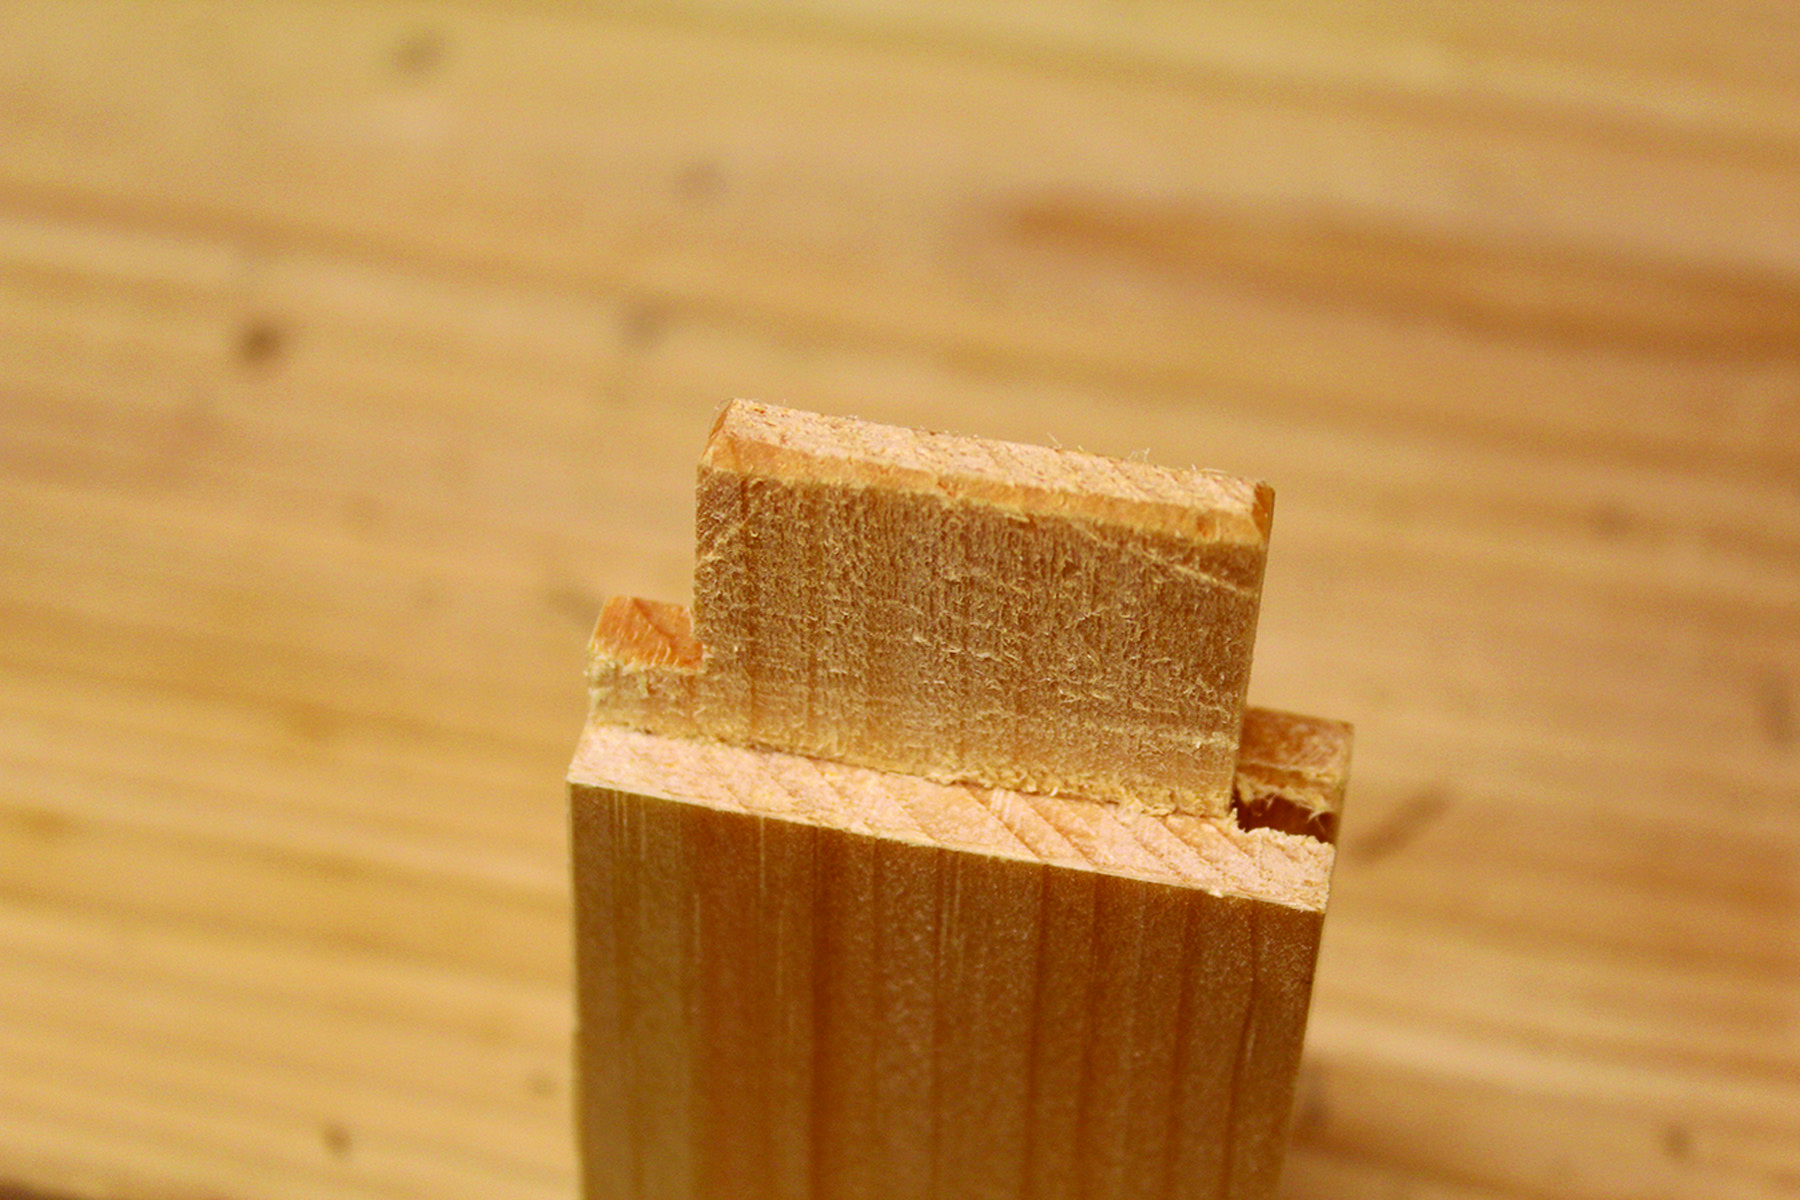
Haunched tenon. The haunch is a small protrusion where the outside shoulder of the tenon would normally be. Its purpose is to fill in the groove in the door stile.
The process for making the door frames is almost identical to that of the face frames, with two minor differences. First, the rails and stiles of the door frames must be grooved to accept the appropriate door panel. This is accomplished with a plow plane. The 1⁄4“-wide x 1⁄4“-deep grooves can be plowed before or after the mortises are cut. The second difference is that because of the groove in the stiles, the tenons on the rails need to have a haunch in order to fill in the groove in the stiles.
Fit the doors. To fine-tune the fit of the doors in the opening, I aim for a reveal around all four edges of the door that is only two or three playing cards in width.
Once the door frame is made, the panel can be sized to fit the opening. The panel should fit snug without being too tight. You want the panel to be able to expand and contract with the seasons. You can make it snug during a humid summer, but during a dry winter, leave room for expansion.
Assemble the doors. Glue only the mortises and tenons of the frames. The panels should be allowed to float in the grooves. Make adjustments for square by checking the diagonals. If desired, the tenons can be pegged for a little added strength. Once the glue is dry, trim the horns and plane the doors to fit their openings.
Toggles Keep Doors Closed
I opted to go with simple wooden toggles to latch the doors. The profile of the toggles is the same as the profile on the case divider and is shaped the same way. To attach the toggles, I used #10 roundhead wood screws. Tighten the toggles just snug enough to keep them from spinning freely, but not so tight that they’re difficult to turn.
Top it Off
The chimney cupboard top really adds no functional value to the cupboard (though of course you can store stuff up there). It does, however, add a bit of shadow and visual interest. It’s nothing more than a board that is slightly oversized with a bullnose profile on the front and side edges.
This profile can be made with moulding planes if you have them, but it’s simple enough to just round the edges over with a smooth or block plane. Once the edges are shaped, the top is glued and nailed to the top of the case.
Raised Panel by Hand
Raised-panel layout. With nothing more than a marking gauge and a rabbet plane, you can easily make raised panels.
Raised panels add an elegant touch to a cupboard door and prevent a tight door from binding in the opening during seasonal fluctuations. All it takes to make them is a marking gauge and a rabbet plane.
Begin by sawing and planing the panel to its final size (the panels for this cupboard are 1⁄2“-thick). Next, decide on the bevel width. (I usually go for a 1 1⁄2“-wide bevel, or whatever width my moving fillister plane can cut at maximum blade exposure.)
Set your cutting gauge to the width of the bevel and scribe the front of the panel on all four edges to define the field (the flat section) and the bevels. Reset the gauge and scribe the field’s depth about 1⁄16” from the top of the panel on all four edges. Then reset the gauge again and scribe the bottom of the bevel on all four edges about 7⁄32” from the back of the panel.
Secure the panel to your workbench and plane 1⁄16“-deep rabbets to define the field. Plane the cross-grain rabbets first so any spelching is removed when the long-grain rabbets are planed. If your plane has a fence, use it to guide the width of the rabbet. If it doesn‘t, clamp a stick to the top of the panel and run the plane along it.
Adjust by eye. Make minor adjustments to the approach angle of the rabbet plane to sneak up on the bevel. Watch the corners; they will tell you where more wood must be removed. The adjacent bevels should meet in a straight line from the corner of the field to the outside corner of the bevel.
Once the rabbets define the field, use the same plane to establish the bevels. If your plane has a fence, readjust it a hair wider. Planing the bevels by eye isn’t hard; take your time and watch the scribe line on the edge. Plane the cross-grain bevels first so any tear-out is removed by planing the long-grain bevels. Adjust the plane’s angle continually so that the last stroke will take a full-width shaving from the edge of the field to the edge of the panel. Make adjustments with the plane set very fine until the side and end bevels meet perfectly at the corners.
— BR
Finish Adds Age
To finish my cupboard, I opted to go with a traditional linseed-oil based paint. My paint was made from a mixture of linseed oil, varnish, turpentine, whiting and yellow ochre earth pigment. I brushed on five thin coats of the paint, allowing each coat to dry thoroughly. I scuff-sanded with #400-grit sandpaper between coats.
After the final coat of paint dried, I added a little age, color and character to the finish with a dark brown paste wax. Working in small sections and using #0000 steel wool as an applicator, I rubbed a liberal coat of the wax into the painted finish. I allowed excess wax to collect in low areas such as the corners of the raised panel doors and in any scratches or dents. This finish technique simulates years of dust and dirt accumulation in areas that could not be easily cleaned.
As the wax began to dry, I lightly buffed off the excess with a clean pad of steel wool, blending adjacent waxed sections together. The final buffing was done with a soft cotton cloth (old flannel bed sheets work great) to bring the waxed surface to a nice satin sheen.
I really hope you build one of these cupboards for yourself. They’re a ton of fun to build and a fantastic way to work on your hand-tool skills – not to mention, they’re a really useful addition to just about any small space.
Bob has been building furniture for almost two decades and now works entirely by hand.
Here are some supplies and tools we find essential in our everyday work around the shop. We may receive a commission from sales referred by our links; however, we have carefully selected these products for their usefulness and quality.