We may receive a commission when you use our affiliate links. However, this does not impact our recommendations.
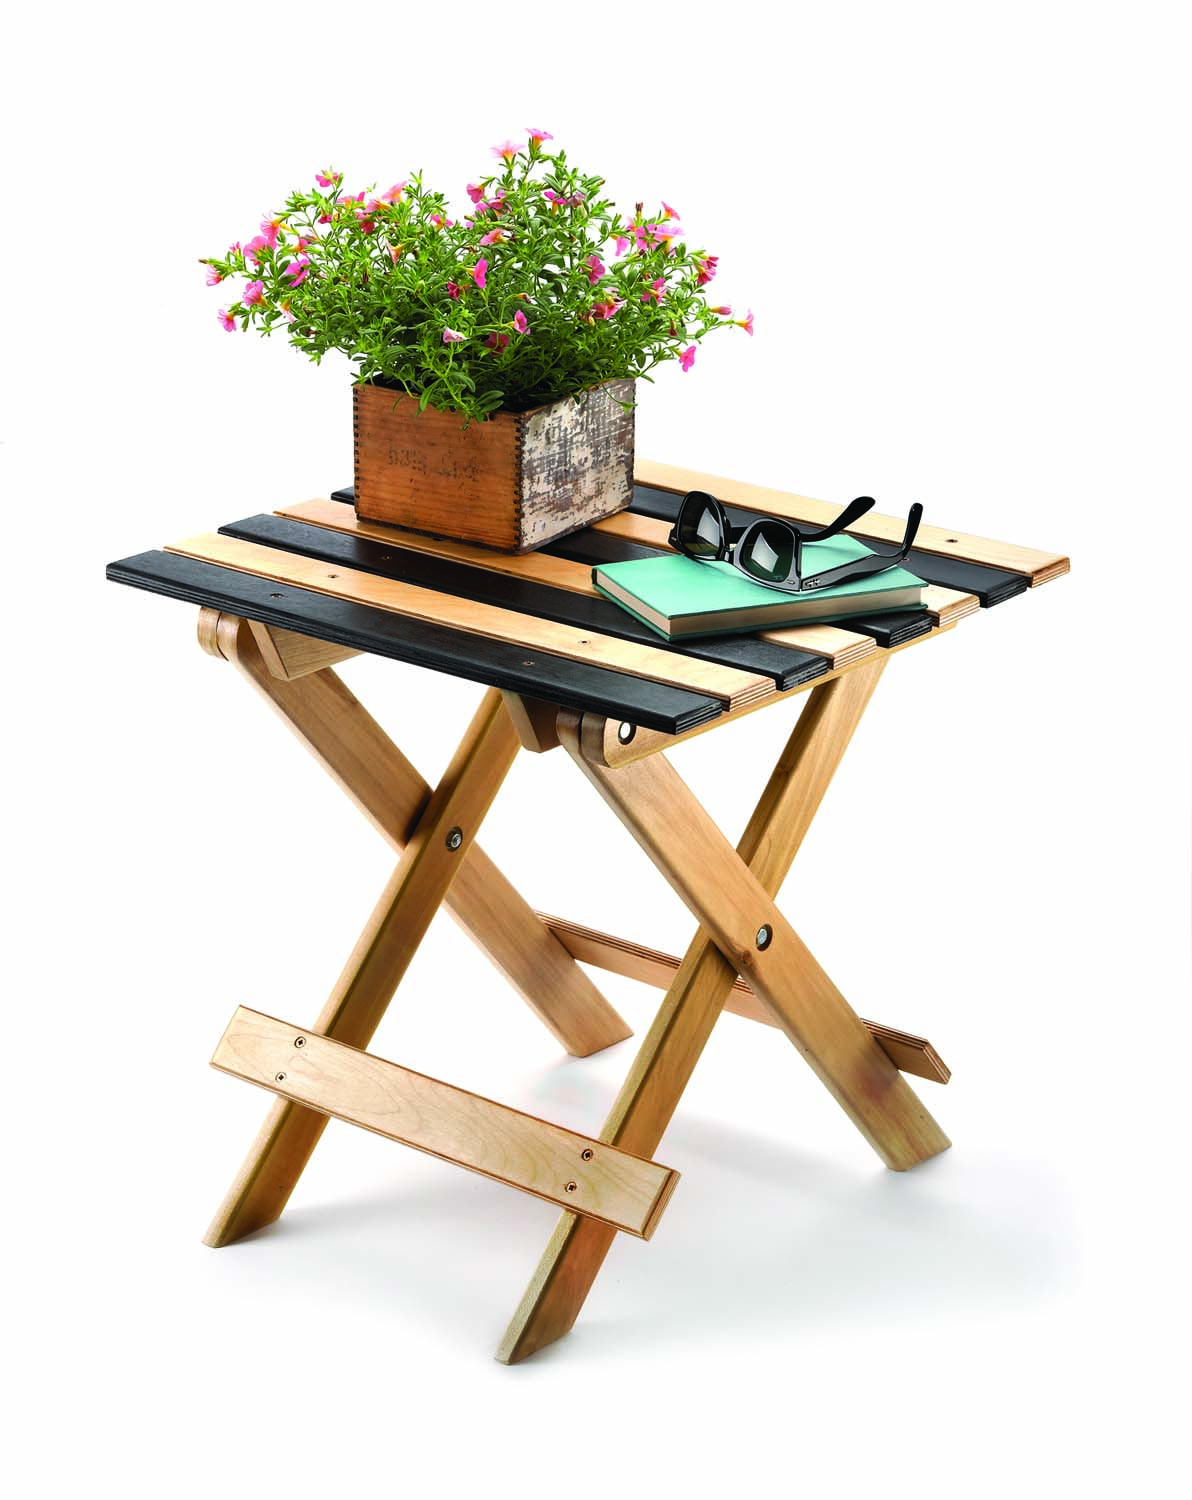
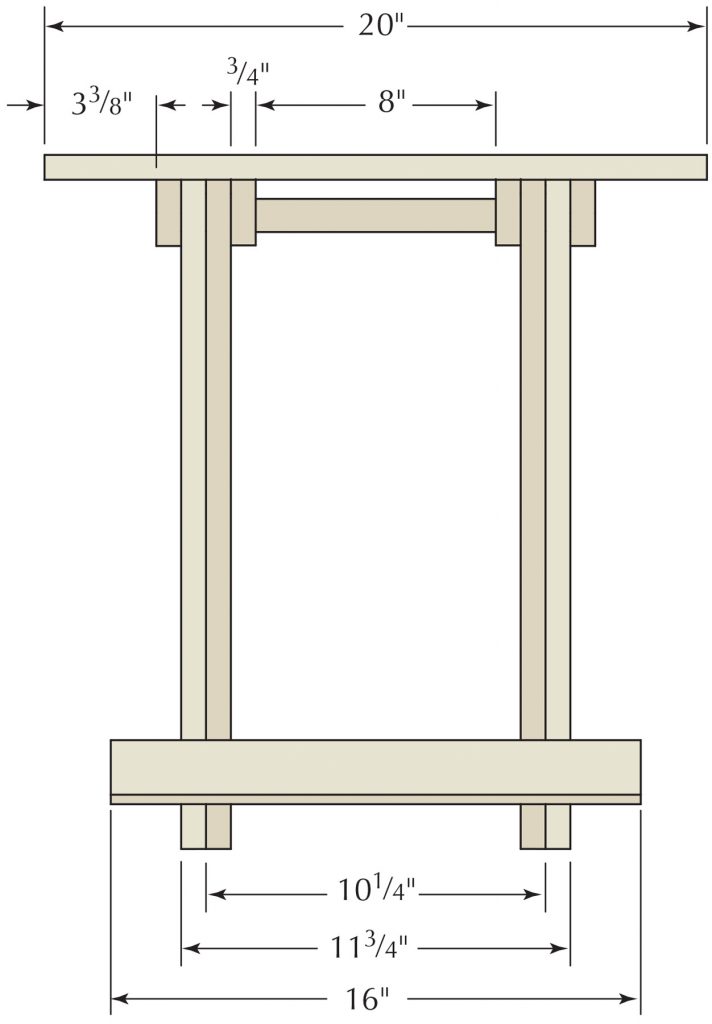
Just the right size. By using the same widths for all of the parts, this table can be sized and constructed in no time at all.
A clever design yields portable functionality.
My father-in-law gave me a table just like this one on our last trip to Portugal. He picked it up in Serra de Monchique, a small mountain village in the Algarve in the southern part of the country. He has a good eye for design, and knew I would appreciate the simple, ingenious way the table folds up. Because it is so light, compact and strong, it could also serve as a stool. And, when my family returned home, it fit easily into my suitcase.
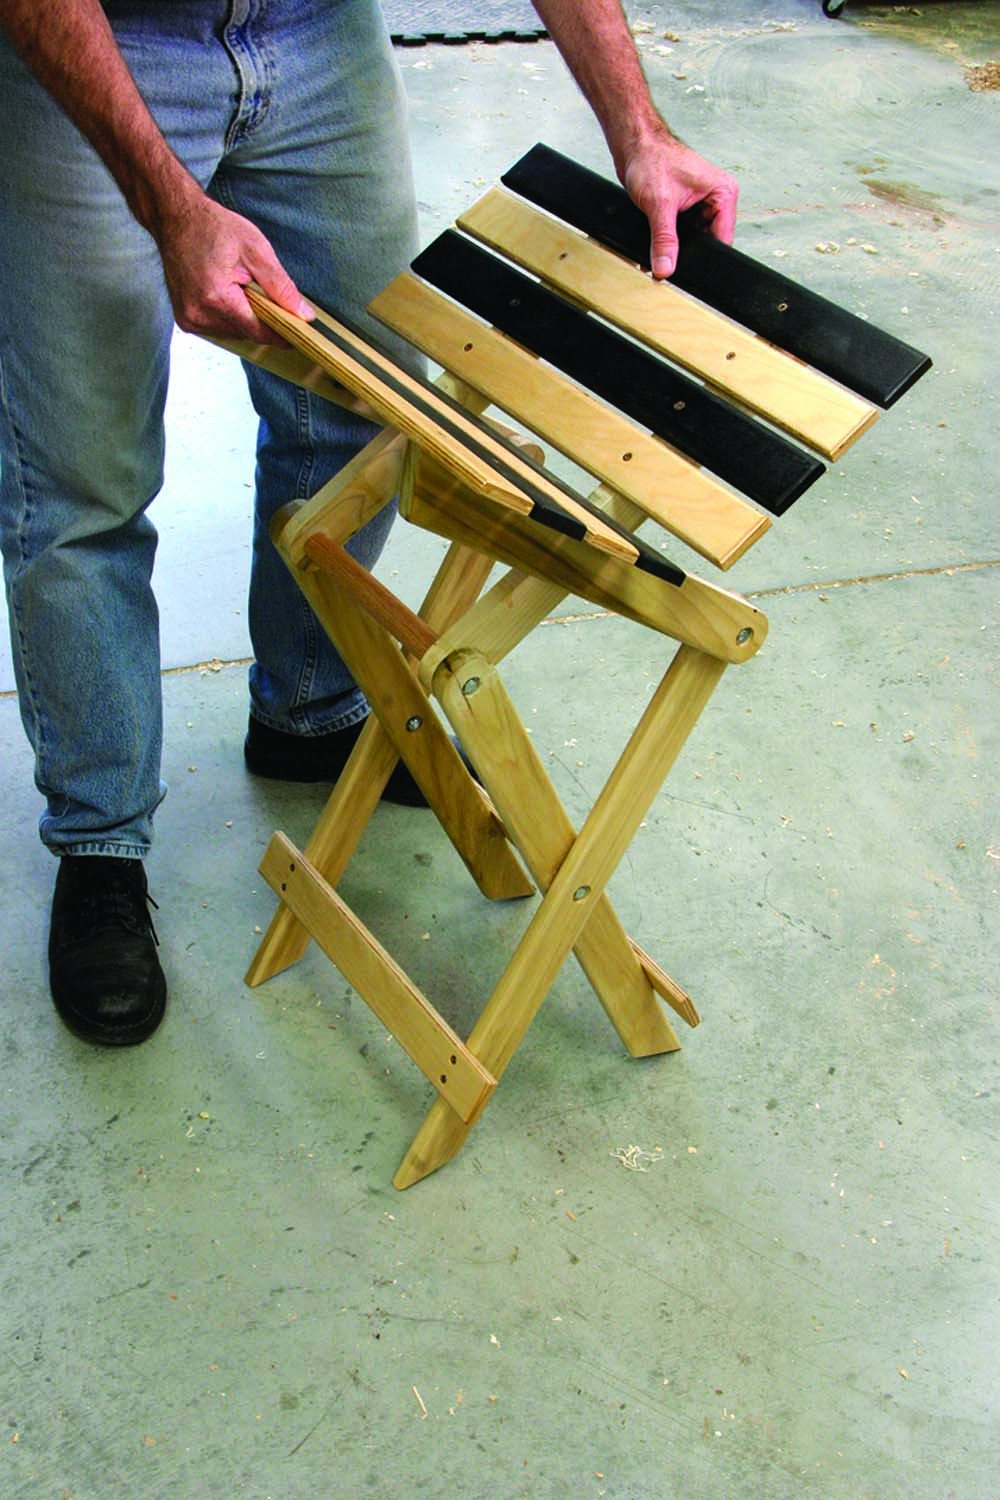
Folding wings. When opening the table, the slats resemble the wings of a bird.
The table my father-in-law gave me is made out of a species of mahogany, as it was intended to serve outdoors. If I were going to build one for my deck here in Ohio, I would use cedar, mahogany or maybe even teak – but the tables I built for this story are for inside use. I wanted a pair of utility tables for my shop, and because I had a lot of poplar and plywood collecting dust, my decision on what woods to use was an easy one.
Set it Up Once & Run With it
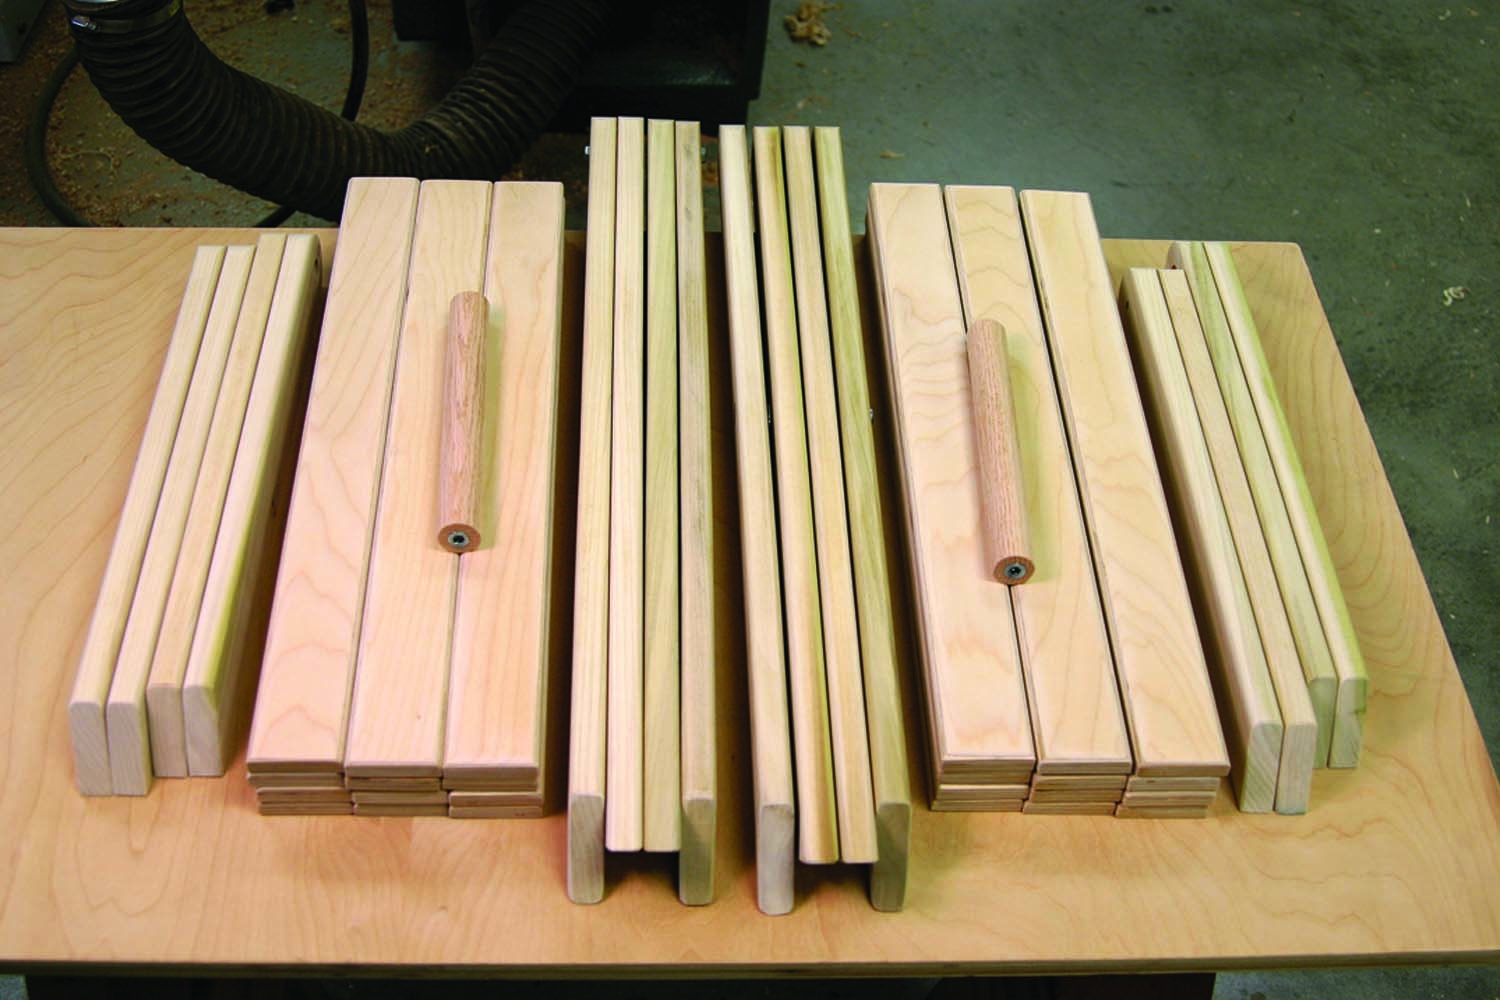
Two are better than one. With not much more effort, you can mill the stock for a second table.
The legs on the original table are 11⁄4” wide. I wanted them to be a little more sturdy, so I bumped up that dimension to 2″. To make things quick and easy, I used the same width for the slats on top. That way, I had to set up the table saw only once, and all of my ripping was done in a matter of minutes.
Next I moved to the miter saw, cutting the final lengths for my legs and slats using a stop-block to ensure consistent lengths – 20″ for the slats, for the legs, 25 1⁄2“.
After I had all the pieces sized, I marked all of my hole locations. It is always a good idea to mark the pieces clearly when all of the pieces are still square, but it is especially important with this table. With all of the rounded and angled pieces, this will eliminate any confusion when you are ready for assembly.
One end of each leg needs to be rounded off, as does the pivot end of the arms. You can mark the curve in a variety of ways. If you have 2″ PVC pipe, cut off a small piece and use the inner radius as a template. I used a compass set to a 1″ radius and scribed a 2″ circle.
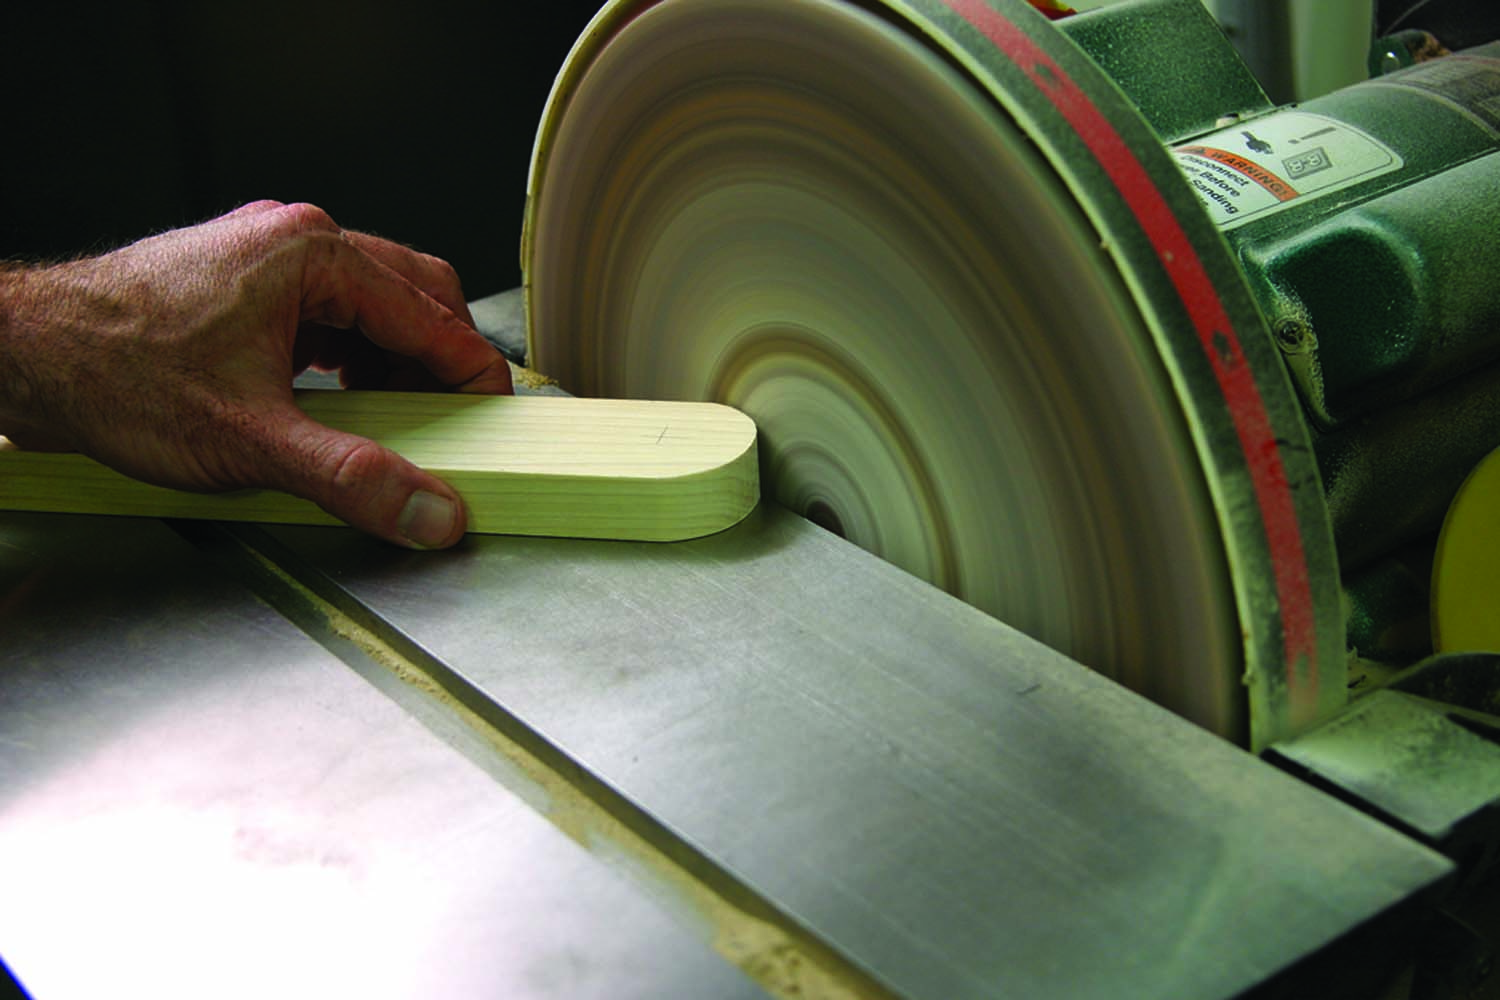
Round the legs and arms. Use a disc sander to round the pivot points on the legs and arms.
Rounding off those corners is easy, too. I used the disc sander in our shop because the amount of wood was so negligible and I had a clean edge when I was finished. If the pieces had been larger, I would have taken the bulk of the waste off at the band saw. If you don’t have the shop machinery I used, you can simply use a coping saw to remove the bulk of the waste then sand it smooth.
Edge it Off
I was in full production mode by this point. I installed a 1⁄4” roundover bit in the router table and proceeded to take the edge off all the leg and arm boards. For the top slats, I only rounded over the top edges. Because I was dealing with plywood for the slats, and the widths were only 2″, I held off using the router table to round over the ends of the slats. I reserved those edges for a hand sander. In a matter of minutes, I had neat stacks of stock ready for the drill press.
Drill Press Stop-blocks
As with the miter saw, I set up a couple stop-blocks on the drill press because I had a lot of repetitive holes that needed to be identical. Even though I marked out all of my holes with care and precision, I still drilled the holes at the end of the legs first then used the bolts as an index. That way, when it came time to drill out the holes for the pivot in the middle of the leg, I was sure they would line up.
I used a 3⁄4” Forstner bit to cut 3⁄8“-deep counterbores then a 1⁄4“-brad-point bit to drill all the through-holes. These dimensions allowed me to use standard 1⁄4“-20 hex bolts for the leg assembly.
Mirror Image
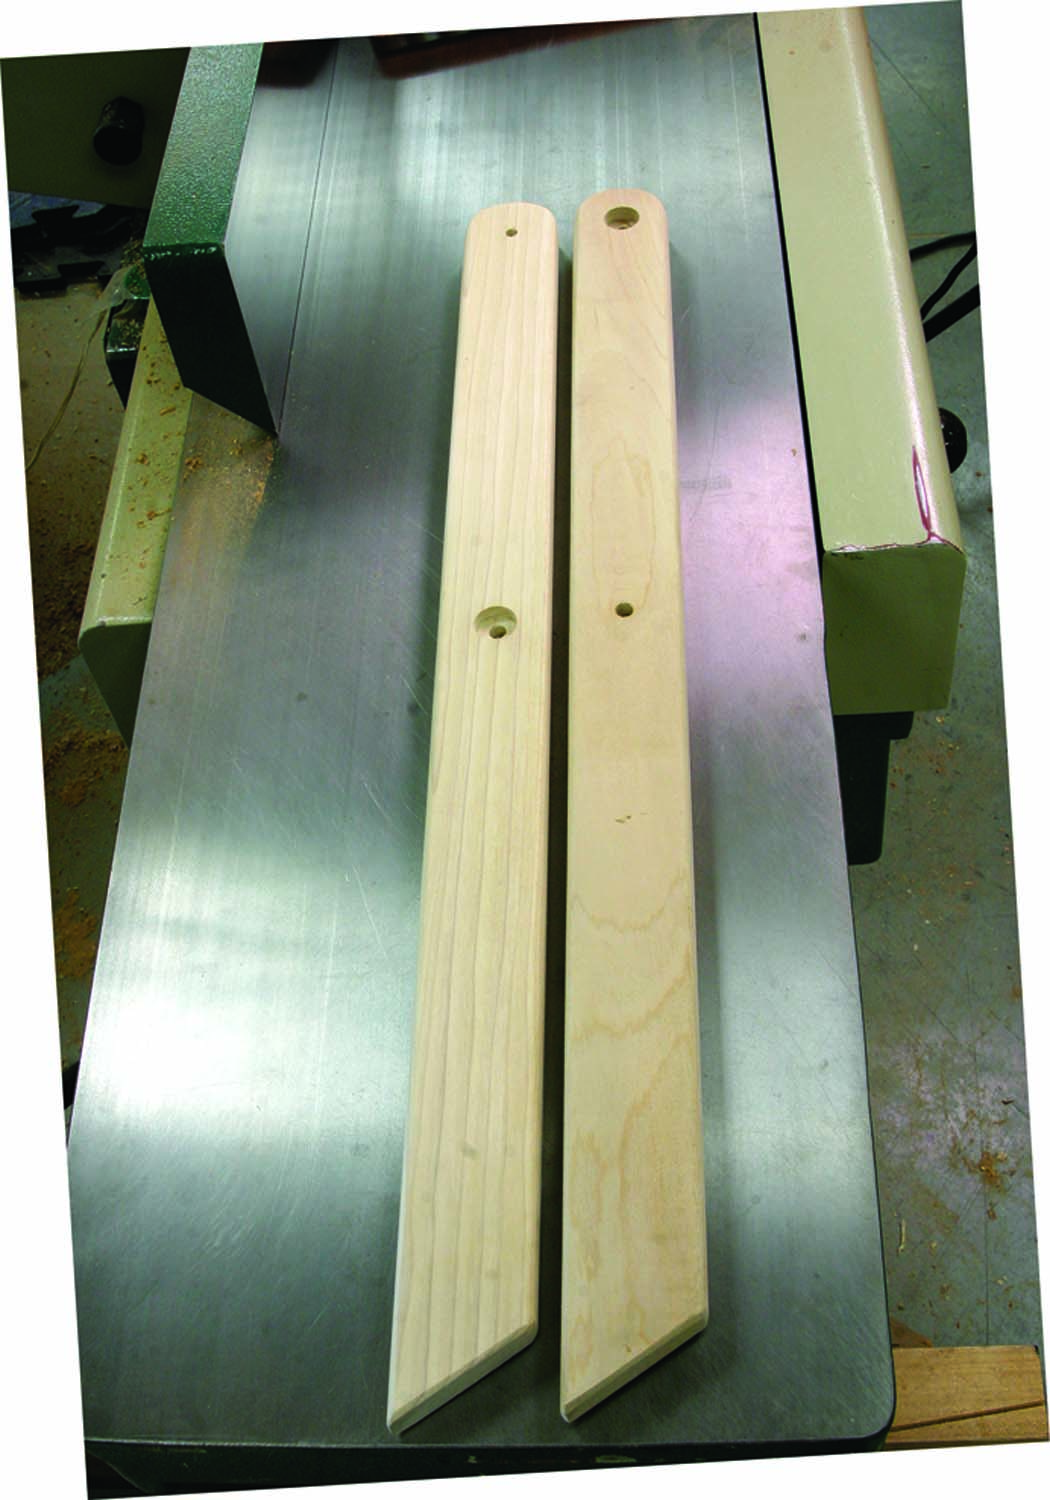
Identical legs. The only difference between the legs is where the holes are drilled (above). You will need two sets of mirror-image legs (below) per table.
 As you can see from the photos on the previous page and above right, the table has inside and outside legs, as well as inside and outside arms – two sets of identical legs and arms. The inside arms are the only pieces that don’t get a counterbore. Because they are wedged between a dowel handle and the inside legs, they only require a 1⁄4” hole to handle the hex bolt.
The only piece that is not 2″ wide is the 1″ dowel that is used as the handle. The original table had a screw that was just drilled straight into the dowel. Because this joint has the potential of getting some regular use, I added a threaded insert for durability.
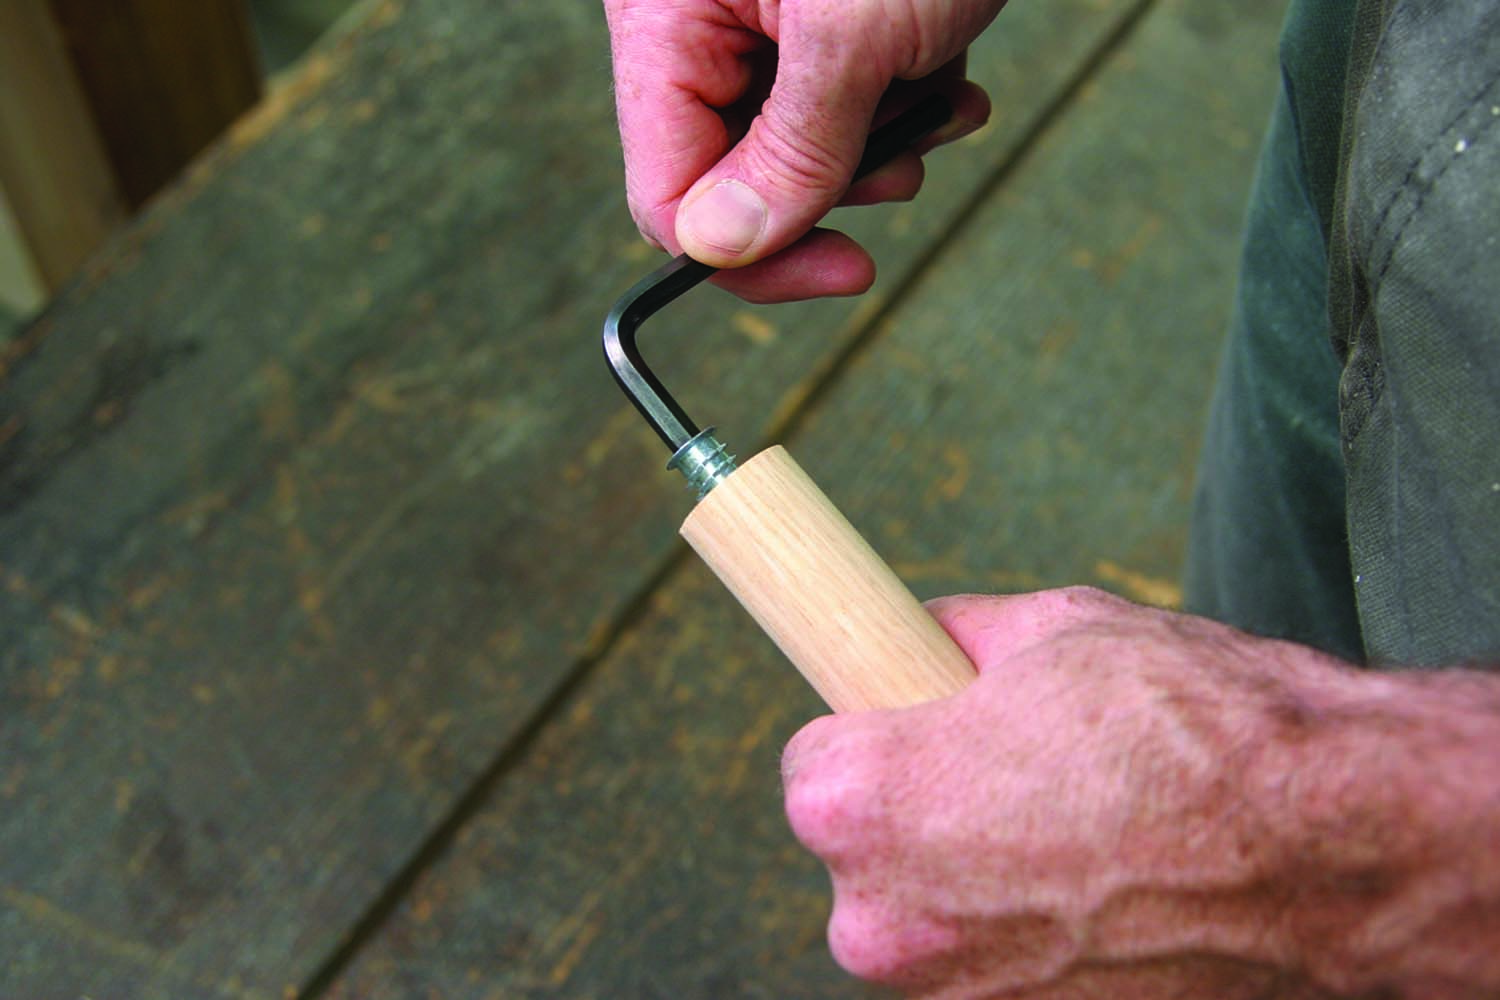
Threaded insert. Use an Allen wrench to drive the insert into the oak handle.
Even if you’ve never used inserts before, you’ll find installation easy. I used two 1⁄4“-20 flanged hex-drive inserts. You’ll need a 23⁄64” drill bit and a 1⁄4” Allen wrench to install them. Drill the holes at a drill press to ensure that they are straight and run parallel to the dowel. I drilled the holes 13⁄4“deep so I would have plenty of room for the hex bolt.
Sand Away
After all the drilling is completed, sand all of the pieces smooth. My stock was already in good shape when I started, so I used #150 grit and was done with it. I was especially careful about making the edges on my plywood slats unified in the amount of layers that I sanded off. I like the little variations in the black line that remains after sanding is completed; it gives it a handmade look.
Ink-stained
Finishing the piece before assembling will save you a lot of headaches and give you nicer results. Because there are repetitive design elements with the slats on top, I added a little visual interest with some black India ink on every other slat. I like to use ink because it has a nice matte appearance and is easy to clean up with water. Also, it doesn’t harden on your brush. You can safely leave your brush in the ink and it won’t dry up like an oil stain will.
After the ink was dry, I used a clear brushing lacquer with a satin finish as a topcoat on all the pieces. This is potent stuff – make sure you have plenty of ventilation. The main benefit of the brushing lacquer is the quick dry time – and it’s nice that each layer melds into the previous one.
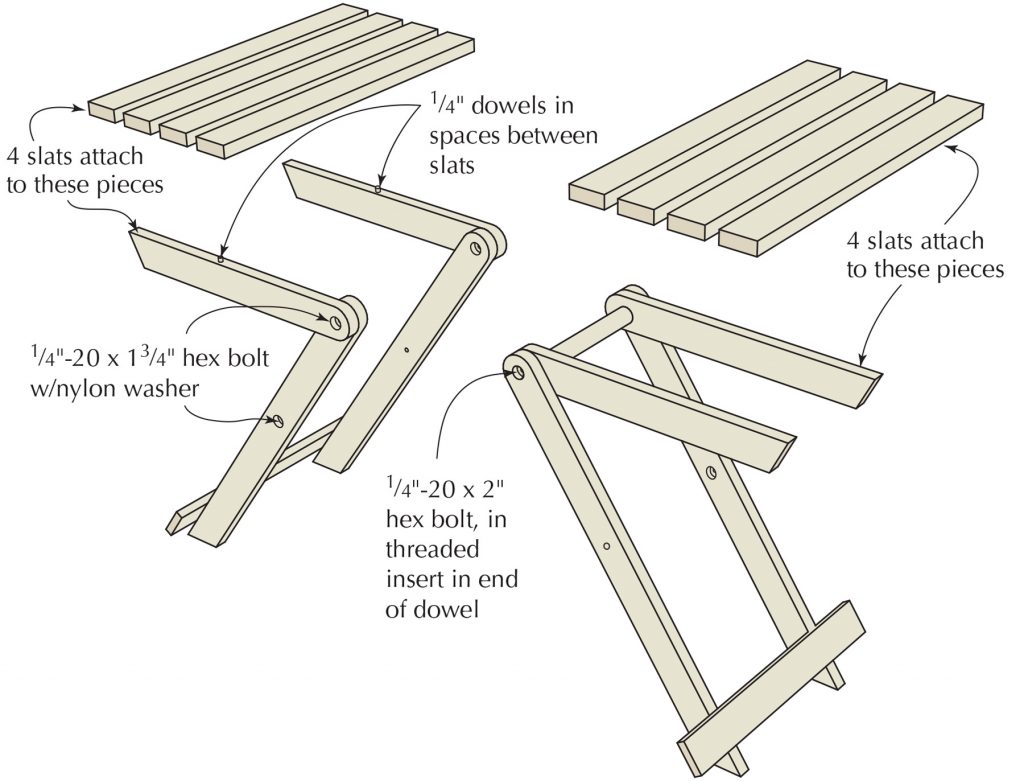
Slats with Spacers

No. item dimensions (inches) material
T x W x L
❏ 4 Legs 3⁄4 x 2 x 25 1⁄2 Poplar
❏ 4 Arms 3⁄4 x 2 x 17 Poplar
❏ 8 Top slats 1⁄2 x 2 x 20 Baltic birch plywood
❏ 2 Leg braces 1⁄2 x 2 x 16 Baltic birch plywood
❏ 1 Handle – dowel 1 8 Oak
The table is finished by screwing the slats into place. I used #8 x 11⁄2” flathead #2 square recess bronze boat screws, simply because I liked the way the bronze looked with the black ink. You need to turn the clutch down on your driver though, as the square head on a bronze screw will distort more easily than on a stainless steel screw. The sequence that I used for assembly is as follows:
Connect the legs together with the counterbores facing out. When you fasten the legs together, the angled feet will be facing in the opposite direction of each other (see image at right).
Assemble the table on a flat surface. Stand the legs on edge and make sure the outside leg has the head of the hex bolt facing inward, and that you can see the end grain on the bottom of the outside feet.
Next, connect the handle between the two arms (the ones that don’t have a counterbore) with the inside legs. After the handle has been tightened, cut a spacer that equals the length of the handle. In my case, it is 8″ long. You will place this spacer (not shown) between the arms to ensure that the arms stay parallel while you install the slats.
The remaining assembly is easy if you use spacers. When measuring is kept to a minimum, you ensure a quick and accurate assembly. You will need to install the leg brace first. I measured 4″ up from the tip of the foot and countersunk two screws on each side into the brace. This brace serves two purposes: It keeps the legs straight and functions as a stop to keep the legs from opening in the wrong direction.
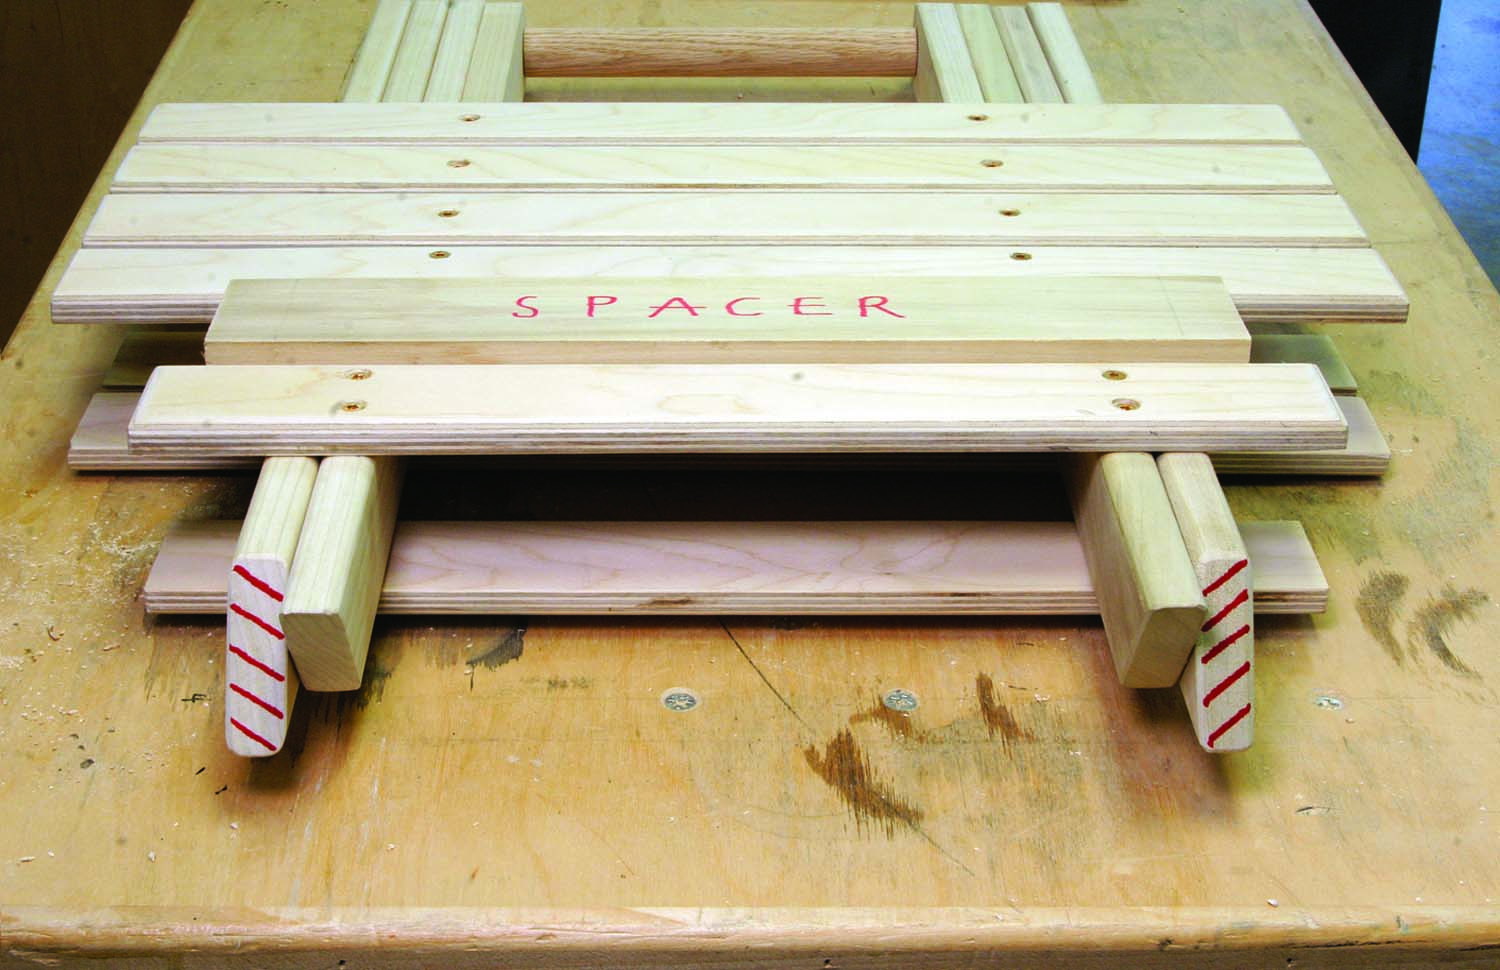
I wanted the slat to overhang 1⁄4” on beyond the end of the arms. Because the leg brace is screwed in place, I used it to determine my space width. I measured from the edge of the brace to the tip of the arm – 21⁄2“. So I subtracted 1⁄4” and cut a spacer that was 21⁄4” wide and long enough to reach both legs.
Quick assembly. Start by attaching the leg brace first with the angle on the outside legs facing up, so that you can see end grain.
For the first slat, because the end of the arm is cut at an angle, I placed the countersunk screw 5⁄8” from the inside edge to keep the screw from coming through the arm; unlike on the remaining slats, the screws are centered.
After the first slat is positioned and screwed onto the inside arms, use a 1⁄4” spacer to set the remaining slats. I used a section of plywood, but a dowel of the same thickness will also work fine.
When all four slats are attached to the inside arms, flip the table over and repeat the process for the outside arms. When all four slats are attached, drill a 1⁄4” hole that’s 1⁄2“deep after you attach the last slat on the outside arms. These holes hold small dowels that act as spacers between the two sides of the table.
Spacers are our friends. Spacers are a great way to ensure accurate and consistent results during assembly. The striped one above keeps the slat spacing consistent; the other locates the first slat.
The dowels should butt up against the last slat and be centered on the arms. These dowels need only to protrude 1⁄4“. You will need to put a slight chamfer on the top of the dowels and glue them in. I used oak because the plywood slats will be putting pressure on the sides of the dowels so I wanted them to be strong.
As with most woodworking projects, the finishing of the table took the most time. But with a little planning, you’ll have two very versatile and portable tables in no time at all. PWM
Ajax is the online community editor of this magazine and a fan of all things Portuguese: the music, writers and, especially, his wife.

Here are some supplies and tools we find essential in our everyday work around the shop. We may receive a commission from sales referred by our links; however, we have carefully selected these products for their usefulness and quality.