We may receive a commission when you use our affiliate links. However, this does not impact our recommendations.
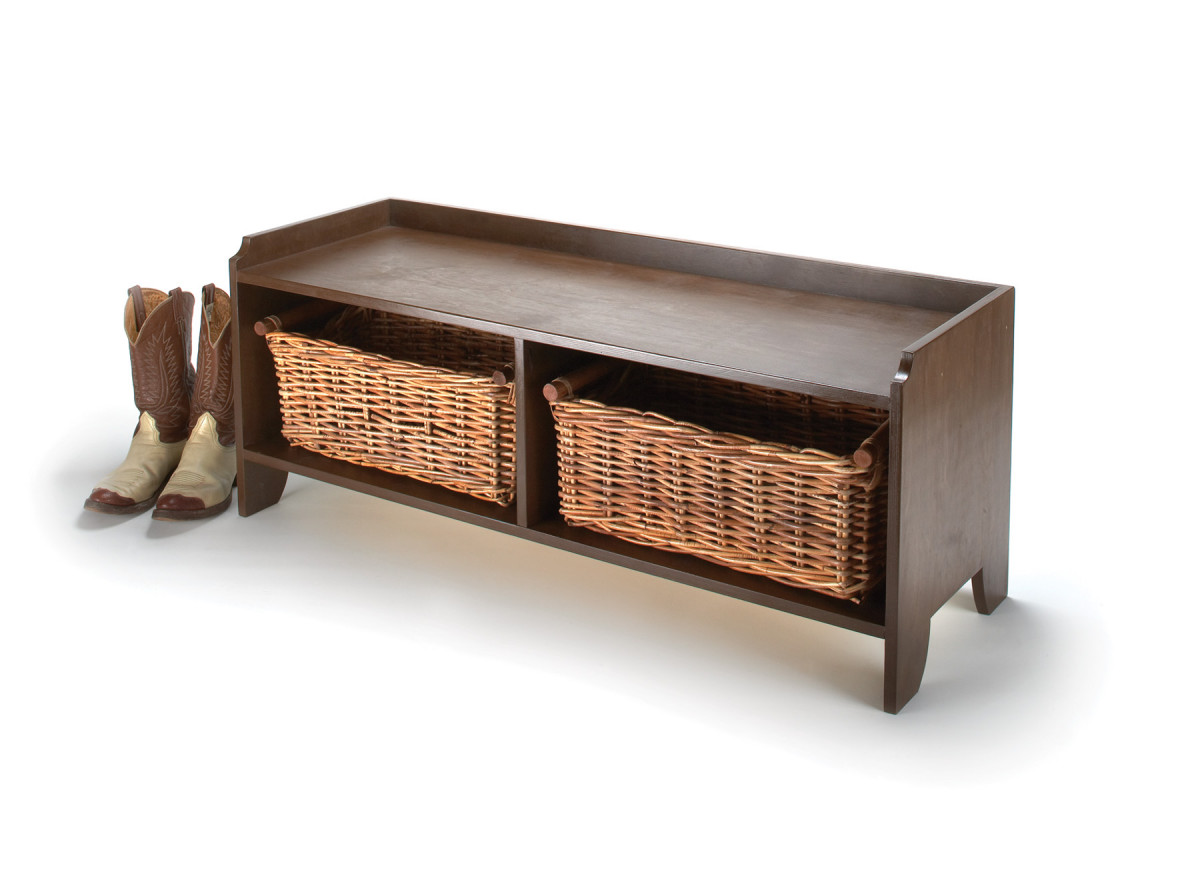
Storage with strength. Hidden pocket screws ensure this handsome bench will grace your home for years to come.
Keep the end of your bed organized in style.
The inspiration for this “I Can Do That” storage bench was simple – I wanted it. Ever since I picked up a king-size bed at a liquidation sale, I wanted a matching bench to hold my shoes at the foot of the bed. After seeing many designs that were running anywhere from $250 to $400, I thought to myself “I can do that” – and with a sheet of plywood and some pocket screws, you can too.
Cut to Length
For my stock, I used 3⁄4” Baltic birch plywood. Using your circular saw and a clamped-down straightedge jig to guide the cut, begin ripping your lumber.
Start by ripping a 16″-wide panel from which you’ll cut both side pieces, then cut them to length. Now rip the benchtop and bottom shelf to 15 1⁄4” wide to accommodate for the 3⁄4” thickness of the back panel. Next cut the back panel to match the length of the benchtop and bottom shelf. Finally cut the height of the center divider to set the height of the storage cubbies.
This is My Good Side
Before cutting the side profiles with your jigsaw, examine your stock to choose the best outside face. With plywood it is more than likely that you’ll have patches in several places; so make sure these will not be exposed.
Using a paper pattern for the feet, trace the outline along the bottom, flip the pattern for the opposite foot, then connect the tops of the feet with a square. For marking the notch on the top, trace the inside of a roll of packing tape.
Now you are ready to cut the profile with your jigsaw. (If you haven’t picked up any Bosch T380B Xtra-Clean jigsaw blades, we highly recommend them.) First cut the insides of the feet, making sure to stay on the waste side of your line. To connect the feet, start by cutting a gradual curve until you reach the connecting line as seen in the photo below. Then remove the rest of the waste.
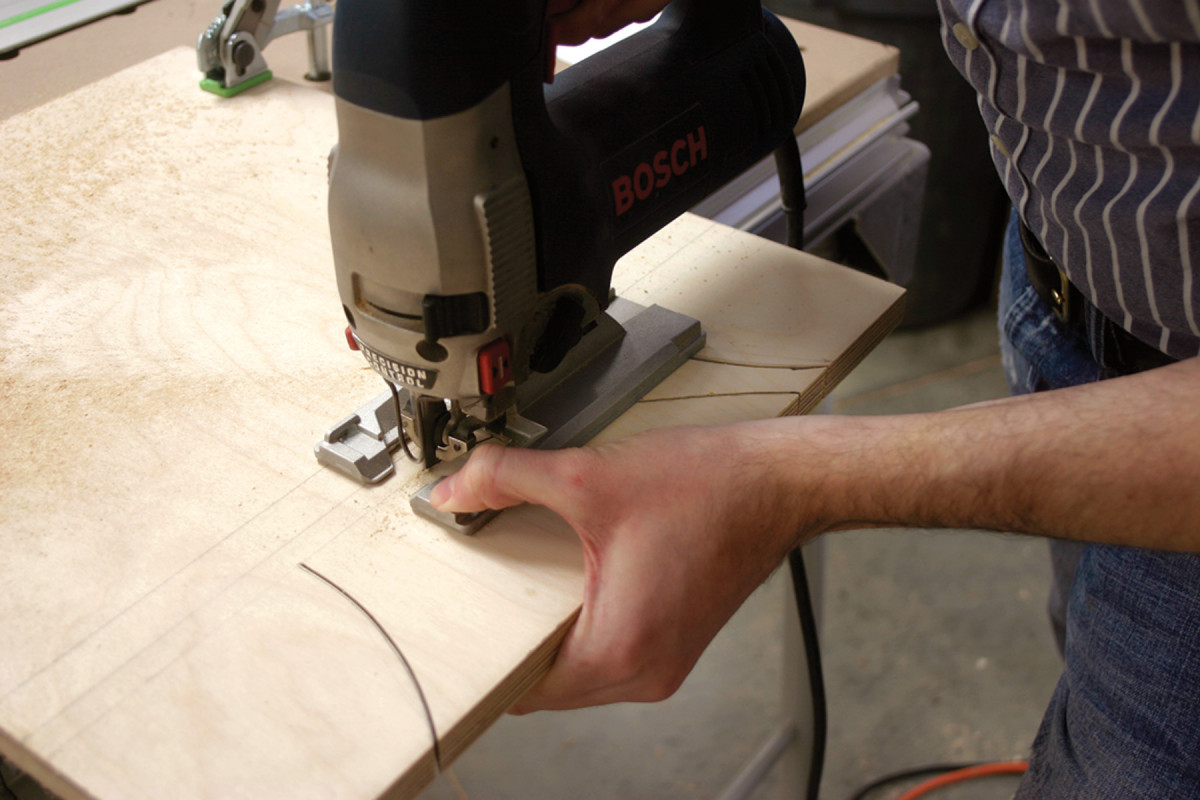
Angle of attack. Your jigsaw can’t turn at sharp angles, so make a curved cut to the line.
To remove the wood for the top corner notch, first make several relief cuts – slice toward the line as if you were cutting a pizza. This will make it easier to cut the final curve of the notch with your jigsaw or with a coping saw.
Then grab your rasp and some #120-grit sandpaper to clean up all your jigsaw cuts and you’re almost ready for assembly.
Prepare for Pocket Screws
To make assembly a breeze, it’s a good idea to cut all your pocket-screw holes in advance. First examine your stock for the best faces, then use your pocket-screw jig to make four evenly spaced holes along the ends of the three large panels. The faces needing pocket screws are the bottom of the benchtop, the bottom of the bottom shelf and the back of the back panel. The center divider needs only one row of holes along its top edge. Once all of your pocket-screw holes are drilled, sand all your parts up to #150 grit.
Upside-down Assembly
To assemble, start by placing the benchtop on two 2″ blocks of scrap with the pocket holes facing up. Clamping these scrap blocks to the side panels provides a square platform for attaching the benchtop and creates the proper seat depth of 2″. After flushing the benchtop to the front of the side panels, attach it with 11⁄4” pocket screws.
Next, locate the center of the benchtop and clamp a block in place to keep the center divider square as you drive the screws. Again, keep this piece flush to the front.
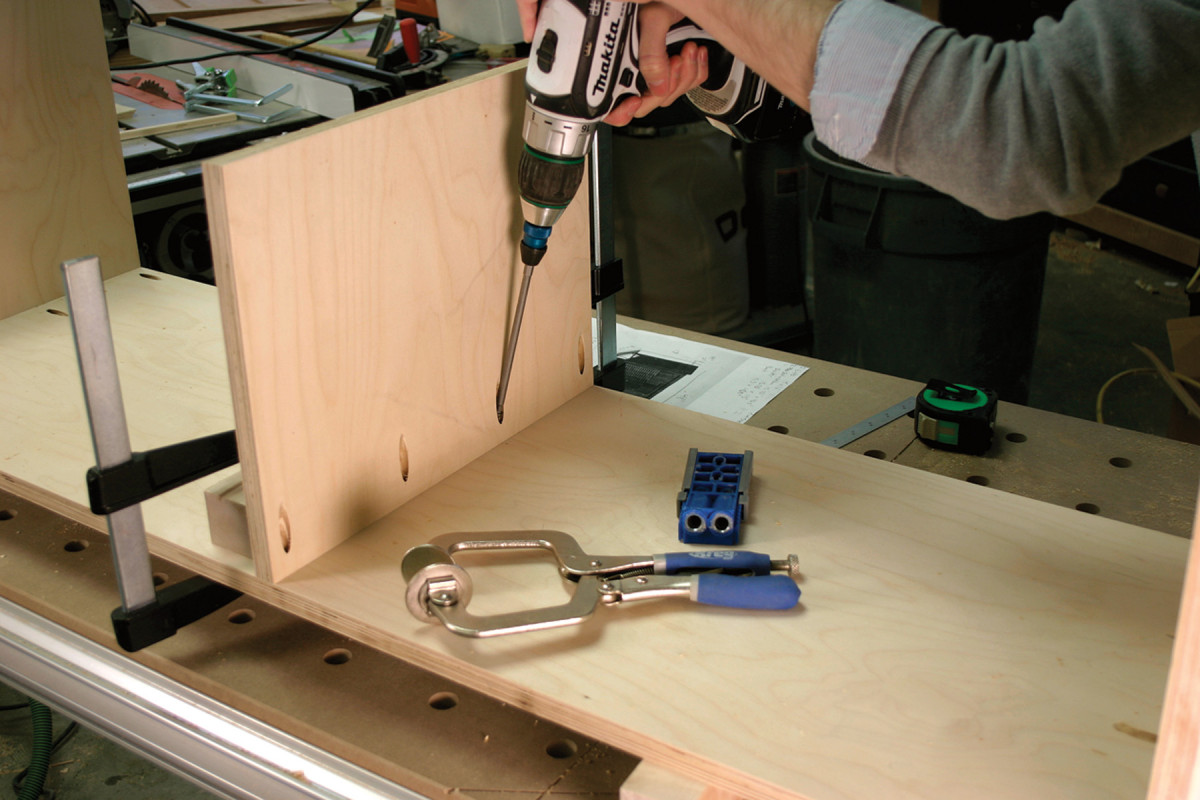
Square with scrap. A clamped block ensures the center divider remains straight as you drive the pocket screws.
To position the bottom of the bench to the sides, clamp two 111⁄2” offcuts to the sides to provide a square platform. This prevents the bottom shelf from rocking on the center divider as you tighten your pocket screws.
After attaching the bottom shelf, mark its center and square up the center divider. Use your countersink bit to drill four holes and secure the bottom shelf to the center divider with #8 x 1 1⁄4” flathead wood screws.
To attach the back, flip the bench forward so it is lying on its face, flush the back panel to the top of the sides, then drive home the pocket screws. Then use your countersink bit to drill four evenly spaced holes to secure the back to the benchtop, and repeat to join the back to the bottom shelf.
Now break all the edges with some #120-grit sandpaper and you’re ready to finish.
For that Store-bought Look
To match my bed, I wanted this bench to have the contemporary finish that, according to Editor Christopher Schwarz, “all the kids love these days.” The goal was to have a dark mahogany look with a touch of grain showing through, while still masking the plys on the exposed edges.
It sounds like a lot to accomplish, but heavily thinned latex enamel paint works perfectly. To thin the latex enough to allow a gradual build of color, begin by adding the paint to a cup of water. Once it has reached the consistency of chocolate milk, test the paint on an offcut. Once the consistency seems right, build up two to three coats of paint on your bench, until the wood reaches a rich, dark color but still has some grain peeking through.
When painting with this thinned-down latex, don’t start at the corners. When you paint the vertical sides, the paint will inevitably run down and fill in the corners. By not painting the corners first, you eliminate this fun “extra” coat and end up with a more even finish all around. For the exposed edges of the plywood, apply multiple coats (it doesn’t hurt to use the extra-thick paint at the bottom of your cup – the plys will soak up a lot).
After that, apply two coats of a glossy wiping varnish, sanding with #320 grit between the coats. Finally, buff down any remaining dust nibs with #0000 steel wool then apply a coat of paste wax.
Storage Bench Cut List

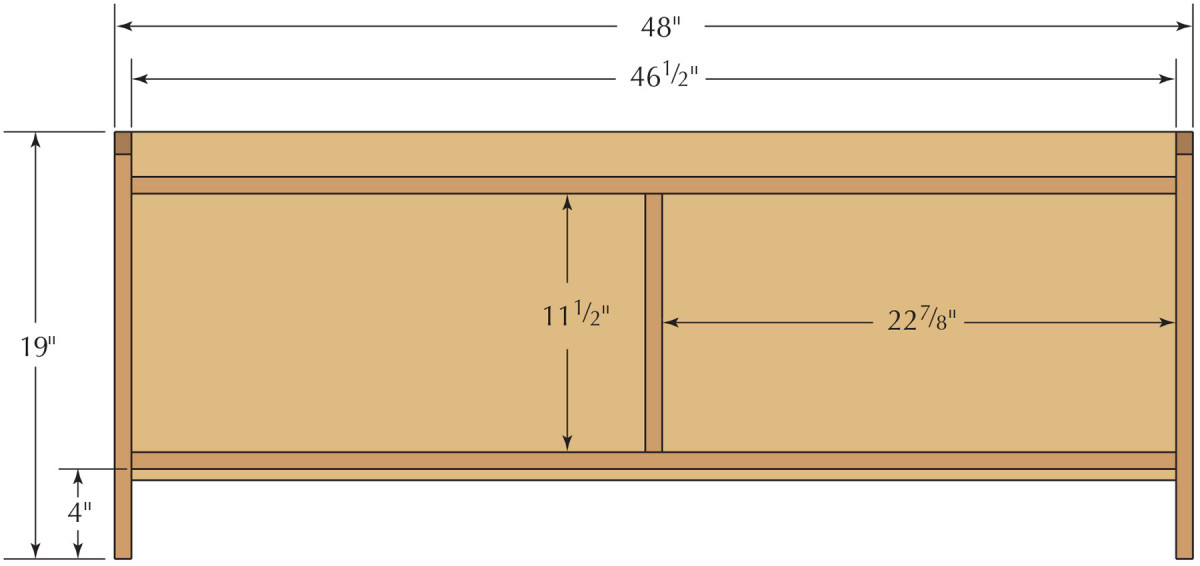
Elevation
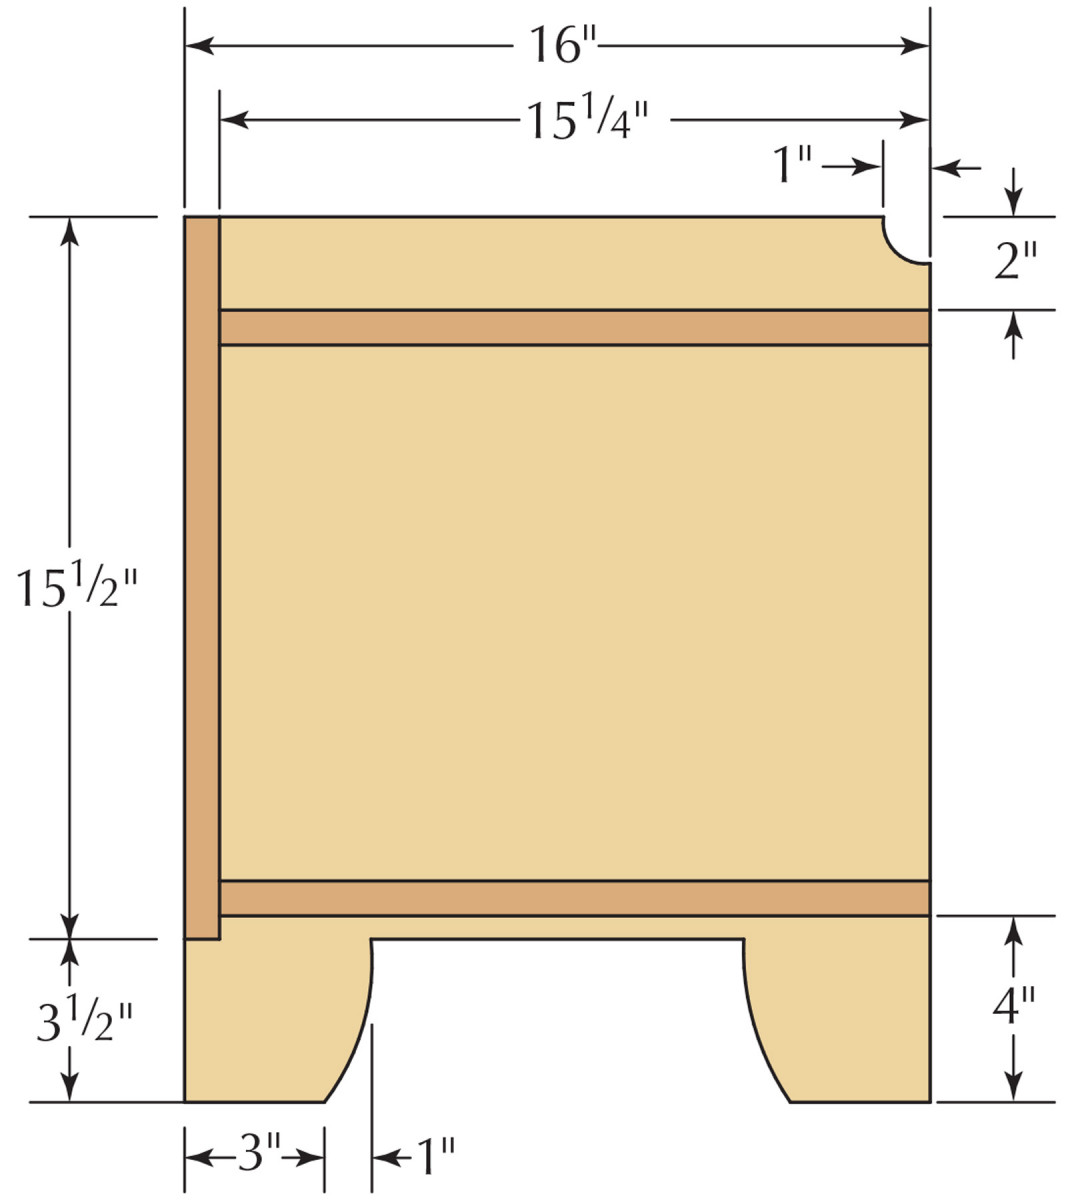
Profile
Here are some supplies and tools we find essential in our everyday work around the shop. We may receive a commission from sales referred by our links; however, we have carefully selected these products for their usefulness and quality.