We may receive a commission when you use our affiliate links. However, this does not impact our recommendations.
 Pocket screws serve as clamps for panel glue-up.
 Pocket screws serve as clamps for panel glue-up.
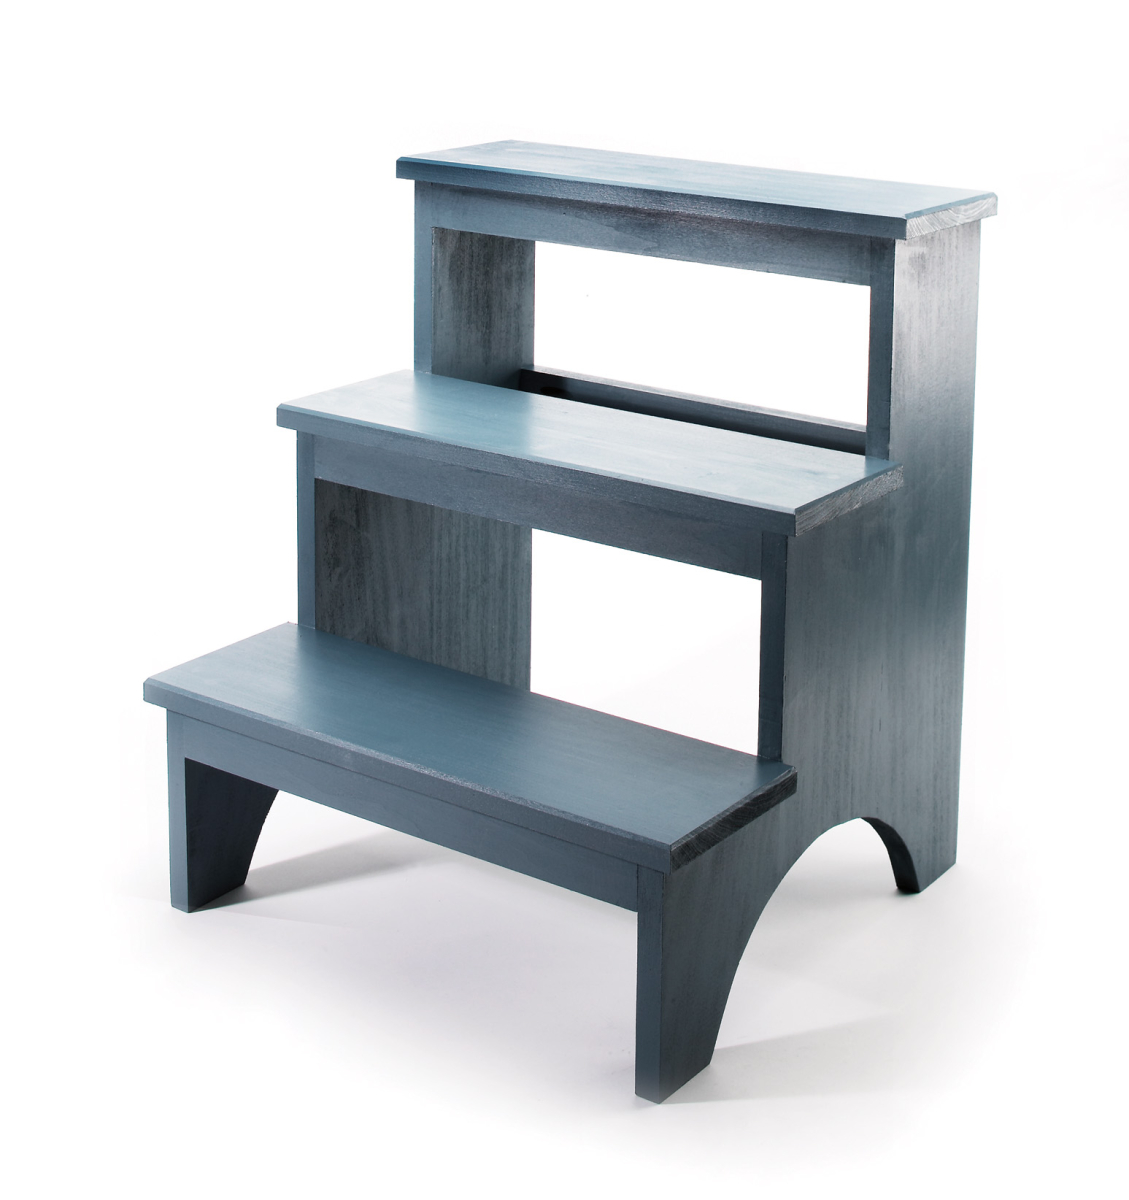
Inspired by a typical Shaker step stool, this version employs pocket screws to join both the side panels and the supports. To cut down on the number of rip cuts, I used three pieces of 1×6 dimensional lumber to form the side panels (1×6 actually measures 3⁄4” x 51⁄2“), so this version also ends up a bit deeper than a traditional Shaker stool – and thus a little sturdier and beefier looking.
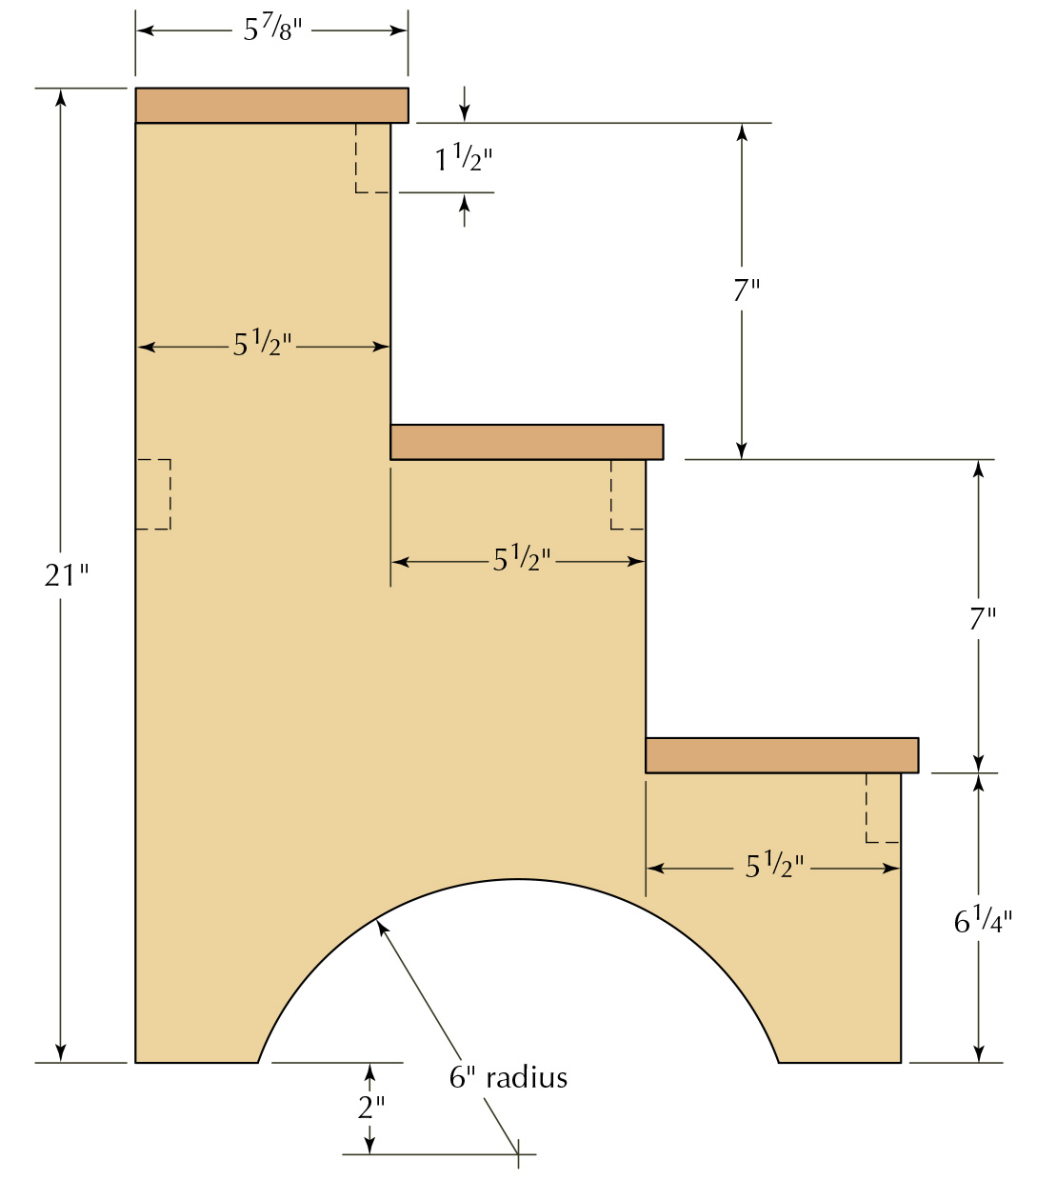
First, use your miter saw to cut the 1×6 pieces to length for the side panels. You’ll need two each at 201⁄4“, 131⁄4” and 61⁄4“.
Now, clamp one of the 201⁄4” pieces flat to your bench (face side down), and drill holes for two pocket screws along the edge that will meet the middle piece. Place one hole 2″ from the bottom edge, the other at 11″. Repeat with the second 201⁄4” piece. Now drill each 131⁄4” piece along the edges that will meet the short pieces. Locate one hole 3″ from the bottom edge, the other at 51⁄4“.
Next, it’s time to glue up the side panels, and this is where the pocket screws come in handy – especially if you’re short on clamps. Run a bead of wood glue along the edge of one of the 61⁄4” pieces, then line up that piece and a 131⁄4” piece flush across the bottom, and flat across the panel, then clamp across the two. Drive screws into the pockets to join the two pieces together. Now that the screws are in place, you can unclamp and move on to joining the 201⁄4” to the 131⁄4” piece. Do the same with the other side panel.
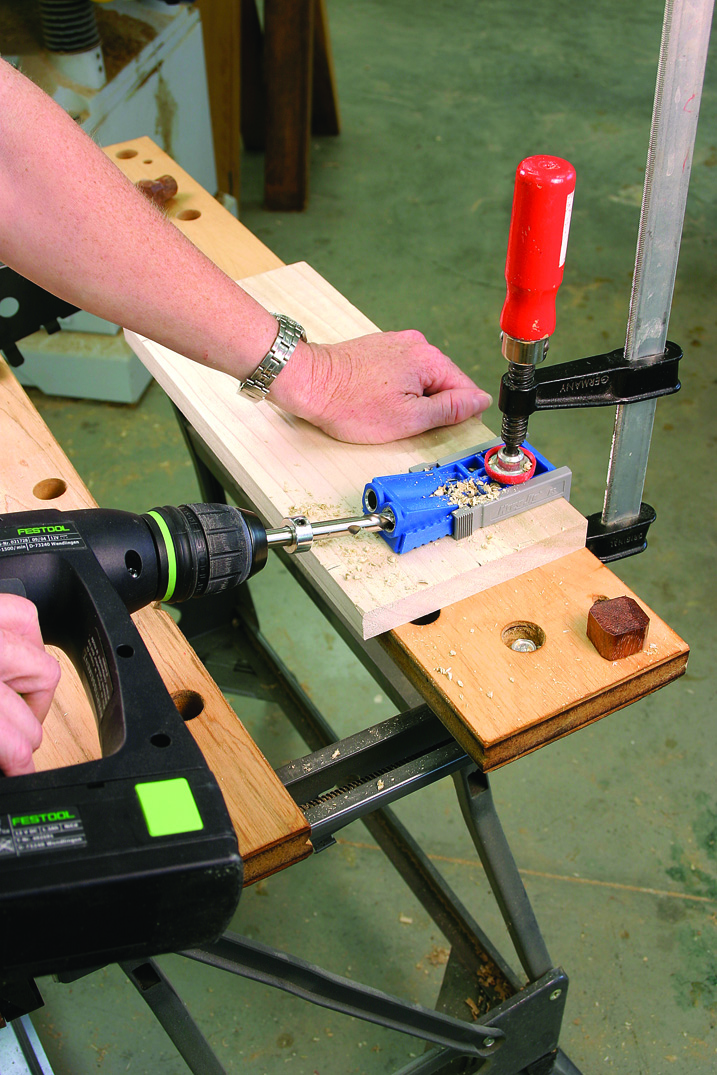
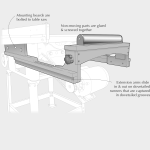
Drill the side panels. To use pocket screws to assist with panel glue-up, clamp the side pieces flat to your bench, and drill pocket holes to join the panel pieces. Here, I’m drilling the middle board with one hole 3″ up from the bottom edge (it will get cut away when you cut the arc) and another hole 51⁄4″ from the bottom edge.
Once your glue is dry, lay the panel screw-side up flat on your bench, and mark the center point across the bottom edge (it should be at 81⁄4“). Now, using an offcut as the base for the compass point, measure 2” down from the center point, place the compass point there, and draw the arc. Use a jigsaw to cut out the arc (you’ll be cutting away the two bottom screws), then clean up the cut using a rasp and sandpaper.
Use a miter saw to cut the three step supports and back brace to 153⁄4” out of 1×2 (which actually measures 3⁄4” x 11⁄2“). Clamp each piece flat and drill one pocket hole into the center at either end. Set them aside.
Now, out of 1×8 (actually 3⁄4” x 71⁄2“), cut the three step treads to their final length of 181⁄4“, then clamp a piece flat to your bench, with one long edge overhanging. Use your jigsaw to rip each tread to a width of 57⁄8“. (You’ll get a straighter cut if you clamp a straightedge in place to guide the foot of the jigsaw.)
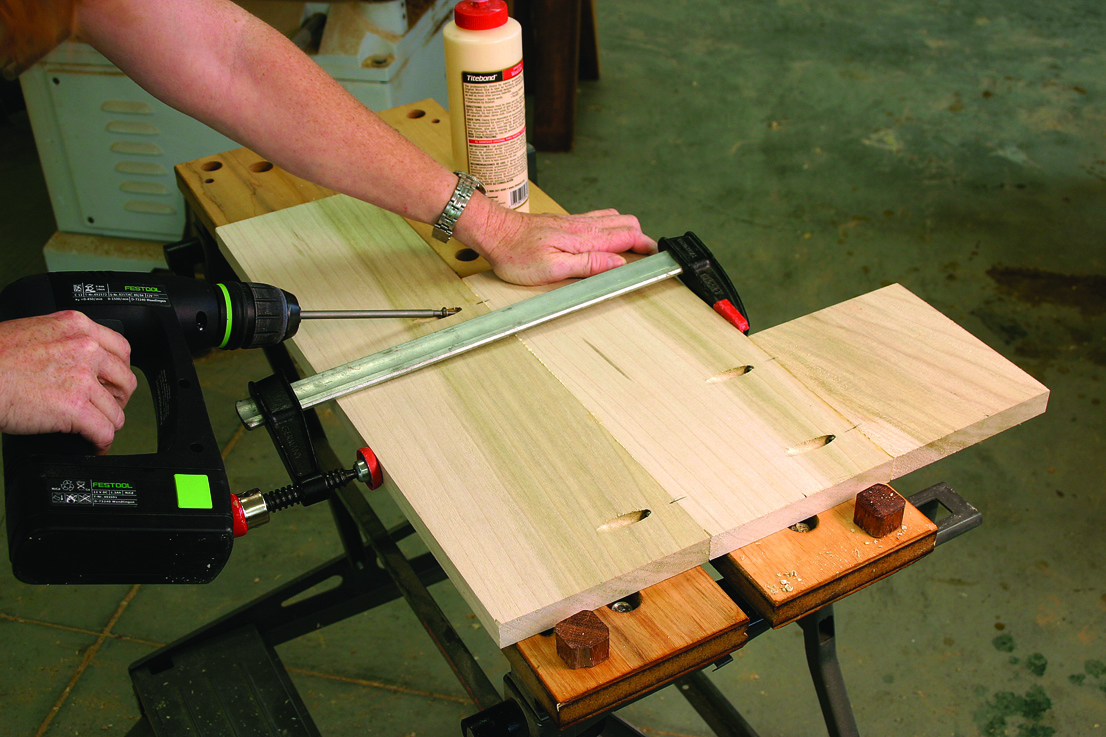
Panel glue-up. Use a clamp to hold your panel pieces together as you seat the pocket screws. Once the screws are in place, the clamp can be removed.
Now all the pieces are ready for assembly; this is a good time to sand (because as yet there are no corners to deal with). Sand over the panel joints to ensure the panels are flat. If you’re planning to paint, sand to #120; if staining, you may want to sand to #180.
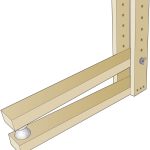
Joining the step supports and back brace to the sides is a bit tricky, involving some creative clamping and a scrap of 2×4. Separate the two halves of your Workmate so you can get clamps through the middle, then clamp the 2×4 scrap tight to the table. Butt the front edge of the bottom riser (the short piece in the panel) flush to the 2×4, and clamp the panel to the table. Hold the step support against the 2×4 flush with the top of the riser, gripping firmly to keep it aligned, then drive the screw into the pocket to join the support to the panel (see picture at left). Reclamp the panel against the 2×4 to attach the center and top step supports, as well as the back brace.
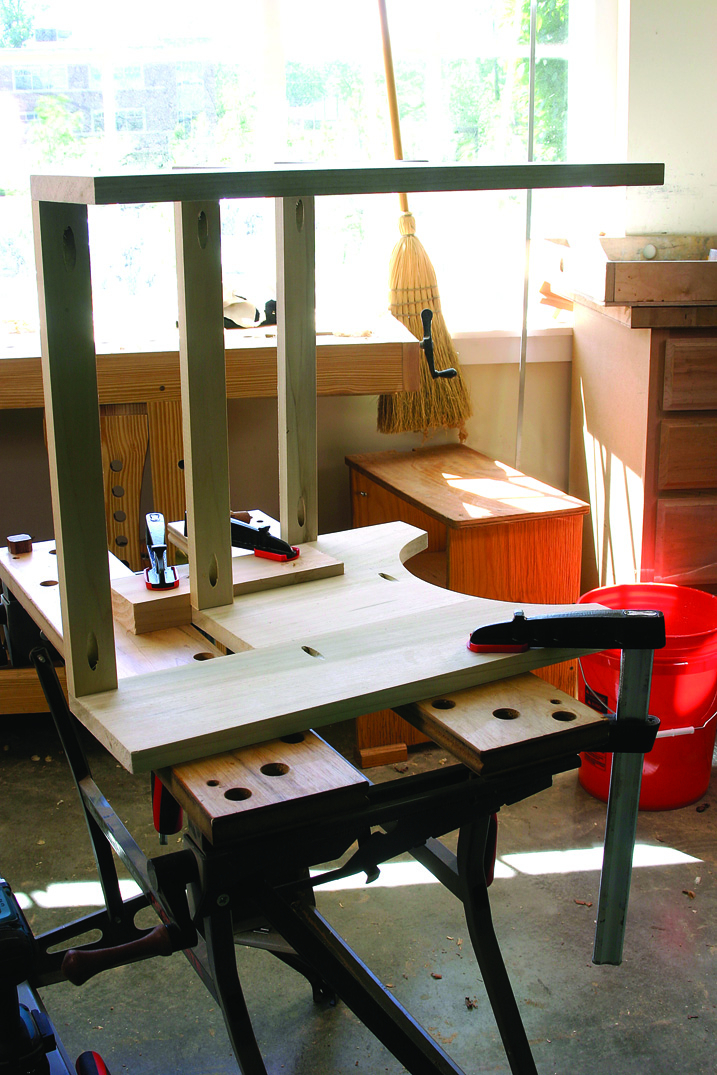
Quick and easy screwing jig. A scrap of 2×4 is clamped to the Workmate to serve as a guide and support for screwing the step supports and back brace in place on the side panels.
Now attach the second side panel, using the same screwing jig. (If your drill is large, borrow a small one – or use a screwdriver – to more easily get inside the workpiece.
Center each tread across the steps, drill pilot holes, then nail the treads in place with #6 finish nails. Use a nailset to sink the nails below the tread surface, then fill the holes with wood filler (or spackle), and let it dry.
Once the filler is dry, sand the joint edges and filler flush. Chamfer the front and side edges of the treads with a block plane to keep them from splintering, and break the back edge with sandpaper. Paint or stain as desired.
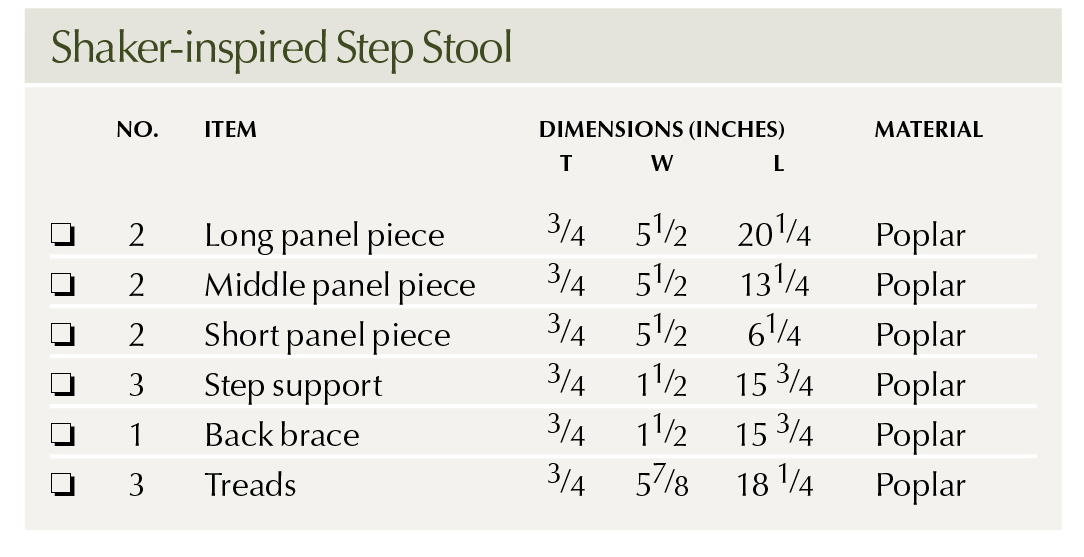
Shaker-inspired Step Stool Cut List
Here are some supplies and tools we find essential in our everyday work around the shop. We may receive a commission from sales referred by our links; however, we have carefully selected these products for their usefulness and quality.